
Check out our latest Home & Kitchen collection!
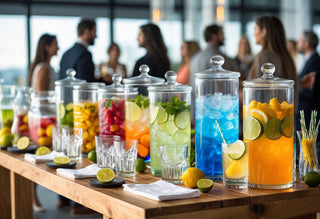
Throwing a great party doesn’t mean you have to play bartender all night. A self-serve drink station lets guests grab what they want, when they want, so you can actually enjoy your own party. It’s a simple upgrade that keeps everything moving and, honestly, makes things a lot more fun for everyone.
From picking the right spot to grabbing the best supplies, you can put together a drink station that's both stylish and practical. A few thoughtful touches go a long way—and might even get a few compliments.
Key Takeaways
- A self-serve drink station makes parties easier for hosts and guests.
- Choosing good supplies and drink options ensures everyone has something they like.
- Smart setup and fun touches keep the drink station inviting and easy to use.
Choosing the Right Drink Station Setup
Getting the drink station right means it fits your space, serves your crowd, and matches the vibe. If you balance location, size, and style, everyone can grab a drink and get back to the fun without fuss.
Selecting the Ideal Location
You want the drink station in a spot that's easy to reach but not in the way. If you put it near the entrance or right in the middle of things, you’ll just end up with a traffic jam. A side wall or a dedicated corner works much better.
For outdoor parties, shady spots are your friend. No one wants lukewarm lemonade or a puddle where the ice used to be. Indoors, keeping it away from electronics and food prep areas helps with safety and keeps things flowing.
If you’ve got kids in the mix, setting up closer to the family area just makes sense. For adult gatherings, place it near the main hangout zones so guests don’t have to wander.
Sizing Your Drink Station for Guest Count
The number of guests decides everything from table size to how many drinks you’ll need. For a small group (under 10 people), a console or bar cart does the trick—just 2-3 drink choices and a handful of glasses.
If you’re expecting 20 or more, aim for at least a 6-foot table or push two smaller tables together. You’ll need space for serving, plus a spot underneath or nearby for backup supplies.
Here’s a quick chart for reference:
| Guest Count | Suggested Surface | Drinks Variety |
|---|---|---|
| Up to 10 | Small side table/bar cart | 2–3 |
| 10–20 | Medium table (4ft) | 3–5 |
| 20+ | Large table (6ft+) | 5+ |
The more drink options you offer, the more space you’ll need—not just for bottles, but also mixers, garnishes, and glassware.
Types of Drink Stations: Beverage Bar, Cooler Cart, and More
You’ve got options. The classic beverage bar—a table with organized bottles, mixers, and cups—works well for signature cocktails or mocktails.
Cooler carts or big ice chests are perfect for self-serve beer, sodas, or bottled water. They’re easy to refill and ideal for outdoors, but not as fancy if you’re aiming for a polished look.
You can also set up a dispenser station for lemonade, punch, or sangria. Dispensers cut down on spills and keep lines moving. For themed parties, why not try a vintage barrel or a quirky tea trolley?
Pick whatever matches your crowd and the party’s energy. Mixing and matching can keep things interesting.
Essential Supplies and Equipment
You’ll need the right containers, vessels, and cooling gear to make self-serve easy and keep drinks fresh all night.
Dispensers, Pitchers, and Coolers
Grab beverage dispensers with spigots for easy pouring—large glass or sturdy plastic ones, at least 1-2 gallons each, work best. They’re great for water infusions, lemonade, iced tea, or batched cocktails.
Pitchers come in handy for smaller groups or specialty drinks. Three or so pitchers let you rotate between juices, milk, and mocktails. If you’re serving soda or anything that needs to stay extra cold, insulated coolers or ice buckets are a must.
Don’t forget a separate cooler for cans and bottles, set off to the side so people aren’t crowding the main table. Here’s a basic checklist:
- 2+ drink dispensers (clear or labeled)
- 3-4 pitchers (various sizes)
- Coolers for cans/bottles
- Ice buckets for quick chilling
Glassware, Cups, and Reusable Options
Disposable cups are easy, but reusable ones—glass, sturdy plastic, or stainless steel—feel nicer and are better for the planet. Clear tumblers help guests spot their drink, and quirky glassware like mason jars or stemless wine glasses add a little personality.
Offer at least two types of cups: one for cold drinks, one for hot if you’re serving coffee or tea. Label or color-code cups so people can keep track and you’ll waste less.
A quick guide:
| Beverage Type | Recommended Vessel |
|---|---|
| Cold (non-fizzy) | Tumbler or mason jar |
| Fizzy/Soda | Plastic cup/glass |
| Hot Drinks | Insulated mug/paper cup |
Keep extras close by for spills or seconds.
Ice, Chilling Tools, and Accessories
Ice is non-negotiable. Bring a big bucket or cooler filled with cubes or crushed ice. Tongs or scoops keep things sanitary—no hands in the ice, please.
Reusable ice packs or frozen water bottles work great as cooler inserts and make less mess than melting ice. If you want to get playful, silicone molds for shaped ice cubes are fun for cocktails or just to brighten up a glass.
Other handy things: stir sticks, cocktail napkins, straws (paper or reusable), and drink labels. Trivets or towels under dispensers help catch drips and keep things tidy.
Curating a Crowd-Pleasing Drink Selection
A good drink station has something for everyone. With a mix of beverages, guests can find something refreshing, whether they want a soda, a mocktail, or a custom cocktail.
Non-Alcoholic Favorites
Never underestimate the power of non-alcoholic drinks, especially if families are invited. Stock up on sparkling water, sodas, lemonades, and iced tea. For a twist, slice up some citrus or offer flavored syrups.
Use a table like this to keep things organized:
| Beverage | Customization Options |
|---|---|
| Lemonade | Strawberries, mint sprigs |
| Iced Tea | Lemon slices, honey, peach |
| Sparkling Water | Lime wedges, berries, cucumber |
Throw in a few non-alcoholic punch recipes. Kids and non-drinking guests appreciate festive choices—like punch bowls with floating fruit or fresh herbs.
DIY Cocktail and Mocktail Options
Set out spirits, mixers, and garnishes to turn your drink station into an experience. A simple setup: vodka, rum, gin, tonic, club soda, and a couple mixers like orange juice or grenadine.
Display basic cocktail recipes and mocktail ideas. A “build-your-own” station lets guests get creative:
- Mojito Base: Lime juice, mint, sugar (add rum or skip for mocktail)
- Spritz Station: Prosecco (or sparkling water), orange slices, aperitif
- Classic Highball: Whiskey or cola and lime
Label everything clearly so people know what’s alcoholic and what’s not. Color-coded cups help avoid mix-ups.
Introducing Signature Party Drinks
Feature drinks add a personal touch. Pick a punch, sangria, or a mocktail that fits your theme or the season. Something like a “Sunset Sangria” with berries or a fizzy mocktail stands out.
Prep a big batch ahead of time, so refills are easy. List the ingredients on a small sign—saves you from repeating yourself. A garnish bar with seasonal extras (edible flowers in spring, cinnamon sticks in winter) is a fun bonus.
One or two signature drinks also keep your shopping list manageable and the station organized. Guests will look for that special drink, and it adds a little spark to the party.
Organizing the Flow and Layout
A smartly arranged drink station helps guests serve themselves quickly and get back to the action. The right layout prevents crowding and makes refilling less of a headache.
Setting Up Stations for Easy Access
Make sure guests can spot the drink station, but don’t stick it in the middle of everything. A wall or a corner works well, out of the kitchen, not hidden behind furniture. Arranging the table or cart against a wall keeps things moving.
Spread out beverages, ice, and cups to avoid traffic jams. If you’re offering both alcoholic and non-alcoholic drinks, keep them separate. Chalkboard tags or little signs on carafes and dispensers are a lifesaver—nobody wants to guess what’s in that jug.
Think about height, too: use risers or tiers to display options without crowding. Trays or mats under dispensers catch drips and keep the area neat. And don’t forget a trash bin nearby—no one likes holding an empty cup with nowhere to toss it.
Arranging Supplies for Quick Refills
Keep backup supplies close so you’re not running to the kitchen every ten minutes. Extra ice in a cooler under the table and clean glasses in a nearby bin or on a shelf make restocking easy. A small basket with bottle openers, napkins, and stirrers keeps things organized.
Here’s a quick refill checklist:
| Item | Back-Up Spot | How Many Extras? |
|---|---|---|
| Ice | Cooler under table | 1-2 full bags |
| Cups/Glasses | Storage bin nearby | 10-20 |
| Napkins | Drawer or basket | 1 extra pack |
| Straws | Jar in cabinet | 1-2 sleeves |
Check supplies every half hour or so. Topping up before things run out keeps the party from stalling.
Adding Fun Details and Personal Touches
A few unique touches can turn your drink station into a highlight. Creative garnishes, custom labels, and coordinated decor set the mood and get people talking.
Creative Garnishes and Mix-Ins
Set out bowls of fresh garnishes and mix-ins so guests can customize their drinks. Sliced citrus (lemons, limes, oranges), mint, and berries are always a hit. For something different, try cucumber ribbons, candied ginger, or jalapeño slices for a spicy kick.
A “garnish bar” keeps everything neat. Use small glasses, mason jars, or divided trays for things like rock candy, flavored salts, or edible flowers. Mini pitchers of juice or soda water give guests more options.
Label each garnish so people can build their perfect drink without confusion. It keeps things moving and adds a little flair.
Custom Drink Labels and Signage
Custom labels and signage make it easy for everyone to see what’s available and add a little flair. We can print out drink names for pitchers or dispensers, and jot down ingredients or fun pairings. Chalkboards or tabletop frames are great for menus that change throughout the night.
For quick identification, let’s throw tags or stickers on glassware for special options—like “alcohol-free” or “spicy!” Personalizing cups with markers or name tags saves us from mix-ups and usually leads to a few laughs when someone gets a ridiculous nickname.
We might want to put up a menu of DIY combos or house favorites using a simple table:
| Drink Name | Ingredients | Best For |
|---|---|---|
| Berry Fizz | Soda, Berries | Non-Alcoholic |
| Zesty Mule | Ginger Beer, Lime | Spicy Lovers |
| Citrus Splash | Lemon, Orange Soda | Kids & Adults |
Decor That Matches Your Theme
Matching the drink station decor to the party theme doesn’t have to be a big production. A couple of themed touches—maybe tropical napkins for a luau or gold confetti for a birthday—can really tie things together.
Reusable bunting, a tablecloth, or a backdrop in our color scheme brings a festive feel. String lights or a bunch of fresh flowers nearby make the area feel a bit more special.
Grouping cups, stirrers, and napkins in matching trays or baskets keeps things tidy and easy to find. If we’re feeling ambitious, a little chalkboard with a punny drink quote never hurts.
Keeping Drinks Fresh and Safe
We want drinks to taste great and stay safe the whole time. That means keeping things cold and clearly labeled, especially for guests with allergies or preferences.
Maintaining Temperature
No one wants warm lemonade. Let’s use big insulated tubs, buckets, or coolers packed with ice for bottles and cans. For pitchers or dispensers, ice sleeves or reusable ice cubes help keep things chilled without watering them down.
Hot drinks like coffee or mulled cider? Insulated carafes or a slow cooker will keep them warm for hours. We should check temperatures now and then, especially for anything dairy-based or perishable.
Leaving drinks in the sun is a no-go. Setting up in the shade or indoors helps keep things fresh. Smaller, refillable pitchers stay colder and are easier to swap out as needed.
Allergy-Friendly and Marked Choices
Labeling isn’t just for looks—it’s a safety thing. Every pitcher, bottle, and dispenser should have a clear label with the drink name and any common allergens. For example:
| Drink Name | Contains | Allergen Highlights |
|---|---|---|
| Lemonade | Sugar, Lemon | None |
| Iced Coffee | Milk | Dairy |
| Punch | Pineapple | Pineapple |
| Horchata | Rice, Nuts | Nuts (specify type) |
Ingredient lists on a small chalkboard or tent cards make it easy for guests to double-check. Let’s add notes for sugar-free, caffeine-free, or alcohol-free options too.
A bit of effort with signage helps guests—especially those with allergies—feel comfortable and included. Honestly, we all appreciate not refilling our glass from the mystery pitcher.
Ensuring a Smooth Self-Serve Experience
A self-serve drink station only works if it’s easy for guests and stays neat. We focus on clear guidance, spill prevention, and a fast cleanup so everyone can relax.
Guest Instructions and Tips
Let’s keep things obvious so everyone knows what to do. Small chalkboard signs or printed cards labeling each drink, listing ingredients, and flagging any alcohol or allergens do the trick.
Simple step-by-step instructions near dispensers (like “Pour first, add ice last”) prevent surprise messes. If we’re offering coffee or cocktails, setting out a recipe or cheat sheet makes people feel like pros.
Napkins, stirrers, and garnishes should be within arm’s reach. Extra cups and a bottle opener nearby mean nobody’s stuck searching mid-party. A friendly reminder to drink responsibly or a “No double-dipping” sign keeps the mood light.
Avoiding Spills and Messes
Mess prevention starts with a smart setup. Drink dispensers with drip-proof spouts, or trays and mats under busy spots, help catch stray splashes.
If we’re serving punch or drinks with ice, long-handled ladles and tongs make things easier—and more sanitary. Paper towels and dishcloths on standby help us handle surprise spills fast.
Spacing matters. Let’s not crowd everything together; set up a logical order: cups first, then drinks, toppings, and finally straws and napkins. That way, fewer elbows bumping into stuff.
Quick Cleanup Solutions
Nobody wants to clean up after every guest. Trash bins with clear labels for recycling, compost, and landfill keep things organized and eco-friendly.
A “Cup Return” bin or tray for used glasses nearby encourages people to use it. Keeping a caddy with wipes, extra coasters, and a spare tablecloth under the table means we’re ready for sticky situations.
Here’s a no-fuss cleanup kit:
| Item | Use |
|---|---|
| Paper Towels | Quick spill cleanups |
| Wet Wipes | Sticky hands & surfaces |
| Trash Bags | Emptying bins fast |
| Spare Cups | Replacing dropped items |
The simpler we make cleanup, the more we get to enjoy the party.
Frequently Asked Questions
We all want a drink station that's organized, easy for guests, and full of choices. It beats running to the kitchen for every refill.
What are some creative self-serve drink station ideas for my next backyard bash?
Try a lemonade bar with fresh fruit and herbs, or set up a “mix your own soda” station with syrups and seltzer. Dispensers, vintage coolers, or big pitchers let guests help themselves.
Don’t forget the fun stuff—colorful straws, umbrellas, or edible flowers always get people talking.
Can you share tips for organizing a hassle-free self-serve bar at my housewarming party?
Clear signs help everyone find what they want. Label drink dispensers, mixers, and glassware to avoid confusion.
Keep ice, napkins, and stirrers right there on the table. If you set the station a bit away from the food or main crowd, you'll avoid traffic jams.
How do I stock a self-serve cocktail station to keep my guests sipping and smiling?
Offer a few basic spirits—vodka, gin, rum—and popular mixers like tonic, soda water, and juices. Pre-sliced citrus, mint, and berries make great add-ins.
Simple recipe cards let guests play bartender without any guesswork.
What's the secret to setting up an efficient mocktail station for all ages?
Fresh juices, herbs, and sparkling water make a great base. Add sliced fruits and fun garnishes so everyone can customize their drink.
Small pitchers or mason jars let younger guests pour and mix safely.
What essentials should I include to ensure my drink station is the toast of the party?
Stock up on ice, sturdy glasses (or tough disposables), tongs, napkins, and stir sticks. Keep a trash or recycling bin nearby for easy cleanup.
Paper towels or a kitchen towel for spills will save you some stress, too.
Could you list the steps for assembling a refreshing self-serve drink setup for a summer soiree?
Start by finding a shady, flat spot for your table—nobody wants their drink station wobbling in the heat. Set up your drink dispensers or coolers at one end, then line up glasses and utensils in the middle, and stash your garnishes at the far end. Makes it easy for everyone to serve themselves without bumping elbows.
Right before guests show up, fill your dispensers or pitchers with cold drinks. Keep an eye on the ice and top it off when it starts to run low. If things get messy, just do a quick tidy-up now and then. That way, everyone can keep sipping and mingling without a hitch.