

Check out our latest home & kitchen collection!
A messy fridge can turn meal prep into a frustrating treasure hunt. We've all been there—digging for that jar of pickles, only to find moldy leftovers hiding behind something else.
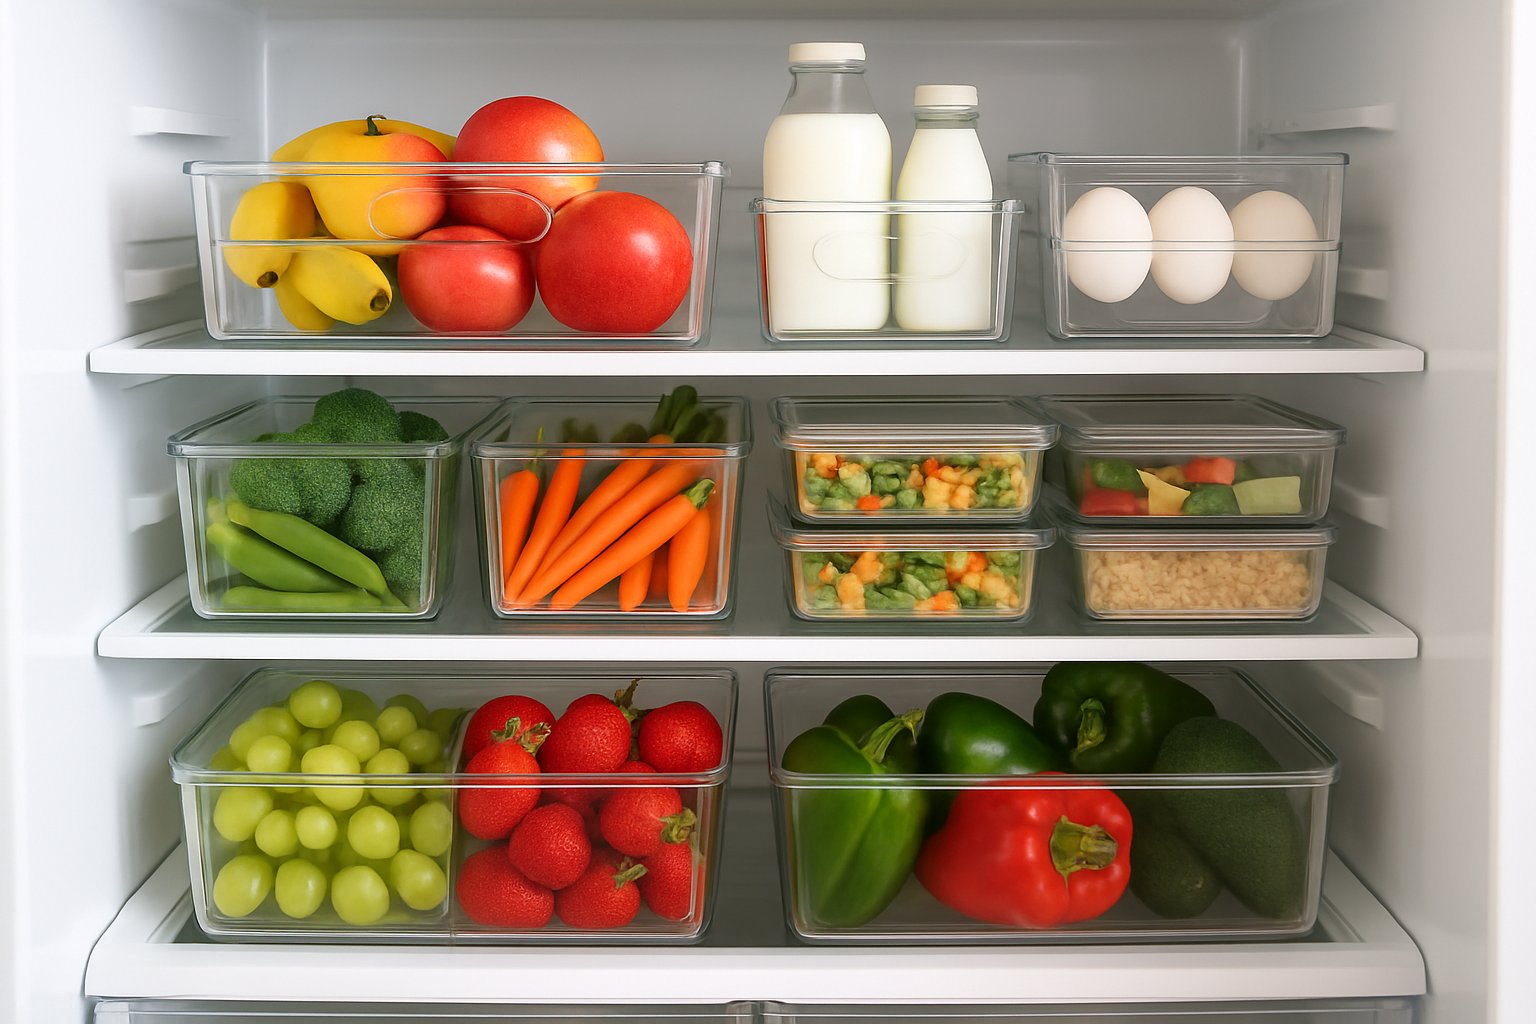
Clear bins, stackable containers, and smarter meal prep can turn your fridge into a stress-free, efficient food zone. With see-through storage, you know exactly what's on hand—no more guessing, no more buying the same thing twice.
Once you set up zones for different foods and stick with a labeling system, it’s honestly pretty easy to keep things tidy. The fridge just works better, and you barely have to think about it.
Key Takeaways
- Clear containers and good labels make it easy to spot everything inside
- Stackable containers and zones use space better and keep similar foods together
- Smart organization cuts down waste and makes meal prep way less of a hassle
Why Fridge Organization Matters
A well-organized fridge makes daily cooking smoother, helps food last longer, and saves you money. It’s a little work up front, but the payoff is real.
Preventing Food Waste and Saving Money
We've all pulled out some mystery container from the back of the fridge and wondered, "What even is this?" Without some kind of system, food just gets lost and goes bad.
Seeing everything prevents waste. If you can spot it, you’re way more likely to use it. Some studies say families toss out nearly a third of their groceries—ouch.
Clear bins and zones make it obvious what’s about to expire. Try a "use first" bin for stuff that needs to go soon.
Fewer accidental doubles. When you can see what you have, you stop buying things you already own. That extra jar of mayo? Not happening anymore.
Improving Food Freshness
Not all fridge spots are the same. Some areas are colder or more humid, and putting foods in the right place keeps them fresh longer.
Temperature zones matter. The bottom shelf is best for raw meats. Door shelves get warm, so condiments go there—not milk or eggs.
Good containers help too. Veggies last longer in the right bin instead of the grocery store bag.
Don’t overcrowd. When you jam everything together, air can’t circulate, and that’s when food goes bad faster.
Making Meal Prep Effortless
When every item has a spot, you spend less time searching and more time actually cooking.
Group similar foods. Breakfast stuff in one spot, lunch things in another, dinner ingredients together. It just makes sense.
Prepped ingredients stay front and center. Chopped veggies, marinated meats, and sauces in clear containers mean you’re more likely to actually cook them.
Leftovers are obvious. Stackable containers show you exactly what’s left. No more digging for last night’s dinner.
The Power of Clear Bins for Visibility
Clear bins take the guesswork out of fridge storage. You can see exactly what’s inside—no more opening five lids just to find the salsa. The right bins make a big difference, and a little cleaning keeps them looking sharp.
Choosing the Right Size and Shape
Measure your fridge shelves before buying bins. Most shelves are 13-15 inches deep, so bins around 12-14 inches usually fit well.
Stackable containers save vertical space. Choose ones with straight sides or lids that lock together.
Rectangular bins are better than round—they fit tight against the fridge walls and each other.
Here’s what works for different spots:
| Fridge Zone | Bin Size | Best Shape |
|---|---|---|
| Main shelves | 8" x 12" x 4" | Rectangle |
| Door shelves | 4" x 10" x 3" | Narrow rectangle |
| Crisper drawers | 6" x 8" x 3" | Square |
Handles help too. Built-in grips make it easier to pull out a bin, especially if it’s loaded with heavy stuff.
Best Foods for Clear Bins
Clear bins are perfect for foods you reach for all the time. Leftovers in clear bins? No more mystery meals.
Prepped fruits and veggies stay fresh and visible. When you prep on Sunday, you can actually see what’s ready for the week.
Snacks like yogurt, cheese sticks, and berries work great grouped in a bin. Kids can grab what they want, and you can keep an eye on what’s running low.
Condiments and sauces are less likely to get lost when you group them—maybe all your Asian sauces in one bin, salad dressings in another.
Other good bin candidates:
- Deli meats and cheeses
- Breakfast things like bagels and cream cheese
- Drinks and mixers
- Meal prep portions
Skip strong-smelling foods like onions or fish in plastic bins—they’ll make everything else smell weird.
Maintaining Cleanliness
Wash bins every week with warm, soapy water. Spills and crumbs make them cloudy, and then you can’t see what’s inside.
Baking soda takes care of stubborn smells or stains. Just make a paste and scrub gently so you don’t scratch the plastic.
Swap out bins that get cloudy or cracked. Old bins can trap bacteria and stop being clear.
Dry bins fully before putting them back. Water droplets just fog things up and can make food spoil faster.
If it’s not obvious what’s inside, slap a label on the bin. Even with clear plastic, tiny package text can be hard to read from above.
Stackable Containers: Maximizing Space and Order
Stackable containers turn the fridge from a pile of chaos into something you can actually use. They let you use vertical space and keep everything grouped and visible.
Selecting Stackable Container Sets
When you’re picking containers, go for uniform shapes and sizes. Square or rectangular ones use space better than round.
Find sets where different sizes share the same length and width. That way, you can stack them neatly without weird gaps.
Look for:
- Airtight lids to keep food fresh
- Dishwasher and microwave safe
- BPA-free plastic or tempered glass
- Lids that fit all sizes
A 6-8 piece starter set with a mix of heights is plenty for most people. You’ll have what you need for soups, veggies, leftovers, and more.
Clear containers are a must—if you can’t see inside, you’ll forget what’s in there.
Tips for Safe Stacking and Access
Stacking is great, but don’t go overboard. Put heavy stuff on the bottom and lighter stuff up top.
A few stacking tips:
- Don’t stack more than 3-4 high
- Keep daily-use items at eye level
- Put essentials where you can grab them fast
- Make sure stacks are stable before closing the fridge
Leave a little space between stacks so air can move. Cramming everything together just makes the fridge work harder.
Label everything with what’s inside and when you made it. Dry-erase markers on lids work well and are easy to update.
Measure your fridge shelves before buying containers. You want to use the height without bumping into the next shelf up.
Meal Prep with Stackable Solutions
Stackable containers make meal prep so much easier. You can prep a bunch of meals at once and stack them by day or type.
Try this:
- Use same-sized containers for portions
- Stack meals by weekday or meal type
- Keep grab-and-go lunches in one stack
- Store chopped ingredients separately from finished meals
Assign certain sizes to snacks, lunches, or dinners. Batch-prep ingredients in matching containers—veggies in one, grains in another, proteins in a third.
You’ll see the whole week’s meals at a glance and can grab what you need without digging. It’s a lifesaver on busy mornings.
Labeling and Categorizing for Fridge Clarity
Labels cut down on confusion, and simple categories keep the fridge from turning into a free-for-all. If you set up zones and stick with them, stuff actually stays organized.
Food Storage Labels and Erasable Options
Waterproof labels survive spills and condensation. Erasable ones are even better—just wipe and relabel.
Always date what you make or open. It’s way too easy to forget how old that salsa is.
Dry-erase markers work on glass and mason jars. The ink comes off with a quick wipe.
Pre-printed labels save time if you tend to store the same things. Look for sets with "leftovers," "meal prep," and "use first."
Color-coding helps too. Red for stuff expiring soon, green for produce, blue for meals.
Label maker tape looks nice but isn’t necessary. Masking tape and a Sharpie work just fine for short-term storage.
Category-Based Zones
Make zones for different foods. Top shelf for grab-and-eat stuff and leftovers.
Keep dairy in the middle where temps are steady—milk, yogurt, cheese all together.
Split the produce drawer up. Use small bins to keep herbs and greens separate from carrots or peppers.
Put a snack bin at eye level so healthy options are easy to spot. Kids will grab what’s right in front of them.
Stash drinks in the door to save shelf space. Group similar beverages together.
Organize condiments by meal type, not alphabetically. All the breakfast spreads together, for example.
Label each zone so everyone knows where things go. Once people get used to it, the system pretty much runs itself.
Rotation Systems for Leftovers
First in, first out keeps old food from getting buried. Put newer stuff behind older stuff.
A "leftover zone" on the top shelf keeps meals visible. You’re more likely to eat what you can see.
Try sticky dots with numbers for expiration—"1" for today, "2" for tomorrow, and so on.
Do a quick leftover check every week. Use up what’s about to go or plan meals around it.
Clear containers make it easier to spot leftovers than opaque ones.
Combine leftovers into new meals to avoid waste. Sometimes a random mix turns into something great.
Date labels should have both the prep date and a "use by" guess. Most leftovers are good for 3-4 days if stored right.
Optimizing Fridge Layout: Zones, Drawers, and Shelves
Knowing your fridge’s hot and cold spots helps you store food where it’ll last longest. Adjust shelves and drawers to fit what you actually use.
Understanding Temperature Zones
Fridges aren’t the same temperature everywhere. The bottom shelf is coldest—keep raw meat and seafood here.
Middle shelves are steady, perfect for dairy, eggs, and leftovers. Don’t put these in the door where it gets warm.
The door is warmest because it’s opened all the time. Stick condiments, dressings, and drinks here.
Top shelves are a bit warmer, so use them for deli meats, cheese, and stuff you grab a lot.
Crisper drawers have their own humidity settings. Use them right, and produce lasts way longer.
Setting Up High- and Low-Humidity Drawers
Most fridges have two crisper drawers you can adjust. High-humidity (vents closed) is for leafy greens and herbs—they need moisture to stay crisp.
Low-humidity (vents open) is for fruits like apples, pears, and citrus. These give off gas that can spoil veggies, so keep them separate.
Toss a paper towel in either drawer to soak up extra moisture. It’s a simple trick that keeps produce fresher.
Making the Most of Adjustable Shelves
Adjustable shelves let you set up your fridge to fit your life, not the other way around. Measure your containers, then move shelves to fit.
Tall items like milk and juice need more space. Take out a shelf or raise one to make a tall zone.
Stackable containers fit best when you adjust shelves to stack a couple high, not just one.
Put everyday items at eye level where you’ll see and grab them first.
If you have lots of tall containers, try removing a shelf entirely. Sometimes the extra space is more useful than another cramped layer.
Door Storage, Turntables, and Drawer Organizers
Using door compartments, turntables, and dividers can turn those weird, overlooked fridge spaces into organized, usable zones. These little tweaks squeeze out every inch of storage and keep things where you can actually see them.
Door Compartments for Condiments
The fridge door is prime real estate for stuff you grab all the time, but let’s not get carried away. Since the temperature jumps around every time you open it, skip the eggs and milk here. Instead, park your condiments, dressings, and drinks on these shelves.
What goes best in the door?
- Hot sauces and salsas
- Salad dressings and marinades
- Juice boxes and water bottles
- Butter (if you’ve got a covered spot)
Clear, removable bins help keep similar items together and make cleanup a breeze. Find bins that actually fit your door shelves—no sense in buying something that won’t sit flat.
Put your go-to condiments at eye level. The random stuff you use once a month? Stick those on the lower shelves.
Pro tip: Door compartments with adjustable dividers are a lifesaver. They keep bottles upright, so you don’t get that ketchup avalanche every time you open the fridge.
Before you buy organizers, measure your door shelves. Matching the bin height to your door clearance avoids a lot of swearing later.
Using Lazy Susans and Turntables
Lazy susans (or turntables, if you want to sound fancy) are the answer to the dreaded “condiment graveyard” in the back. With a quick spin, you can actually find the mayo or soy sauce hiding behind everything else.
A 9- to 12-inch turntable fits most fridge shelves. Go for models with raised edges—otherwise, bottles just slide off when you spin it.
Where to put them:
- Corners for condiments
- Upper shelves for oils
- Even door shelves for smaller bottles
Non-slip bases are a must. If the whole thing slides around, what’s the point?
Try grouping similar items on each lazy susan. Stack all the Asian sauces together, or make a breakfast turntable with jam and syrup.
Organizing tip: Put tall bottles in the center, shorter jars around the outside. It’s easier to see what you’ve got, and things don’t tip over as much.
Honestly, several smaller turntables beat one giant one. You can tweak your setup and fit them in more spots.
Drawer Organizers and Shelf Dividers
Drawer organizers are a game changer for those messy produce and deli drawers. Adjustable dividers let you make custom compartments for whatever’s in your fridge this week.
Crisper Drawer Ideas:
- Produce bags with built-in dividers
- Stackable mesh containers for berries
- Adjustable dividers for veggies
Deli drawers work better with slim dividers to keep meats and cheeses separate. No more mystery flavors sneaking into your cheddar.
Shelf dividers stand upright to carve out zones right on your shelves. Handy for separating food types without using bins.
Wire dividers let air flow, which really matters for produce. Airflow keeps things fresher, longer.
Install tip: Most drawer organizers pop out for easy cleaning. Go for ones that can handle the dishwasher or at least wipe down fast.
Expandable dividers are great if your needs change a lot. Adjust the size as you go—no big deal.
Fridge Organization Hacks for Daily Life
Fridge organization shouldn’t feel like a weekly battle. A few smart tricks—like shelf liners, quick family routines, and low-effort maintenance—can make your fridge way less stressful.
Shelf Liners for Easy Cleanup
We’ve all had that moment when a jar tips over or leftovers spill everywhere. Shelf liners are the unsung heroes here.
Refrigerator-safe shelf liners keep spills off your actual shelves. When something leaks, just pull out the liner, rinse it, and slide it back in. No scrubbing sticky messes from glass.
The best picks:
- Plastic grid liners for airflow
- Silicone mats that grip containers
- Washable fabric liners for drawers
Measure each shelf before you buy. Most liners can be trimmed—kitchen scissors do the trick.
Pro tip: Light colors help you spot spills and crumbs. Clear or white liners don’t hide potential problems.
Quick Tips for Busy Families
If your schedule is nuts, you need fridge hacks that actually work for real family life—not just for Instagram.
Make grab-and-go zones at eye level for snacks and lunches. Clear bins holding single portions let kids help themselves.
Assign spots for each person’s leftovers. Colored containers or name labels keep the “who ate my food?” drama to a minimum.
Prep produce right away after shopping. Wash berries, chop veggies, and store them where you can see them. Suddenly, healthy snacks are actually easy.
Stick to “first in, first out.” Put new stuff behind the old so nothing gets forgotten and turns into a gross experiment.
Maintaining Your Organized Fridge
Even the best fridge hacks won’t help if you never keep up with them. Consistency matters more than perfection—trust me.
Do a quick 5-minute tidy before every grocery run. Toss expired stuff, wipe up spills, and move older items to the front.
Monthly deep cleans mean taking everything out, washing bins, and checking if your system still works. If something’s not working, tweak it. Don’t just give up.
Keep cleaning supplies handy—a pack of wipes in a nearby drawer makes it way more likely you’ll actually clean up spills.
Get the family involved. When everyone knows where things go, the system stays together longer.
Honestly, your organized fridge should make life easier, not add more stress.
Frequently Asked Questions
You’ve got questions about bins, containers, and keeping things together in a house where people actually live (and make messes). Let’s get into it.
What are the best clear bins to use for a fridge makeover?
Look for bins with rounded corners. They’re easier to wipe down and won’t scratch shelves.
Stackable rectangles beat round bins for saving space. Get a mixed set—small, medium, and large—to handle everything from snacks to leftovers.
How do meal prep strategies vary when using different types of containers?
Glass containers work best for reheating—you can go straight from fridge to microwave or oven. We love these for casseroles and stews.
Plastic containers are lighter and safer if you’ve got kids helping. They’re perfect for salads and cut veggies.
We use shallow, wide containers for proteins and deep ones for soups. It’s easier to see portions and heat food evenly that way.
Are there any clever labeling tricks to keep my fridge items organized and easy to find?
Removable labels are way better than permanent ones. Painter’s tape and a Sharpie work cheap and peel off easily.
Color-coding saves time. Red for meat, green for veggies, blue for leftovers—one glance and you know what’s what.
Date everything with a dry-erase marker right on the container. You’ll waste less food and know what to eat first.
What's the top trick to maintaining an organized fridge with a busy family life?
Assign everyone their own bin or shelf section. Kids grab snacks from their area, adults know where to find lunch stuff.
Stick with “one in, one out.” When you bring home new groceries, use up the old stuff first.
Sunday evening resets help a ton. Spend 10 minutes wiping bins, tossing expired food, and restocking. It sets you up for a less chaotic week.
How often should I be cleaning and reorganizing my fridge to keep it tidy and functional?
Weekly spot-cleaning helps keep things under control. I usually wipe up spills as soon as I see them, and on Sundays, I’ll give the bins a quick rinse—nothing fancy, just enough to feel like I’m not ignoring the mess.
Once a month, I go for a deeper clean. I’ll pull out all the bins, actually wash them, and give the shelves and drawers a proper wipe-down. It’s a bit of a hassle, but honestly, it makes a difference.
For reorganizing, I like to switch things up with the seasons. About four times a year, I move bins around and tweak how I store stuff, depending on what we’re eating or how our grocery runs look lately. It keeps the fridge working for us, not the other way around.
Share:
Under-Sink Storage Solutions: Maximize Every Inch in Kitchen and Bath
Over-the-Door Organizers for Instant Entryway and Closet Storage