

Check out our latest home & kitchen collection!
Dry ingredients like flour, rice, pasta, and spices are kitchen staples we reach for all the time, but they can go bad faster than we think if we don’t store them right.
Moisture, air, light, and pests have a knack for turning our pantry favorites into stale, clumpy, or even buggy messes. Honestly, who hasn’t reached for a bag of flour and found it unusable, or spotted tiny bugs crawling in the rice?
The good news? Keeping dry ingredients fresh mostly comes down to using airtight containers, stashing them in cool, dark spots, and staying on top of labeling and rotation. You don’t need fancy gadgets or a complicated system.
With a few smart habits, you’ll stretch the shelf life of your pantry goods, waste less, and avoid those last-minute grocery runs when something’s gone off.
Let’s break down storage tricks that actually work, how to pick containers, what environmental factors matter, and which pantry items need special care.
Whether you’re bulk shopping or just want your everyday ingredients to last, these tips will help you run a more efficient, less stressful kitchen.
Key Takeaways
- Airtight containers and cool, dark, dry storage help prevent spoilage and pests
- Label everything with purchase dates and use the first-in, first-out method to avoid waste
- Freeze nuts, whole grains, and flours to extend freshness and kill off potential pests
Why Proper Dry Ingredient Storage Matters
Storing dry ingredients right keeps their flavor and nutrition intact, and helps dodge issues with moisture, bugs, and other nasties. If we slack off, we end up wasting money and risking food safety—nobody wants that.
How Storage Affects Flavor, Nutrition, and Safety
When dry goods sit in the wrong conditions, they lose their punch pretty quickly. Spices that used to be bold get bland. Flour can pick up funky, rancid notes that ruin baked goods.
Nutritionally, it’s not great either. Vitamins like B and C, especially in whole grains, break down with too much light or heat—kind of defeats the purpose of buying those healthier options.
If moisture sneaks in, things get riskier. Even a little humidity can trigger mold or bacteria. Grains and flours in damp spots might develop mycotoxins, which are bad news even if everything still looks fine.
Key Enemies: Moisture, Air, Heat, Light, and Pests
Here’s what we’re up against:
- Moisture makes things clump, mold, or spoil—think sugar, cornmeal, you name it
- Air oxidizes oils in nuts, whole grain flours, and seeds, making them taste off
- Heat speeds up staleness and can even wake up insect eggs hiding in products
- Light breaks down vitamins and fades colorful ingredients
- Pests (weevils, moths, larvae) can take over a whole container if they get in
The sweet spot for storage is 50°F–70°F and humidity under 60%. Keep dry goods away from the stove, dishwasher, and sunny windows—those spots fluctuate too much.
The Cost and Hassle of Spoilage
Tossing out ruined flour, finding bugs in rice, or chipping away at rock-hard brown sugar hurts the wallet. Buying in bulk only pays off if you actually use what you bought before it goes bad.
Then there’s the inconvenience. Nothing derails dinner plans faster than discovering your baking powder’s dead or your cornmeal smells weird. Cue the emergency grocery run or last-minute recipe swap.
Pest infestations are the worst. Once moths or weevils show up, you’ll probably have to dump a bunch of stuff, scrub your pantry, and keep an eye out for more unwelcome guests for weeks.
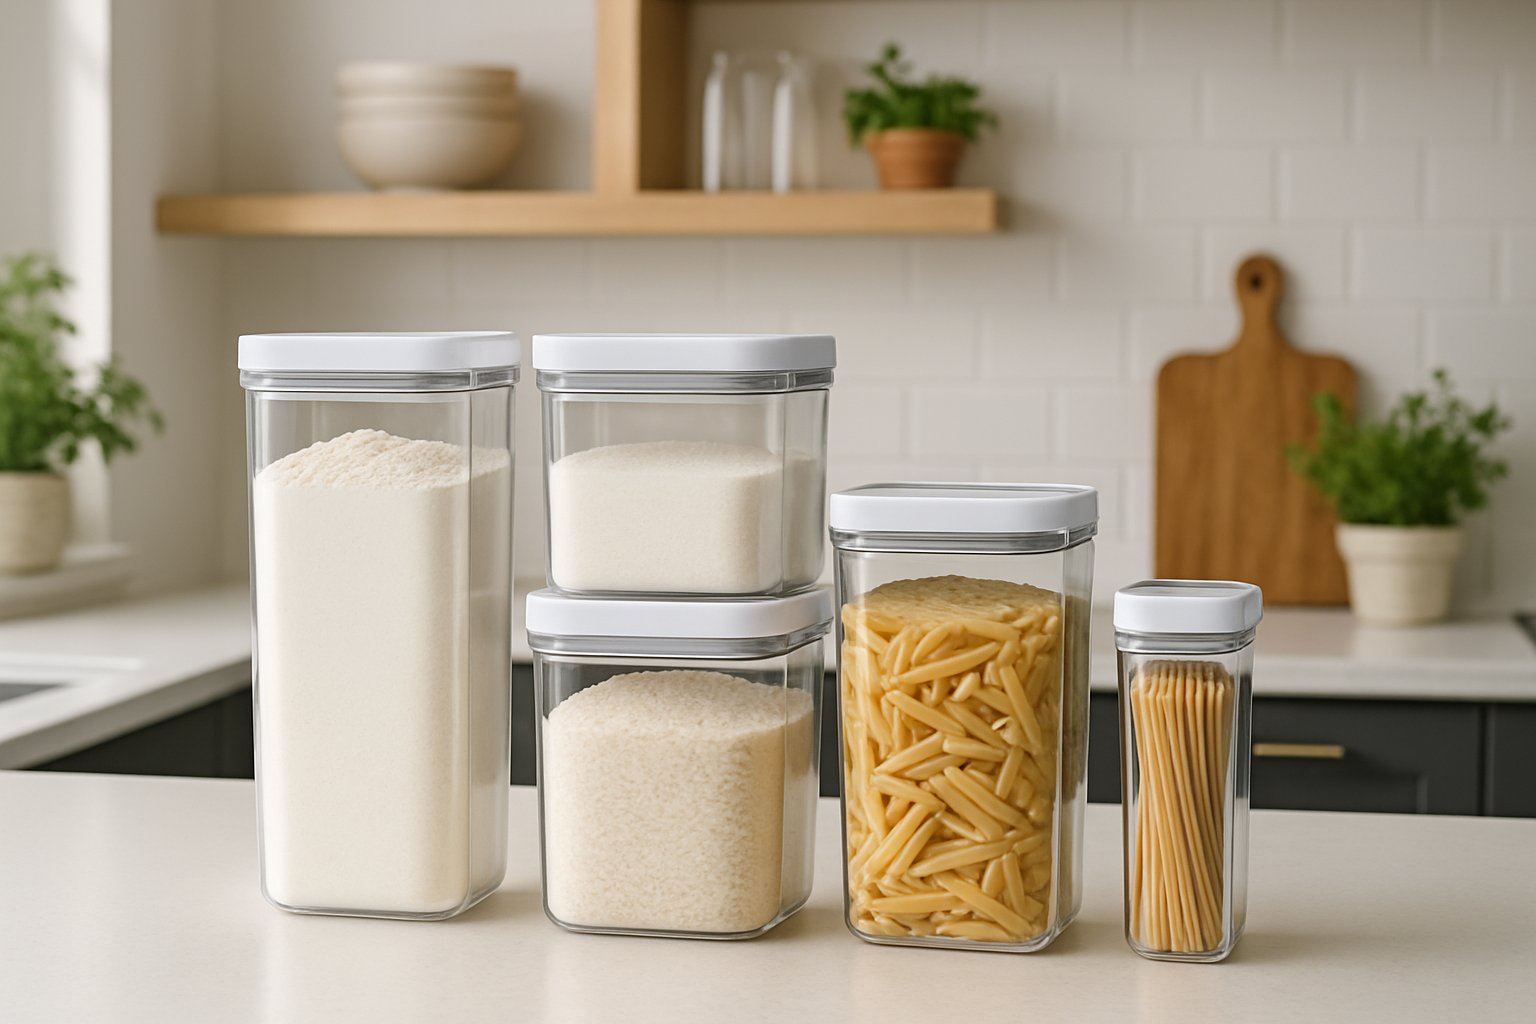
Choosing the Right Storage Containers
The container you pick really does make a difference. Airtight seals keep moisture and bugs out, and the right material can block light and odors.
Airtight Containers: Your First Line of Defense
Seriously, don’t skimp here—airtight containers are a must. If air can get in, so can moisture and pests.
Look for containers with rubber or silicone gaskets that actually seal. The lid should take a little effort to open; if it just pops off, it’s not sealing well enough. We like to flip ours upside down after sealing to check—if anything moves, the seal isn’t tight.
What to look for:
- Rubber or silicone gasket in the lid
- Locking or clamp closures
- No gaps between lid and container
- Passes the upside-down test
Mason jars with new lids are great for small amounts. For bigger quantities, go for containers made for dry goods with locking lids. Even budget ones work if the seal’s good.
Glass vs. Plastic: Pros, Cons, and BPA-Free Options
Glass and plastic both have their place. Glass doesn’t react with food, never smells, and you can see what’s inside. Downside? It’s heavy and breakable, but lasts forever if you don’t drop it.
Plastic is light, stackable, and won’t shatter. But stick with BPA-free options—look for codes 2, 4, or 5. Cheaper plastics can pick up smells or stain, especially with spices.
| Feature | Glass | Plastic (BPA-free) |
|---|---|---|
| Weight | Heavy | Lightweight |
| Durability | Breakable | Shatter-resistant |
| Odor retention | None | Minimal to moderate |
| Visibility | Clear | Usually clear |
| Lifespan | Indefinite | 5-10 years |
| Cost | Higher | Lower |
If you’re storing stuff that’s sensitive to light (like whole grain flours), go with opaque containers. Some plastics have tinted or solid sides that help block out light but still keep things organized.
Vacuum Sealers, Mylar Bags, and Metal Tins for Specialty Uses
Vacuum-sealed bags pull out almost all the air, which keeps things fresh a lot longer. If you buy flour, nuts, or grains in bulk, a vacuum sealer is worth it. The bags squish down to fit wherever you need them.
Mylar bags do a similar job and work even without a vacuum sealer. Pair them with oxygen absorbers for long-term storage—like for rice, beans, or dehydrated foods. They’re tougher than regular plastic bags and keep out moisture better.
Metal tins are great for anything that needs total darkness. We stash loose-leaf teas, cocoa powder, and whole spices in them. They even help with rodents, if that’s a concern. Just check for a food-safe lining so you don’t get a metallic taste.
Best Storage Practices for Pantry Staples
How you store things really changes how long they last. Rice and pasta need different care than flour or dried fruit, and knowing these details helps cut waste and keep things tasting good.
Storing Rice, Pasta, Lentils, and Beans
White rice can last 3–5 years in a sealed container at the right temperature (50–70°F). Brown rice, because of the oils, only lasts 6–8 months. Pasta stays fresh up to two years if you keep it dry and sealed.
Dried beans and lentils can last for ages, but they cook best if you use them within a year. Cool, dark, and dry is key—humidity under 60%.
Clear, stackable containers make it easy to see what you’ve got left. Glass or BPA-free plastic both work. Label everything with the purchase date so you can use older stuff first.
Keeping Dried Fruits and Spices Flavorful
Whole spices can stay good for up to four years, but ground spices usually need replacing after one or two. Store them in dark cabinets or drawers, not on the counter where light can zap their flavor.
Temperature matters for spices, too—shoot for about 70°F and keep them away from the stove. Red spices like paprika actually do better in the fridge to keep their color and taste.
Dried fruit does best in airtight containers in a cool, dry place. Check for moisture regularly—if you spot any, mold could be on the way. Rotate your spices every six months, and give them a sniff or taste before using.
How to Store Flour, Sugar, and Baking Supplies
White flour keeps 9–15 months at room temp if it’s airtight. Whole grain flour is more finicky—store it in the fridge and use it within 3–6 months. Always seal flour tight to keep bugs and moisture out.
Sugar basically lasts forever if it stays dry. Brown sugar is trickier—it hardens fast, so use an airtight container and maybe toss in a terra cotta disk or a piece of bread to keep it soft.
Baking powder and baking soda lose their oomph over time. Mark the purchase date and swap them out every 6–12 months. Test baking powder with hot water (it should fizz) and baking soda with vinegar before baking. Keep them away from humidity and strong-smelling foods.
Environmental Factors: Where and How to Store
Where you keep your dry ingredients really matters for shelf life and quality. Temperature, humidity, and light can all mess with your pantry staples.
Ideal Pantry Conditions: Cool, Dry, and Dark
Keep your pantry between 50°F and 70°F (10°C–21°C) for best results. Too much heat speeds up rancidity in flours and nuts. If things get too cold, condensation can form when items warm back up.
A pantry away from appliances that throw off heat is ideal. Don’t store dry goods near the stove, dishwasher, or water heater. Cabinets above these spots get hot and will shorten shelf life.
Places to avoid:
- By windows or outside walls
- Near or above the fridge
- Garages or unheated rooms with lots of temperature swings
- Under sinks or close to plumbing
Keep things off the floor for better air flow and easier cleaning. Shelves away from sunlight help protect flours and spices from losing quality.
Temperature and Humidity Control
Humidity over 60% is bad news—it encourages mold and makes things clump. In humid areas, a small dehumidifier can help keep things dry.
A cheap hygrometer can track humidity in your pantry. If things get out of range, you’ll know before your food gets ruined.
For stuff with oils—whole wheat flour, nuts, seeds—consider the fridge if your kitchen runs hot. Just make sure everything’s sealed tight to keep out moisture and odors.
Light Exposure and Opaque Storage
Light breaks down vitamins and speeds up oxidation in a lot of dry goods. Move things from clear store packaging into opaque containers, or at least stash them in closed cabinets.
Ingredients that need darkness:
- Whole grain flours
- Dried herbs and spices
- Nutritional yeast
- Ground coffee
Glass works fine if you keep it in
Using Oxygen Absorbers and Silica Gel Packets
If you want to keep dry goods fresh longer, oxygen absorbers are a game changer. These little packets—filled with iron powder—suck up oxygen inside your containers, creating an environment where oxidation slows way down. Nuts, whole grain flours, and seeds especially benefit, since rancidity is mostly an oxygen problem.
Silica gel packets fight a different battle: moisture. Toss one in with powdered sugar, cornstarch, or dried herbs, and you’ll see less clumping and spoilage. They’re a must if you live somewhere humid or when summer humidity creeps in.
Best practices for packet use:
- Drop 1-2 oxygen absorbers into each quart container for grains and flours
- Use silica gel for spices, baking powder, and powdered ingredients
- Replace silica gel packets every 6-12 months
- Never use oxygen absorbers with brown sugar (it needs moisture)
- Label containers with the date you added packets
We keep extra packets sealed up until we need them, since they start working as soon as they hit air.
Protecting Against Mold and Infestation
Mold loves warmth and moisture, so dry storage is everything. We always check dry goods before storing—if we spot mold, weird smells, or dampness, out it goes.
Pests? They’re sneaky. Weevils and moths can hitch a ride home from the store. We freeze whole grains, flours, and rice for 48-72 hours right after buying them to kill any hidden eggs.
Prevention checklist:
- Store items 6 inches off the floor and away from walls
- Keep pantry temperature below 70°F if possible
- Clean up spills right away to avoid attracting pests
- Toss bay leaves into flour containers (they actually deter bugs)
- Check containers monthly for webbing or holes
We trust airtight seals to keep critters out, but you’d be surprised how tiny a gap they can squeeze through.
The Power of Freezing and Refrigeration
Freezers and fridges—honestly, we could use them more for dry goods. Nuts, seeds, whole grain flours, and nutritional yeast all last way longer in the freezer. Their oils won’t turn rancid as quickly, and you can keep them fresh for a year or more.
The fridge is perfect for stuff you grab a lot, like whole wheat flour or ground spices. To avoid freezer burn, we use heavy-duty bags or vacuum-sealed containers and squeeze out as much air as possible.
Temperature storage guidelines:
| Item | Best Storage | Shelf Life |
|---|---|---|
| Nuts & seeds | Freezer | 12-18 months |
| Whole grain flour | Refrigerator/freezer | 6-12 months |
| White flour | Cool pantry | 12 months |
| Dried fruit | Refrigerator | 6-12 months |
| Spices (ground) | Cool pantry | 6 months |
Let frozen goods warm up before opening to avoid condensation. That tiny step keeps moisture from sneaking in and ruining your stash.
Organization and Maintenance for Long-Term Freshness
Good containers are only half the battle—you need a system to keep things moving, spot problems early, and avoid waste.
Labeling and Expiration Dates
Honestly, labeling saves us headaches and money. Every container gets a label with the ingredient name and either the date we opened it or transferred it. If there’s an expiration date, we jot that down too.
Dry goods don’t last forever, despite what we’d like to think. Flour is good for 6-12 months; whole wheat flour, 3-6 months. Ground spices fade after a year, but whole spices hang in there for a few years.
What to Include on Labels:
- Ingredient name
- Date transferred or opened
- Original expiration date (if you have it)
- Source or brand (handy for bulk buys)
We use masking tape and a Sharpie for quick labels, or a label maker if we’re feeling fancy. For big bins, we tape a contents list outside so we’re not digging through everything.
FIFO and Stock Rotation
“First in, first out”—it’s not just for restaurants. When we restock, new stuff goes to the back and older stuff comes forward. That way, nothing gets lost in the back for years.
We keep older items at eye level or front and center. Some of us use risers or tiered shelves so we can actually see what’s there. It makes meal planning less of a guessing game.
Bulk buys? We keep a small container for daily use and refill from a larger backup. That way, we don’t keep exposing the main stash to air and moisture.
Regular Inspections and Quick Cleanups
Every couple months, we do a quick check for clumps, odd smells, discoloration, or bugs. Catching problems early means tossing one item, not the whole pantry.
We wipe down bins and shelves during these checks. Flour dust and crumbs attract pests, so a quick cleanup goes a long way. We also check that seals are still tight—rubber gaskets don’t last forever.
If we see webbing, holes, or bugs, we pull out affected items and check everything nearby. Then we scrub the area before restocking. It’s a pain, but better than losing everything.
Frequently Asked Questions
Here are some of the questions we get most about storing dry ingredients—whether you’re fighting pantry pests or trying to keep flour fresh for months.
What's the secret to keeping flour bug-free and fresh for the long haul?
We move flour into airtight containers as soon as we open the bag. That keeps weevils and other bugs from sniffing it out.
For extra peace of mind, we freeze flour for 48 hours after buying it—kills any eggs hiding inside. After that, we stash it in a cool, dark pantry in a tight container.
Whole grain flours go rancid faster because of their oils, so we refrigerate or freeze them. That stretches shelf life from a few months to about a year.
We label containers with purchase dates and try to use all-purpose flour in 6-8 months, whole grain in 3-4 months if it’s at room temp.
Glass vs plastic containers: which champion keeps sugar ants at bay?
Glass and plastic both work—what matters is the seal. Rubber or silicone gaskets are your friend.
Glass doesn’t absorb smells or stain, and it’s easy to clean. Plastic is lighter and less likely to break, so it’s good for high shelves or if you’ve got kids around. We stick to BPA-free options.
The real trick? Wipe down the outside of containers and keep the pantry clean. Ants are more interested in sticky residue than what’s inside.
Baking powder's ticking clock—how do I extend its shelf life beyond the baking buzz?
Baking powder usually lasts 6-12 months once opened, but moisture ruins it fast. We keep it sealed in its original container, away from heat and humidity.
To test if it’s still good, mix half a teaspoon with hot water—if it bubbles, you’re golden.
For longer life, transfer baking powder to an airtight container with a silica gel packet. Just make sure everything’s bone dry before you do.
Humidity makes baking powder fizzle out early, so always use a dry spoon and never scoop over steam.
Powdered sugar's sweet spot—where does it hide for ultimate longevity?
We keep powdered sugar in a tight container in a cool, dry spot—far from anything damp or smelly. It clumps fast if it gets humid.
Cornstarch in powdered sugar makes it extra sensitive to moisture. A little parchment paper or a terra cotta sugar saver helps keep it loose.
It’ll last almost forever if stored right, but we try to use it within two years for best results. Never refrigerate—condensation is the enemy.
If it does clump, a quick sift or pulse in the food processor fixes it. Still, proper storage beats breaking up hard lumps.
Got sugar for days (or decades)? Tell me how to store it like a seasoned pro!
White sugar will keep forever in a sealed container in a cool, dry place. We always transfer it from bags to containers that really seal, to keep out moisture and pests.
Brown sugar’s trickier because of the molasses. We keep it in a tight container with a terra cotta saver or a slice of bread to keep it soft.
Different sugars go in separate containers to avoid flavor mixing and weird moisture issues. Raw, coconut, and specialty sugars each get their own labeled bin.
Biggest threats? Temperature swings and humidity. We steer clear of sinks, dishwashers, or heat sources that might turn sugar into a brick.
The dynamic duo of dry food storage—care to share the two must-follow rules?
First off, keep dry ingredients away from moisture, heat, and light. I always toss stuff into airtight containers and stash them somewhere cool and dark—think between 50°F and 70°F, and if you can, keep humidity under 60%.
The other rule? Use the First-In, First-Out rotation. I slap a date on each container as I fill it, then line things up so the oldest stuff sits up front. That way, I actually use things before they go stale or expire.
Regular check-ins help, too. About once a month, I poke around and look for clumping, dampness, or any weird signs of pests. If I spot something off, I deal with it before it spreads.
Share:
How to Read Green Surrounds: Slopes, Grain, and Miss Zones
The Right Way to Organize a Small Kitchen for Maximum Efficiency