

Check out our latest collection of compact vacuum sealer for food!
Food waste hits our wallets and crowds our trash bins, with the average American family tossing over $1,300 of groceries every year. A portable food vacuum sealer can be a surprisingly effective fix—by sucking air out of storage bags, it keeps food fresh far longer. Used right, a portable vacuum sealer can cut your household food waste nearly in half and keep groceries fresh three to five times longer than old-school containers.
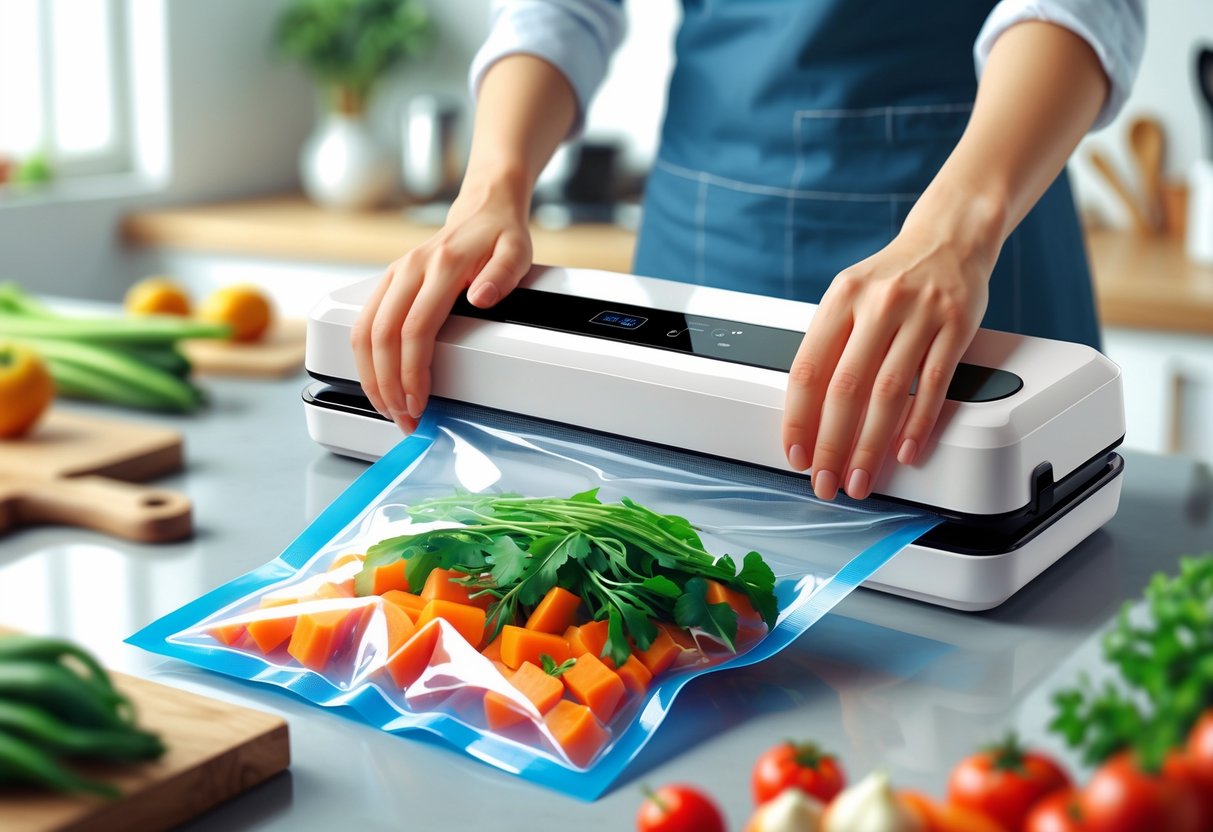
Most of us have unearthed sad leftovers in the fridge or found meat in the freezer that looks like it’s been on a polar expedition. Vacuum sealers make these moments way less common by creating airtight seals that keep air out and food in good shape. These little gadgets pull air from special bags and then heat-seal them tight, locking in freshness.
This guide covers how to pick a sealer that fits your kitchen, plus tips for sealing liquids, prepping for sous vide, and even shopping smarter. There’s step-by-step advice, grocery strategies, and some pitfalls to watch out for.
Key Takeaways
- Portable vacuum sealers keep food fresh up to five times longer by removing air that causes spoilage and freezer burn
- Good sealing technique and using the right bags are critical for results and reducing food waste
- Pairing smart shopping with vacuum sealing lets you buy in bulk and plan meals to save cash
How Portable Food Vacuum Sealers Slash Food Waste Fast
Vacuum sealing pulls oxygen out of food packaging, which slows down bacteria and stretches shelf life by three to five times compared to regular storage. It stops freezer burn, keeps nutrients and flavor, and can cut grocery waste in half—saving you hundreds a year.
The Science Behind Vacuum Sealing and Food Spoilage
Food spoils when oxygen feeds bacteria, mold, and yeast that break down what we buy. Vacuum sealing chokes out these tiny troublemakers by removing nearly all the air.
Oxygen is the enemy of fresh food. It browns apples, turns oils rancid, and lets bacteria multiply. By removing air, vacuum sealing sort of puts food on pause.
Here’s how vacuum sealing protects your groceries:
- Removes oxygen so spoilage bacteria can’t thrive
- Prevents moisture loss so textures stay right
- Blocks outside contaminants from getting in
Studies show vacuum-sealed food keeps its quality three to five times longer. For example, fresh meat that lasts just a few days in the fridge can stay good for two weeks when sealed.
Key Benefits: Reducing Food Waste and Saving Money
With a portable vacuum sealer, you can cut food waste up to 50%. The average family wastes $1,500 in food each year, but sealing makes a serious dent in that.
Check out the numbers:
| Food Type | Normal Storage | Vacuum Sealed | Money Saved |
|---|---|---|---|
| Ground beef | 1-2 days | 2 weeks | $8-12/month |
| Fresh vegetables | 3-7 days | 2-3 weeks | $15-25/month |
| Bread | 5-7 days | 1 month | $10-15/month |
Bulk buying actually pays off when you can keep food from spoiling. Stock up during sales, seal it, and use it when you need it.
Vacuum sealing does more than just stop waste. It holds onto nutrients that would otherwise break down. Vitamin C and other antioxidants stick around longer in vacuum-sealed food.
Meal prep gets easier, too. You can make big batches and seal single servings, so you always have something healthy and homemade ready to go.
How Vacuum Sealing Fights Freezer Burn
Freezer burn is a sneaky food killer. Those white, frosty spots? They’re not just ugly—they ruin taste and texture, and you end up tossing what you paid for.
Freezer burn happens when air gets to frozen food. Moisture escapes, forms ice crystals, and the food dries out. It’s a one-way ticket to bland, cardboard-like meals.
Vacuum sealing stops this cold. With an airtight seal, air can’t reach your food, so ice crystals don’t form. Food keeps its original taste, texture, and nutrients for months.
Standard freezer bags just don’t cut it—air seeps in through weak seals. Vacuum-sealed bags pull out all the air and seal tight, solving the problem.
We’ve noticed vacuum-sealed frozen food tastes almost as good as fresh, even after six months or a year. Regular freezer bags? Freezer burn shows up in just a few months.
Choosing the Right Portable Food Vacuum Sealer for Your Kitchen
Picking a vacuum sealer depends on your kitchen, budget, and how much you’ll use it. External models are great for most home cooks, while handheld ones work for people who want something small and simple.
External, Chamber, and Handheld Models Explained
External vacuum sealers are the go-to for home kitchens. These sit on your counter, suck air from textured bags, and seal the opening. They’re solid for most foods, but don’t handle liquids well unless you freeze them first.
Chamber vacuum sealers take a different approach. You put the whole bag inside, and the machine removes air from both the bag and the chamber before sealing. This works for liquids and has stronger suction.
Home chamber models tend to be small inside, so big cuts of meat or full jars usually won’t fit. For serious use, something like the VacMaster VP210 is worth a look.
Handheld vacuum sealers are all about portability. Cordless handheld sealers are ideal for portability, offering quick, lightweight sealing without needing to be plugged in. These are nice for light jobs, but don’t have the power of countertop machines.
Feature Checklist: What to Look for When Shopping
Start with vacuum strength—look for at least 13 inHg. More suction means better preservation.
Controls matter, too. A pulse button gives you manual control for delicate stuff like berries or chips. Moist and dry modes adjust sealing for different foods.
Size is worth thinking about—both the machine and the bags it can seal. An 11-12 inch sealing bar covers most needs. Bag storage and built-in cutters make life easier, but take up more space.
Some handy features:
- Double seal for extra-strong closures
- Accessory port for jars or wine stoppers
- Easy-lock lid that doesn’t require a wrestling match
- Cancel button to stop mid-cycle
Expect to spend $100-200 for a good balance of features and durability. Cheaper models often skimp on power and don’t last.
Importance of Compatible Bags and Accessories
Vacuum sealer bags aren’t all the same. Most external sealers need textured bags—smooth ones won’t work.
FoodSaver bags fit most machines, not just FoodSaver brand. You’ll find them at major stores, so replacements are easy. Generic textured bags can work, but it’s smart to check compatibility.
Bag rolls save money over pre-cut bags. You can cut the size you need and seal one end, so there’s less waste.
Accessories like jar attachments or wine stoppers make your sealer more useful. Most brands use similar connections, but double-check for an accessory port if you want these extras.
If you seal a lot, built-in bag storage and a cutting bar speed things up. Otherwise, you’ll need scissors and a place to stash bag rolls.
Mastering the Vacuum Sealing Process Step by Step
Getting vacuum sealing right makes all the difference. Here’s what works best, from prepping food to keeping your machine in good shape.
Prepping and Portioning Foods for Best Results
Prep matters. Let cooked foods cool completely before sealing—hot food makes steam, which messes with the seal and can cause bacteria.
Cut food into meal-size portions that fit your bags. Leave 2-3 inches of extra space at the top, so the machine can seal without sucking food into the works.
For veggies, blanch briefly, then chill in ice water. Dry everything really well—moisture is your enemy here.
Pre-freeze delicate foods like berries for an hour or two before sealing. That way, they keep their shape and don’t get squished.
Sealing Dry, Moist, and Delicate Foods
Different foods need different handling. Dry foods like nuts or pasta are easy—just bag and seal.
Moist foods need some care. Stick a paper towel near the bag opening to catch stray liquid. For soups or sauces, freeze them in containers first, then seal the solid blocks.
Don’t try to vacuum seal liquids directly—they’ll get sucked into the machine and make a mess. Use the pulse vacuum if you have it, or stick to the freeze-first method.
Delicate things like soft bread or cookies need a light touch. Use the lowest setting, or stop the vacuum early so nothing gets crushed. Some machines have special settings for this.
Labeling, Storing, and Organizing Your Sealed Items
Labeling is a game changer. Write what’s inside and the date on each bag before sealing—once it’s sealed, ink won’t stick well.
Use a permanent marker or labels that actually stay put. Add portion size and any quick notes, like “add 2 cups water” for dried meals.
Store bags flat—they stack better and thaw faster. Put what you use most up front.
Organize your freezer or pantry by type—proteins in one spot, veggies in another. It saves time and helps you use things before they expire.
Even vacuum-sealed food doesn’t last forever, so keep an eye on dates.
Cleaning and Maintaining Your Sealer
A little maintenance keeps your sealer running and your food safe. Wipe the sealing area after every use to clear away crumbs and moisture.
Check the sealing strip for cracks or wear. If it’s damaged, replace it—otherwise you’ll get bad seals.
Clean the vacuum chamber weekly if you use the sealer a lot. Remove any bits of food that could block airflow or cause smells.
Change or clean filters as the manual says. Dirty filters mean weak suction and could overwork the motor.
Store your sealer somewhere dry and clean. Moisture can wreck electronics and lead to mold if you leave the machine unused for too long.
Smart Grocery Strategies: Use Vacuum Sealing to Shop and Store Like a Pro
Vacuum sealing can totally change how you shop and store food. It lets you buy in bulk, prep meals ahead, and waste a lot less.
Meal Prep and Bulk Buying to Slash Waste
Bulk buying is a real money-saver when you vacuum seal. You can grab meat at a discount, then portion and seal it right away.
Great bulk buys:
- Ground beef (split into 1-lb packs)
- Chicken breasts (seal solo or in pairs)
- Seasonal veggies (blanch, then seal)
- Cheese blocks (portion for the week)
Focus meal prep on foods that seal well. Soups, stews, and casseroles work great—just portion after cooling and seal.
Plan your shopping around how much freezer space and bag supply you have. Otherwise, you’ll end up with more than you can store.
Fresh herbs are worth sealing, too. Try sealing small portions with a little olive oil to keep flavor locked in for months.
Vacuum Sealing for Leftovers and Busy Nights
Leftovers turn into meal gold when we vacuum seal them right. Suddenly, that three-day window in the fridge stretches out to several weeks in the freezer.
Best Leftover Candidates for Vacuum Sealing:
- Cooked pasta dishes
- Rice-based meals
- Roasted vegetables
- Grilled proteins
Let leftovers cool all the way before sealing—hot food just makes condensation, which messes up the seal.
Portioning them out in single servings is a lifesaver. Makes for easy grab-and-go lunches or quick dinners when you just can’t be bothered.
Labeling each bag with what’s inside and the date? Not glamorous, but it makes life so much easier later. A permanent marker right on the bag does the trick.
Vacuum sealing yanks out the air that dulls flavors. When you reheat, it’s almost like you just cooked it.
Freezer Storage Hacks for Maximum Shelf Life
Organizing your freezer takes vacuum sealing to another level. If you can, set up zones for different bagged foods.
Optimal Freezer Organization:
- Top shelf: Ready-to-eat meals and leftovers
- Middle shelves: Raw proteins and bulk purchases
- Bottom/drawers: Vegetables and fruits
- Door: Herbs and small portions
Vacuum-sealed bags stack flat—way better than those clunky containers. You’ll be amazed at how much more you can fit.
Keep bags out of the freezer door; that spot’s a temperature roller coaster.
Freezer burn? Not really an issue with vacuum sealing. No air means no weird ice crystals or funky flavors.
Rotate your stash—put the new stuff behind the old. Even though vacuum-sealed food lasts ages, it’s still smart to use up the oldest first.
Advanced Techniques: Liquids, Sous Vide, and More
Once you’ve got the basics down, there’s a whole world of tricks—soups, marinades, and even fancy sous vide cooking. Who knew a vacuum sealer could do so much?
How to Safely Vacuum Seal Liquids and Sauces
Liquids need a different approach. The secret? Partially freeze them first.
Stick your soup, sauce, or marinade in the freezer for a couple hours until it’s slushy but not rock solid. That way, it won’t get sucked into the machine and make a mess.
Leave a good 3-4 inches of space at the top of the bag. Liquids expand when they freeze, and you don’t want a blowout.
If your sealer has a pulse feature, use it. You get more control, and less chance of disaster.
| Liquid Type | Freeze Time | Special Notes |
|---|---|---|
| Thin soups | 2-3 hours | Might need a little longer |
| Thick stews | 1-2 hours | Easier to handle |
| Marinades | 2 hours | Add meat after partial thaw |
Pro tip: Set a little tray or dish under the sealer. Even with freezing, drips happen.
Using Vacuum Sealed Bags for Sous Vide Cooking
Sous vide changes everything. Your vacuum sealer suddenly becomes a tool for restaurant-level precision.
Most bags hold up fine in water baths up to 195°F. Just double-check your seal before you start—nothing ruins dinner like a leaky bag.
Here’s what’s worked for us:
- Delicate fish: Gentle vacuum so you don’t crush it
- Tough meats: Full vacuum to get marinade deep inside
- Veggies: Medium vacuum keeps them from getting squished
Marinating? Vacuum sealing speeds it up big time. What used to take hours now takes maybe half an hour.
The best part? Consistency. Steak comes out exactly how you want it, veggies stay bright and crisp. It’s kind of addictive.
Creative Uses: Snacks, Coffee, and Dry Goods
Vacuum sealers aren’t just for leftovers. We use ours to keep coffee beans fresh for months—huge difference.
Snacks in single servings? Saves you from demolishing a whole bag of chips in one go.
Nuts and seeds stay crunchy way longer. Buying in bulk suddenly makes sense.
Some of our favorite uses:
- Cereal and crackers: No more stale snacks, even in humidity
- Spices and herbs: Stays potent, no clumping
- Emergency kits: Matches and meds stay dry
- Travel packing: Clothes compress, electronics stay safe
Brown sugar is a revelation. No more giant sugar bricks.
Cheese blocks last forever compared to store packaging. Use gentle settings for soft cheeses, or you’ll have a squished mess.
Buying in bulk? Vacuum sealing actually makes it practical.
Common Mistakes and Troubleshooting for Seamless Sealing
Most sealing fails come down to moisture, bag placement, or just picking the wrong foods. Knowing the pitfalls saves your food and your machine.
Avoiding Incomplete Seals and Leaks
Moisture is the arch-nemesis here. Even a drop of water on the bag edge can ruin the seal and spoil your food.
Always pat foods dry first. For really juicy stuff like marinated meats, freeze them for a bit before sealing.
Bag placement matters. The opening needs to lay flat—no folds, no wrinkles.
Quick checklist:
- Wipe sealing bar clean
- Make sure bag edges are dry
- Leave a few inches at the top
- Smooth out air bubbles
Overfilling bags? Tempting, but don’t do it. Food can get sucked into the vacuum chamber and cause all sorts of problems.
For soups and sauces, freeze them in containers first, then pop the solid block into a bag. Way less messy.
Recognizing When Foods Shouldn't Be Vacuum Sealed
Not everything is vacuum sealer-friendly. Some foods just cause trouble or even create unsafe conditions.
Sharp bones or pointy foods can poke holes in bags. Wrap them in paper towels or use tougher bags.
Fresh mushrooms, garlic, and soft cheeses let off gases—bags inflate, and that’s not good. Blanch or cook first, or use another storage method.
Skip vacuum sealing for:
- Raw mushrooms
- Fresh garlic and onions
- Soft cheeses
- Fried foods
- Cabbage and Brussels sprouts
Hot food is a no-go. It can melt the bag or damage the machine. Let it cool first.
Fixing Common User Errors
If your seals keep failing, start simple. Worn gaskets are usually the culprit after a while.
Check for cracks or crumbs. Clean gently, dry well, and replace if needed.
Thicker bags or stubborn materials? Try increasing the seal time by a second or two.
If your sealer just stops working, check the basics—power cord, outlet, fuses, maybe even the pump filter.
Quick troubleshooting:
- Check the power cord
- Try a different outlet
- Look for blown fuses
- Clean the vacuum pump filter
Wipe down the sealing bar after every use, and give the whole thing a good clean once a month. It really helps.
Frequently Asked Questions
Portable vacuum sealers spark a lot of questions—what foods work, what to avoid, and how to get the most out of your investment. Here’s what we get asked most.
What's the scoop on the best foods to vacuum seal for slashing your grocery waste?
Meats are the big winner. Beef, chicken, and fish last up to three years in the freezer, compared to just months in regular bags.
Cheese is another money-saver. Hard varieties like cheddar and parmesan skip the mold and last way longer.
Nuts and dry goods, like coffee and pasta, keep their quality if you buy in bulk.
Produce? Some works, some doesn’t. Berries, herbs, and leafy greens benefit, but blanch veggies first for best results.
Can you give me the lowdown on using a vacuum sealer with already cooked munchies?
Totally doable—just let food cool to room temp first. Sealing hot food traps moisture and encourages bacteria.
Soups and stews? Partially freeze them so the liquid doesn’t get sucked into the machine.
Cooked meats are perfect for meal prep. Portion out and seal for easy dinners.
Casseroles and pasta dishes work well too. Leave extra space at the top for sealing.
Hey, can vacuum sealing your wardrobe space save you a bundle of space?
Absolutely. We use it for winter coats, comforters, sweaters—huge space saver.
Bulky stuff shrinks to about a third of its size. Closets suddenly have room again.
Travel’s easier, too. More clothes in less space, or you can pack smaller bags.
Don’t use it on leather, fur, or fancy embellishments—they don’t handle the compression well.
What's the real deal behind the cons of vacuum sealing your grub?
Upfront cost can sting—good sealers run $50-200, and bags aren’t free.
Some foods just don’t work. Soft fruits get crushed, sharp stuff can poke holes.
Anaerobic bacteria is a real risk if you’re not careful. Garlic and mushrooms, for example, can get dangerous without oxygen.
And beware: If you get into bulk buying, you’ll need serious freezer space.
Are there any food no-nos when it comes to vacuum sealing?
Raw mushrooms are a bad idea—bacteria risk. Cook first.
Fresh garlic? Same deal. Use cooked garlic or powder.
Soft cheeses like brie? They’ll just turn into a squished mess.
Veggies like broccoli and cabbage give off gas and inflate bags. Blanch first or skip them.
Sharp, pointy foods poke holes. Crackers, chips, bones—protect them or find another method.
Got any clever hacks for other uses of a food vacuum sealer beyond grub storage?
Vacuum sealers aren't just for leftovers. We've found they're surprisingly handy for protecting documents—think birth certificates, passports, or old photos you really don't want ruined by a leaky roof or spilled coffee.
If you're into emergency kits, these things are a game-changer. Toss in first aid supplies, matches, or meds, and they'll stay dry and easy to find. No more digging through soggy boxes during a storm.
Ever travel with jewelry or tiny valuables? Sealing them up keeps everything together and helps prevent tarnish. I mean, who wants to untangle necklaces at the hotel?
Camping? Oh, absolutely. We squish down sleeping bags, stash toiletries without worrying about leaks, and keep matches so dry you could light a fire in the rain. Maybe not recommended, but you get the idea.
Marinating? This might be my favorite. Seal meat with marinade, and it soaks up flavor way faster. Plus, you don't have to deal with messy bags sloshing around in the fridge.
Share:
Compact Vacuum Sealer vs. Full‑Size Models: Which Fits Your Kitchen and Budget?
Top 15 Foods You Didn’t Know You Could Vacuum Seal With a Mini Sealer