

Check out our latest collection of compact vacuum sealer for food!
Vacuum sealing liquids can feel like a kitchen disaster waiting to happen. Most of us have been there—trying to seal soup or sauce, only to watch it get sucked into the machine, creating a mess and ruining the seal. But with the right techniques and gear, you can actually vacuum seal liquids without chaos.
The secret to mess-free liquid vacuum sealing is freezing the liquid first. That way, it doesn’t get sucked up into the machine and you still get a tight, clean seal. It’s a simple trick, but it really works. There are a few other methods and tools that make sealing liquids way easier, too.
Let’s go over the must-have equipment, the best techniques, and a few clever hacks that turn vacuum sealing liquids from a headache into a pretty painless part of meal prep. Whether you’re dealing with soups, marinades, or sauces, these tips will help you keep your kitchen clean and your vacuum sealer safe.
Key Takeaways
- Freezing liquids before sealing keeps them from getting sucked into the machine—no more mess
- Using the right tools, like canning funnels and keeping the seal area dry, makes a huge difference
- There are several ways to vacuum seal liquids, so you can preserve soups, sauces, and marinades without much hassle
Why Vacuum Seal Liquids? Benefits & Use Cases
Vacuum sealing liquids completely changes how we store soups, marinades, and sauces. It really extends their shelf life and keeps flavors locked in.
Food Preservation and Extended Shelf Life
When we vacuum seal liquids, we’re basically pausing spoilage. No air means bacteria can’t do their thing.
Freezer storage gets way more efficient. Vacuum-sealed liquids can last 6-12 months in the freezer, while regular containers only manage 2-3 months. That’s a big deal if you like to batch cook.
In the fridge, vacuum-sealed liquids stay good for 1-2 weeks. Unsealed, you’re lucky to get 3-5 days. So, you can meal prep Sunday and still have fresh soup the next weekend.
A few preservation perks:
- Stops freezer burn
- Blocks air exposure and oxidation
- Prevents ice crystals that wreck texture
- Less food waste
And honestly, the space savings are nice. Bags lay flat and take up way less room than containers.
Meal Prep, Sous Vide, and Beverage Storage
Vacuum sealing liquids makes meal prep so much easier. You can portion out soups, stews, and sauces, and they’ll reheat perfectly.
Sous vide cooking wouldn’t be the same without vacuum-sealed liquids. Marinades work faster and deeper under vacuum.
For drinks, it’s handy for:
- Fresh juices and smoothies
- Homemade broths and stocks
- Cocktail mixers and syrups
- Wine for cooking (no more oxidation)
Other upsides:
- Grab-and-go servings
- Faster marinating
- Soups keep their texture after thawing
Chamber vacuum sealers definitely handle liquids better, but with patience, you can make it work with an external machine, too.
Keeping Flavors and Nutrients Intact
Vacuum sealing locks in flavors that would otherwise disappear. You really notice it when you reheat a vacuum-sealed soup.
Nutrients, especially vitamin C and B vitamins, stick around longer since there’s no air to break them down.
Sometimes, flavors even get better over time. Marinades keep working in the sealed bag, and tomato sauces, for example, get richer and more complex after a few days sealed up.
Key Challenges When Vacuum Sealing Liquids
Vacuum sealing liquids brings a few headaches. Liquid can get sucked into the machine, spills happen, and pressure changes can cause weird expansion problems.
Avoiding Spills and Leaks
The biggest issue is liquid going where it shouldn’t. When you vacuum seal soup or marinade, the machine can pull the liquid up toward the seal.
This creates two problems: the liquid covers the sealing area (so the seal fails), and it can get pulled into the vacuum sealer’s guts.
Typical spill scenarios:
- Overfilling bags
- Tilting bags while sealing
- Using bags that are too small
- Not leaving enough headspace
You need the seal area bone dry for a good closure. Even a little moisture can ruin the seal and lead to freezer burn later.
Also, wet bags are slippery and messy to handle.
Preventing Sealer Damage
Liquids can wreck your vacuum sealer. If liquid gets inside, it can mess up the pump, clog air pathways, and even cause electrical problems.
The pump’s built for air, not water. If liquid gets in, it can corrode parts or cause the motor to fail.
Possible damage:
- Burned-out pump motor
- Clogged filters
- Messy internal chambers needing a deep clean
- Electrical issues from moisture
Most warranties won’t cover liquid damage, either. Some machines have overflow protection, but I wouldn’t count on it.
Dealing with Expansion and Air Bubbles
Liquids act weird under vacuum. As you pull out air, liquids can bubble and expand, pushing more liquid toward the opening.
Hot liquids are the worst—they release steam and gases, which makes things even messier.
Expansion issues:
- Carbonated drinks foam up
- Warm soups release steam bubbles
- Thick sauces trap air
- Oil in marinades separates
Thick liquids can trap air bubbles, so you don’t get an even seal. Temperature matters, too—room temp liquids expand less than hot ones, but you still need to leave extra space in the bag.
Choose the Right Equipment for Mess-Free Liquid Sealing
Having the right vacuum sealer makes all the difference. Chamber vacuum sealers are best for liquids, but you can make an external sealer work with some tricks.
Chamber Vacuum Sealer: The Gold Standard
Chamber vacuum sealers are the best for sealing liquids, hands down. They put the whole bag inside a chamber, so there’s no way for liquid to get sucked into the machine.
You can seal soups, marinades, and wet foods without freezing first. The Weston Pro-2300 is a standout, with a big sealing bar and a strong pump.
Chamber sealers equalize pressure inside and outside the bag, so liquids stay put.
Why they’re great:
- No need to freeze
- Seal any liquid, any consistency
- Pro-level results
- Handles big batches
The downside? Price. Chamber sealers usually start around $300 and can go way higher for commercial models.
External Vacuum Sealer Workarounds
You can use an external vacuum sealer for liquids if you’re careful. Freezing the liquid first is the safest bet.
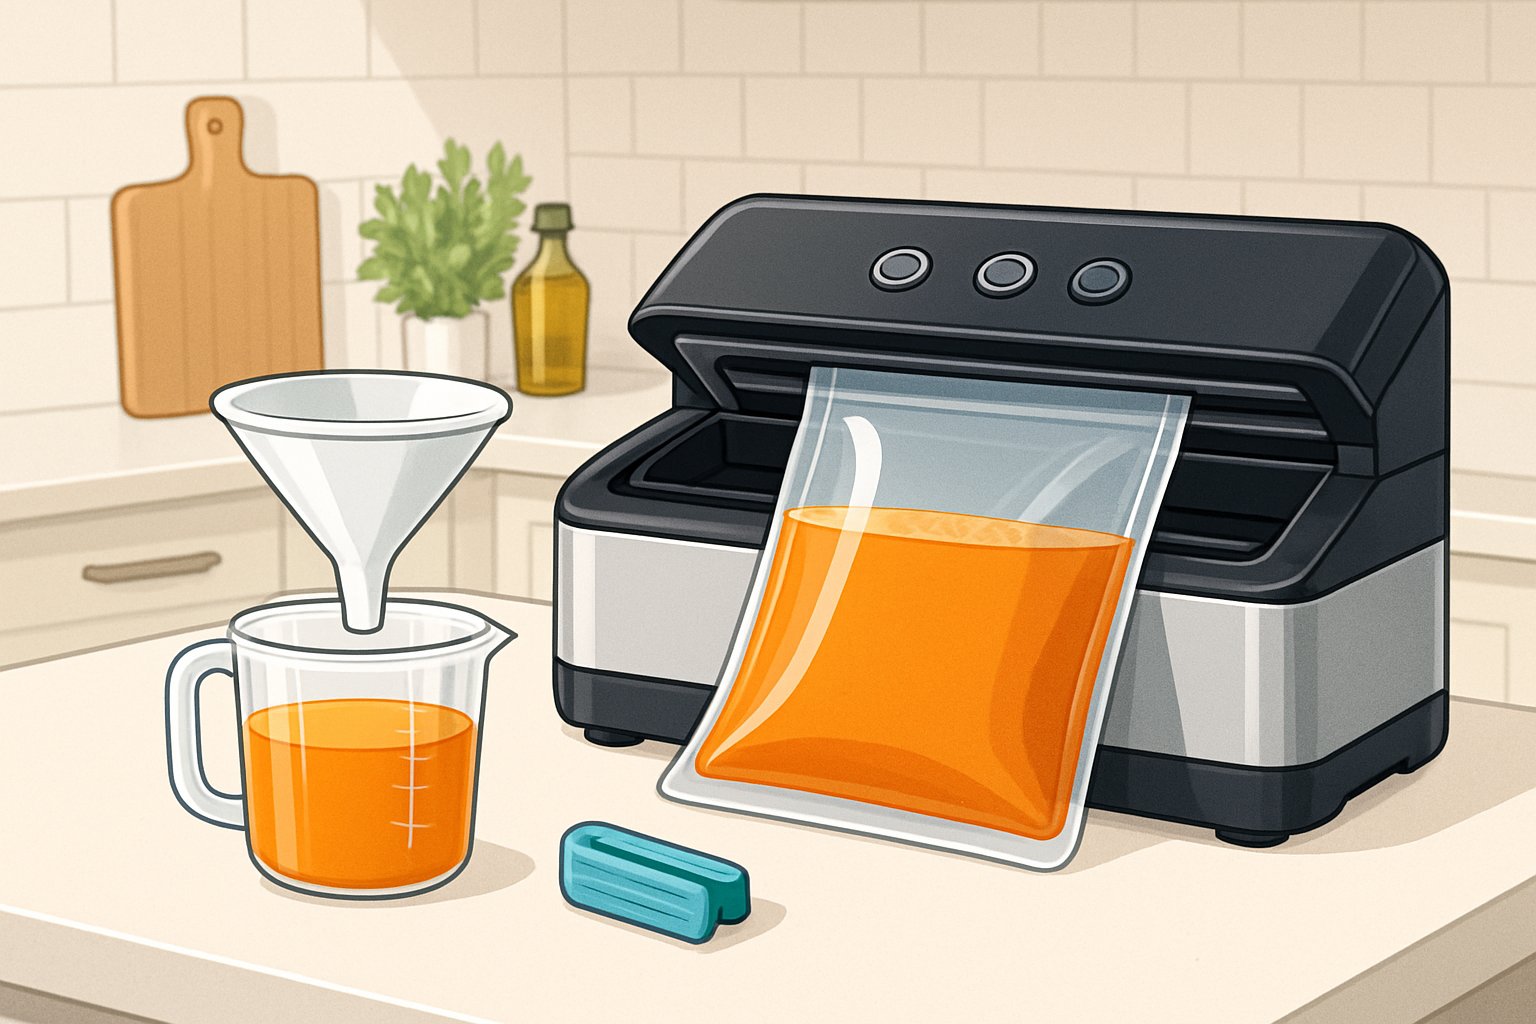
A canning funnel helps fill bags without making a mess. Keep the seal area dry—any liquid there will ruin the seal.
Most external sealers have a pulse or manual mode so you can control the suction and avoid sucking up liquid.
How to make it work:
- Freeze liquids first
- Use gripsticks to hold bags while freezing
- Keep seal areas dry
- Use gentle/manual vacuum settings
It takes more time, but you’ll get good results if you plan ahead.
Vacuum Sealing Bags & Compatible Materials
Some bags are better for liquids. Go for ones that are thicker—at least 4 mil—so they don’t puncture when you’re handling frozen blocks.
Textured bags are best because they let air out easily. Smooth bags can trap air around the liquid.
Bag tips:
- Polyethylene/Nylon blends are tough
- BPA-free is always a plus
- Rolls let you custom-size bags
Leave 3-4 inches of space above the liquid to prevent overflow. And some sealers only work with specific bags, so check before you buy a bunch.
Pro Methods for Vacuum Sealing Liquids Without Mess
The best ways to vacuum seal liquids focus on controlling temperature, putting up barriers, portioning smartly, and using careful sealing techniques. It’s all about keeping the liquid from moving and making sure the seal area stays clean.
Freezing Liquids Before Sealing
Freezing turns liquids into solids that won’t spill. Partially freezing for 2-4 hours (until slushy) works for things like marinades and broths.
Fully freezing is best for soups, stews, and sauces. Pour them into shallow containers so they freeze faster. Once they’re solid, you can vacuum seal them without worry.
If you want perfect portions, freeze liquids in ice cube trays. Then toss the cubes into vacuum bags—no spills, and you get single servings.
The only catch is time—you’ll need to wait a few hours for liquids to freeze. But it’s pretty much foolproof.
Using Liquid Barriers and Blocker Strips
Barriers keep liquids from reaching the seal area. A couple of paper towels in the bag opening can soak up any liquid that gets pulled up.
Coffee filters work well, too—just put one near the opening, leaving a gap between the liquid and the filter.
You can make custom strips out of paper towels and place them in the bag for extra absorption.
Some people use a slice of bread as a barrier. It’ll soak up extra liquid and you can just toss it later.
Angle the bag (about 15-20 degrees) during sealing so gravity helps keep the liquid down.
These tricks work with edge-seal machines and don’t need special gear.
Small-Batch and Portion Control Techniques
Sealing smaller portions makes everything easier. Four to six ounces per bag is a good target.
Use single-serving containers to measure before transferring to bags. This is especially handy for soups and sauces you’ll use in recipes.
Flat-packing spreads the liquid thin, so there’s less chance of spills. Fill bags only a third full and lay them flat.
It’s better to use several small bags than one big one. If something goes wrong, you don’t lose the whole batch.
Always leave 3-4 inches of headspace to handle expansion. Small bags also freeze and thaw faster, which is just more convenient for meal prep.
Pulse and Manual Seal Settings
Pulse vacuum settings let you control the vacuum process in short bursts, pausing to prevent rapid boiling and splashing. This helps stop liquids from rushing up and making a mess.
Most vacuum sealers have a manual seal button so you can stop the vacuum and seal the bag instantly if you see liquid creeping up. You can keep an eye on things and react fast—no more surprise spills.
Lower vacuum pressure is usually better for liquids than cranking it all the way up. Try starting at 60-70% vacuum strength and adjust if needed. This gentler pull keeps liquids calmer and less likely to boil.
Two-stage sealing means using pulse vacuum first to get most of the air out, then switching to continuous vacuum for the last bit. It gives you more control, especially with tricky liquids.
Chamber vacuum sealers are the gold standard for sealing liquids. They control the air pressure in the whole chamber, not just the bag, so liquids don't get sucked around. If you've ever wanted pro-level results, this is the way.
It's a good idea to pre-chill liquids before sealing, no matter what settings you use. Cold liquids behave better—they're less likely to bubble up and make sealing a headache.
Expert Tips, Tricks, and Workarounds
Getting liquids vacuum sealed without drama comes down to smart prep, a little patience, and keeping your sealer in good shape. Cooling your liquids and thinking about how you position the bag can save you from most disasters.
Prepping and Cooling Liquids
Honestly, pre-cooling liquids by about a third makes a night-and-day difference. Stick soups, sauces, or marinades in the fridge for half an hour, or use an ice bath if you're in a rush.
Leave headspace. Give yourself 2-3 inches at the top of the bag. This way, if things expand, they won't hit the seal and ruin everything.
Try the angle trick—tilt the bag 10-20 degrees as you seal to keep liquids away from the heat strip. Sometimes, we tuck a paper towel by the opening as a barrier. It helps, especially if you're sealing something splashy.
For thick stuff like stews, partial freezing is a lifesaver. Freeze for an hour or two until it's slushy but not solid. It keeps things from moving around too much but still lets the vacuum pull the air out.
Keep bag mouths super clean. Even a drop of liquid can mess up your seal. Wipe the opening with a paper towel every single time.
Testing Seals for Leaks
Check your seals within a day to catch any issues. Press on the bag gently—if it's sealed right, you won't see bubbles or feel it give.
Try the water test. Dunk the bag in water and watch for bubbles. If you spot any, mark the spot and reseal.
Look closely at the seal line. Wrinkles or uneven spots are weak points. They tend to fail later.
For thick liquids, the squeeze test works well. Gently press the bag from different sides. If the vacuum feels tight and nothing shifts toward the seal, you're good.
Double sealing gives extra peace of mind. Run a second seal just below the first if you're worried about leaks.
Cleaning and Maintaining Equipment
Liquid residue is rough on vacuum sealers. Wipe down the chamber after sealing liquids, using a damp cloth and mild soap.
Check the drip tray often. Empty and wash it every few uses to keep things clean and suction strong.
Clean the heating element. Use a soft brush to get rid of any gunk on the sealing strip. Buildup here leads to weak seals and can eventually break the element.
We always check bags for tiny holes before using them. Even a pinhole can ruin a liquid seal.
Maintain the pump. Change oil filters as recommended, and never let liquid get sucked into the chamber. If you see liquid heading toward the machine, stop right away.
Store your sealer somewhere dry. Run empty cycles now and then to keep it working smoothly.
Storing and Organizing Vacuum Sealed Liquids
Storing vacuum sealed liquids isn't just about tossing them in the freezer. Where you put them and how you label them can make your life way easier—and help you use things up before they go bad.
Freezer, Fridge, and Pantry Solutions
The freezer is best for things like soups and stews. Lay bags flat to freeze at first—this makes tidy, stackable packets.
Once they're frozen, stand the bags up vertically in bins or baskets. It's kind of like a file cabinet for food, and you can see everything at a glance.
Refrigerators are good for liquids you'll use within a week. Keep bags on shelves, not in the door, since temps swing around too much there.
Pantry storage only works for shelf-stable liquids like broths or certain sauces. Keep them in a cool, dark spot.
Storage Duration Guidelines:
- Freezer: 6-12 months for most liquids
- Refrigerator: 3-7 days depending on what's inside
- Pantry: Stick to the original expiration dates
Labeling and Dating Bags for Easy Rotation
Labels save you from mystery meals and wasted food. We use waterproof markers or freezer labels that don't peel off.
Always write down: what's inside, the date you sealed it, and how much is in there. Something like "Tomato Soup - 7/28/25 - 2 servings" covers it.
Color-coding helps if your freezer's busy—maybe blue for broths, red for sauces, green for marinades.
What to include on the label:
- Type of liquid and key ingredients
- Date sealed
- Portion size
- Any reheating tips
Stick the label on the top corner so you can spot it easily, even when bags are stacked. It makes grabbing dinner way less chaotic.
Frequently Asked Questions
Here's where we get real about the messy side of vacuum sealing liquids. These answers tackle the stuff that actually happens in the kitchen—spills, thick sauces, equipment choices, and all.
What's the secret to vacuum sealing soups without creating a kitchen disaster?
Honestly? Chill your soup until it's almost freezing before sealing. Cold soup doesn't boil up under vacuum, so you avoid the explosive mess that ruins seals (and your machine).
We always leave at least 3 inches of headspace. That buffer keeps soup from sneaking up to the seal.
Angle the bag at 10-20 degrees while sealing—keeps liquid away from the heat strip. Sometimes, we put a paper towel near the opening for backup. It soaks up any stray drops that might mess with the seal.
Got a vacuum sealer? Ever wondered if it can handle a batch of your grandma's chili?
Standard edge sealers really struggle with thick chili unless you freeze it first. Chunky, thick stuff just doesn't seal well and can even damage your machine.
Chamber vacuum sealers handle chili way better. They control pressure in the whole chamber, so liquid doesn't get sucked into the machine.
Partially freeze the chili for 2-3 hours before sealing. It makes it semi-solid and much easier to manage, plus the texture stays nice after thawing.
Double-seal those bags for good measure. Running the cycle twice helps make sure nothing leaks in the freezer.
Are there any vacuum sealers out there that play nice with any old bag from the store?
Most vacuum sealers need special bags made for their sealing style. Store-bought bags are usually too thin and lack the texture needed for a good seal.
Chamber vacuum sealers are more flexible with bag types, as long as the bags are thick enough to handle the vacuum.
We've found that textured channel bags work best with most machines. The little ridges help air escape and make a stronger seal.
Skip smooth bags for liquids—they just don't work well and tend to leak.
Who else struggles with liquids going everywhere but in the bag during vacuum sealing?
Yep, we've all been there—especially with thin stuff like broths or marinades. The trick is to control the liquid before sealing.
Freeze thin liquids like stocks or wine sauces in portions first, then vacuum seal the blocks. It's way less messy.
Fill bags slowly and don't splash near the opening. We usually keep the liquid below halfway up the bag to avoid overflow.
For marinades, the water displacement method is handy. Submerge the bag in water (opening above water), let the air escape, then seal. It's not perfect, but it works.
Food saver with a liquid mode: marketing myth or a kitchen miracle?
Liquid modes are real—they tweak the vacuum and sealing process for wet foods. Usually, they use lower vacuum pressure and shorter cycles to keep liquids from being sucked out.
These modes detect when things start to boil under vacuum, then stop and seal right away to avoid spills.
We've tested a few models with these features. They help a lot with stews or chunky sauces, but aren't perfect for very thin liquids or overfilled bags.
If you're sealing pure liquids, you'll still want to pre-chill or partially freeze for best results. Liquid mode helps, but it's not magic.
Share:
Bulk‑Buy Like a Pro: Saving $1,000 a Year With a Compact Food Vacuum Sealer
Student‑Dorm Cooking Hacks: Maximize Mini‑Fridge Space With a Small Vacuum Sealer