

Check out our latest home & kitchen collection!
Kitchen counters—let's be honest—become that spot where everything lands. Mail, keys, sunglasses, and whatever else you brought in, right alongside the coffee maker and cutting board.
So, you end up digging for the spatula or wondering where on earth you can chop an onion. But you don't have to give up convenience to get a counter that feels tidy and inviting.
The real trick to organized counters is setting up zones for different activities and keeping the stuff you use every day within easy reach.
That way, you’re not always shuffling things around or running to a cabinet for the olive oil. Even small kitchens can feel a lot more functional with a little strategy.
It’s not about hiding everything out of sight, either. Honestly, a kitchen should look like someone actually cooks there. The point is to curate what’s out and make sure every item has a home and a reason to be there.
Key Takeaways
- Set up specific zones for kitchen tasks so things naturally stay organized
- Use vertical storage and movable organizers to stretch your counter space
- Keep only daily essentials on display—stash the rest in cabinets or drawers nearby
Core Principles of Kitchen Counter Organization
Good counter organization basically comes down to three things: keep only what you use all the time out, set up zones for different jobs, and make sure it all looks intentional.
Prioritizing Essentials and Daily Use Items
First, be honest: do you really use that bread maker enough to justify it taking up half your counter? Probably not.
Take stock of what actually gets used. Coffee makers, knife blocks, oils you reach for daily—all those can stay out. If it’s more of a once-a-week thing, like a stand mixer, it only stays if you’ve got the room.
Daily must-haves usually include:
- Coffee or tea supplies
- Oils and salt you grab every day
- Main knife set
- Dish soap and a hand towel
Everything else? Find it a spot in a cabinet or the pantry. It doesn’t mean you have to go full minimalist, but you should be intentional about what lives on the counter.
If you’re always moving things to get to what you need, something’s off. The best setups let you grab what you want without playing Tetris.
Creating Functional Zones on Counters
Divide your counter into work areas that make sense. Maybe a coffee zone by the machine, a prep area near the sink, and a cooking zone by the stove.
Keep each zone stocked with only what you need for that job. Coffee stuff with the coffee maker, knives and boards near where you prep, and so on.
Typical zones might be:
- Beverage station: Coffee maker, mugs, supplies
- Prep area: Cutting boards, knives, bowls
- Cooking zone: Oils, salt, utensils
- Cleaning station: Soap, sponges, towel
Corners? Great for things like stand mixers or knife blocks. L-shaped counters kind of create their own zones naturally.
Don’t stress about making it perfect—just keep things flexible enough to handle whatever you’re cooking up.
Balancing Aesthetics and Utility
You want your counters to work for you and look good. No shame in making things pretty. Matching containers or a color theme can actually make the whole setup feel more intentional.
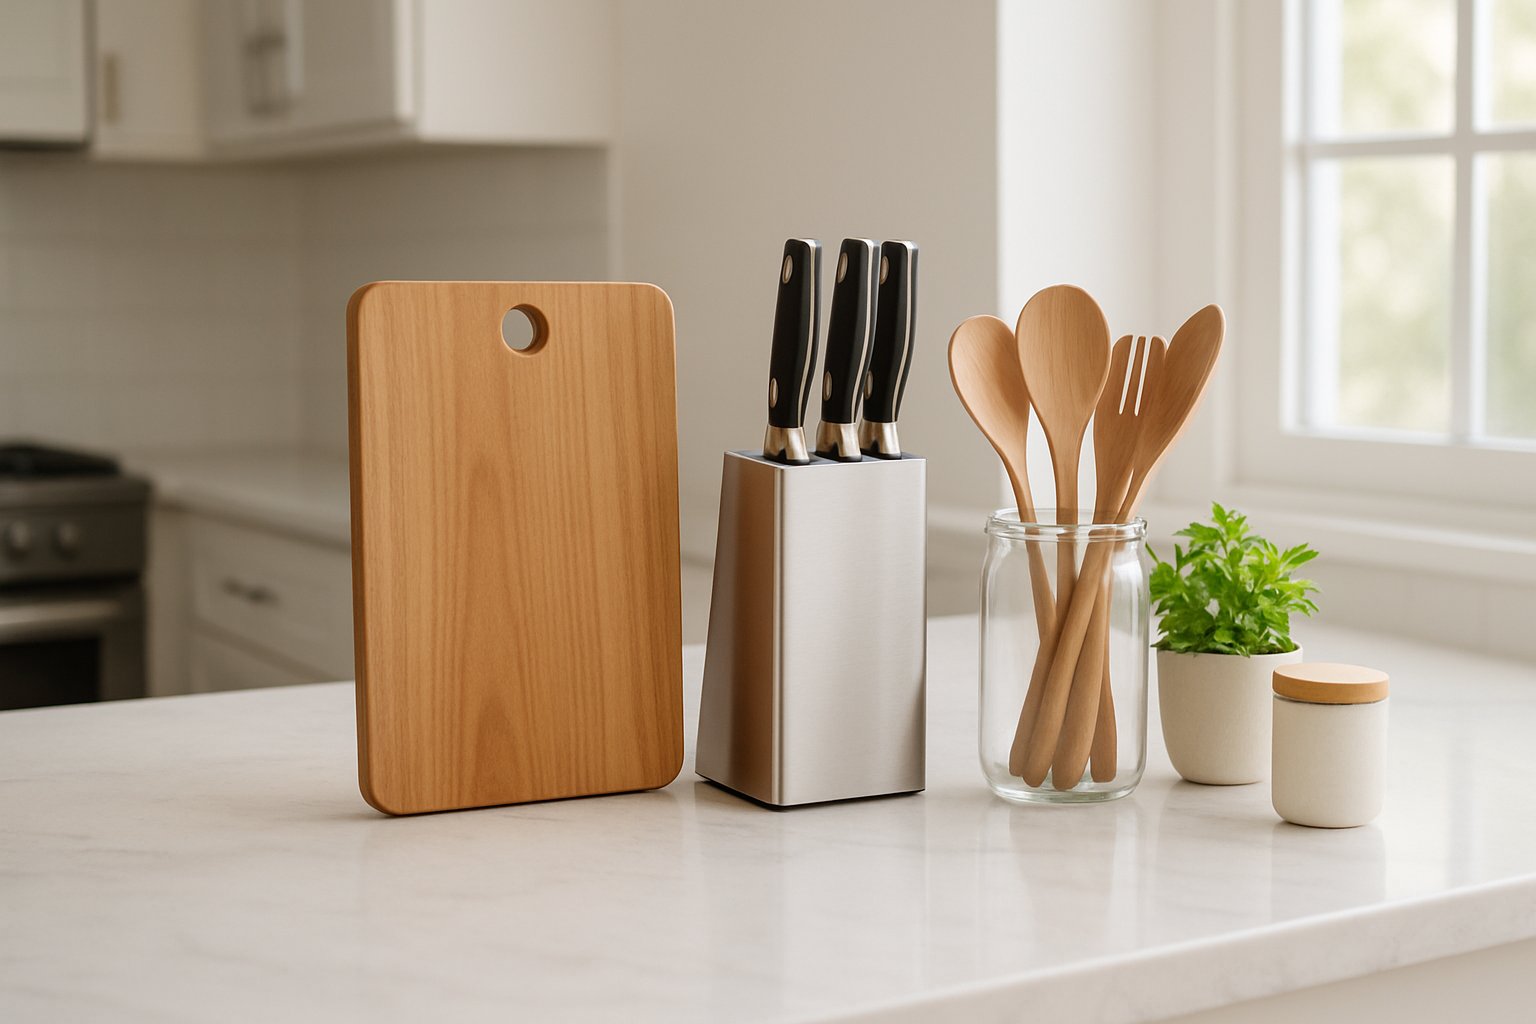
Clear glass jars for pantry basics look tidy and let you see what’s inside. A nice wooden cutting board propped up can double as decor.
Use trays to group things like salt, pepper, and oils. It keeps them together and easy to move if you need the space.
Some style-forward picks:
- Glass or ceramic containers that match
- Bamboo or wooden storage accents
- Metal wire baskets for fruit
- Natural fiber baskets if you want to tuck things away
Stick with neutral or natural tones if you’re unsure—they suit most kitchens. Don’t get hung up on everything matching, but a little cohesion goes a long way.
Show off the stuff you use all the time—there’s no need to stash everything in a cabinet.
Best Storage Solutions for Everyday Essentials
Smart storage turns clutter into order. Trays, tiered stands, and well-placed utensil holders make a world of difference.
Utilizing Decorative Trays to Contain Items
Trays are lifesavers for keeping essentials from migrating all over the counter. A wooden tray by the stove can hold your oils, salt, and pepper so you’re not hunting for them.
Galvanized metal trays have a bit of rustic charm and work well for grouping dish soap and sponges by the sink.
Glass or ceramic trays can make your coffee setup feel like a little café corner—great for pods, sugar, stirrers.
Go for trays with a lip so things don’t slide off. Measure your space first—too big and it just adds to the clutter.
Tiered Stands and Cake Stands for Vertical Storage
Tiered stands let you build up, not out. A three-tier basket might hold fruit, bread, and snacks all in one spot.
Cake stands aren’t just for cakes—use them to elevate your salt and pepper or other everyday items so you free up space underneath.
Lazy Susans—especially two-tier ones—work wonders in corners. Load them up with spices or oils for a mini rotating pantry.
Two-tier wooden stands are nice for splitting up categories—maybe tea things on top, coffee below.
Keeping Cooking Utensils Within Reach
Utensils need to be handy, not buried. Pitchers of different heights make a kind of utensil bouquet and keep long tools from hiding behind short ones.
Wall-mounted magnetic strips are great for metal utensils or knives, but keep them away from the stove so they don’t get hot.
Utensil crocks are perfect for plopping by the stove or prep area. No more rummaging in drawers mid-recipe.
If you’re short on space, under-cabinet hooks can hold can openers, measuring spoons, or towels—no counter space needed.
Organizing Food and Ingredients on the Countertop
Where you put food on the counter matters for both looks and function. The right bowls and containers keep things fresh and the kitchen looking pulled together.
Displaying Fresh Produce with Fruit Bowls
A good fruit bowl is storage and decor in one. Metal bowls let air flow, which is great for citrus and apples.
Wooden bowls fit a rustic vibe and are nice for stone fruits that need to ripen.
Keep just a few days’ worth of fruit out—rotate older stuff to the front so nothing goes to waste.
Use shallow bowls for delicate things like tomatoes, deeper ones for apples or oranges.
Don’t park fruit bowls in direct sun or near heat. Corners by the sink are usually handy for a quick wash before eating.
Smart Solutions for Spices and Seasonings
If you cook a lot, keep your go-to spices out. Magnetic spice racks stick to the fridge or metal backsplash to save space.
Lazy Susans corral spice jars and make them easy to spin and grab. A 12-inch one holds a decent amount.
Small tiered shelves work for spices too—just keep them close to where you cook.
Salt and pepper should be right by your prep area. Matching grinders or little dishes beat out big shakers for daily use.
Grouping spices by cuisine or use (baking vs. savory) makes things easier to find.
Clear Containers for Dry Ingredients
Clear, airtight containers keep flour, sugar, and cereal fresh and let you see what you’ve got. Glass or BPA-free plastic—either works.
Matching sets look tidy and stack well. Rectangular ones usually save more space than round.
Label everything with what’s inside and when it expires. Waterproof labels are a must in the kitchen.
Keep these away from heat and sun—maybe near the pantry for easy refills.
Put the stuff you use most (coffee, tea, cereal) up front. Baking supplies can hang out in the back.
Maximizing Counter Space with Vertical and Movable Storage
Going vertical and adding movable storage can free up a surprising amount of space. These setups adapt as your needs change and help small kitchens feel bigger.
Open Shelving for Frequently Used Items
Open shelves above the counter turn empty wall space into storage. Float a few shelves to keep dishes, spices, or oils close at hand.
Adjustable brackets mean you can tweak shelf heights as your needs shift.
Group similar things on each shelf—everyday dishes lower, pretty things higher. It keeps things looking neat and easy to grab.
Aim for about 18 inches between the counter and the first shelf—enough space to work without bumping your head.
Open shelving is a lifesaver in galley kitchens or anywhere cabinets are scarce. You can even make a mini pantry this way.
Rolling Carts for Flexible Organization
Rolling carts act like a bonus counter you can move around. Wheel it next to the stove when you’re cooking, then stash it out of the way.
Multi-level carts let you stack stuff—frequent-use things on top, extras below.
Pick carts with locking wheels so they don’t roll off mid-chop. Go for wood or metal—they handle kitchen life better than cheap particleboard.
If you don’t have room for an island, a cart gives you a lot of the same perks. Park it where you need it, then roll it back out of the way.
Some carts come with built-in cutting boards, towel bars, or spice racks. Handy, right?
Utilizing Pegboards and Ladder Shelves
Pegboards turn a wall into a custom storage zone. Arrange hooks or shelves exactly where you want them.
Ladder shelves lean against the wall and don’t need permanent mounting—great for renters or anyone who likes to rearrange.
Metal pegboards can handle heavy stuff like pans; wood is good for lighter utensils or just for looks.
Keep pegboards close to where you work, but not where they’ll get splashed. Behind the sink or beside the stove often works.
Ladder shelves fit in tight spots between appliances or at the end of a counter. You can stash cookbooks, plants, or whatever else needs a home.
Streamlining Drawers and Hidden Storage Near Counters
If you want clear counters, you’ve got to make the most of the drawers and hidden nooks nearby. Good drawer dividers and clever storage keep your go-to items close but off the counter.
Drawer Dividers for Utensil Organization
Nobody likes digging through a jumbled utensil drawer while something sizzles on the stove. Drawer dividers bring order to the chaos.
Expandable cutlery trays fit most drawers and work for silverware. For bigger tools, try multi-compartment organizers that can handle everything from peelers to spatulas.
Bamboo organizers look good, are easy to clean, and have a bit of natural antimicrobial power.
Group like with like:
- Prep tools: peelers, zesters, paring knives
- Cooking utensils: spatulas, tongs, whisks
- Measuring tools: spoons, cups, scales
Pull-out spice racks in shallow drawers near the stove are underrated—seasonings stay visible and you free up counter space.
Hidden Storage for Less-Used Items
You don’t have to see every storage spot for it to be useful. Tuck away the stuff you use less often but keep it handy.
Toe-kick drawers at the base of cabinets turn wasted space into storage for baking sheets or gadgets.
Appliance garages hide things like the toaster or blender behind roll-up doors. You can even put outlets inside to keep cords out of sight.
Mount magnetic knife strips inside cabinets near your prep area for safe, easy access.
Stackable containers in deep drawers use vertical space for dry goods, linens, or cleaning stuff. Clear ones let you see what’s inside without opening everything.
Under the sink often gets ignored—sliding drawer organizers make it easier to grab cleaning supplies without crawling around.
Creating Specialty Zones: Coffee, Breakfast, and Beverage Stations
Specialty zones for coffee, breakfast, or drinks can turn hectic mornings into a smoother routine. Group everything you need together and give it a dedicated spot—you’ll save time and keep clutter at bay.
Setting Up a Daily Coffee Station
You really just need three basics for a solid coffee station: the coffee maker, storage for your supplies, and easy water access. Try tucking your coffee maker into a corner or against the wall—frees up the rest of your counter for, well, everything else.
Keep coffee beans or pods in airtight containers close to the machine. Mugs, spoons, sweeteners—just stash those on a nearby shelf or in the drawer underneath. No need to overthink it.
A tray or lazy Susan works wonders for wrangling sugar packets, stirring spoons, and creamer. It keeps things together and, honestly, makes it easier if you ever want to move the whole setup.
If you’re short on counter space, mount a small shelf above the coffee maker for extra mugs or a couple of cute canisters. Wall storage means less clutter, more breathing room.
If you can swing it, set up a small water source close by. A countertop filter or just keeping the sink handy makes refilling the coffee maker way less of a hassle, especially when mornings get hectic.
Organizing Breakfast and Beverage Areas
An efficient breakfast zone really just means putting all your morning stuff in one spot. Store cereal, oatmeal, or breakfast bars in clear containers on a shelf or in a dedicated cabinet.
Put breakfast dishes and utensils in the nearest drawer or cabinet to wherever you eat. Stack bowls, plates, and glasses so everyone can grab what they need without bumping into each other.
For drinks, pick one area for all your options. Use a divided container for tea bags, keep hot chocolate packets in a jar, and set an electric kettle nearby for fast hot water.
Drawer dividers help keep tea, coffee accessories, and breakfast bits separated. No more digging for that one rogue packet.
Set up a self-serve station with napkins, little spoons, and to-go cups in a basket or on a tray. Makes it easy for everyone to help themselves and, fingers crossed, put things back where they belong.
Styling and Personalizing Countertops Without Adding Clutter
Honestly, the trick to stylish counters is picking things that actually do something—not just look pretty—and keeping displays simple. A little personality goes a long way, especially when it doesn’t get in the way of cooking.
Decorative Bowls as Organizational Accents
Decorative bowls can turn boring storage into something you actually want to see every day. I’m a fan of ceramic or wooden bowls for keys, coins, or cooking basics.
One nice bowl by the door grabs all the pocket junk and keeps it off the rest of your surfaces. Plus, it looks intentional.
For cooking areas, try these:
- Wooden bowl for spices you reach for all the time
- Ceramic bowl for tea bags or coffee pods
- Stone bowl for garlic and onions
Pick bowls that fit your kitchen vibe. Modern? Go ceramic. Farmhouse? Rustic wood is classic.
Stick to one or two bowls per section, tops. Too many and they just collect random stuff you don’t need out.
Choose bowls heavy enough to stay put. Flimsy ones tip over and just add to the mess—no thanks.
Combining Functional Decor with Daily Use
The best counter decor actually gets used. Honestly, pretty storage beats pointless knickknacks every time.
Clear glass canisters show off colorful ingredients and keep them fresh. Coffee, pasta, baking stuff—they all look better in matching jars.
A wooden cutting board propped against the backsplash brings in some warmth and is always ready to go. It’s kitchen art with a purpose.
A few favorites:
- Vintage utensil crocks for spatulas and spoons
- Good-looking dish towels for a splash of color on hooks
- Small potted herbs for a bit of green and fresh flavor
Think about size. Big pieces swallow up tiny counters, and small ones disappear on big ones.
Swap things out for the seasons if you like. New herbs, different towel colors, or a fresh bowl can make the space feel new without piling on clutter.
Frequently Asked Questions
Organizing kitchen counters brings up all sorts of real-life questions. What should you leave out? How do you make it work in a tiny space? Let’s dig in.
What are the top five items to keep on your kitchen counter for efficiency?
If you drink coffee every day, the coffee maker definitely earns its spot. Keep your go-to cooking oil and salt out—those are in constant rotation.
A knife block or magnetic strip keeps your best knives handy. Lean a cutting board against the backsplash so it’s always ready.
And a big bowl or basket for fruit and veggies you eat all the time rounds out the essentials. Those five cover most daily needs and don’t make a mess.
How can you organize small kitchen counters to maximize space?
Vertical space is your secret weapon in a small kitchen. Hang mugs or measuring spoons from hooks under cabinets.
Use tiered organizers in corners for those awkward spots. A lazy Susan is perfect for oils and spices—spins, saves space, looks neat.
Pick items that multitask. A decorative bowl can hold fruit and look good doing it. Stack cutting boards upright against the backsplash to save room.
Only keep what you use every day on the counter. Tuck the rest away in cabinets or hang it up.
Can you share some tips for creating a clutter-free counter with kids in the house?
Give kids a specific spot for water bottles and lunch boxes. A tray or basket does the trick, so there’s no confusion.
Set up storage at their level so they can put things away themselves. That way, stuff doesn’t end up scattered across the “grown-up” counters.
If they have kitchen toys, try a “one out, one away” rule. Snacks for kids? Use clear, labeled containers they can spot and grab safely.
Make cleanup part of the daily routine, right after meals. When kids help put things back, it sticks with them.
What's the secret sauce for maintaining an organized kitchen counter after a big cook-off?
Clean as you go. Seriously. Fill the sink with soapy water before you start and wash up between steps.
Put ingredients away as soon as you use them. That keeps the pile-up under control, even during marathon cooking sessions.
Keep a clear “staging area” for plating and serving. If you need to, use a tray to collect things temporarily.
Give yourself five minutes after every session to reset—put away food, wipe down, and return everything to its home while you’re still in the zone.
How do you decide what stays out and what gets stashed away in drawers/cabinets?
Think about how often you actually use each thing. Coffee maker and oil you use daily? Leave them out. Stuff you use weekly? Easy-access cabinets.
Be honest about your counter space. If it’s tight, you’ve got to be ruthless about what stays.
Store things where you use them most. Baking gear goes near the mixer, not taking up prime counter real estate.
And let seasonal stuff rotate. The ice cream maker can hang out for summer, but pack it away once winter hits.
What are some kitchen counter organization hacks that won't break the bank?
Grab some glass jars—maybe old pasta sauce or jam jars—and stash utensils, dry goods, or even sponges in them. Mason jars are classic, but honestly, any jar does the trick.
Wooden cutting boards can double as dividers to carve out little zones on your counter. Thrift shops usually have a bunch, and sometimes you’ll find one with real character.
Try making a DIY turntable with a cheap lazy Susan from the dollar store. If you toss a tray on top, it feels a bit sturdier and looks less like, well, a dollar store find.
Stick a few adhesive hooks underneath your cabinets for things like measuring cups or potholders. They’re super cheap, and you don’t need to mess with drills or fancy hardware.
Share:
Toy Storage That Works: Bins, Cubbies, and Rolling Carts for Kids’ Rooms
Stackable Storage Bins: The Best Ways to Use Them in Every Room