

Check out our latest home & kitchen collection!
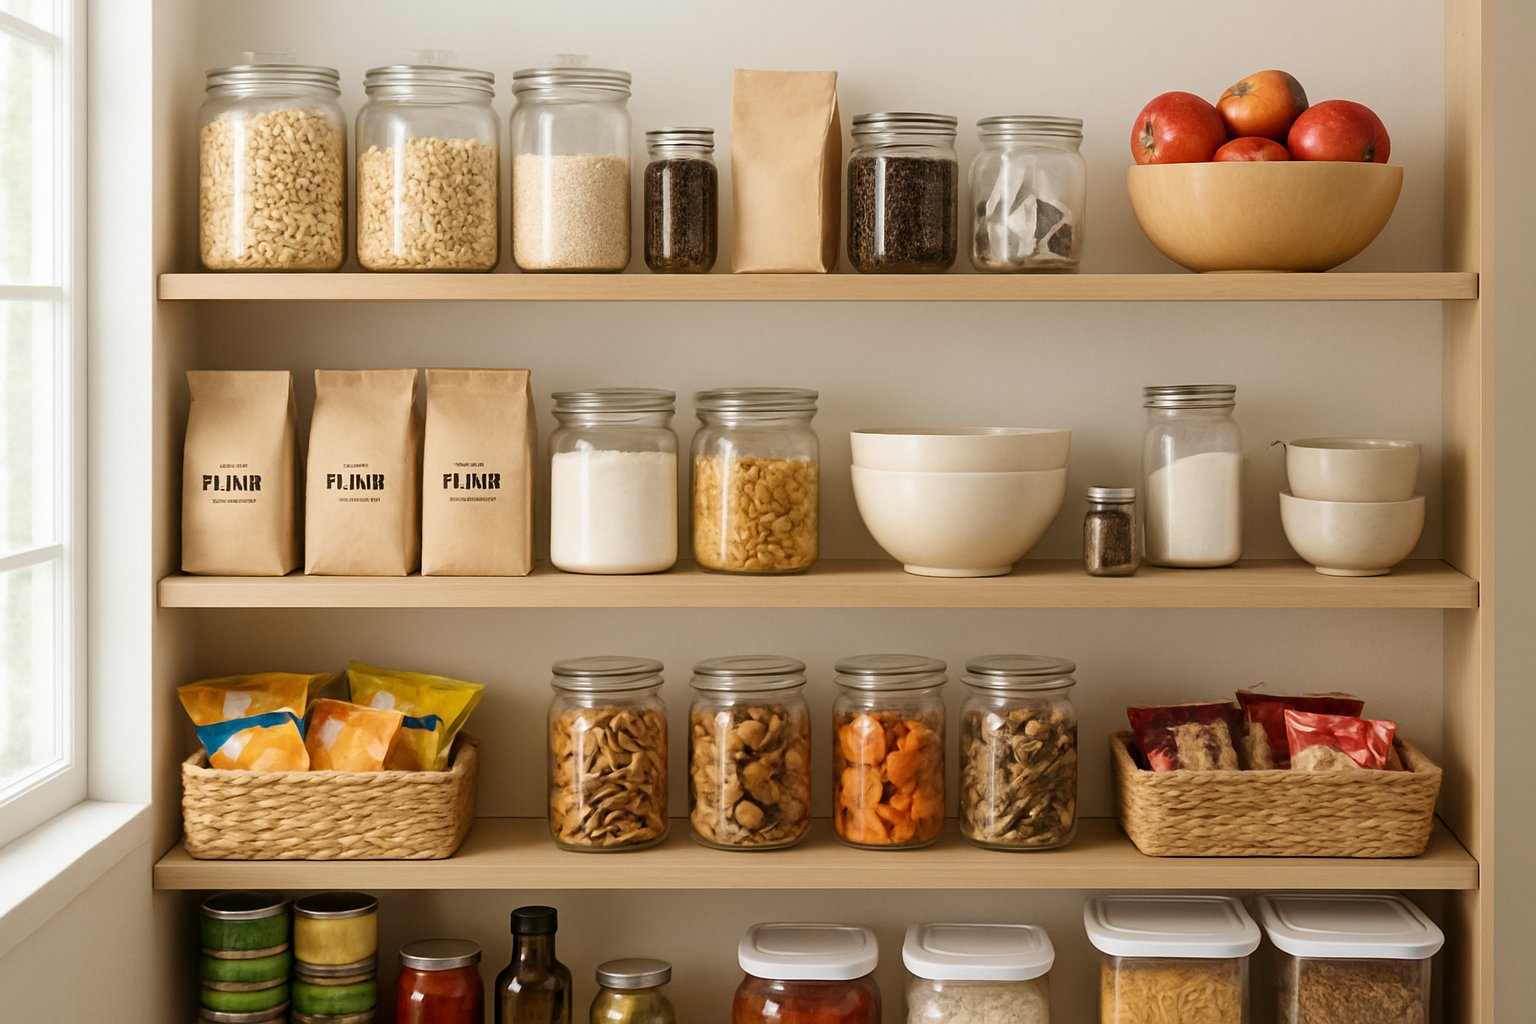
A chaotic pantry can turn meal prep into a frustrating scavenger hunt. When you set up smart zones; breakfast, baking, snacks, and backstock, your pantry suddenly works for you, not against you.
Group similar items together, and what used to be a cluttered mess becomes a kitchen command center you actually want to use. You’ll spot what you need, keep tabs on your stash, and maybe even enjoy the process.
Who hasn’t lost pancake mix behind a pile of canned beans or bought more flour because the old bags hid in the shadows?
Setting up pantry zones gives everything a home. When breakfast foods stick together and baking supplies stay in their lane, mornings get less frantic and baking feels less like a gamble.
The best part? Zone organization bends to fit your space, whether you have a tiny cabinet or a walk-in pantry. Let’s break down how to set up each zone, choose containers that actually work, and keep your system humming long-term.
Key Takeaways
- Dividing your pantry into breakfast, baking, snack, and backstock zones saves time and cuts down on food waste
- Good storage containers and shelves make the most of your space and keep food fresh and visible
- Zone-based setups work for any pantry size and make meal planning and shopping way easier
Defining Pantry Zones for an Organized Kitchen
Pantry zones take chaos and turn it into a system where every item has a spot. When you group similar foods, meal prep speeds up and grocery trips get less confusing.
What Are Pantry Zones and Why They Matter
Pantry zones are just areas in your pantry where you put like with like. Think of them as little neighborhoods—each with its own crowd.
Instead of stashing food wherever it fits, you give each category its own real estate. Cereal and oatmeal get one spot, baking ingredients another.
This works because our brains love patterns. When you know where things live, you’re not rooting through shelves every time you cook. It’s also easier to avoid buying doubles, since you can actually see what you’ve got.
How you assign zones depends on:
- How often you use stuff
- What you usually use together
- What kind of storage each thing needs
Keep your most-used items at eye level or within easy reach. Stash the less-used things higher or lower.
Benefits of a Zone-Based System
Zones save time, money, and mental energy. You know where to look, so you’re not wasting minutes hunting for vanilla or flour.
Time savings show up instantly. No more digging for that one spice or wondering if you’re out of sugar.
Money savings come from seeing what you own. No more three half-used bottles of olive oil hiding in different corners.
Less food waste happens naturally. When you can see everything, stuff doesn’t expire in the back. You rotate what you have, and use things up before they go bad.
Meal planning gets simpler because you can scan your ingredients in seconds. Less inventorying, more cooking.
Common Zones: Breakfast, Baking, Snacks, and Backstock
These four zones cover most pantry needs.
Breakfast Zone: Cereals, oatmeal, pancake mix, syrup, coffee—basically, the stuff you reach for first thing. Eye-level is best so you’re not fumbling around before coffee.
Baking Zone: Flour, sugar, baking powder, vanilla, spices. Clear, airtight containers make it easy to see what you’ve got. Middle shelves are ideal for easy grabbing.
Snacks Zone: Crackers, nuts, granola bars, and other grab-and-go options. Lower shelves work well if you’ve got kids who need to help themselves.
Backstock Zone: Bulk items and overflow—think extra cans or backup flour. Tuck this stuff on high shelves or the pantry floor since you don’t need it every day.
Breakfast Zone: Streamlining Your Morning Routine
A solid breakfast zone keeps the morning essentials—cereal, oatmeal, coffee, spreads—right where you need them. Grouping similar things in labeled containers and using vertical space can make a big difference.
Essential Breakfast Items to Store
Figure out what you actually use for breakfast, and park it here. The basics: cereals, oatmeal, pancake mix, syrup, coffee, tea, bread.
Shelf-stable staples you’ll want close by:
- Hot cereals (oatmeal, cream of wheat)
- Cold cereals in airtight containers
- Pancake and waffle mixes
- Coffee beans, ground coffee, tea bags
- Nut butters and jams
Grab-and-go items need their own nook—granola bars, instant oatmeal packets, protein bars.
Breakfast condiments like honey, maple syrup, and cinnamon belong here too. If you use powdered milk or non-dairy options, stash them close.
Don’t forget the tools: coffee filters, measuring spoons, and small utensils fit in labeled bins within this zone.
Best Storage Solutions for the Breakfast Zone
Clear containers are a game changer. You’ll know exactly how much cereal is left without opening every box.
Airtight containers keep cereal and granola fresh. Pour them in as soon as you get home from the store.
Labeled bins help group things—maybe one for hot breakfasts, another for cold.
Use your vertical space. Stackable containers and shelf risers let you see everything. No more mystery boxes hiding in the back.
| Storage Solution | Best For | Key Benefit |
|---|---|---|
| Clear canisters | Cereals, oats | Visibility and freshness |
| Labeled bins | Tea, coffee supplies | Easy grouping |
| Shelf risers | Small jars, syrups | Maximize vertical space |
Pre-make snack packs in small containers for extra-busy mornings.
Tips for Easy Grab-and-Go Mornings
Set up breakfast stuff the night before if you can. Pre-portion oatmeal in jars or prep coffee so it’s ready to brew.
Placement matters. Keep the things you use most right at eye level. Save higher shelves for backups or treats you only eat on weekends.
Prep grab-and-go snacks—nuts, dried fruit, granola—in small containers for rushed mornings or lunchboxes.
Label everything. When you’re half-awake, a clear label saves you from grabbing the wrong thing.
Keep a small basket of breakfast essentials for travel or the office—instant oatmeal, nut butter packets, maybe a spoon.
A simple “breakfast inventory” list on the pantry door helps you track what’s running low before it’s too late.
Baking Zone: Keeping Ingredients and Tools Ready
A tidy baking zone means you can find flour, grab measuring cups, and start mixing without losing your mind. Good categories, solid containers, and smart placement make baking less of a hassle.
Categorizing Baking Ingredients for Visibility
We break baking stuff into three groups: dry staples, wet ingredients, and mix-ins. No more finding expired baking powder mid-recipe.
Dry Staples:
- All-purpose, cake, whole wheat flour
- White, brown, powdered sugar
- Baking powder, baking soda, salt
- Cocoa powder, cornstarch
Wet Ingredients:
- Vanilla and other extracts
- Oils (vegetable, coconut)
- Honey, maple syrup, molasses
Mix-ins & Decorative Stuff:
- Chocolate chips, nuts, dried fruit
- Sprinkles, coconut flakes
- Food coloring
Keep each group on its own shelf or in its own bin. Glass jars let you see what’s left at a glance.
Clear containers end the guessing game that comes with bags and boxes. Always label with names and expiration dates—no one wants to ruin cookies with old baking soda.
Storing Baking Tools and Accessories
Baking tools need their own spot. Drawers, baskets, and containers keep things handy but not messy.
Essential Tools Storage:
| Tool Category | Storage Method | Location |
|---|---|---|
| Measuring cups/spoons | Hanging hooks or drawer divider | Eye level shelf |
| Mixing bowls | Nested stack | Lower shelf |
| Small tools (whisks, spatulas) | Utensil crock or drawer | Counter level |
| Cookie cutters | Flat container with dividers | Upper shelf |
Keep your most-used tools like measuring cups and vanilla at eye level. Stuff you only use for holidays can go up high.
A portable baking caddy is a lifesaver. Fill it with your go-tos—measuring cups, salt, vanilla—so you can just grab and go.
Matching containers look nice and save space. Rectangular ones fit together better than round, so you can pack more in.
Maintaining Freshness and Accessibility
Airtight containers are a must. Stale flour or clumpy brown sugar will ruin your baking.
Move dry goods into airtight containers as soon as you get them. This keeps bugs out, extends shelf life, and stops spills.
Freshness Timeline:
- Flour: 6-8 months in airtight containers
- Sugar: Lasts pretty much forever if sealed
- Baking powder: 18 months (always check before using)
- Spices and extracts: 2-3 years
Put your everyday stuff—flour, sugar—front and center. Specialty items like almond extract can stay in the back.
Check your baking zone monthly. Wipe down containers, rotate older stuff to the front, and pitch anything expired. Five minutes now saves headaches later.
When everything has a home, you’ll put it back without thinking. It takes seconds, but next time you bake, you’ll thank yourself.
Snack Zone: Smart Ways to Store Favorite Treats
A well-set-up snack zone keeps treats easy to grab but doesn’t let chaos take over. The trick? Put snacks where kids can reach, use containers that control portions, and make sure everything’s visible.
Creating a Kid-Friendly Snack Zone
Snacks should be at kid height so little ones can help themselves. Put grab-and-go snacks in lower cabinets or drawers, using labeled bins for clarity.
Wicker baskets are sturdy and easy for kids to carry. You can give each child a basket or sort by snack type.
Pull-out drawers in lower cabinets make it easy for kids to see choices without climbing. Stackable bins fit great here and can pop out for refills.
A snack station on the counter works too. A lazy susan with a few containers lets kids spin and pick what they want—less nagging, more independence.
Label bins with words and pictures so even pre-readers know what’s inside.
Portion Control and Visibility Tips
Clear containers remove the mystery and help you track what’s running low.
Pre-portion snack packs to control serving sizes and cut down on waste. Use small containers or reusable bags to split up bulk snacks.
Glass jars work well for crackers, nuts, and dried fruit. You see what’s inside, and they keep things fresh. Mason jars stack easily and come in all sizes.
Rotate snacks so new ones go in the back and older ones in front. This keeps things from going stale and ensures you use what you buy.
Try tiered organizers in deep cabinets. They make everything visible—no more forgotten treats at the back.
Storage Options for Different Snack Types
Chips and crispy snacks really need airtight storage if you want them to stay fresh. Big clear containers with tight lids work a lot better than just clipping the original bag. They keep things from getting crushed and help your snacks stay crisp longer.
Granola bars and other packaged snacks fit nicely in stackable bins. You can sort them by flavor or whoever eats them most. Since they're all about the same shape, these bins use space well.
Fruit snacks and gummies do best in dry storage, far from heat. Small labeled containers keep them from turning into a sticky disaster. I like grouping similar textures together—it just makes things easier.
Lazy susans are kind of a game changer for jars of nut butters, spreads, and condiments. That spin makes grabbing stuff from the back of a deep cabinet so much easier.
Bulk snacks like trail mix or cereal work well in dispenser-style containers. They help control portions and keep everything fresh and easy to grab.
Wicker baskets are great for those weird-shaped packages that never fit anywhere else. If you line them with fabric, cleanup's easier and small things don't fall through the cracks.
Backstock Zone: Efficient Overflow and Bulk Storage
The backstock zone is where all your bulk buys and overflow land when there's no room in the main pantry. If you organize it smartly, you won't end up with six bags of rice you forgot you had, and you'll always know where to find extras.
Organizing Bulk Items and Overflow Stock
Try putting backstock on the highest and lowest shelves. That way, the stuff you use every day stays at eye level, and the big, bulky things stay out of the way.
Heavy items? Always on the bottom. Wrestling a giant flour bag down from an overhead shelf is something you only want to do once—trust me.
Stackable bins help you use all that vertical space, especially in a deep pantry. Clear ones are best so you don't have to dig around blindly.
Group similar things together in their own spots:
- Canned goods: Stack by type and size
- Dry goods: Airtight containers, labeled clearly
- Paper products: Tall bins for extra paper towels and TP
- Snack multipacks: Leave them sealed until you need to refill the main zone
Woven baskets handle lighter bulk stuff like pasta or cereal. They're easier to pull down from high up than heavy, rigid containers.
First In, First Out Strategies (FIFO)
FIFO rotation is the secret to avoiding waste. Put new stuff behind the old, and you'll always grab the oldest first.
Date everything as soon as it goes into backstock. A permanent marker on boxes or containers does the trick.
Keep a simple inventory list for your bulk stash. It doesn't have to be fancy—just enough so you know when you're running low or if something needs to be used up.
Always put newer items behind older ones. That way, you naturally use the oldest stuff first.
Pull-out bins are lifesavers in deep pantries. They let you slide everything forward, so nothing gets lost in the abyss.
Check expiration dates once a month. If anything's about to go, move it to the main pantry so it actually gets used.
Choosing Bins and Shelving for Backstock
Adjustable shelving is a must if you want flexibility. Raise shelves for tall cereal boxes, lower them for bulk drinks—easy.
Pick containers based on what you actually buy in bulk:
- Large clear bins for snack packs and dry goods
- Narrow pull-out drawers for canned goods in deep spaces
- Tall containers for pasta, cleaning stuff, or paper products
Weight matters. Standard wire shelves hold about 40-50 pounds, but heavy-duty ones can handle over 100.
Always measure before you buy or install anything. That giant cereal box has to fit somewhere, after all.
Mobile storage carts are handy for things you rotate in and out a lot. Just roll them over when it's time to restock.
Label everything—even empty bins. That way, when you're putting groceries away, you'll know exactly where each thing goes.
Pantry Essentials: Containers, Shelving, and Storage Tools
Having the right storage tools can make or break your pantry. Good containers keep food fresh and make the most of your space. Adjustable shelves let you change things up as needed. And little extras like lazy susans help you avoid losing stuff in the back corners.
Selecting the Right Containers for Each Zone
Clear containers are the MVPs here. You can see exactly what's inside and how much is left. For breakfast stuff, airtight containers keep cereal and oats crisp and stack easily.
Airtight containers are non-negotiable in baking zones. Flour, sugar, and other basics need protection from moisture and pests. Matching containers look nice and help you fit more on each shelf.
Different zones call for different shapes. Tall, skinny containers are great for pasta and snacks. Wide, shallow ones work better for things like tea bags or protein bars.
Glass containers are nice for things you use a lot, but lightweight plastic is easier to move around in the backstock area. Magnetic strips on lids are a clever way to track expiration dates without making things look messy.
Making the Most of Adjustable and Vertical Shelving
Vertical space is your best friend if your pantry's on the small side. Adjustable shelves let you set the perfect height for whatever you're storing—tall boxes, short jars, you name it.
Pull-out drawers turn deep shelves from a pain into something useful. You can see everything and don't have to risk toppling a stack to get what you need. These are especially good for heavy stuff like cans.
Under-shelf baskets basically double your storage. They're perfect for lighter things like snack bars or soup packets.
Sliding shelves make those awkward corners usable. Install them in existing cabinets and suddenly nothing gets lost in the back.
Functional Accessories: Lazy Susans, Drawers, and More
Lazy susans save you from the dreaded corner shuffle. They're perfect for condiments, oils, and vinegars.
Over-the-door organizers use up that forgotten space behind the pantry door. They're great for spices, snacks, or cleaning supplies—anything light that benefits from being easy to see.
Hanging racks inside doors or on walls give you a spot for measuring cups, kitchen tools, or even snacks. Keeps your most-used items handy without hogging shelf space.
A spice rack—whether it's wall-mounted, in a drawer, or on a lazy susan—keeps seasonings organized and helps you avoid buying duplicates. I like being able to see all the labels at a glance.
Labeling for Effortless Maintenance
Labeling isn't just for looks—it actually makes life easier. The more specific, the better. "Breakfast Cereals" beats "Food" every time.
Waterproof labels survive spills and cleaning. Use clear, easy-to-read fonts so you don't have to squint when you're in a hurry.
Color-coded labels can help everyone in the house find what they need. Blue for breakfast, green for baking, red for snacks—whatever works for your crew.
Labels on both containers and shelf edges create a double reminder. Even if you pull out a bin, you'll know exactly where it goes back.
Design Ideas for Any Pantry Size
Every pantry has its own quirks, but there are ways to make any space work. Small pantries need creative solutions and vertical thinking, while big ones need a plan so things don't disappear.
Maximizing Small Pantries and Cabinets
Small pantries demand some creativity. Tiered shelf organizers create "stadium seating" for cans so you can see them all.
Over-the-door racks turn wasted space into storage for spices and little packets. They're slim, so you don't lose floor space.
A few vertical tricks I swear by:
- Under-shelf wire baskets for lightweight things
- Stackable clear bins that nest when not in use
- Wall-mounted clip strips for seasoning packets
Rolling carts are surprisingly useful in tight spots. Wheel them out when you need them, tuck them away when you don't.
Magnetic containers on cabinet doors hold small things like spice packets without eating up shelf space.
Organizing Walk-In and Deep Pantries
Walk-in and deep pantries can become black holes for food. Pull-out drawers fix that by bringing everything forward.
Lazy susans make those awkward corners actually usable. Oils, vinegars, and condiments spin right into reach.
Key tools for deep pantries:
- Pull-out wire drawers for the back shelves
- Clear bins with handles
- Battery-powered LED strips for dark corners
Zone placement matters more in big spaces. Keep breakfast stuff at eye level and near the entrance.
Put backstock on higher shelves or deeper in the pantry. Label these areas so you don't lose track of expiration dates.
Style Tips for Farmhouse and Modern Pantries
Farmhouse kitchens look great with natural materials like wooden crates and wicker baskets. They add warmth and still keep things organized.
Mason jars nail that farmhouse vibe and keep dry goods fresh. Arranging them by height looks nice and makes them easy to grab.
Modern pantry style is all about:
- Matching white or clear containers
- Clean lines, minimal clutter
- Sleek metal wire shelves
Chalkboard labels fit the farmhouse look and are easy to update. For modern spaces, stick to one style of container for a tidy, unified appearance.
Color coordination helps in both styles. Group similar packaging or use matching containers for a calm, organized look.
Frequently Asked Questions
Smart pantry zone organization brings up plenty of practical questions—about stocking basics, keeping categories straight, managing expiration dates, and just keeping it all running smoothly.
What are the must-have items for a well-stocked breakfast zone in my pantry?
We always keep cereals, oatmeal, and pancake mix on hand—breakfast staples that get used daily and deserve a prime spot at eye level.
Coffee supplies get their own dedicated spot, too. Pods, ground coffee, sweeteners, stirrers—they all live together in one container.
Bread products go in undershelf baskets to make the most of vertical space. Toast essentials like peanut butter, jelly, and honey fit perfectly on a lazy susan nearby.
Don't forget backup supplies. We always keep an extra box of our favorite cereal and a spare jar of peanut butter stashed away.
How do I differentiate between goods for the baking and snacks sections without mixing them up?
Clear containers make it pretty hard to mess this up. Baking flour, sugar, and other dry ingredients go in transparent, stackable containers so you know what's what.
Physical separation helps, too. Baking stuff gets its own shelf, away from snacks, so you don't mix them up when you're in a rush.
Snack items usually stay in their original packaging, while baking ingredients go into storage containers. That difference alone helps keep things clear.
We group baking mixes, frostings, and decorating supplies together. Snacks get their own bins or baskets for grab-and-go access.
Can you give me some tips for organizing my backstock area to make it easy to find what I need?
Higher shelves are perfect for backstock since you don't grab these items as often. We put duplicates right above their main zone.
Rotation is key. When you bring home new bulk items, move the older ones to the front.
Clear labels on backstock bins keep mystery items from hiding. Write both what's inside and the expiration date where you can see it.
Use sturdy bins to group backstock by category. One for cans, another for backup breakfast stuff, a third for baking overflow—whatever works for you.
What's the best way to manage expiration dates in a smart pantry setup?
We jot expiration dates on the bottom of clear containers when transferring dry ingredients. Saves you from finding out your flour's gone bad right when you need it.
First-in, first-out rotation keeps everything fresh. Always move older products to the front when restocking.
Monthly checks work better than big, infrequent cleanouts. Set a reminder and just scan each zone.
Canned goods go with labels facing out so you can check dates at a glance. Group similar items and organize by expiration date within each group.
How often should I reorganize my pantry zones to keep them fresh and functional?
We do a quick tidy every week when putting away groceries—just making sure everything's in its place.
A deeper reorg happens every few months, or when things start to look messy. Seasonal changes usually prompt a bigger overhaul.
Twice a year is good for major cleanouts—think spring cleaning and before the holidays. That's when we rethink zone boundaries and swap out storage if needed.
Whenever our eating habits change, we adjust zones right away. A new diet or a shift in family routines means the pantry needs to keep up.
Any clever labeling tricks to quickly identify my breakfast, baking, snacks, and backstock items?
Color-coded labels really save time. We go with blue for breakfast stuff, red for baking, green for snacks, and yellow for backstock—makes grabbing what you need way less of a hassle.
Picture labels are a lifesaver if you’ve got kids or anyone who just prefers visuals. We mix in little icons—like a coffee cup for breakfast bins—alongside the text. It’s simple, but honestly, it makes a big difference.
Sometimes we’ll slap recipe cards right onto bins that hold weeknight meal ingredients. That way, when it’s time to cook, you’re not digging through drawers or scrolling on your phone for the recipe.
Magnetic labels are great for metal containers. They’re easy to swap around as your system changes, and with erasable markers, you’re not stuck with anything permanent.
We’ve started putting clear tape over paper labels, too. It’s not fancy, but it keeps them from smudging or peeling when you’re always grabbing stuff. The labels stay looking decent, which is more than I can say for most of my kitchen hacks.
Share:
Glass vs. Plastic Food Storage: Which Containers Are Best for You?
Glass vs. Plastic Food Storage: Which Containers Are Best for You?