
Check out our latest collection of compact vacuum sealer for food!
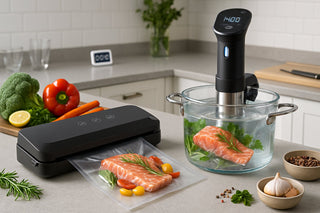
Sous vide cooking can deliver restaurant-quality results at home, but without a good vacuum seal, you’re missing the magic that makes this technique really shine. The vacuum sealer keeps things airtight, stops water from sneaking in, and helps hold a steady temperature so your food cooks evenly—every time.
Compact vacuum sealers strike a great balance between function and space-saving, making pro-level sous vide accessible even in tiny kitchens. After testing a pile of models, I’ve seen what makes a real winner—and some of the results are, honestly, a bit unexpected.
Let’s get into it. I’ll walk you through how to pick the right compact sealer for your setup and how to actually use it so your bags stay leak-free. We’ll look at which features actually matter, how to dodge common mistakes (and wasted food), and why some budget models punch way above their weight.
Key Takeaways
- Vacuum sealers make the airtight environment you need for sous vide—no air pockets, no water sneaking in
- Compact models do everything you need for home sous vide without hogging counter or cabinet space
- Good sealing technique and the right machine can seriously boost food quality, storage life, and meal prep
Why Vacuum Sealers Matter for Sous Vide
Vacuum sealers take sous vide from “maybe it’ll work” to “nailed it” by making airtight seals that kick out air pockets and give you consistent results. They boost flavor and texture compared to makeshift hacks, while keeping water out during the cook.
Critical Role of Air Removal in Sous Vide
Air is the enemy here. Leave air pockets in the bag, and you get little insulation zones that mess with heat flow.
Vacuum sealing solves this. A solid vacuum sealer pulls out almost all the air, so the food sits right up against the hot water.
This means:
- Even temperature everywhere
- Consistent cook times—no weird hot or cold spots
- Predictable results every time
If you skip good air removal, you risk biting into a supposedly perfect protein and finding it’s not cooked through. Not fun.
Vacuum sealing also keeps bags from floating. Trapped air makes them bob around, which means uneven heating.
Benefits Over Ziplock Bags
Sure, you can use ziplock bags, but honestly, it’s like using a butter knife when you need a scalpel. The water displacement trick with ziplocks never gets a real airtight seal.
Vacuum sealers just do it better. They pull way more air out—think 26-28 inches of mercury, compared to the half-hearted effort you get with a ziplock.
Here’s the breakdown:
| Vacuum Sealer | Ziplock Bags |
|---|---|
| 99% air removal | 60-70% air removal |
| Heat-sealed edges | Just zipped shut |
| No water getting in | Leaks happen |
| Strong, consistent seals | Kinda hit or miss |
Water getting in is a real problem with ziplocks. Even a little water can mess up marinades and change the final texture.
Vacuum sealed bags also store better. You can prep ahead, toss them in the fridge, and not worry about the seal giving out.
Enhanced Flavor and Texture
Vacuum sealing cranks up flavor in ways you just don’t get with regular cooking. Pulling out the air creates a little flavor chamber where marinades and seasonings can really get into the food.
The vacuum actually helps push liquids into the meat. This mechanical tenderization breaks down tougher bits and infuses flavor deep inside.
Food keeps its own moisture, too. Instead of drying out like with some other methods, vacuum sealed stuff cooks in its own juices. The result? Seriously tender bites.
Aromatics go further in a vacuum. Herbs and spices don’t waft away—they stay put and build up more complex flavors.
Texture-wise, you’ll notice the difference right away. Meats stay juicy and get that silky, restaurant feel that’s tough to pull off otherwise.
Vegetables? They keep their structure but soak up flavors, so you get tender veggies with a nice bite.
Choosing the Perfect Compact Vacuum Sealer
The best compact vacuum sealer for sous vide gives you strong suction and a smart design that fits your kitchen. You want to check suction power, seal quality, bag options, and whether it’s actually easy to use.
Key Features for Sous Vide Success
Double sealing strips matter for long sous vide cooks. Machines that make two seals instead of one help keep water out, even after hours in the bath.
Wet and dry modes are a must for different foods. Wet mode stops the machine from sucking up liquid from marinated meats or juicy veggies. Some models have a pulse button for delicate stuff.
One-hand operation speeds things up, especially if you’re sealing lots of bags. Built-in bag cutters are a lifesaver—no more hunting for scissors.
Accessory ports let you seal containers or jars, which is great for marinating or dry goods. Makes your sealer more versatile.
How to Compare Suction Power and Seal Strength
At least 85-90 kPa suction is what you want for sous vide. Anything less, and you risk leaving air pockets. Top units run at 120 watts or more.
But suction isn’t everything. Seal strength counts too—you want a seal at least 3mm wide so it holds up during long cooks.
From what I’ve seen, fast vacuum speeds (about 12 liters/minute) work best. Slower machines can overheat, especially the little ones. Efficiency’s good, but durability matters too.
Temperature resistance is important for high-heat sous vide. Good machines keep the seal tight even up to 185°F for those all-day cooks.
Bag Compatibility and Types
Universal bag compatibility saves money and lets you try different brands. Most compact sealers work with standard textured bags. Avoid machines that make you buy their own special bags.
Thicker bags (3-4 mil) are tougher and stand up to bones or sharp veggies. Thin bags can fail mid-cook. It’s handy to have both types around.
| Bag Type | Best Use | Thickness |
|---|---|---|
| Standard textured | Most proteins, veggies | 3 mil |
| Heavy-duty | Bones, sharp stuff | 4 mil |
| Pre-cut | Quick portions | 3 mil |
Ziplocks don’t really work for vacuum sealing, but some handheld sealers can use them for light storage. Reusable silicone bags are an eco-friendly option with some compact models.
Bag roll storage inside the machine keeps things tidy. Built-in cutters let you size bags as needed, so there’s less waste.
Noise, Size, and Ease of Use
Compact size—under 18 inches long—fits most counters. If you’re short on space, look for vertical storage options. Under 6 pounds is ideal for easy moving.
Noise can be an issue. Good machines run at 60-65 dB, about as loud as a normal conversation. Cheap ones can sound like a shop vac.
LED lights help you see what’s going on. No one wants to guess if the cycle’s done. Simple buttons beat complicated digital controls, especially on smaller units.
Easy cleaning is a must. Removable drip trays and smooth surfaces help. Too many little nooks just collect gunk.
Warranty of 2-5 years is a good sign. Shorter warranties? Probably not built to last.
Types of Vacuum Sealers: Pros and Cons
External vacuum sealers are the go-to for most home cooks—affordable, simple, and get the job done. Chamber sealers are awesome with liquids but big and pricey. Handhelds are portable but not super reliable for sous vide.
External Vacuum Sealers
External vacuum sealers are the workhorses for home sous vide. They suck air out from the open end, then heat-seal the bag.
Why they’re great:
- Lightweight and compact—usually under 10 lbs
- Affordable—good ones start around $50-100
- Big enough for large cuts—can seal whole turkeys if you’ve got the right bag
- Easy to stash away
These shine with dry or slightly moist foods. Liquids can be tricky—they tend to get sucked up into the machine.
Drawbacks:
- Not great with liquid-heavy foods
- Need textured bags for a good seal
- Wet stuff might require sealing twice
For most home cooks, externals are the sweet spot. They tackle steak, chicken, veggies, you name it.
Chamber Vacuum Sealers
Chamber sealers work differently: you put the whole bag inside, and the machine vacuums the entire chamber.
What’s awesome:
- No problem with liquids—great for marinades or saucy dishes
- Super strong vacuum
- Use cheaper, smooth bags
- Pro-level sealing
But—they’re huge, heavy, and expensive. Most weigh 50+ lbs and cost $500 or more.
Downsides:
- Chamber size limits bag size
- Need maintenance (like oil changes)
- Take up a ton of space
- Overkill for most home cooks
Unless you’re sealing gallons of soup or prepping for a crowd, chamber sealers are probably more than you need.
Handheld and Manual Sealers
Handhelds are tiny and portable. They work with special bags that have a little valve port.
Pros:
- Super portable—fits in a drawer or go-bag
- Cheap—under $20 for basics
- Reusable bags
- No plug needed—manual pumps work anywhere
But the trade-offs are real. Suction is weak compared to countertop models. Seals just aren’t as strong for long sous vide cooks.
Cons:
- Limited bag choices
- Vacuum strength varies a lot
- Takes longer and more effort
- Not ideal for heavy use
Handhelds are handy for travel or the occasional quick seal, but for regular sous vide, they’re not the main event.
Step-By-Step Guide: Using a Compact Vacuum Sealer for Sous Vide
Getting the hang of your compact vacuum sealer can turn basic ingredients into restaurant-level meals. It’s all about prep, sealing technique, and avoiding the usual pitfalls. Here’s how I do it, whether it’s one steak or a week’s worth of meals.
Prepping and Filling Vacuum Bags
Pick a bag that fits your food, leaving 3-4 inches at the top for sealing.
Dry off proteins thoroughly—extra moisture messes with the seal.
If you’re batch cooking, portion things evenly. That way, everything cooks at the same rate.
Sharp bones or shells can poke through bags. I usually wrap them in parchment or double-bag them.
Season before bagging, but don’t go crazy with liquids. Oil-based seasonings work better than watery marinades at this stage.
Lay everything flat and in a single layer when you can. That helps with even cooking.
For delicate stuff like fish, I’ll pre-freeze it for half an hour so the vacuum doesn’t squash it.
Achieving a Reliable Airtight Seal
Lay the bag opening smooth across the sealing bar—no wrinkles or folds, or you could get a leak.
Wipe the bag opening clean. Any crumbs or moisture can ruin the seal.
Most compact sealers have a pulse mode. Use it for delicate foods so you don’t crush them.
Watch the vacuum gauge. Stop when the bag’s snug but not collapsing your food.
Hold the bag steady during sealing. Wiggling it can make the seal fail.
Give the seal a gentle tug. If it holds, you’re set.
For wet foods, sometimes I’ll use the water displacement trick as backup—just dunk the bag to push out air before sealing.
Store bags flat until you’re ready to cook. It’s easier on the seals and saves space.
Preventing Food Float and Leaks
We add weight to bags with fatty or buoyant foods—a couple of spoons or a small plate usually does the trick to keep bags underwater.
Check your bag seals before dropping them in the water bath. Even tiny pinholes can let water in over long cooks.
Double-seal bags if you’re cooking for more than 4 hours. Just run two seal lines about a quarter inch apart for peace of mind.
Clip bags to the container edge with binder clips. This keeps them from floating and helps water circulate evenly.
When vacuum sealing several portions, don’t crowd the water bath. Packed bags bump into each other and can stress the seals.
Keep an eye on bags for the first 15 minutes. Early leaks are way easier to fix than ones you find hours later.
If you’re batch cooking, have a few backup sealed bags ready. If one fails, you can swap it out fast and keep cooking.
Maximizing Value: Meal Prep, Storage, and Longevity
Vacuum sealing can really stretch your food budget, boost batch cooking, and keep your gear running longer. With a few habits, you’ll keep food fresher, waste less, and get more out of your compact sealer.
Extending Shelf Life of Fresh Food
Vacuum sealing keeps ingredients good way longer. Most vacuum-sealed foods last 3-5 times longer than stuff stored the old-fashioned way.
Here’s what you can expect:
| Food Type | Normal Storage | Vacuum Sealed |
|---|---|---|
| Raw meat | 1-3 days | 6-10 days |
| Fresh vegetables | 3-7 days | 2-3 weeks |
| Cheese | 1-2 weeks | 4-8 months |
| Dry goods | 6 months | 1-2 years |
Removing oxygen slows down spoilage by stopping oxidation and bacteria. It’s like hitting pause on freshness.
Make sure foods are dry before sealing. Too much moisture can mess up the bag and cut down on shelf life.
For berries or liquids, pre-freeze for 30 minutes before sealing. This keeps liquid from getting sucked into the machine and makes a better seal.
Tips for Batch Cooking and Freezer Storage
Batch cooking with vacuum sealing turns your freezer into a stash of homemade meals. You can prep restaurant-quality dinners weeks ahead.
Portion cooked meals into single or family servings. It cuts waste and makes reheating a breeze.
Double-bagging tip: Put sealed vacuum bags inside freezer bags for extra insurance against freezer burn. Always label with what’s inside and the date.
Cook proteins like chicken or beef in bulk, then vacuum seal in meal-sized packs. They’ll last up to 12 months in the freezer.
Soups and stews keep their texture better when vacuum-sealed—no more freezer-burned, mushy leftovers.
Pre-portion ingredients for recipes. Seal chopped veggies, spices, and proteins together for fast dump-and-cook meals.
Cleaning and Maintaining Your Vacuum Sealer
A clean sealer runs better and lasts longer. It’s not glamorous, but it’s worth it.
Wipe the sealing strip with a damp cloth every few uses. Food bits here can mess up your seals.
Weekly checklist:
- Wipe the outside
- Check the vacuum chamber for crumbs
- Look over the gaskets for wear
- Test seal strength on an empty bag
Swap out sealing strips every 6-12 months, depending on how much you use it. Most brands sell replacements.
Store the machine with the lid slightly open. This keeps the gaskets from getting crushed and losing their shape.
If any liquid gets sucked into the machine, clean it out right away. A cotton swab with rubbing alcohol works for the inside parts.
Frequently Asked Questions
New sous vide fans usually have the same questions about gear, techniques, and safety. Let’s hit the big ones so you can get cooking.
What's the ideal first recipe to try out with my new sous vide setup?
Start with chicken breast at 140°F for 1-2 hours. It’s forgiving, quick, and really shows off how juicy sous vide can make proteins.
Salmon fillets are another easy win—125°F for 45 minutes. The fish turns out perfectly tender, never dry.
Skip tough cuts like brisket or pork shoulder at first. Those need long cooks and can be a headache for beginners.
Can you break down the pros and cons of using sous vide for my steak dinners?
The big win is perfect doneness from edge to edge. Every bite is the same temperature—not just the center.
Steaks come out juicier than pan-cooked ones, and you get repeatable results every single time.
Downsides? Time. Even a basic steak takes at least an hour, and you’ll still need to sear it after for that crust.
Some folks miss the smoky grill flavor, and the texture can be a little different than what you’re used to.
How crucial is owning a vacuum sealer for sous vide—can I improvise?
You don’t need a vacuum sealer to start. The water displacement trick works fine with regular zip-lock bags for most things.
Just submerge the bag slowly in water and seal it when the air’s out. This works well, except for liquids.
If you’re meal prepping or doing longer cooks, a vacuum sealer is a game changer. It keeps water out of your food and cooks more evenly.
Honestly, most people end up buying a vacuum sealer after a few months. It just makes life easier.
Could you dish out a beginner-friendly sous vide temperature and time chart?
Chicken breast: 140°F for 1-2 hours—super juicy. Beef steaks: 129°F for medium-rare, 135°F for medium, both for 1-2 hours.
Pork chops: 140°F for 1-2 hours. Salmon: 125°F for 45 minutes to 1 hour.
Vegetables like asparagus: 183°F for 15-20 minutes. Carrots: 183°F for 45 minutes.
Always finish meats with a quick sear in a hot pan. It adds color and a better bite.
Are there any health risks associated with sous vide cooking I should know about?
The main thing is pasteurization—make sure you follow time and temperature guidelines, especially for longer, lower-temp cooks.
Never cook below 130°F for long periods unless you really understand the safety risks. Bacteria can multiply between 40-130°F.
Vacuum sealing removes oxygen, which means anaerobic bacteria like botulism can grow if you’re not careful. Always chill or freeze sealed foods right away.
Use food-grade vacuum bags made for sous vide. Regular plastic bags might leach chemicals at higher temps.
What are some simple sous vide recipes to kickstart my culinary adventure?
Soft-boiled eggs at 145°F for 45 minutes turn out with creamy yolks and nicely set whites. Hard to mess these up, honestly.
Try herb-crusted chicken thighs at 165°F for 2 hours—they’ll stay juicy. Just toss in some garlic, thyme, and a splash of olive oil before sealing the bag.
Honey-glazed carrots at 183°F for 45 minutes come out tender every time. After cooking, toss them with butter and a handful of fresh herbs.
For dessert, chocolate pot de crème at 176°F for an hour makes a silky treat. Just mix cream, chocolate, and egg yolks in mason jars, seal them up, and you’re good to go.