

Check out our latest collection of compact vacuum sealer for food!
Soft foods need more than a tight seal. They need protection.
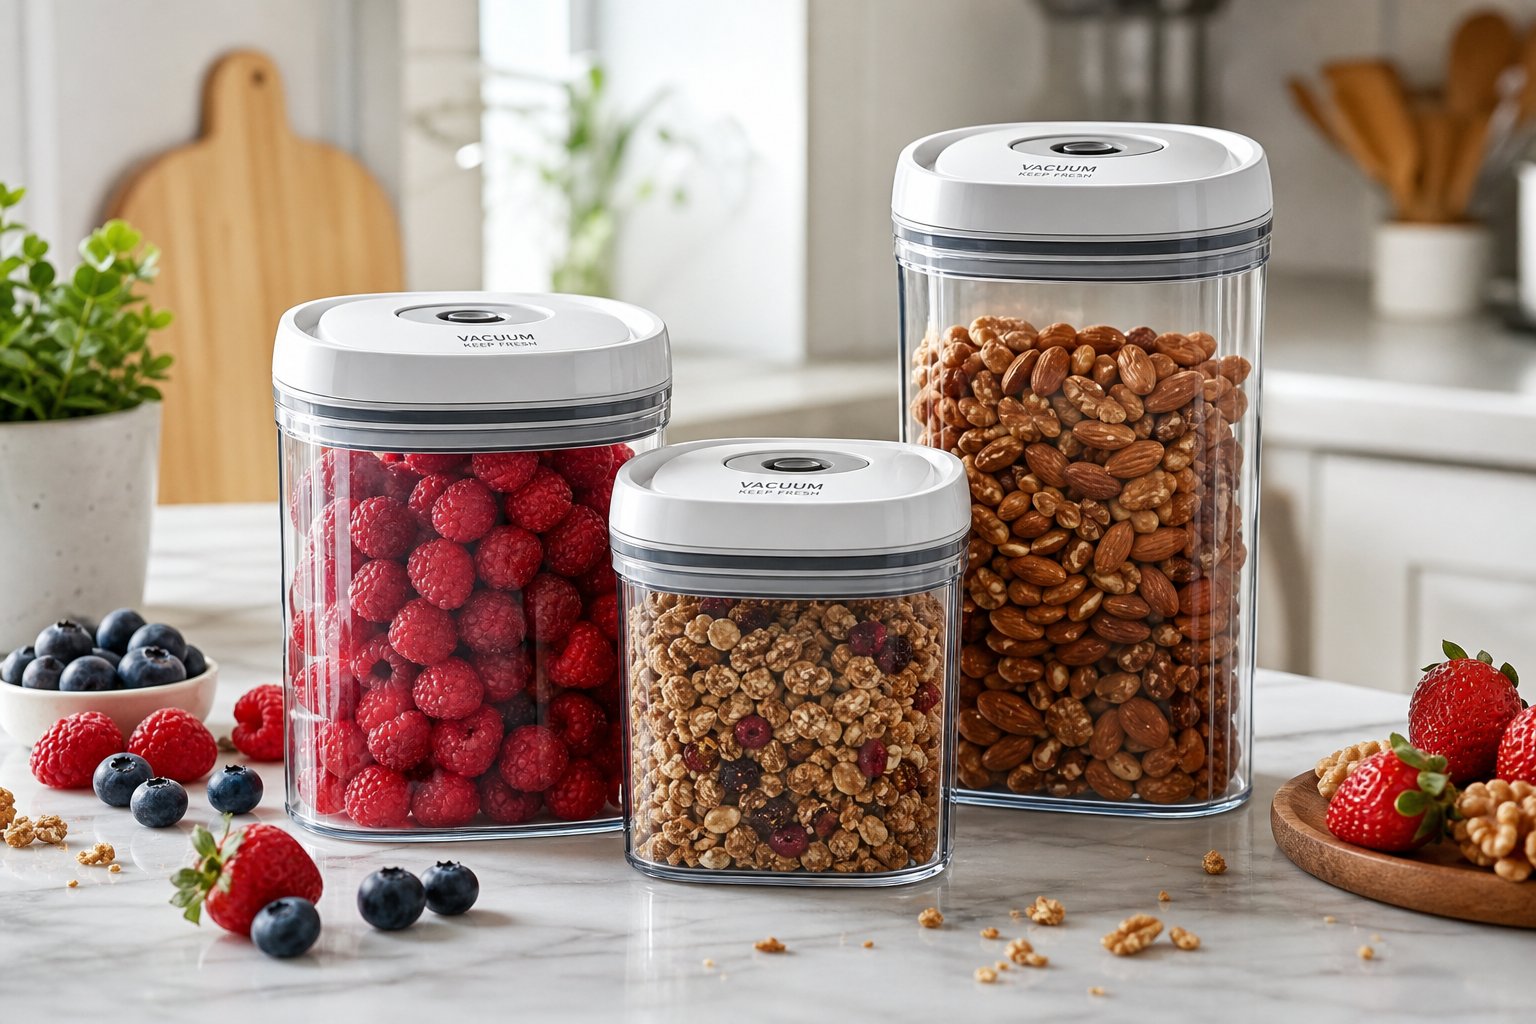
Fresh berries, delicate herbs, flaky pastries, soft cheeses, and crisp snacks can lose their shape quickly when stored in flexible vacuum bags. As air is removed, the bag presses directly against the food, which can lead to bruising, cracking, flattening, or texture loss. Vacuum canisters solve that problem with rigid walls that hold their shape while still removing the oxygen that speeds up spoilage.
This guide explains why vacuum canisters are better for foods that crush easily, how they compare with vacuum bags, which features matter most, and how to use them properly for fresher, better-looking food storage.
Key Takeaways
- Vacuum canisters have rigid walls that keep soft foods safe from crushing while removing air that spoils them
- Gentle vacuum settings and picking the right container help protect delicate stuff like berries and baked goods
- Using canisters instead of bags for fragile foods means less waste and longer shelf life without losing texture
The Science Behind Protecting Delicate Foods
Vacuum canisters pull out oxygen and create a stable pressure around fragile foods. This tackles both the main causes of spoilage and the physical damage that ruins soft textures. By controlling the environment, you slow down chemical reactions and stop the crushing that would otherwise flatten your food.
Oxygen and Food Spoilage
Oxygen is the main culprit behind why delicate foods go bad so fast. When berries, herbs, or pastries sit in normal containers, oxygen in the air starts breaking down vitamins, flavors, and color.
Bacteria and mold that thrive on oxygen multiply quickly on damp foods. When you vacuum out the air, you limit their growth, which means no slime, funky smells, or obvious spoilage. It also helps keep the good flavors and aromas from drifting away.
Plenty of research shows that cutting down oxygen can keep food fresh several times longer than regular airtight containers, which still leave some air inside. That’s a big deal for pricey or delicate foods. Sometimes just getting one more day of freshness is worth it.
How Vacuum Removal Slows Decay
When we vacuum out the air from a canister, we’re actually getting rid of the oxygen that causes browning and rancid fats. These chemical changes turn cut fruit brown and make pastries taste stale.
Vacuuming also keeps food from drying out by stopping air from moving around inside the container. With no airflow, delicate foods hold onto their moisture and don’t get leathery. This works best if you prep foods properly and make sure the seal stays tight the whole time.
Lowering the pressure around fresh produce also slows down how fast it “breathes” (yep, fruits and veggies keep metabolizing after they’re picked). Less respiration means slower nutrient loss and slower ripening.
Preventing Texture Loss in Fragile Items
Vacuum canisters protect texture in a way bags just can’t. The hard walls of a canister keep outside pressure from squishing your food, and gentle vacuum settings let you remove air without sucking the life out of soft stuff.
The trick is in how you apply pressure. Regular vacuum bags clamp down tight and flatten berries or pastries, but canisters create a gentle vacuum around the food without the walls caving in. Raspberries and muffins actually stay looking like raspberries and muffins.
If you’re dealing with really juicy foods, try pre-chilling or partially freezing them first. That way, the cells firm up and juice stays put, instead of leaking out when you vacuum. Combining sturdy containers with gentle vacuuming keeps both the taste and shape intact.
Design Features That Prevent Crushing
Vacuum canisters use solid construction, careful air removal, and good seals to keep fragile foods safe during vacuuming. All these features come together to hold the vacuum and protect your food from getting squished.
Rigid Walls for Structural Support
Hard plastic or glass makes vacuum canisters way better than bags for storing soft berries, pastries, or herbs. Rigid walls don’t cave in when you pull out the air, so the outside pressure pushes on the container, not your food.
In our experience, high-quality airtight containers made from thick plastic or tempered glass spread the pressure evenly, stopping the crushing you get with bags. The stiff sides also keep food in place so it doesn’t get jostled around.
Reinforced corners and thick bottoms help too, especially when you’re stacking canisters in the fridge or moving them around. That extra strength means your muffins or soft cheeses don’t get squashed by accident.
Pulse Vacuuming and Adjustable Sealing
Pulse vacuuming puts you in charge of how much air gets pulled out and how fast. Instead of running the pump nonstop, pulse mode lets you go in short bursts and stop as soon as you see the lid start to dip.
We usually watch the canister closely. When the lid just starts to pull down, we stop the vacuum sealing process before anything gets squished. This trick works great for stuff like croissants or raspberries that can’t handle full pressure.
A lot of vacuum sealers have gentle or delicate settings now. These pull air more slowly, giving moisture time to settle and keeping liquids from bubbling up into the valve. For super soft foods, we use a gentle setting plus pulse mode to get just enough vacuum for freshness, without ruining the shape.
Snap-On Lids and Gasket Quality
A good seal between the lid and canister rim is non-negotiable if you want the vacuum to last. Vacuum canisters use snap-on or twist lids with silicone or rubber gaskets that make an airtight seal once you’ve pulled out the air.
Top-notch gaskets stay flexible in the fridge or freezer and press evenly all the way around, so you don’t get leaks. We always check for cracks, bits of food, or bends that could mess up the seal.
The lid’s valve connects to your vacuum pump and snaps shut automatically when you stop. Look for one-way valves that keep air out after you disconnect the pump. If the gasket and valve are both in good shape, your vacuum integrity holds, and your fragile foods stay safe from oxygen and drying out.
Vacuum Canisters vs. Vacuum Seal Bags and Containers
Vacuum seal bags squeeze food to get rid of air, which can crush delicate stuff, while vacuum canisters create an airtight space without squishing the contents. Bags are great for freezer storage but not so much for stacking, and they don’t protect fragile foods as well as canisters do.
Bag Compression and Its Pitfalls
Vacuum bags pull air out and collapse right onto your food. This tight wrap flattens soft items like berries, baked goods, and leafy greens. The bag hugs every curve, which just destroys delicate shapes.
Vacuum canisters, on the other hand, pull air from a hard container. The walls stay put, so your food sits safe inside the vacuum storage space. We’ve seen plenty of people switch to canisters after bags left their cookies or fruit looking pretty sad.
There’s a trade-off, of course. Bags squish down small and save freezer space, but canisters take up more room. For anything that needs to keep its shape, though, rigid containers are the way to go.
Single-Layer vs. Stack Storage
Vacuum sealing bags make stacking tough, since heavy stuff on top crushes what’s below. You have to lay bags flat to freeze, then rearrange them. If you stack heavy things on fragile bags, you risk crushed food and broken seals.
Canisters stack easily because the hard sides carry the weight, not your food. We use canisters for pantry basics and foods we grab often. Their uniform shape just makes organizing shelves less of a headache.
| Storage Method | Stacking Safety | Space Efficiency | Best For |
|---|---|---|---|
| Vacuum bags | Low | High | Dense, durable foods |
| Vacuum canisters | High | Moderate | Fragile, accessed often |
Bags still work well for soups, meats, and big-batch meals where compression isn’t a problem.
Freezer Burn and Food Longevity
Both vacuum seal bags and vacuum canisters prevent freezer burn by removing oxygen, which is the main reason ice crystals and freezer dryness happen. Bags seal tight to every surface, blocking air everywhere. Canisters rely on airtight containers and a solid vacuum seal at the lid.
Bags might keep food safe a bit longer in the freezer since they leave no air pockets. Canisters can leak a little over time if the gasket isn’t perfect. As long as you keep the seals clean and well-fitted, though, canisters hold their own for 6-12 months in the freezer.
For pantry use, canisters win. Coffee, flour, and snacks stay fresher longer in rigid vacuum containers because you can reseal them quickly. Bags need clips or heat sealing, which lets air sneak back in. Both systems help reduce food waste, but canisters just make daily use easier.
Choosing and Using Vacuum Canisters for Maximum Protection
The canister material, how you care for seals, and matching size to food type all make or break whether your delicate foods stay whole or turn to mush.
Best Materials: Plastic, Glass, and Beyond
From experience, hard, food-safe plastic canisters are the sweet spot for everyday use. They’re tough, light, and work with most home vacuum pumps. Glass canisters are great for resisting odors and letting you see inside, but they’re heavier and can break.
For crushable foods like berries or cookies, we like clear plastic or borosilicate glass with wide mouths. Wide openings make loading and unloading less stressful for fragile stuff. Look for BPA-free labels and smooth interiors to avoid snagging.
Stainless steel canisters block light, which is handy for herbs or coffee, but you can’t see inside or check the vacuum easily. These are best for folks who trust their seals. Avoid thin or flexible containers; they can collapse under vacuum and wreck your food.
Maintenance and Seal Care
Vacuum only works if the gaskets and valves are clean and undamaged. We always check the rubber or silicone seal before each use. Cracks, crumbs, or warps will ruin the airtight seal.
Wash gaskets by hand with mild soap after each use. Dishwashers can warp seals, especially on cheaper models. Make sure everything’s dry before putting it back together, or you risk mold near the valve.
Swap out gaskets every 6 to 12 months, depending on how often you use them. We keep spares handy so a worn seal doesn’t mean tossing a good canister. Store canisters with lids loosely on top, not fully sealed, to keep gaskets from getting squished and worn out.
Matching Canisters to Foods
We always try to match canister size to the volume and fragility of the food. Small 1- to 2-cup canisters are perfect for raspberries or cake slices. Less air means a quicker vacuum and gentler suction.
For breads or muffins, tall narrow canisters work best, fitting the height without too much empty space. Large, shallow canisters are better for stacking cookies with parchment between layers. Try to fill canisters about 70-80% full for the best vacuum without crushing.
For strong-smelling foods like onions or garlic, we use dedicated canisters to avoid flavor transfer. Labeling each airtight container by food type makes grabbing the right one during meal prep way easier.
Advanced Sealing Techniques for Fragile Items
Pre-chilling or freezing helps fragile foods keep their shape during vacuuming, and pulse settings let you control air removal in small bursts. Marinating and prepping for sous vide also benefit from these tricks when you’re working with delicate ingredients.
Pre-Chill and Portioning Tips
Chilling or partially freezing fragile foods before vacuum sealing really helps keep them from getting squished. If you cool down berries, soft cheeses, or pastries, they firm up and don’t lose as much moisture when you pull the air out. That’s especially true with vacuum canisters since the rigid container already gives some extra protection.
Here’s what works for us: lay out your items on a tray and stick them in the freezer for about 30 to 60 minutes before sealing. That way, the outside gets firm but the inside doesn’t freeze solid. Portion foods into similar sizes so the air comes out evenly. We usually grab smaller canisters (like 1 or 2 cups) for delicate stuff. There is less air to remove, less risk.
After washing, pat everything dry to get rid of surface moisture. If you’re working with herbs or leafy greens, spread them out in a single layer instead of cramming them together. This approach fits both countertop vacuum sealers and the handheld ones made for canisters.
Gentle and Pulse Settings
Pulse vacuuming lets you control exactly how much air you remove from your canisters. Instead of running a full cycle that might crush soft foods, you just hit the vacuum in 1- or 2-second bursts, checking as you go.
Most home sealers have a pulse or gentle mode for this. Watch the canister lid during each pulse. Stop when you notice a bit of tension, before things start to compress. This works especially well for raspberries, cookies, and any delicate baked goods that can’t handle normal vacuum pressure.
Chamber vacuum sealers do things differently. They equalize pressure all around, but most of us use external suction through canister valves. With these, pulsing is key to avoiding that sudden pressure drop that can ruin soft foods. We usually tell people: it’s better to use less vacuum than too much. Removing about 70% of the air keeps food fresh almost as long as 95%, but your snacks stay intact.
Marinating Functions and Sous Vide Preparation
Some vacuum sealers come with a marinate function that uses gentle pulses to draw marinade into food without smashing it. If you’re working with delicate fish or thinly sliced veggies, use vacuum canisters instead of bags. The rigid walls keep everything safe while the marinade soaks in.
When prepping for sous vide, canisters aren’t meant for the water bath itself, but they’re perfect for portioning and storing ingredients ahead of time. You can seal seasoned proteins or veggies in canisters, keep them in the fridge, then move them to sous vide bags when you’re ready to cook. This way, fragile foods stay protected during storage but still cook properly.
If you’re marinating things like mushrooms or tofu, stick to 2 or 3 short pulses instead of a full cycle. That partial vacuum speeds up marinade absorption without turning everything to mush.
Reducing Food Waste and Extending Shelf Life
Vacuum canisters help cut down food waste by pulling out oxygen, the main culprit behind spoilage. Delicate foods stay fresh for days or even weeks longer compared to regular containers. That means fewer trips to the store and less tossing out stale snacks. Honestly, you’ll notice the difference if you buy in bulk or just want to keep your pantry organized.
How Vacuum Canisters Help Minimize Spoilage
When you vacuum air out of a container, you create a low-oxygen space that slows down bacteria, mold, and yeast. These guys need oxygen to multiply, so without it, they just can’t do much. This simple change keeps food fresher way longer than old-school storage.
Vacuum sealing also slows down oxidation, the thing that makes crackers stale and colors fade. Foods like crushed cookies or broken chips keep their crunch and taste when you keep air out. We’ve seen shelf life stretch 3 to 5 times longer with vacuum sealing compared to tossing snacks in regular containers.
For fragile foods, this method does double duty. The canister’s rigid walls shield everything from getting crushed, while the low-oxygen environment stops spoilage. Stuff like cereal, granola, and nut clusters stay fresh and whole much longer than they would in a bag.
Practical Pantry Organization
Vacuum canisters make pantries so much easier to manage. We use clear ones so it’s easy to see what’s inside and keep track of what’s running low. That way, we don’t accidentally buy doubles or let stuff expire in the back of a shelf.
Stackable canisters help maximize vertical space, especially for snacks that come in weird packaging. Move crushed nuts, half-used cereal, or broken pretzels into matching canisters and suddenly the shelf looks neat. Airtight seals also keep out moisture and pests, which is a must if you want food to last.
Label each canister with what’s inside and the date you filled it. Trust us, this little habit helps you rotate food properly and use up the oldest stuff first.
Bulk Buying and Prep
Buying in bulk really pays off if you can keep food fresh long enough. Vacuum sealing makes bulk buys practical, even for smaller households. When we grab those giant bags of crackers or granola, we portion them into canisters right away to stretch their shelf life.
This is a game changer for meal prepping, too. Crushed tortilla chips for taco night, crumbled feta for salads, or chopped nuts for baking all stay good for weeks when vacuum-sealed. Less oxygen means your prep work doesn’t go stale before you get to it.
Split up big bags into several smaller canisters based on how quickly you’ll use them. That way, you only open what you need, and the rest stays sealed and fresh.
Frequently Asked Questions
Vacuum canisters are especially helpful for foods that need freshness protection without direct pressure. These quick answers cover when to use them and how to get the best results.
Which foods are most likely to get crushed in a vacuum bag, and when should you use a rigid container instead?
Use a rigid container for berries, leafy greens, herbs, chips, crackers, cookies, muffins, croissants, soft breads, and delicate cheeses. These foods can flatten, bruise, crumble, or lose texture in a vacuum bag.
How can you pull a strong vacuum without smashing chips, berries, pastries, or baked goods?
Use a gentle or pulse setting and remove air in short bursts. Stop once the lid shows light tension. For very soft foods, chill or partially freeze them first, then place them in a single layer.
What features should you look for in a vacuum canister to protect delicate foods while still sealing tightly?
Choose rigid plastic or glass, a strong silicone gasket, a smooth rim, a reliable valve, and compatibility with gentle vacuum settings. Clear walls and smaller sizes also make delicate food storage easier.
How long do fragile snacks and baked goods typically stay fresh in a vacuum-sealed canister compared to a regular container?
Chips and crackers may stay crisp for two to three weeks, while cookies and muffins often last about a week at room temperature. Fresh berries may gain a few extra days in the fridge when sealed properly.
Can you vacuum seal cooked foods, soups, or sauces in a canister without making a mess or damaging the seal?
Yes, but cool foods completely first and leave extra headspace. For soups or sauces, fill the canister only halfway and use short, gentle pulses to keep liquid away from the valve.
What are the downsides of vacuum sealing, and how do canisters help avoid common problems like squishing and moisture buildup?
Vacuum sealing can crush soft foods, trap moisture, or pull liquids toward the seal if used too aggressively. Canisters help because their rigid walls protect food, while gentle settings give you more control.
Share:
Which Foods Should Go in Vacuum Canisters Instead of Vacuum Sealer Bags?
How to Build a Pantry System Using Vacuum Bags for Backstock and Canisters for Daily Use