

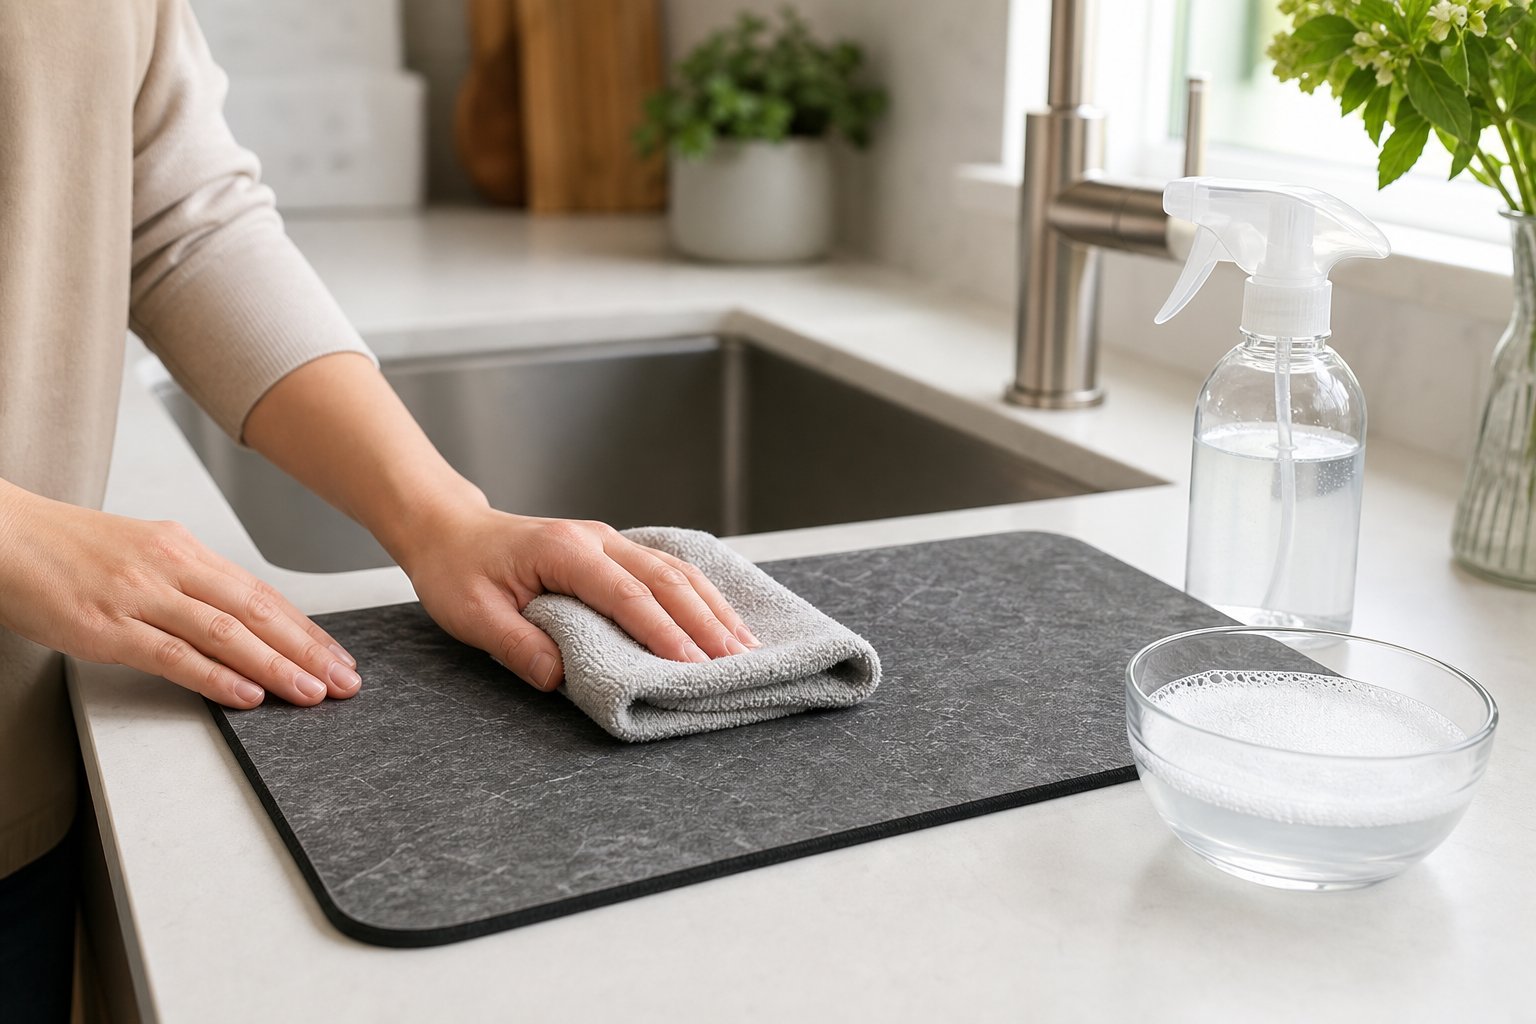
Schauen Sie sich unsere neueste Abtropfmatten-Kollektion an!
Eine Abtropfmatte aus Stein kann ihre schnelltrocknende Wirkung lange vor dem Austausch verlieren. Seifenreste, Mineralien aus hartem Wasser, Speisereste und Öle können die winzigen Poren, die Feuchtigkeit aufnehmen, allmählich verstopfen.
Glücklicherweise kann eine einfache Pflege die Saugfähigkeit wiederherstellen und Flecken, Gerüche und Risse verhindern. Die meisten Steinmatten benötigen lediglich ein sanftes Abspülen, gründliches aufrechtes Trocknen und gelegentliches leichtes Abschleifen. Dieser Leitfaden erklärt, wie Sie Ihre Stein-Abtropfmatte reinigen, pflegen, wiederherstellen und sicher lagern, damit sie jahrelang effektiv funktioniert.
Wichtige Erkenntnisse
- Spülen Sie Ihre Abtropfmatte aus Stein nur mit Wasser ab. Verwenden Sie niemals Seife. Tenside verstopfen die Poren, die die Matte saugfähig machen.
- Schleifen Sie die Oberfläche alle paar Monate mit 220er Schleifpapier ab, um Ablagerungen zu entfernen und die sofortige Wasseraufnahme wiederherzustellen.
- Trocknen Sie Ihre Steinmatte immer aufrecht auf der Kante, damit sich keine Feuchtigkeit darunter ansammelt und Risse verursacht.
Reinigungsgrundlagen für Abtropfmatten aus Stein
Abtropfmatten aus Stein benötigen eigentlich nur Wasser und weiche Werkzeuge, um ihre winzigen Poren offen zu halten. Die falschen Reinigungsmittel verstopfen die Struktur, die diese Matten so gut funktionieren lässt, aber der richtige Ansatz hält sie jahrelang am Laufen.
Sichere Reinigungsmittel und was zu vermeiden ist
Wasser erledigt die Arbeit für Ihre Geschirrmatte aus Stein. Wir bevorzugen kühles fließendes Wasser für die monatliche Wartung. Es spült Schmutz weg, ohne Rückstände zu hinterlassen. Wenn Sie einen hartnäckigen Tee- oder Kaffeefleck haben, mischen Sie eine Paste aus Backpulver und Wasser an. Es wirkt, ohne die Saugfähigkeit zu beeinträchtigen.
Verwenden Sie diese nicht auf einer Stein-Geschirrmatte:
- Geschirrspülmittel oder andere Tensidreiniger. Sie überziehen die Poren und hindern die Matte am Funktionieren.
- Geschirrspülreiniger. Die Hitze und die aggressiven Chemikalien verstopfen die Poren und können sogar den Stein zum Reißen bringen.
- Bleichmittel oder Entkalkungssprays. Sie hinterlassen Rückstände und sind ehrlich gesagt einfach nicht nötig.
- Ölbasierte Produkte. Diese dringen tief ein und manchmal kann man sie auch durch Schleifen nicht vollständig entfernen.
Es kommt darauf an, was Sie weglassen. Jeder Reiniger oder jedes Stück Seife, das Sie jetzt verwenden, wird später zu einer weiteren Schicht, die die Wasseraufnahme blockiert.
Werkzeuge und Materialien für die sanfte Pflege
Sie benötigen nur ein sauberes, fusselfreies Tuch und etwas 220er Schleifpapier für so ziemlich die gesamte Pflege Ihrer Steinmatte. Das Tuch wischt beide Seiten beim Abspülen ab, und das Schleifpapier entfernt die dünne, verstopfte Schicht, wenn die Dinge langsamer werden.
Hier ist, was wir immer zur Hand haben:
- Weiche Tücher zum Abwischen von Oberflächen ohne Kratzer
- 220er Schleifpapier für den gelegentlichen Neustart
- Weiche Bürste zum Abstreifen von losem Schmutz vor dem Abspülen
- Backpulver gegen Flecken
Verzichten Sie auf steife Bürsten oder Scheuerschwämme. Verwenden Sie nur leichte, kreisende Bewegungen mit feinem Schleifpapier. Aggressives Schrubben drückt den Schmutz nur tiefer hinein.
Ein feuchtes Tuch eignet sich für schnelle Abwischvorgänge, aber lassen Sie die Matte danach immer auf der Kante trocknen. Wir stellen unsere normalerweise gegen die Spritzwand, damit beide Seiten Luft bekommen.
Schritt-für-Schritt-Reinigungsmethoden
Regelmäßiges Reinigen sorgt dafür, dass Ihre Steinmatte schnell Wasser aufnimmt. Wir empfehlen ein kurzes Abspülen nach dem täglichen Gebrauch, eine monatliche Grundreinigung und ein wenig mehr für Flecken.
Routinemäßige tägliche Reinigung
Sobald Ihr Geschirr trocken ist, spülen Sie Ihre Steinmatte etwa 30 Sekunden lang unter kühlem, fließendem Wasser ab. Wischen Sie beide Seiten mit einem sauberen, feuchten Tuch ab, um Seifenreste oder Speisereste zu entfernen.
Verzichten Sie jedes Mal auf Seife. Selbst milde Seife hinterlässt Rückstände, die die Poren verstopfen.
Stellen Sie die Matte aufrecht auf ihre lange Kante gegen Ihre Rückwand oder in ein Gestell. Beide Seiten benötigen Luft, um innerhalb weniger Stunden zu trocknen. Wenn Sie sie flach liegen lassen, sammelt sich Feuchtigkeit darunter an, und Sie riskieren Risse.
Diese 90-sekündige Routine verhindert wirklich, dass Ablagerungen die Dinge verlangsamen. Wir machen das nach dem Abendessen, und unsere Matte funktioniert dadurch wie neu.
Tiefenreinigungstechniken
Führen Sie alle 4-6 Wochen eine Grundreinigung durch, oder früher, wenn Sie sehen, dass Wasser abperlt statt einzuziehen. Stellen Sie sicher, dass die Matte über Nacht trocknet, bevor Sie beginnen.
Schleifen Sie die Oberfläche mit 220er Schleifpapier in leichten, kreisenden Bewegungen. Zwei oder drei Durchgänge pro Stelle entfernen die verstopfte Schicht und öffnen frische Poren. Sie schleifen nicht. Sie polieren nur.
Wischen Sie den Staub mit einem trockenen Tuch ab, spülen Sie die Matte kurz ab und trocknen Sie sie aufrecht, wobei beide Seiten Luft bekommen.
Testen Sie mit einem Teelöffel Wasser. Wenn es innerhalb von 2 Sekunden einzieht, ist es gut. Dieser Reset dauert nur etwa 10 Minuten. Bei hartem Wasser müssen Sie dies möglicherweise alle 6-8 Wochen tun; bei weicherem Wasser vielleicht nur zweimal im Jahr.
Hartnäckige Flecken gezielt bekämpfen
Kaffee, Tee und Kurkuma können auf hellen Steinmatten Flecken hinterlassen. Mischen Sie eine Paste aus Backpulver und Wasser (Verhältnis 2:1).
Verteilen Sie die Paste auf dem Fleck und lassen Sie sie 15 Minuten einwirken. Wischen Sie sie mit einem feuchten Tuch ab und spülen Sie sie dann ab. Das Backpulver entfernt die meisten Flecken ohne aggressive Chemikalien.
Wenn Sie immer noch einen Schatten sehen, wird Ihr nächster Schleifvorgang ihn normalerweise entfernen. Flecken und porenverstopfender Schmutz befinden sich in derselben Oberflächenschicht, sodass regelmäßiges Schleifen beides beseitigt.
Verzichten Sie auf Bleichmittel oder scharfe Reiniger. Die Matte trocknet so schnell, dass Bakterien und Schimmel wirklich kein Problem sind, und Chemikalien verursachen nur neue Probleme. Bei Ölspritzern wischen Sie diese sofort auf. Öle dringen tiefer ein als Wasserflecken und sind schwer zu entfernen.
Maximale Saugfähigkeit erhalten
Steinmatten verlieren ihre Saugfähigkeit, wenn die Poren durch Seife, Mineralien oder Öl verstopft werden. Leichtes Abschleifen entfernt die verstopfte Oberfläche und stellt die ursprüngliche Trocknungsgeschwindigkeit der Matte in nur wenigen Minuten wieder her.
Wie die Saugfähigkeit in Steinmatten funktioniert
Abtropfmatten aus Stein werden aus Kieselgur hergestellt, das im Grunde fossile Algen sind. Der Stein ist voller mikroskopisch kleiner Poren, die Wasser durch Kapillarwirkung aufnehmen. Wenn sie neu ist, kann eine Steinmatte eine Pfütze in etwa 2 Sekunden aufnehmen und in 10 Minuten trocknen.
Aber diese gleichen Poren erleichtern es, dass sich Dinge ansammeln. Jedes Geschirr, das Sie ablegen, bringt ein wenig Seife, Mineralien oder Öl mit sich. Wasser verdunstet, aber diese hinterlassen einen Film, der die Poren im Laufe der Zeit überzieht.
Die Saugfähigkeit hört nicht einfach über Nacht auf. Sie verlangsamt sich allmählich, bis Wasser abperlt, anstatt einzuziehen. Wenn Ihre Matte dies tut, ist sie nicht kaputt. Die Poren sind nur verstopft, und Schleifen behebt das Problem.
Wiederherstellung der Saugfähigkeit durch Schleifen
Schleifen ist bei Steinmatten nur Routinepflege. Sie entfernen eine superdünne, verstopfte Schicht, nicht die ganze Form. Nehmen Sie 220er Schleifpapier und machen Sie leichte, kreisende Bewegungen über die Oberfläche.
Lassen Sie die Matte trocknen, bevor Sie beginnen. Wenn sie täglich benutzt wurde, gönnen Sie ihr einen Tag. Machen Sie zwei oder drei sanfte Durchgänge an jeder Stelle. Sie polieren, nicht schleifen.
Wischen Sie den Staub ab, spülen Sie unter fließendem Wasser ab und trocknen Sie sie aufrecht. Testen Sie mit einem Teelöffel Wasser. Es sollte in etwa 2 Sekunden verschwinden.
Bei hartem Wasser schleifen wir unsere Matten jeden zweiten Monat. Weicheres Wasser? Zweimal im Jahr ist wahrscheinlich in Ordnung. Jedes Schleifen trägt nur ein winziges bisschen ab, sodass Sie jahrelang davon profitieren, bevor es dünn wird.
Regelmäßige Wartung und Lagerung
Eine regelmäßige Reinigungsroutine und gute Lagerungsgewohnheiten sorgen dafür, dass Ihre Steinmatte lange hält und so saugfähig bleibt, wie sie sollte. Luftzirkulation ist genauso wichtig wie die Reinigung.
Einen Reinigungsplan erstellen
Wenn Sie Ihre Matte täglich verwenden, spülen Sie sie einmal pro Woche unter warmem Wasser ab. Dies entfernt Mineralablagerungen und Speisereste, bevor sie die Poren verstopfen. Wenn Sie möchten, geben Sie einen winzigen Tropfen Spülmittel auf einen weichen Schwamm, wischen Sie in geraden Linien und spülen Sie gründlich ab.
Wöchentliche Checkliste:
- Beide Seiten mit warmem Wasser abspülen
- Leichte Seifenwäsche mit einem weichen Schwamm (falls nötig)
- Alle Seife abspülen
- Aufrecht zum Lufttrocknen stellen
Wenn Sie sehen, dass Wasser sich sammelt, anstatt einzuziehen, ist es Zeit zu schleifen. Verwenden Sie 180 bis 320er Schleifpapier und schleifen Sie sanft in geraden Linien. Dies erfrischt die obere Schicht, ohne viel Material zu entfernen. Sie können dies drei- bis fünfmal im Laufe der Lebensdauer der Matte tun.
Für Kaffee- oder Kurkuma-Flecken machen Sie eine Backpulverpaste mit ein paar Tropfen Wasser. Verteilen Sie sie, warten Sie 30 Minuten und wischen Sie sie dann sauber.
Richtige Trocknungs- und Lagerungsgewohnheiten
Stellen Sie Ihre Steinmatte nach dem Waschen immer aufrecht auf ihre Kante und lehnen Sie sie an Ihre Küchenrückwand oder Wand. Beide Seiten benötigen Luftzirkulation, um auszutrocknen. Wenn Sie sie flach hinlegen oder direkt nach dem Waschen wegstellen, wird Feuchtigkeit eingeschlossen und es kann sich Schimmel bilden.
Stapeln Sie keine schweren Gegenstände auf Steinmatten. Da sie aus komprimierten fossilen Algen hergestellt werden, kann zu viel Gewicht sie zum Reißen bringen. Lagern Sie sie aufrecht in einem trockenen Schrank oder lassen Sie sie einfach aufrecht auf der Arbeitsplatte stehen.
Vermeiden Sie:
- Einweichen oder Untertauchen
- Geschirrspülerzyklen (sie werden die Matte zum Reißen bringen)
- Flache Lagerung im feuchten Zustand
- Stapeln von Gusseisen oder schwerem Kochgeschirr darauf
Die Matte bleibt natürlich antibakteriell, solange sie zwischen den Anwendungen austrocknet. Wenn Ihr Spülbeckenablage kleine Füße hat, lassen Sie sie dran. Sie schaffen einen Luftspalt, damit sich keine Feuchtigkeit darunter ansammelt.
Schäden und häufige Fehler vermeiden
Steinmatten verlieren ihre Saugfähigkeit hauptsächlich, weil ihre Poren verstopft oder beschädigt werden, meist durch gut gemeinte Reinigungsversuche. Wenn Sie auf Seife, Hitze und Öl verzichten, wird Ihre Matte jahrelang funktionieren.
Schlechte Gewohnheiten, die die Saugfähigkeit verringern
Verwenden Sie kein Spülmittel oder Reinigungsmittel. Seifenreste überziehen die Poren und verhindern, dass Wasser eindringt. Selbst ein kurzes Schrubben mit Seifenwasser hinterlässt Rückstände, deren Entfernung mehrere Schleifvorgänge erfordert.
Verzichten Sie auf die Spülmaschine. Die Mischung aus heißem Wasser, Spülmittel und schnellen Temperaturwechseln verstopft die Poren und kann den Stein zum Reißen bringen. Wir haben Matten gesehen, die nach nur einem Spülmaschinengang in zwei Hälften zerbrochen sind.
Weichen Sie Ihre Matte nicht ein. Wenn Sie sie unter Wasser liegen lassen, dringen Wasser und Mineralien tief in den Stein ein, und es kann Tage dauern, bis sie trocknet. Die Unterseite bleibt nass, während die Oberseite trocknet, was den Stein belastet und zu Rissen führt.
Halten Sie Öle von der Matte fern. Speiseöl, Handlotion und fettige Lebensmittel dringen tiefer ein als andere Substanzen. Öl füllt die Poren auf molekularer Ebene, und Schleifen kann nicht immer alles entfernen. Wischen Sie Ölspritzer sofort auf.
Lagern Sie die Matte immer aufrecht. Wenn Sie sie flach hinlegen, wird Feuchtigkeit darunter eingeschlossen und der Stein wird mit der Zeit geschwächt.
Was tun, wenn Ihre Matte nicht mehr funktioniert?
Beginnen Sie mit einem Abspülen und vollständigen Trocknen. Manchmal perlt Wasser einfach ab, weil Staub oder Rückstände vorhanden sind. Spülen Sie beide Seiten ab, wischen Sie sie sauber und lassen Sie sie einen Tag lang aufrecht trocknen, bevor Sie sie testen.

Entwickelt, um Ihr Zuhause, Ihre Küche und Ihren Alltag zu vereinfachen.


Kontaktieren Sie uns
Fragen? Wir sind Montag bis Freitag von 10:00 bis 18:00 Uhr PST für Sie da.
Kontaktinformationen