

Schauen Sie sich unsere neuesten Snackbox-Kollektionen an!
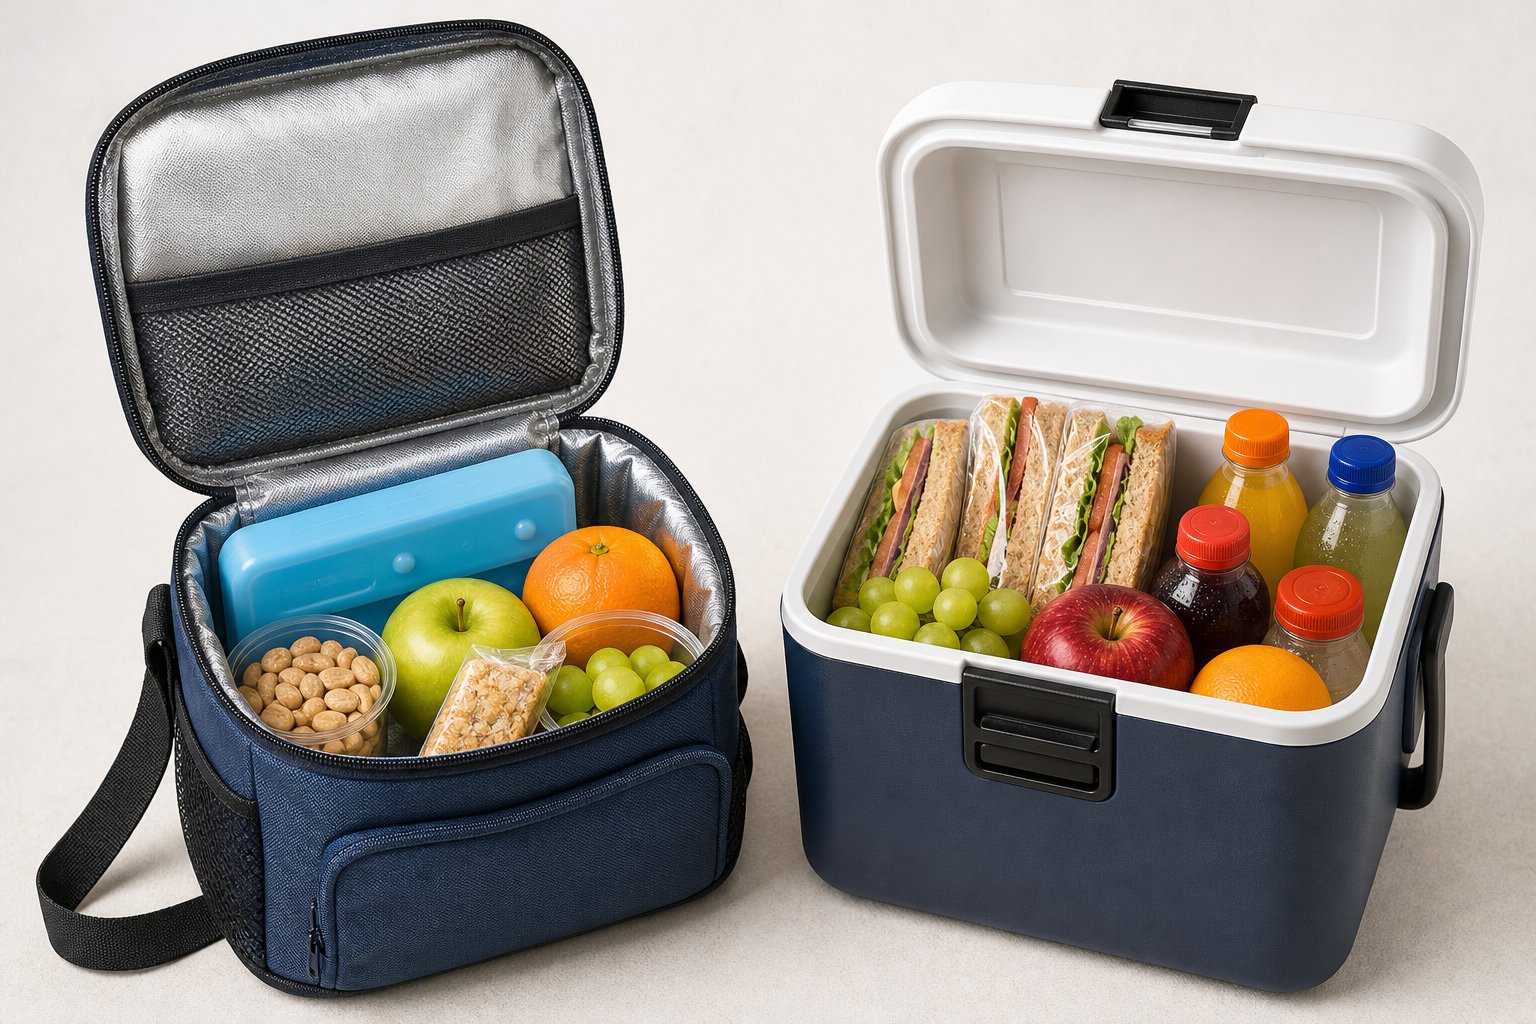
Snacks unterwegs kühl zu halten, ist einfacher, wenn jeder Teil Ihrer Packroutine die Kältehaltung unterstützt. Egal, ob Sie Schulsnacks, ein Mittagessen für eine Autofahrt oder Essen für das Büro zubereiten, eine isolierte Tasche und vollständig gefrorene Kühlakkus können dazu beitragen, verderbliche Lebensmittel mehrere Stunden lang bei einer sicheren Temperatur zu halten. Die tatsächliche Kühldauer variiert je nach Tasche, Anzahl und Größe der Kühlakkus, Außentemperatur und Häufigkeit des Öffnens der Tasche.
Für die besten Ergebnisse kühlen Sie die Lebensmittel vor dem Verpacken, verwenden Sie genügend gefrorene Kühlakkus, füllen Sie leere Räume aus, halten Sie die Tasche geschlossen und lagern Sie sie vor direkter Sonneneinstrahlung und anderen Wärmequellen geschützt. Eine isolierte Tasche verlangsamt die Wärmeübertragung, benötigt aber dennoch eine zuverlässige Kältequelle im Inneren.
Dieser Leitfaden erklärt, wie Sie eine isolierte Tasche auswählen, Kühlakkus auswählen und positionieren, verschiedene Snacks organisieren, Kondensation reduzieren und praktische Lebensmittelsicherheitspraktiken befolgen.
Wichtige Erkenntnisse
- Verpacken Sie Lebensmittel direkt aus dem Kühlschrank und verwenden Sie vollständig gefrorene Kühlakkus.
- Legen Sie, wenn der Platz es zulässt, Kältequellen über und unter verderbliche Lebensmittel und reduzieren Sie den leeren Raum in der Tasche.
- Halten Sie die isolierte Tasche vollständig geschlossen und fern von Sonnenlicht, heißen Fahrzeugen, Asphalt, Lüftungsschlitzen und anderen Wärmequellen.
Die richtige isolierte Lunchtasche oder Kühlbox auswählen
Die richtige isolierte Tasche kann einen spürbaren Unterschied bei der Temperaturregelung, der Tragbarkeit und dem Schutz der Lebensmittel machen. Berücksichtigen Sie die Isolierung, die Konstruktion, den Verschluss, das Fassungsvermögen und die Form, bevor Sie eine für eine tragbare Snackbox auswählen.
Vergleich von Materialien und Designs
Die Isolationsdicke und die Gesamtkonstruktion beeinflussen, wie schnell die Außenwärme die Lebensmittel erreicht. Schaumstoffisolierte Taschen sind für alltägliche Mittagessen üblich, während Taschen mit dickerer Isolierung oder speziellen Wärmesperren die Kälte länger halten können. Die Leistung variiert je nach Produkt, daher sollten Sie die Pflege- und Leistungsinformationen des Herstellers prüfen, anstatt sich nur auf den Materialnamen zu verlassen.
Einige hochwertige Kühltaschen verwenden fortschrittliche Isolationssysteme, einschließlich Vakuumisolationspaneele. Diese Paneele können die Wärmeübertragung reduzieren, während sie weniger Innenraum beanspruchen als einige dicke Schaumstoffkonstruktionen. Die Gesamtkühldauer hängt jedoch immer noch von den Packbedingungen und der Anzahl der verwendeten Kältequellen ab.
Hartschalen-Kühlboxen halten die Kälte oft länger und schützen Behälter vor Stößen, während weiche Taschen leichter sind und einfacher in Rucksäcke, Spinde oder Büroräume passen. Die bessere Wahl hängt von der Dauer des Ausflugs und davon ab, wie wichtig die Tragbarkeit ist.
Suchen Sie nach einem strapazierfähigen Äußeren, das Feuchtigkeit und Flecken widersteht, einem glatten Inneren, das leicht abzuwischen ist, und verstärkten Nähten an stark beanspruchten Stellen. Diese Eigenschaften unterstützen den täglichen Gebrauch und erleichtern die routinemäßige Reinigung.
Merkmale, auf die man bei einer hochwertigen Kühltasche achten sollte
Ein gut gestaltetes Hauptfach sollte die Snackbox und die Kühlakkus aufnehmen, ohne große Lücken zu hinterlassen. Außentaschen sind nützlich für Besteck, Servietten und haltbare Snacks, da sie die Notwendigkeit reduzieren, den isolierten Bereich zu öffnen.
Wasserabweisende Reißverschlüsse und versiegelte oder geschweißte Nähte können dazu beitragen, Kondensation und kleine Lecks einzudämmen. Eine Reißverschlussklappe oder Dichtung kann auch das Eindringen warmer Luft durch den Verschluss reduzieren.
Bequeme Trageeigenschaften sind für den regelmäßigen Gebrauch wichtig. Gepolsterte Griffe, ein verstellbarer Schultergurt oder Befestigungsschlaufen können eine volle Tasche leichter transportierbar machen.
Wählen Sie einen Verschluss, der sich reibungslos öffnen und vollständig schließen lässt. Jede Öffnung lässt warme Luft eindringen, daher helfen ein schneller Zugriff und eine zuverlässige Dichtung, die Temperatur im Inneren zu schützen.
Fassungsvermögen für den täglichen Gebrauch
Das Fassungsvermögen sollte der Menge der Lebensmittel, der Größe der Snackbox und der Anzahl der benötigten Kühlakkus entsprechen. Eine kompakte 4- bis 6-Liter-Tasche kann für ein Mittagessen und ein paar Snacks geeignet sein, während eine 8- bis 10-Liter-Tasche für Familienausflüge oder längere Tage praktischer sein kann.
Eine Tasche, die zu groß für ihren Inhalt ist, lässt mehr Luft zum Erwärmen. Versuchen Sie, den größten Teil des isolierten Fachs zu füllen, ohne die Lebensmittel zu zerdrücken. Verwenden Sie bei Bedarf einen zusätzlichen Kühlakku, ein gekühltes Getränk oder ein sauberes, gefaltetes Handtuch, um kleine Lücken zu füllen.
Auch die Form der Tasche ist wichtig. Hohe Taschen eignen sich möglicherweise für Flaschen, während rechteckige Taschen mit flachem Boden geteilte Snackboxen oft sicherer aufnehmen und ein Umkippen verhindern.
Kühlmethoden und Kühlakku-Optionen verstehen
Verschiedene Kältequellen eignen sich für unterschiedliche Packbedürfnisse. Wiederverwendbare Kühlakkus sind in der Regel die bequemste Option für eine tragbare Snackbox, da sie beim Auftauen dicht bleiben und in verschiedenen Formen und Größen erhältlich sind.
Kühlakkus gegenüber Eisblöcken und Eiswürfeln
Wiederverwendbare Gel- oder flüssigkeitsgefüllte Kühlakkus lassen sich leicht neben Lebensmitteln positionieren und erzeugen kein loses Schmelzwasser, wenn sie intakt sind. Schlanke Packs können über, unter oder neben einer Snackbox platziert werden, ohne so viel Platz einzunehmen wie ein großer Eisblock.
Eiswürfel können in einem versiegelten, auslaufsicheren Behälter funktionieren, aber sie erzeugen beim Schmelzen Wasser und können während des Transports verrutschen. Größere Eisblöcke schmelzen im Allgemeinen langsamer als einzelne Würfel, obwohl sie mehr Platz einnehmen und immer noch eine wasserdichte Einrichtung erfordern.
Wählen Sie einen wiederverwendbaren Kühlakku, der eng in die Tasche passt, vollständig einfriert und für die Verwendung in der Nähe von Lebensmitteln zugelassen ist. Ersetzen Sie jeden Akku, der Risse, Undichtigkeiten, Schwellungen oder andere Beschädigungen aufweist.
Vorteile integrierter Kühlakkus
Einige Snackbehälter und Lunchboxen enthalten einen herausnehmbaren oder integrierten Kühlakku im Deckel, Boden oder an der Seitenwand. Dieses Design kann Platz sparen und die Kältequelle während des Transports in einer konstanten Position halten.
Die integrierte Kühlung kann auch die Wahrscheinlichkeit verringern, einen separaten Kühlakku zu vergessen. Herausnehmbare Packs sind im Allgemeinen einfacher zu ersetzen, während vollständig integrierte Designs möglicherweise erfordern, dass das gesamte Bauteil oder der Behälter eingefroren wird.
Prüfen Sie vor dem Kauf die Gefrieranweisungen, Reinigungsanforderungen, Ersatzoptionen und ob das Design ausreichend Kühlung für die Lebensmittel bietet, die Sie verpacken möchten.
Wie Vakuumisolationspaneele die Leistung verbessern
Vakuumisolationspaneele wurden entwickelt, um die Wärmeübertragung effektiver zu reduzieren als viele einfache Schaumstoffschichten. Da die Paneele relativ dünn sein können, bieten sie eine starke Isolierung, ohne so viel Innenraum zu beanspruchen.
Sie können nützlich sein für lange Tage fernab eines Kühlschranks, aber sie ersetzen weder Kühlakkus noch die richtigen Lebensmittelsicherheitspraktiken. Die Kühlleistung variiert immer noch mit der Umgebungstemperatur, den Öffnungen der Tasche, der Temperatur der Lebensmittel und der Packdichte.
Diese Taschen kosten in der Regel mehr, daher sollten Sie vor einer Investition überlegen, ob die zusätzliche Isolierung für Ihren Alltag notwendig ist.
Bewährte Praktiken für das Verpacken und Schichten von Snacks
Gutes Verpacken hilft der kalten Luft, verderbliche Lebensmittel zu erreichen, während empfindliche Snacks vor Feuchtigkeit und Druck geschützt werden. Beginnen Sie mit gekühlten Lebensmitteln, positionieren Sie die Kühlakkus sorgfältig und verwenden Sie Behälter, die eng in die isolierte Tasche passen.
Lebensmittel vor dem Verpacken kühlen
Kühlen Sie verderbliche Snacks, bis sie gründlich gekühlt sind, bevor Sie sie in die Tasche legen. Das Beginnen mit kalten Lebensmitteln ermöglicht es den Kühlakkus, die Temperatur aufrechtzuerhalten, anstatt zuerst Lebensmittel zu kühlen, die bei Raumtemperatur begonnen haben.
Artikel wie Joghurt, Käse, geschnittenes Obst, Eier und Wurstwaren sollten bis zum Verpacken gekühlt bleiben. Ein gefrorenes Getränk, ein Joghurt-Tube oder ein anderer geeigneter Gegenstand kann zusätzliche Kühlung bieten, während er auftaut, vorausgesetzt, die Verpackung kann sicher eingefroren werden.
Verlassen Sie sich nicht darauf, dass ein Kühlakku warme verderbliche Lebensmittel schnell kühlt. Kühlen Sie die Lebensmittel zuerst im Kühlschrank, dann geben Sie sie direkt in die isolierte Tasche.
Optimale Platzierung von Kühlakkus in Snackboxen
Wenn der Platz es zulässt, legen Sie einen gefrorenen Akku unter die Snackbox und einen weiteren darüber. Dies umgibt verderbliche Lebensmittel mit Kältequellen und unterstützt eine gleichmäßigere Kühlung.
Für einen größeren Behälter können mehrere schlanke Akkus, die an verschiedenen Seiten platziert sind, eine bessere Abdeckung bieten als ein Akku an einer einzigen Stelle. Halten Sie Kältequellen in der Nähe von Milchprodukten, Eiern, Fleisch, Meeresfrüchten und anderen temperaturempfindlichen Lebensmitteln.
In einer kompakten Tasche mit Platz für nur einen Akku platzieren Sie diesen über oder direkt neben den verderblichsten Gegenständen. Packen Sie die Tasche so, dass der Kühlakku in Kontakt mit dem Behälter bleibt und nicht während des Transports verrutscht.
Verwendung von Behältern mit Fächern
Fächerbehälter halten Lebensmittel getrennt, begrenzen die Feuchtigkeitsübertragung und schützen knusprige Snacks vor nassen Zutaten. Behälter mit einzeln versiegelten Fächern sind besonders nützlich für Dips, geschnittenes Obst, Gemüse, Käse und Cracker.
Gruppieren Sie Lebensmittel, die gekühlt werden müssen, in der Nähe der Kühlakkus. Legen Sie haltbare Lebensmittel wie Cracker oder Brezeln in versiegelte Fächer oder separate Beutel, um sie vor Kondensation zu schützen.
Wählen Sie einen Behälter, der genau in die isolierte Tasche passt. Eine gut gefüllte Tasche hält ihre Temperatur im Allgemeinen effektiver als eine überdimensionierte Tasche mit großen leeren Bereichen.
Innovative Snackbox-Designs und -Funktionen
Moderne Snackboxen können gefrierbare Komponenten, herausnehmbare Trennwände, versiegelte Fächer und sichere Deckel enthalten. Diese Funktionen können es erleichtern, eine vielfältige Auswahl an Snacks zu verpacken, während Lecks, Feuchtigkeit und Temperatur kontrolliert werden.
Integrierte Kühlakkus und modulare Layouts
Einige Snackboxen enthalten gefrierbares Gel im Boden, Deckel oder den Wänden. Je nach Design können Sie eine herausnehmbare Komponente oder den gesamten Behälter vor Gebrauch einfrieren. Befolgen Sie immer die Anweisungen des Herstellers, um eine Beschädigung der Box zu vermeiden.
Modulare Layouts mit herausnehmbaren Trennwänden ermöglichen es Ihnen, die Fachgrößen für Lebensmittel wie Hummus, Gemüse, Obst, Käse, Cracker und kleine Sandwiches anzupassen. Separate Abschnitte können auch die Übertragung von Geschmack und Feuchtigkeit reduzieren.
Behälter, die herausnehmbare Kühlakkus mit unterteilten Schalen kombinieren, bieten mehr Kontrolle darüber, wo die Kältequelle sitzt. Herausnehmbare Teile können auch die Reinigung und Lagerung vereinfachen.
Auslaufsichere und leicht zu reinigende Deckel
Deckel mit sicheren Verschlüssen und lebensmittelechten Dichtungen können Dips, Saucen und saftiges Obst während des Transports sicher halten. Wählen Sie einen Deckel, der gleichmäßig schließt und für den vorgesehenen Benutzer leicht zu öffnen ist.
Ein transparenter Deckel ermöglicht es Ihnen, den Inhalt zu überprüfen, ohne den Behälter zu öffnen. Einige Designs bieten auch einen speziellen Platz für einen Kühlakku, der verhindert, dass dieser verrutscht.
Glatte Innenflächen und herausnehmbare Dichtungen sind einfacher zu reinigen als tiefe Rillen und feste Spalten. Überprüfen Sie das Pflegeetikett, bevor Sie eine Snackbox oder einen Deckel in die Spülmaschine geben, und trocknen Sie alle Teile vollständig, bevor Sie sie aufbewahren.
Tragbare Optionen für Familien unterwegs
Ein isolierter Träger, der um die Snackbox herum konzipiert ist, bietet zusätzliche Kühlung und schützt den Behälter vor Stößen. Gepolsterte Griffe und verstellbare Gurte können den Komfort während der Schulzeit, bei Picknicks, Autofahrten und Outdoor-Aktivitäten verbessern.
Zusammenklappbare Taschen sparen Stauraum, wenn sie nicht verwendet werden, obwohl ihre Isolierung dünner sein kann als die von strukturierteren Designs. Vergleichen Sie die Tragbarkeit mit dem Grad der Kältehaltung, den Sie benötigen.
Leichte Behälter und entsprechend dimensionierte Kühlakkus helfen, die Gesamtlast überschaubar zu halten. Berücksichtigen Sie Alter und Komfort des Benutzers und vermeiden Sie es, die Brotdose oder den Rucksack eines Kindes zu überpacken.
Maximierung der Kältehaltung während des Gebrauchs
Die Kältehaltung hängt von der Ausgangstemperatur, der Isolierung, der Packdichte und der Wärmeeinwirkung ab. Geeignete Komponenten vorkühlen, das Öffnen der Tasche begrenzen und die Tasche am kühlsten verfügbaren Ort aufbewahren.
Vorkühlen der Tasche und isolierter Kühlakkus
Eine Tasche mit Raumtemperatur kann einen Teil der Kühlenergie der Kühlakkus absorbieren. Wenn der Hersteller es erlaubt, kühlen Sie die isolierte Tasche im Kühlschrank vor. Eine andere Möglichkeit ist, einen zusätzlichen gefrorenen Akku über Nacht in die geschlossene Tasche zu legen und ihn dann beim Packen durch vollständig gefrorene Akkus zu ersetzen.
Kühlen Sie Kühlakkus gemäß den Anweisungen des Herstellers und lassen Sie sie vor dem Gebrauch vollständig fest oder vollständig gefroren werden. Die Gefrierzeit variiert je nach Packgröße, Füllung und Gefriertemperatur.
Verpacken Sie gekühlte Lebensmittel und Getränke direkt aus dem Kühlschrank. Je kälter der Inhalt zu Beginn ist, desto weniger Arbeit müssen die Kühlakkus leisten, um eine sichere Temperatur aufrechtzuerhalten.
Minimierung des Öffnens der Tasche
Jedes Mal, wenn die Tasche geöffnet wird, entweicht kalte Luft und wärmere Luft tritt ein. Der Effekt wird bei heißem Wetter oder wenn die Tasche wiederholt geöffnet wird, deutlicher.
Ordnen Sie den Inhalt so an, dass der erste Snack leicht zu erreichen ist. Wenn das Essen zu unterschiedlichen Zeiten gegessen wird, gruppieren Sie die Artikel in der Reihenfolge des Verzehrs, damit die Tasche schnell geöffnet und geschlossen werden kann.
Überprüfen Sie den Reißverschluss oder Verschluss nach jedem Gebrauch. Ein vollständig geschlossener Verschluss verlangsamt die Wärmeübertragung und schützt die Lebensmittel im Inneren.
Die Tasche vor direkter Sonneneinstrahlung schützen
Direkte Sonneneinstrahlung kann die Außenseite einer isolierten Tasche schnell erwärmen. Lagern Sie die Tasche nach Möglichkeit im Schatten, unter einem Schreibtisch, in einem Spind oder unter einem Sonnenschutz.
Wenn der Schatten begrenzt ist, bedecken Sie die Tasche mit einem hellen Handtuch und halten Sie sie von heißem Asphalt, Fahrzeugsitzen oder anderen beheizten Oberflächen fern. Eine Abdeckung kann die direkte Sonneneinstrahlung reduzieren, macht aber einen heißen Ort nicht sicher für verderbliche Lebensmittel.
Halten Sie die Tasche fern von Heizkörpern, Heizlüftern, Geräten und geparkten Fahrzeugen. Ein Autoinnenraum oder Kofferraum kann gefährlich heiß werden, selbst wenn die Außentemperatur mäßig ist.
Pflege, Wartung und Überlegungen zur Lebensmittelsicherheit
Regelmäßige Reinigung und ordnungsgemäße Temperaturkontrolle tragen dazu bei, die Lebensmittelqualität zu schützen und das Risiko einer Kontamination zu verringern. Befolgen Sie die Pflegeanweisungen für die Snackbox, die isolierte Tasche, die Dichtungen und die Kühlakkus.
Reinigung und Trocknung Ihrer Snackbox
Waschen Sie wiederverwendbare Snackboxen nach jedem Gebrauch mit warmem Wasser und Spülmittel, es sei denn, die Anweisungen des Herstellers empfehlen eine andere Methode. Achten Sie besonders auf Ecken, Deckeldichtungen, Scharniere und texturierte Bereiche, in denen sich Essensreste ansammeln können.
Verwenden Sie bei anhaltenden Gerüchen oder Flecken eine für das Material zugelassene Reinigungsmethode. Eine milde Backpulverpaste kann auf einigen Oberflächen wirken, aber testen Sie sie zuerst an einer kleinen Stelle und vermeiden Sie scheuerndes Schrubben.
Lassen Sie jede Komponente vor der Lagerung vollständig trocknen. Lassen Sie Deckel, Dichtungen und Behälter getrennt, damit eingeschlossene Feuchtigkeit keine Gerüche oder Schimmelbildung fördert.
Wischen Sie die isolierte Tasche regelmäßig ab und reinigen Sie Verschüttungen sofort. Falls eine Desinfektion erforderlich ist, verwenden Sie ein Produkt und eine Verdünnung, die für die Materialien der Tasche zugelassen sind, befolgen Sie die Anweisungen auf dem Etikett und mischen Sie niemals Bleichmittel mit Ammoniak, Essig oder anderen Reinigungsmitteln.
Überprüfen Sie Kühlakkus auf Risse, Löcher, Undichtigkeiten oder Schwellungen. Entsorgen Sie beschädigte Kühlakkus gemäß den Entsorgungsanweisungen des Herstellers.
Sichere Temperaturpraktiken
Bewahren Sie verderbliche Lebensmittel bei 40°F (4°C) oder kälter auf. Verwenden Sie genügend vollständig gefrorene Kältequellen, um diese Temperatur aufrechtzuerhalten, und platzieren Sie sie in der Nähe der Lebensmittel, die gekühlt werden müssen.
Verderbliche Lebensmittel sollten nicht länger als zwei Stunden zwischen 40°F und 140°F (4°C und 60°C) bleiben. Reduzieren Sie diese Grenze auf eine Stunde, wenn die Umgebungstemperatur über 90°F (32°C) liegt.
Die Kühlzeit kann nicht allein durch die Tasche garantiert werden. Außentemperatur, Isolationsqualität, Größe des Kühlakkus, Lebensmitteltemperatur und Öffnungen der Tasche beeinflussen alle die Leistung. Wenn die Temperaturkontrolle unsicher ist, verwenden Sie ein Lebensmittelthermometer oder entsorgen Sie Lebensmittel, die möglicherweise zu lange zu warm geblieben sind.
Wenn ein Kühlschrank am Arbeitsplatz oder in der Schule verfügbar ist, stellen Sie verderbliche Lebensmittel so schnell wie möglich hinein. Befolgen Sie die örtlichen Richtlinien für die Lagerung von Mittagessen und halten Sie die Lebensmittel abgedeckt.
Aufbewahren und Etikettieren verderblicher Lebensmittel
Verpacken Sie nur die Menge, die voraussichtlich am selben Tag gegessen wird. Entsorgen Sie verderbliche Reste, die über die empfohlenen Zeitgrenzen hinaus über 40°F (4°C) geblieben sind.
Lebensmittel können im Voraus zubereitet und über Nacht gekühlt werden, aber legen Sie sie sofort vor dem Verlassen in die isolierte Tasche, damit sie den Tag so kalt wie möglich beginnen.
Beispiele für Snacks, die möglicherweise keinen Kühlakku benötigen, wenn sie ungeöffnet, ungeschnitten und wie angegeben gelagert werden:
- Ganzes, ungeschnittenes Obst und Gemüse
- Cracker, Brezeln und trockenes Müsli
- Einzelportionen Nuss- oder Samenbutter-Päckchen
- Trockenfrüchte und Nüsse
- Kommerziell verpackte, haltbare Snacks
Geschnittenes Obst und Gemüse, Milchprodukte, Eier, Fleisch, Meeresfrüchte, gekochte Speisen und andere verderbliche Artikel müssen gekühlt werden, es sei denn, die Verpackung gibt eindeutig an, dass sie haltbar sind.
Beschriften Sie zubereitete Lebensmittel mit dem Zubereitungsdatum. Maskierband und ein lebensmittelechter Stift bieten eine einfache Option für wiederverwendbare Behälter.
Häufig gestellte Fragen
Wo sollte der Kühlakku in der Snackbox platziert werden, damit alles am längsten kalt bleibt?
Platzieren Sie einen gefrorenen Akku über oder direkt neben den verderblichsten Lebensmitteln. Wenn der Platz es zulässt, verwenden Sie einen Akku unter dem Behälter und einen weiteren darüber für eine umfassendere Abdeckung.
Wie lange bleiben Snacks in einer isolierten Tasche an einem typischen Sommertag kalt?
Es gibt keine universelle Kühldauer. Isolierung, Größe des Kühlakkus, Lebensmitteltemperatur, Außentemperatur, Sonnenlicht und Öffnungen der Tasche beeinflussen alle die Leistung. Bewahren Sie verderbliche Lebensmittel bei 40°F (4°C) oder kälter auf und verwenden Sie ein Thermometer, wenn Sie die Temperatur bestätigen müssen.
Welche Arten von Snacks halten am besten, wenn sie neben einem Kühlakku verpackt werden, ohne matschig zu werden?
Ganze Früchte, Babykarotten, Zuckerschoten, Paprikastreifen, versiegelter Joghurt, verpackter Käse und luftdichte Behälter mit Nüssen oder Crackern reisen normalerweise gut. Halten Sie trockene Snacks von Kondenswasser und nassen Zutaten getrennt.
Wie kann ich verhindern, dass Cracker, Sandwiches oder Obst durch Kondensation matschig werden?
Verwenden Sie versiegelte Fächer oder Beutel für trockene Lebensmittel, bewahren Sie Kühlakkus in einer sauberen Hülle auf, wenn sich Kondenswasser bildet, und trennen Sie nasse Sandwichzutaten bis zum Servieren. Fügen Sie bei Bedarf ein trockenes Papiertuch zu Behältern mit gewaschenem Gemüse hinzu.
Welche Größe und Art von Kühlakku eignet sich am besten für eine kleine tragbare Snackbox?
Wählen Sie einen lebensmittelechten, wiederverwendbaren Kühlakku, der eng anliegt und eine große Fläche abdeckt, ohne die Lebensmittel zu zerdrücken. Schlanke Gelpacks sind praktisch für kompakte Taschen, aber die beste Größe hängt von der Tasche, der Lebensmittelmenge und der Zeit fernab der Kühlung ab.
Was sind die besten Tipps zum Packen einer Snackbox für die Schule oder die Arbeit, wenn sie stundenlang in einem Spind oder Rucksack liegen muss?
Beginnen Sie mit gründlich gekühlten Lebensmitteln, verwenden Sie ausreichend gefrorene Kühlakkus, füllen Sie leere Zwischenräume und halten Sie die Isoliertasche geschlossen. Bewahren Sie sie am kühlsten verfügbaren Ort auf und kühlen Sie verderbliche Lebensmittel bei Ankunft, sofern ein Kühlschrank vorhanden ist.
Teilen:
So packst du eine Snackbox mit Fächern, damit Süßes und Herzhaftes getrennt bleiben
So bereiten Sie eine Woche voller Snacks für unterwegs mit herausnehmbaren Fächern und einem Datumsrad vor