

Schauen Sie sich unsere neueste Golf-Kollektion an!
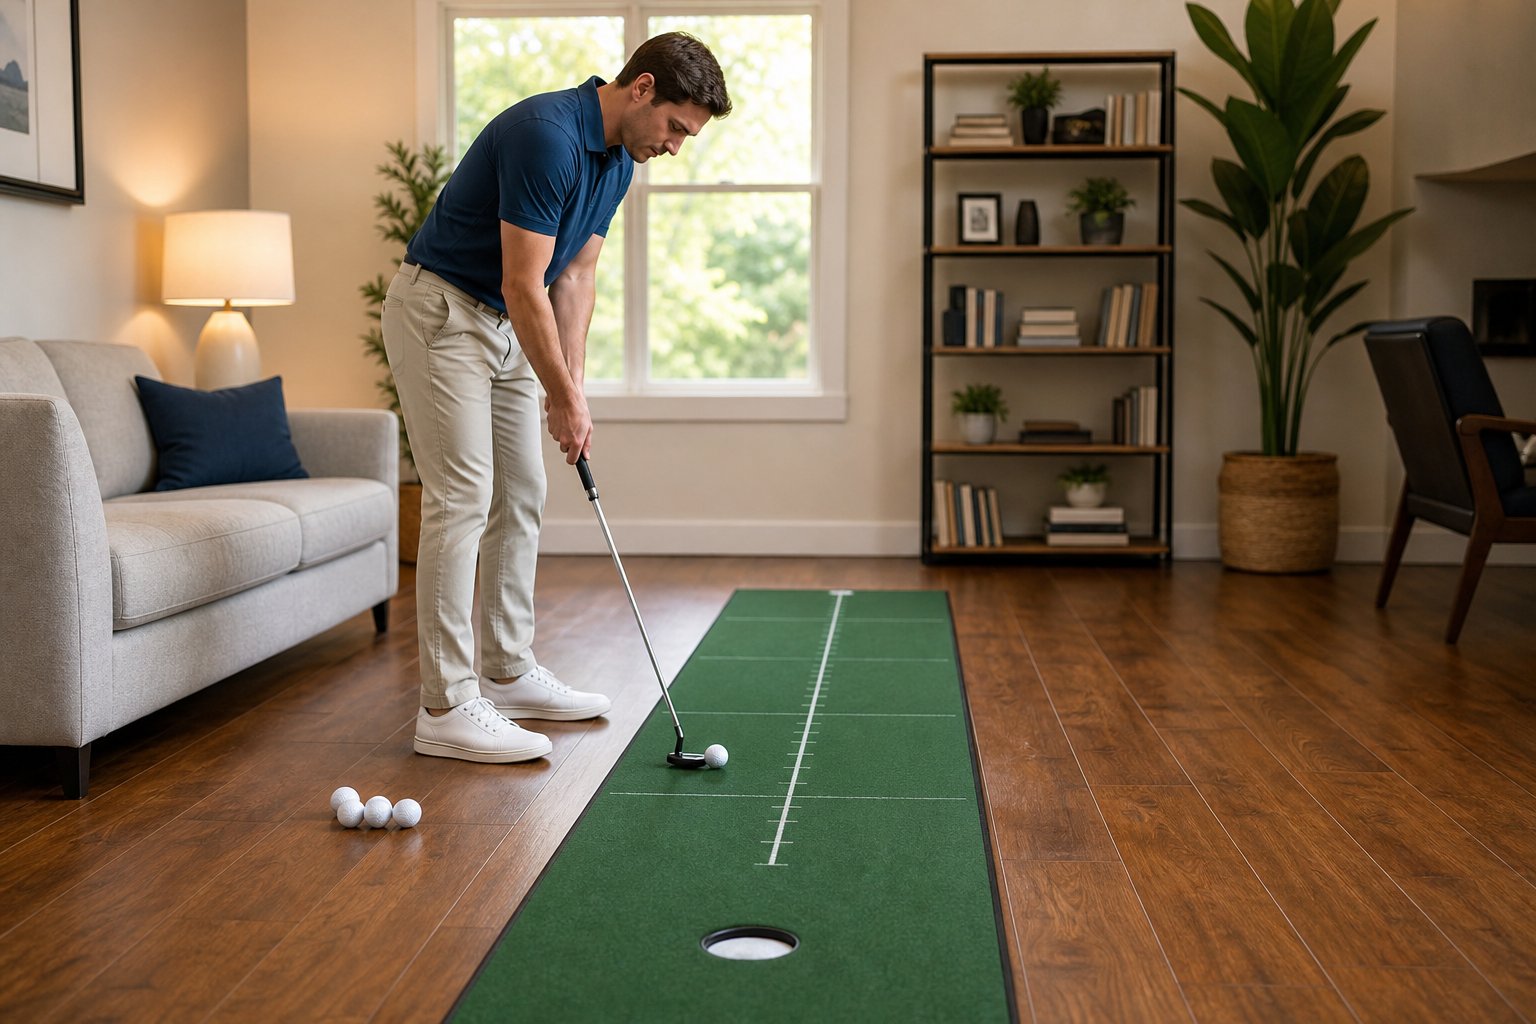
Besseres Putten kann in Ihrem Wohnzimmer beginnen. Eine gut eingerichtete Putting-Matte für zu Hause ermöglicht es Ihnen, die Startlinien-Genauigkeit und die Geschwindigkeitskontrolle zu üben, während Sie gleichzeitig die Schlägerflächenkontrolle, das Tempo und den mittigen Ballkontakt stärken. Diese Grundlagen können auf echte Grüns übertragen werden, wenn Ihr Training fokussiert und konsequent ist.
Einfaches Hin- und Herrollen von Bällen ist nicht genug. Sie benötigen klare Ziele, zuverlässiges Feedback und Übungen, die zeigen, ob der Ball auf Ihrer beabsichtigten Linie beginnt und in der richtigen Entfernung landet.
Dieser Leitfaden erklärt, wie Sie Ihre Übungsstation einrichten, effektive Startlinien- und Geschwindigkeitsübungen verwenden, Ihren Fortschritt verfolgen und diese Fähigkeiten auf dem Platz anwenden können.
Wichtigste Erkenntnisse
- Putting-Matten für zu Hause helfen, die Startlinien-Genauigkeit, die Schlägerflächenkontrolle und die Schlagmechanik zu trainieren, die auf den Platz übertragen werden können.
- Entfernungs-Kontrollübungen mit Zielen und Toren fördern das Geschwindigkeitsgefühl, auch wenn die Matte nicht den Geschwindigkeiten echter Grüns entspricht.
- Das Üben mit einem strukturierten Wochenplan und gezielten Übungen ist effektiver als zufälliges Putten.
Ihre Home-Putting-Station einrichten
Eine solide Home-Putting-Station benötigt drei Dinge: ausreichend Platz für effektives Training, eine Oberfläche, die gerade rollt, und ein paar Ausrichtungshilfen für sofortiges Feedback. Diese Grundlagen entscheiden, ob Ihr Training Ihnen auf dem Platz wirklich hilft.
Den richtigen Raum und die richtige Oberfläche wählen
Sie benötigen mindestens 2,5 bis 3 Meter freie Bodenfläche. Das reicht aus, um im Bereich von 1,5 bis 2,5 Metern zu arbeiten, wo die meisten von uns Schwierigkeiten mit der Geschwindigkeit und der Startlinie haben.
Suchen Sie einen flachen, ebenen Bereich abseits belebter Zonen. Schlafzimmer, Flure oder eine Kellerecke eignen sich oft. Überprüfen Sie den Boden, indem Sie einen Ball in beide Richtungen rollen; wenn er in eine Richtung abweicht, müssen Sie Ihr Setup anpassen oder einen flacheren Ort finden.
Hartholz-, Laminat- oder Fliesenböden bieten Matten die beste Unterstützung. Dicker Teppich macht die Dinge unvorhersehbar und kann Ihre Ausrichtungshilfen beeinträchtigen. Wenn Teppich Ihre einzige Wahl ist, wählen Sie eine dickere, festere Matte mit einer soliden Basis anstelle einer dünnen, die sich unter Ihrem Schlag bewegt oder biegt.
Teppich vs. Putting-Matte: Was am wichtigsten ist
Auf bloßem Teppich zu üben, ist eine schlechte Idee. Der Ball rollt möglicherweise nicht gleichmäßig, da der Teppichflor seine Richtung und Geschwindigkeit beeinflussen kann. Das macht es schwierig, Ihre Startlinie oder Geschwindigkeit genau zu beurteilen.
Eine gute Putting-Matte sorgt für ein gleichmäßiges Rollen und Feedback zu Richtung und Geschwindigkeit. Matten mit integrierten Ausrichtungslinien oder -gittern erleichtern das Ausrichten und die Überprüfung Ihres Putterpfades ohne zusätzliche Ausrüstung.
Drei-Meter-Matten fühlen sich für den Heimgebrauch ideal an. Sie sind lang genug, um an nützlichen Distanzen zu arbeiten, passen aber dennoch in die meisten Räume. Kürzere Matten beschränken Sie auf die Tap-in-Reichweite, was bei der Geschwindigkeitskontrolle nicht viel hilft.
Machen Sie sich keine Sorgen, wenn die Geschwindigkeit der Matte von den echten Grüns abweicht. Sie kann Ihnen dennoch helfen, an Ihrer Mechanik und Startlinienkontrolle zu arbeiten. Kalibrieren Sie Ihre Geschwindigkeit auf dem Übungsgrün vor jeder Runde neu.
Wesentliche Ausrüstung und optionale Hilfsmittel
Sie benötigen nur drei Dinge für ein solides Putting-Training zu Hause: eine Matte, Ihren Putter und ein paar Bälle. Alles andere ist hilfreich, aber nicht unbedingt notwendig.
Unverzichtbar:
- Putting-Matte, idealerweise 3 Meter lang mit Ausrichtungslinien
- Drei bis fünf Golfbälle
- Ein Ziel oder Loch
Nützliche Extras:
- Putting-Spiegel zur Überprüfung der Einrichtung und Augenposition
- Ausrichtungshilfen oder Schnur für Feedback zum Schlagweg
- Gate-Drill-Werkzeuge für das Üben des mittigen Ballkontakts
- Ihr Telefon zum Filmen Ihres Schlags
Ein Putting-Spiegel wird unter den Ball gelegt und zeigt an, wo sich Ihre Augen, Schultern und die Putterfläche beim Ansprechen befinden. Er kann eine der nützlichsten Hilfen für das Putting zu Hause sein, da Einrichtungsfehler die Startlinie beeinflussen können, noch bevor der Schlag beginnt.
Ausrichtungshilfen wie eine Schnur oder ein Laserpointer helfen Ihnen, Ihr Zielen zu überprüfen. Schlechtes Zielen ist ein häufiger Grund, warum Golfer ihre beabsichtigte Startlinie verfehlen. Eine über Ihre Linie gespannte Schnur gibt Ihnen sofortiges Feedback.
Überladen Sie Ihre Station nicht mit zu vielen Gadgets. Beginnen Sie einfach. Fügen Sie Werkzeuge nur hinzu, wenn Sie ein spezifisches Problem mit Ihrem Schlag oder Setup feststellen.
Grundlagen für eine konstante Startlinie
Den Ball auf der beabsichtigten Linie zu rollen, beginnt mit einem konsistenten Setup und einem Bewusstsein dafür, wohin die Putterfläche im Treffmoment zeigt. Ihre Ausrichtung, Augenposition und die Fähigkeit, Fehlschläge zu erkennen, sind alle wichtig. Andernfalls raten Sie einfach.
Ausrichtung und Augenposition verstehen
Die Augenposition beeinflusst, wie Sie die Ziellinie wahrnehmen. Viele Golfer sehen die Linie am konstantesten, wenn ihre Augen über oder leicht innerhalb der Linie sind.
Eine Augenposition, die zu weit innen oder außen an der Ziellinie liegt, kann die Wahrnehmung Ihres Ziels verzerren. Für eine schnelle Überprüfung: Sprechen Sie den Ball normal an und lassen Sie dann einen zweiten Ball unter Ihrem führenden Auge fallen. Er sollte auf oder leicht innerhalb der Ziellinie landen, abhängig von Ihrem Setup.
Konzentrieren Sie sich auf Ihre Putterausrichtung, bevor Sie an den Schlag denken. Die Schlagfläche muss rechtwinklig zu Ihrer Ziellinie sein, nicht zu Ihrem Körper. Wenn Ihr Körper und Ihr Putter beide nach links ausgerichtet sind, kann der Ball vor dem Schlag von der Linie abweichen.
Ausrichtungsspiegel und Putting-Gates verwenden
Ein Putting-Spiegel gibt Ihnen sofortiges Feedback zum Schlagflächenwinkel und zur Augenposition. Suchen Sie nach einem, der Linien für Ihre Augen, Schultern und Putterfläche gleichzeitig anzeigt.
Stellen Sie den Spiegel senkrecht zu Ihrer Ziellinie auf und legen Sie den Ball auf die markierte Stelle. Stellen Sie sicher, dass Ihre Augen über der Linie in der Reflexion sind und Ihre Putterfläche mit der vertikalen Linie beim Ansprechen übereinstimmt.
Der Gate-Drill trainiert die Schlagflächenkontrolle mit zwei Ausrichtungsstäben oder Tees, die etwas breiter als Ihr Putterkopf platziert werden. Positionieren Sie das Gate etwa 30 cm hinter dem Ball bei einem geraden 1 Meter Putt.
Rollen Sie den Ball durch das Gate. Wenn Sie verfehlen, werden Sie schnell sehen, ob der Ball nach rechts oder links begonnen hat. Beginnen Sie mit einem breiteren Gate und verkleinern Sie es, wenn Ihre Genauigkeit sich verbessert.
Pushes und Pulls diagnostizieren
Für einen Rechtshänder beginnt ein Push nach rechts, weil die Putterfläche im Treffmoment offen zur beabsichtigten Startlinie ist. Überprüfen Sie Ihr Zielen, den Schlagflächenwinkel, den Kontaktpunkt und den Schlagpfad, anstatt anzunehmen, dass es nur eine Ursache gibt.
Ein Pull beginnt links, weil die Schlagfläche im Treffmoment geschlossen zur beabsichtigten Linie ist. Verwenden Sie ein Gate oder Video-Feedback, um festzustellen, ob das Problem von der Ausrichtung, der Schlagflächenrotation oder einem Schlagpfad herrührt, der die Linie kreuzt.
Filmen Sie Ihren Schlag von hinten, um Ihre Startlinie zu beurteilen. Legen Sie einen Ausrichtungsstab oder ein Lineal entlang der Matte in Richtung Ihres Ziels. Rollen Sie fünf Bälle und notieren Sie, wie viele auf dieser Linie beginnen, unabhängig davon, ob sie im Loch landen.
Konzentrieren Sie sich auf den ersten Fuß des Rollens. Wenn die meisten Bälle auf Linie beginnen, aber das Ziel verfehlen, ist Ihre Startlinie möglicherweise in Ordnung. Möglicherweise müssen Sie stattdessen an der Geschwindigkeit oder dem Grünlesen arbeiten.
Beherrschung von Tempo und Distanzkontrolle in Innenräumen
Die Geschwindigkeitskontrolle kann auf einer Matte schwieriger zu meistern sein, aber Sie können dennoch Tempo, konstanten Kontakt und ein Bewusstsein für die Schlaglänge entwickeln, die sich auf echte Grüns übertragen lassen.
Geschwindigkeitsgefühl auf einer Matte entwickeln
Putting-Matten rollen oft mit einer anderen Geschwindigkeit als echte Grüns, und erhöhte Rückführungsrampen können das Distanz-Feedback beeinflussen. Anstatt zu versuchen, die Platzbedingungen zu erreichen, konzentrieren Sie sich auf Schlagmechanismen, die eine konstante Ballgeschwindigkeit erzeugen.
Verwenden Sie eine Metronom-App, um einen konstanten Rhythmus zu etablieren, wobei der Rückschwung etwa doppelt so lang ist wie der Vorwärtsschlag. Schlagen Sie 20 Putts auf dasselbe Ziel, während Sie diesen Rhythmus beibehalten. Versuchen Sie, für die gleiche Distanz dieselbe Schlaglänge zu verwenden. Dies baut eine wiederholbare Bewegung auf, die nicht an die Geschwindigkeit der Matte gebunden ist.
Als Nächstes versuchen Sie ein Drei-Stufen-System: einen kurzen Schlag von etwa 30 Zentimetern, einen mittleren Schlag von etwa 45 Zentimetern und einen langen Schlag von etwa 60 Zentimetern. Markieren Sie die Positionen mit Klebeband oder Stäben. Schlagen Sie fünf Putts mit jeder Schlaglänge, während Sie dasselbe Tempo beibehalten, und beobachten Sie dann, wie weit jede Gruppe rollt.
Diese Übung trennt die Distanzkontrolle vom Raten der Grüngeschwindigkeit. Auf echten Grüns können Sie Ihre Schlaglänge anpassen, während Sie Ihr Tempo und Ihren Kontakt konstant halten.
Übungen für langes Putten und Distanzgefühl
Langes Putten zu Hause erfordert etwas Kreativität, da viele Matten nicht länger als drei Meter sind. Probieren Sie einen Tempo-Leiter-Drill, indem Sie Ziele bei einem, zwei und drei Metern oder bei den von Ihrer Matte zugelassenen Entfernungen festlegen. Schlagen Sie drei Putts auf jedes Ziel, wobei Sie für die längeren Entfernungen einen längeren Schlag verwenden, während Sie Ihren Rhythmus stabil halten.
Konzentrieren Sie sich nicht nur auf die exakte Enddistanz. Verfolgen Sie, wie eng die Bälle gruppiert sind. Wenn Ihre Drei-Meter-Putts innerhalb von 30 Zentimetern voneinander landen, verbessert sich Ihre Geschwindigkeitskonstanz. Wenn die Streuung größer ist, konzentrieren Sie sich auf einen sanften Kontakt und ein gleichmäßiges Tempo.
Für eine schwierigere Herausforderung versuchen Sie einen „Augen-zu“-Kontakt-Drill. Schließen Sie die Augen und schlagen Sie fünf Putts, während Sie auf das Geräusch des Aufpralls achten. Ein mittiger Kontakt erzeugt einen gleichmäßigeren Klang und Roll, während Fehlschläge anders klingen und sich anders anfühlen können.
Anpassung des Schlags an Grüngeschwindigkeitsvariationen
Versuchen Sie nicht, die Grüngeschwindigkeit auf Ihrer Matte anzupassen. Trainieren Sie stattdessen die Verbindung zwischen Schlaglänge und Tempo. Vor jeder Runde schlagen Sie eine Tempo-Leiter bei drei, sechs und neun Metern auf dem Übungsgrün mit dem Rhythmus, den Sie zu Hause entwickelt haben. Passen Sie Ihre Schlaglänge an die Oberfläche an.
Sie können Neigungen in Innenräumen nicht vollständig üben, aber Sie können Vertrauen in Ihre Linie und Geschwindigkeit aufbauen. Bei brechenden Putts wählen Sie Ihre Linie und halten Sie daran fest. Eine Verzögerung kann dazu führen, dass der Ball zu früh an Geschwindigkeit verliert und mehr Biegung nimmt als beabsichtigt, also üben Sie, ein gleichmäßiges Tempo auf einer flachen Matte beizubehalten.
Bewährte Indoor-Putting-Übungen, die funktionieren
Konsistenz auf einer Putting-Matte entsteht durch das Wiederholen von Übungen, die sich darauf konzentrieren, wo der Ball beginnt und wie weit er rollt. Diese drei Übungen zielen auf die Startlinie, die Geschwindigkeitskontrolle und die Fähigkeit ab, beide Fähigkeiten unter Druck zu kombinieren.
Gate-Übung für Startlinien-Genauigkeit
Die Gate-Übung ist eine klassische Übung, um die Putterfläche square zu halten. Platzieren Sie zwei Tees, Münzen oder Ausrichtungshilfen etwas breiter als Ihren Putterkopf, 30 bis 45 cm vor dem Ball.
Rollen Sie Putts durch das Gate, ohne eine Seite zu berühren. Beginnen Sie mit einer breiteren Öffnung und verengen Sie sie, wenn Ihre Genauigkeit sich verbessert. Sie werden sofort merken, wenn der Schlagflächenwinkel den Ball dazu bringt, das Gate zu verfehlen.
Verfolgen Sie erfolgreiche Serien. Streben Sie fünf in Folge an, dann zehn. Wenn Ihre Matte integrierte Führungen hat, verwenden Sie diese, um Ihre Startlinie zu überprüfen.
Diese Übung stärkt die Schlagflächenkontrolle und die Stabilität des Schwungpfads. Verbringen Sie fünf konzentrierte Minuten damit, bevor Sie zu Geschwindigkeitsübungen übergehen.
Leiter- und Uhrenübungen für das Tempo
Die Leiter-Übung erfordert, dass Sie mehrere Distanzen nacheinander treffen. Platzieren Sie ein Ziel wie ein Handtuch, eine Münze oder eine Mattenmarkierung an Ihrem Startpunkt. Rollen Sie den ersten Putt darauf zu und versuchen Sie dann, jeden folgenden Putt etwas weiter zu schicken.
Fahren Sie fort, Distanz hinzuzufügen, bis ein Ball vor dem vorherigen landet oder zu weit geht. Ihre Punktzahl ist die Anzahl der erfolgreichen Sprossen, die vor dem Ende der Sequenz abgeschlossen wurden. Dies hilft Ihnen, die kleinen Anpassungen zu lernen, die für verschiedene Distanzen erforderlich sind.
Für die Uhren-Übung platzieren Sie Bälle an den 3-, 6-, 9- und 12-Uhr-Positionen um ein Loch oder Ziel, alle in derselben Entfernung. Schlagen Sie einen Putt von jeder Position und notieren Sie, wie viele innerhalb Ihrer gewählten Zone landen.
Beide Übungen bauen die Geschwindigkeitskontrolle auf, ohne eine große Matte zu benötigen. Sie stärken auch das Vertrauen in die Distanzeinschätzung, was zu Hause schwieriger zu trainieren ist als die Startlinienkontrolle. Wechseln Sie zwischen der Leiter- und der Uhren-Übung, um Abwechslung in Ihre Sessions zu bringen.
Startlinien- und Ausrichtungsherausforderungen
Sobald sich Ihre Mechanik und Distanzkontrolle verbessern, kombinieren Sie diese mit Ausrichtungsherausforderungen, die sich mehr wie echte Putts anfühlen. Richten Sie einen geraden Putt auf ein Ziel aus und fügen Sie ein Gate an der 30-cm-Marke hinzu, um Ihre Startlinie zu überprüfen.
Sie können das Ziel auch außermittig auf der Matte platzieren und auf einen bestimmten Eintrittspunkt zielen. Verwenden Sie ein Lineal, einen Ausrichtungsstab oder die Linien auf Ihrer Matte, um Ihre Ausrichtung vor jedem Schlag zu überprüfen.
Filmen Sie Ihren Schlag von hinten, um Ihr Zielen mit der tatsächlichen Startrichtung des Balls zu vergleichen. Die Kombination eines Gates mit Video-Feedback eliminiert das Raten und hilft Ihnen, zuverlässigere Ausrichtungsfähigkeiten aufzubauen.
Einen produktiven Putting-Übungsplan für zu Hause erstellen
Ein guter Putting-Übungsplan kombiniert strukturierte Wiederholung, messbaren Fortschritt und genügend Abwechslung, um ansprechend zu bleiben. Betrachten Sie Ihren Indoor-Putting-Bereich als einen fokussierten Trainingsraum und nicht als einen Ort, an dem Sie unkonzentriert Bälle rollen.
Ihre Übungsroutine strukturieren
Teilen Sie Ihre Putting-Sessions in fokussierte Blöcke von etwa 15 bis 20 Minuten ein. Dies ist effektiver als langes, unkonzentriertes Üben. Jede Session sollte einen klaren Zweck haben, wie z.B. Geschwindigkeitskontrolle, Startliniengenauigkeit oder Kurzputt-Vertrauen.
Für eine Startlinien-Session verbringen Sie fünf Minuten damit, Ihre Ausrichtung anhand der Linien auf Ihrer Matte zu überprüfen. Schließen Sie dies mit zehn Minuten Putten auf ein Ziel ab, wobei Sie sich auf die anfängliche Richtung des Balls konzentrieren. Beenden Sie mit fünf Minuten Putts aus verschiedenen Entfernungen auf dasselbe Ziel.
Für die Geschwindigkeitskontrolle erstellen Sie drei Zielzonen in unterschiedlichen Entfernungen. Schlagen Sie fünf Bälle auf jede Zone und wechseln Sie von einer zur nächsten. Das Ändern der Entfernung erfordert, dass Ihr Gehirn die Geschwindigkeit neu kalibriert, und ist nützlicher als wiederholtes Schlagen von einer Position.
Wechseln Sie zwischen Startlinien- und Geschwindigkeitskontroll-Sessions, um beide Fähigkeiten zu entwickeln, ohne das Training repetitiv zu gestalten. Eine Metronom-App kann Ihnen auch helfen, ein gleichmäßiges Timing beizubehalten. Stellen Sie sie auf Ihren natürlichen Schlagrhythmus ein und verwenden Sie sie gelegentlich, um Ihr Tempo zu überprüfen.
Fortschritt verfolgen und Abwechslung hinzufügen
Führen Sie ein einfaches Protokoll Ihrer Indoor-Sessions. Notieren Sie Datum, die geübte Fähigkeit und ein messbares Ergebnis, wie „7 von 10 aus zwei Metern getroffen“ oder „8 von 10 innerhalb von 15 cm vom Ziel gelandet“.
Im Laufe der Zeit kann das Protokoll Muster aufdecken, die während einzelner Sessions schwer zu erkennen sind. Sie könnten feststellen, dass Ihre Geschwindigkeitskontrolle jenseits von 2,5 Metern weniger konsistent wird oder dass bestimmte Ausgangspositionen zu mehr Fehlschlägen führen.
Fügen Sie spielähnliche Übungen hinzu, um Ihr Training spannend zu halten. Probieren Sie „Around the Clock“ aus, indem Sie Bälle in verschiedenen Winkeln um Ihr Ziel platzieren. Sie können sich auch selbst herausfordern, fünf Putts hintereinander aus 1,5 Metern zu machen, bevor Sie auf 2,1 Meter zurückgehen.
Feedback und digitale Tools nutzen
Sofortiges Feedback verwandelt Übung in Fortschritt. Verwenden Sie Ausrichtungsstäbe oder eine Kreidelinie auf Ihrer Matte, um zu überprüfen, ob Ihre Putterfläche beim Ansprechen und im Treffmoment square bleibt.
Filmen Sie Ihren Schlag von hinten mit Ihrem Telefon. Überprüfen Sie die Clips nach jeder Session und suchen Sie nach Inkonsistenzen in Ihrem Setup, Takeaway oder Follow-Through. Die Kamera kann Bewegungen aufdecken, die Sie während des Schlags möglicherweise nicht spüren.
Wenn Sie eine smarte Putting-Matte mit Tracking haben, überprüfen Sie die Daten. Überprüfen Sie Ihre Startliniengenauigkeit bei verschiedenen Entfernungen und vergleichen Sie Ihre Geschwindigkeitskonstanz. Diese Messungen können klare Ziele für Ihre nächste Session liefern.
Übertragung der Heimfähigkeiten auf echte Grüns
Das Training zu Hause schafft eine Grundlage für die Startlinienkontrolle und einen stabilen Schlag. Diese Fähigkeiten werden wertvoll, wenn Sie sie auf echte Grüns übertragen. Die Herausforderung besteht darin zu verstehen, welche Grundlagen direkt übertragbar sind und welche Elemente an Neigungen und wechselnde Geschwindigkeiten angepasst werden müssen.
Die Lücke zwischen Matte und Platz überbrücken
Putting-Matten und echte Grüns geben unterschiedliches Feedback. Zu Hause arbeiten Sie hauptsächlich an der Mechanik und daran, den Ball auf die Linie zu bringen. Auf dem Platz erfordern Graswuchs, Neigung und wechselnde Grüngeschwindigkeiten, dass Sie jeden Putt lesen und anpassen.
Nutzen Sie Ihre ersten Putts auf dem Übungsgrün zur Kalibrierung. Beobachten Sie, wie viel schneller oder langsamer die Oberfläche im Vergleich zu Ihrer Matte rollt und wie stark die Neigung den Ball beeinflusst.
Ihre Startlinienkontrolle aus dem Indoor-Training wird zu einer wichtigen Grundlage. Auf dem Platz wählen Sie ein geeignetes Ziel und passen Ihr Tempo an, anstatt größere Änderungen an Ihrem Schlag vorzunehmen.
Neigungen und unterschiedliche Grüngeschwindigkeiten simulieren
Flache Matten können reale Neigungen nicht vollständig reproduzieren, aber Sie können dennoch an Geschwindigkeitsanpassungen arbeiten. Wenn Ihre Matte glatt und stabil bleiben kann, legen Sie eine dünne, sichere Unterlage unter ein Ende, um eine leichte Neigung zu erzeugen. Üben Sie, Ihren Schlag für Bergauf- und Bergab-Putts anzupassen, während Sie die Schlagfläche square halten.
Die Anpassung an die Grüngeschwindigkeit erfordert Gefühl. Üben Sie, dasselbe Ziel mit unterschiedlichen Schlaglängen zu treffen. Versuchen Sie einen kürzeren, festeren Schlag, gefolgt von einem längeren, weicheren Schlag, während Sie beobachten, wie sich jeder auf das Rollen auswirkt.
Wenn Sie auf dem Platz sind, verbringen Sie Zeit auf dem Übungsgrün und schlagen Sie Putts auf verschiedene Entfernungen. Dies hilft, die Schlaglänge mit dem tatsächlichen Rollen des Balls zu verbinden. Ihre Heimroutine bildet die Grundlage, während die Arbeit auf dem Übungsgrün Ihr Gefühl für die Bedingungen des Tages feinabstimmt.
Übertragbares Selbstvertrauen und Routine entwickeln
Ihre Heimroutine kann ein Anker sein, wenn ein Putt wichtig erscheint. Bauen Sie denselben Pre-Shot-Prozess auf Ihrer Matte auf, den Sie auch auf dem Platz anwenden möchten, einschließlich Ihrer Ausrichtung, Atmung und Ihres Tempos.
Beginnen Sie jede Heimsitzung mit Ihrer Ausrichtungsroutine. Stellen Sie den Putter hinter den Ball, überprüfen Sie die Schlagflächenausrichtung, machen Sie einen Probeschlag und verpflichten Sie sich dem Ziel. Wiederholen Sie den Prozess, bis er vertraut wird.
Selbstvertrauen wächst, wenn Ihre Mechanik auf verschiedenen Oberflächen stabil bleibt. Der Ball mag auf Gras anders rollen, aber stabile Handgelenke, mittiger Kontakt und kontrollierte Schlagflächenausrichtung bilden eine zuverlässige Grundlage.
Häufig gestellte Fragen
Diese prägnanten Antworten behandeln häufige Fragen zur Einrichtung des Home-Putting-Bereichs, zu Startlinienübungen, zur Geschwindigkeitskontrolle, zu Zielen, zu Übungsdistanzen und zu häufigen Fehlern.
Wie richte ich eine Home-Putting-Matte ein, damit ich meiner Startlinie tatsächlich vertrauen kann?
Legen Sie die Matte auf einen flachen, festen Boden und glätten Sie alle Wellen oder hochstehenden Kanten. Rollen Sie einen Ball in beide Richtungen, um die Neigung zu überprüfen. Fügen Sie eine gerade Klebebandlinie oder einen Ausrichtungsstab parallel zur Ziellinie hinzu, damit Sie Ihre Ausrichtung und die anfängliche Richtung des Balls überprüfen können.
Welche sind die besten einfachen Übungen auf einer Matte, um die Startlinie zu verbessern, ohne meinen Schlag zu sehr zu überdenken?
Verwenden Sie eine „Gate-Übung“ mit zwei Tees oder Münzen, die etwas breiter als der Ball platziert werden, und versuchen Sie dann, jeden Putt durch die Öffnung zu rollen. Sie können auch eine Münze auf Ihre beabsichtigte Linie legen und üben, den Ball direkt darüber zu rollen. Zählen Sie, wie viele erfolgreiche Versuche Sie von zehn machen.
Wie kann ich die Geschwindigkeitskontrolle auf einer Puttingmatte üben, wenn die Rollgeschwindigkeit anders ist als auf echten Grüns?
Konzentrieren Sie sich auf einen wiederholbaren Rhythmus, einen zentrierten Ballkontakt und wie eng Ihre Putts beieinander liegen. Platzieren Sie Markierungen in verschiedenen Abständen und rollen Sie einen Ball zu jedem Ziel. Wenn Sie auf dem Platz sind, kalibrieren Sie Ihre Schlaglänge auf dem Übungsgrün neu, bevor Sie spielen.
Was sollte ich zu Hause als realistische Ziele verwenden, um sowohl die Startlinie als auch die Entfernungskontrolle zu trainieren?
Verwenden Sie einen Cup in Standardgröße oder ein kleines Ziel für kurze Putts. Für die Entfernungskontrolle erstellen Sie eine Stoppzone mit Klebeband, einem Handtuch oder zwei Markierungen. Münzen sind auch nützlich, um zu überprüfen, ob der Ball auf Ihrer beabsichtigten Linie startet.
Aus wie vielen Metern Entfernung sollte ich auf einer Heimmatte üben, um eine echte Verbesserung auf dem Platz zu sehen?
Konzentrieren Sie sich hauptsächlich auf Putts von einem bis zwei Metern, wo die Kontrolle der Startlinie und das Selbstvertrauen am wichtigsten sind. Fügen Sie längere Putts hinzu, wenn der Platz es zulässt, aber beurteilen Sie sie nach Tempo und Endentfernung, anstatt danach, ob jeder Ball das Ziel erreicht.
Welche häufigen Fehler auf der Puttingmatte verursachen Schläge nach außen, innen oder eine inkonsistente Geschwindigkeit, und wie behebe ich sie?
Häufige Probleme sind das Üben auf einer unebenen Oberfläche, das Zielen ohne Referenzlinie, ein wechselndes Tempo und das Schlagen des Balls außerhalb der Schlägerblattmitte. Überprüfen Sie regelmäßig Ihre Matte, Ausrichtung, Augenposition und Ihren Rhythmus. Geben Sie jeder Übung ein klares Ziel und ein messbares Ergebnis.
Teilen:
Wie viel Platz benötigt man für ein Golf-Übungsnetz für Innenräume?
Wie man Driver- und Eisenschläge mit unterschiedlichen Teehöhen auf einer Golf-Übungsmatte trainiert