

Check out our latest collection of compact vacuum sealer for food!
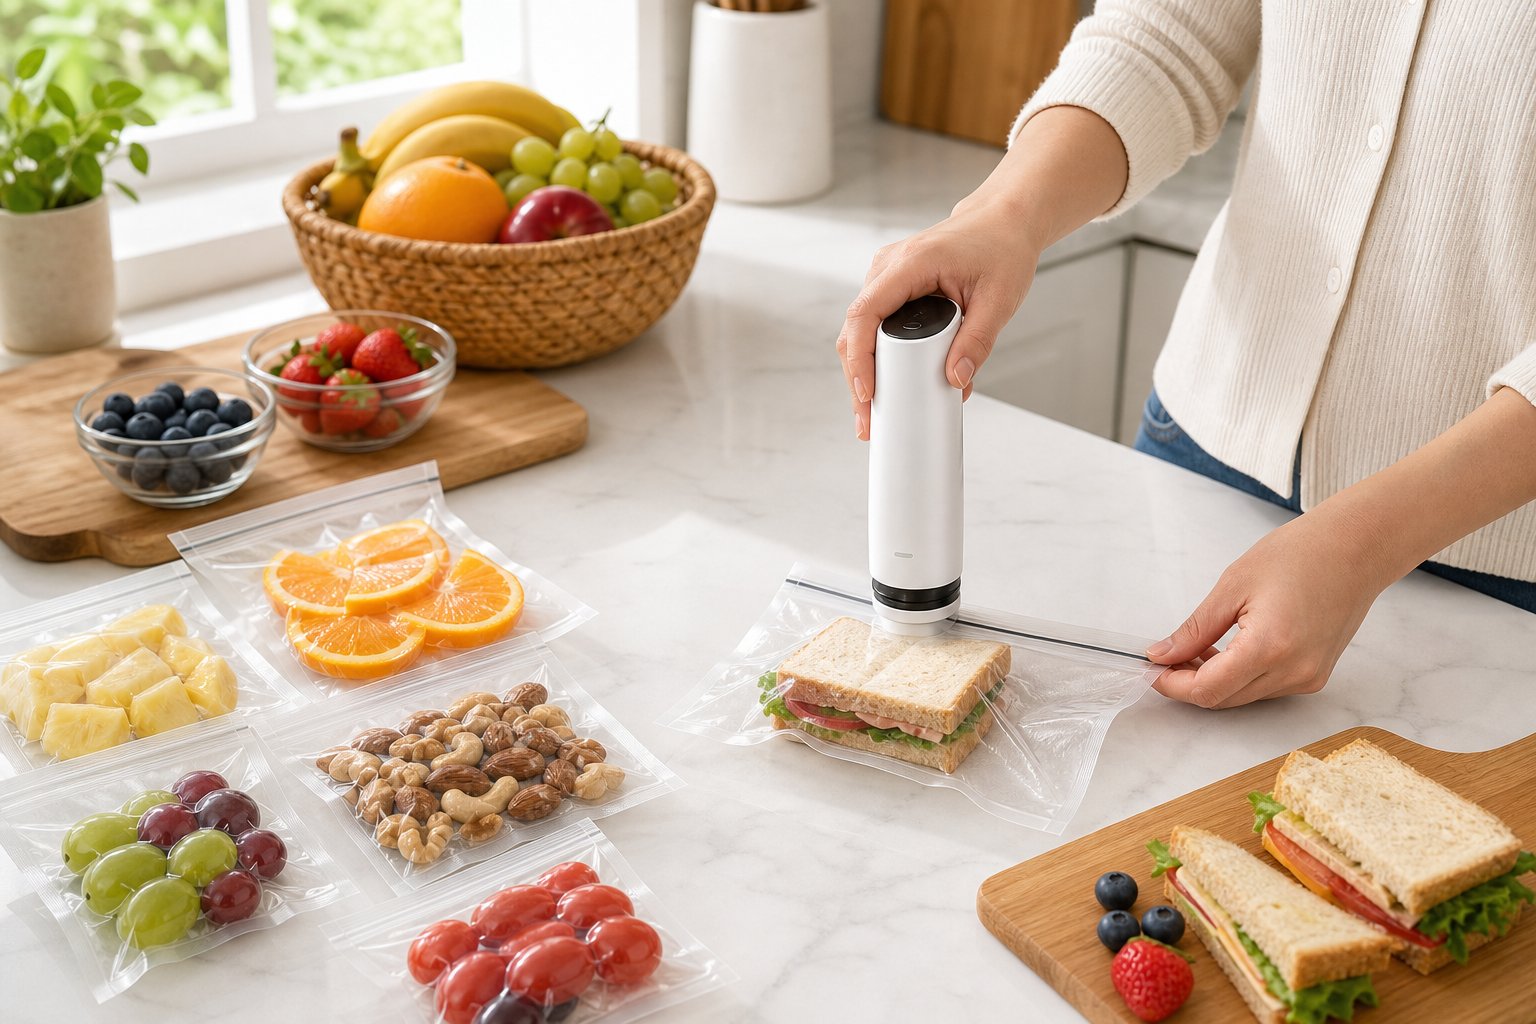
Small leftovers, open snack bags, and half-used ingredients can go stale fast. A cordless vacuum sealer helps solve that problem by removing air from storage bags, so everyday portions stay fresher with less waste and less kitchen clutter.
Because it is portable and easy to grab, it works well for quick jobs like sealing nuts, cheese, cut vegetables, pasta, or lunch portions without clearing counter space or searching for an outlet.
In this guide, you will learn how to choose the right bags, seal snacks and leftovers properly, avoid common mistakes, and store small daily portions with better results.
Key Takeaways
- Cordless vacuum sealers make it easy to seal small batches for daily food storage and meal prep, no cords, no hassle.
- Vacuum sealing gets rid of air, which keeps snacks and leftovers fresh much longer than just tossing them in a bag or container.
- For the best results, pick bags that fit your food, let items cool before sealing, and store sealed portions the right way.
Understanding Cordless Vacuum Sealers
Cordless vacuum sealers put food preservation right in your hands, wherever you need it. These little gadgets run on rechargeable batteries (usually lithium-ion), powering a small motor that sucks the air out of special bags before a heat strip seals them tight.
How Cordless Models Work
Using a cordless vacuum sealer is pretty straightforward. The motor pulls air out of the bag through a valve or a narrow channel. When the air’s gone, a heating element melts the bag shut.
Most cordless models work with two main bag styles. Valve bags have a little port where you attach the sealer’s nozzle to suck out air. Edge-seal bags work like classic vacuum sealer bags: you slide the open end into the machine, and it does the rest.
Battery life usually covers 30 to 100 seals on a single charge, depending on the model. That’s plenty for a week’s worth of meal prep or sealing up leftovers after a few dinners. USB charging is the norm now, so you can recharge almost anywhere.
Types: Handheld Versus Countertop Units
Handheld sealers are the cordless go-to for most folks. They’re light, small enough to live in a drawer, and perfect for quick jobs, like sealing up half an onion, a snack bag, or resealing a bag of chips.
Portable countertop vacuum sealers give you more power than handhelds but still don’t need a cord. They sit on the counter but can move wherever you need them, combining stronger suction with cordless freedom.
The main difference? Suction strength and capacity. Handhelds are great for everyday portions and lighter tasks. Portable countertop units can handle bigger bags and pull a stronger vacuum, but they’re a bit bulkier.
Common Use Cases for Snacks and Leftovers
Cordless vacuum sealers really earn their keep in daily kitchen life. Sealing single servings of nuts, trail mix, or crackers keeps snacks fresh in lunchboxes or the pantry. Open bags of chips or cookies don’t go stale when you reseal them properly.
Leftovers are a breeze, you can seal up that last chicken breast, a chunk of cheese, or some extra pasta sauce right at the fridge, without dragging out a big machine. The portability means you seal food wherever you’re working, not just on the counter.
Prepping snacks for kids’ lunches or for travel is so much easier. You can batch-seal carrot sticks, apple slices (a little lemon juice helps), or granola for the whole week. These smaller, frequent sealing jobs just make sense with a cordless sealer, instead of breaking out a big countertop model every time.
Essential Benefits of Vacuum Sealing Small Portions
Vacuum sealing small portions totally changes how we store food. You squeeze out the air, lock in freshness, control serving sizes, and cut down on waste. It’s a real boost to your daily routine, your grocery budget, and how long your food actually tastes good.
Keep Food Fresh Longer
Vacuum sealing gets rid of oxygen, which really slows down spoilage. Without air, food keeps its color, texture, and flavor way longer than if you just used regular containers or bags.
In the freezer, vacuum sealed food lasts three to five times longer than stuff in regular bags. A chicken breast that would dry out in six months can last two to three years if you seal it right. The tight seal also stops freezer burn, so you don’t end up with sad, dried-out food.
In the fridge, vacuum sealing helps too. Cheese can last four to eight months instead of just a week or two. Deli meats stay good for up to two weeks, not just a few days. Even dry goods like nuts and coffee beans keep their flavor longer when you keep air out.
Just a quick heads-up: vacuum sealing doesn’t kill bacteria or make food shelf-stable. You still need to refrigerate or freeze sealed foods to keep them safe.
Portion Control and Bulk Storage
Buying in bulk saves money, but only if you actually use everything before it goes bad. Vacuum sealing lets you break up big packages into meal-sized portions you’ll actually use.
If you buy a big pack of ground beef, split it into 450-gram bags for recipes. That way, you only thaw what you need, no more dealing with a giant frozen brick or tossing leftovers. The same goes for snacks: seal up single servings of trail mix or crackers so they stay fresh and you don’t end up eating the whole bag at once.
Some bulk foods we like to portion and seal:
- Meat and fish in recipe-sized bags
- Cheese blocks cut down to smaller pieces
- Nuts and seeds in snack portions
- Dried fruit for lunches
- Coffee beans for the week
This also makes meal prep easier. You can seal up cooked proteins, chopped veggies, or even whole meals in single or family-sized bags. Everything stacks neatly in the freezer and takes up less space than bulky containers. Plus, you can see what you have at a glance.
Reducing Food Waste in Daily Life
The average Canadian household throws away over $1,300 in food each year, mostly because things spoil before we use them. Vacuum sealing helps you actually eat what you buy.
Leftover veggies from dinner? Seal and freeze them, they’ll be ready for soup next month instead of turning into mush in the crisper. Extra bread from a sale? Sealed bread stays soft and avoids freezer burn for months. Even half an onion or bell pepper can get sealed up instead of going bad in the fridge.
Vacuum sealing also protects food from moisture, air, and odors. Opened chips stay crispy. Crackers don’t get stale. Dried goods avoid pantry pests.
If your household runs on different schedules, sealed portions mean everyone can grab meals or snacks without exposing the rest to air. Each bag keeps its quality, so you don’t have to worry about the leftovers going bad just because someone opened the container.
Selecting the Right Bags and Accessories
You’ll get the best results from your cordless vacuum sealer when you use bags that fit both your device and your storage habits. The right bag type, size, and material means you’ll get reliable seals for snacks, leftovers, and meal portions, without wasting plastic or fighting with bags that don’t fit.
Choosing Bag Types: Pre-Cut, Rolls, and Reusable Bags
Pre-cut bags are the fastest for daily use. They come in standard sizes and are ready to go, just grab one and seal up your cheese, crackers, or nuts.
Rolls let you cut bags to the exact size you need. If you have leftovers in weird shapes or want to avoid wasting plastic, cutting your own bags from a roll is the way to go. Plus, rolls usually cost less per square centimetre.
Reusable bags are our pick for things like sandwiches or regular snack prep. They’re thicker, washable, and you can use them at least ten times if you buy good ones. Just check that they’re food-safe and BPA-free.
Matching Bags to Your Sealer
Most cordless vacuum sealers need textured or embossed bags so the air can get sucked out properly. Smooth bags just don’t work with these machines.
Before you buy a big pack of bags, double-check your sealer’s specs. Most cordless models work with bags that are 3-4 mil thick, good enough for the fridge or light freezer use. For sharp-edged foods or bones, bump up to 4-5 mil for extra durability.
Some sealers only work with their own brand of bags. If you’re not sure, try a small pack first. Most universal textured bags fit, but it’s worth checking the width matches your sealer’s opening.
Custom Bag Sizes for Different Needs
We size our bags based on what we’re storing. Small bags (15-20 cm) are great for snacks, cheese, or cookies. Medium bags (20-28 cm) work for family leftovers, veggies, or sandwiches.
Cutting custom sizes from rolls saves freezer space and avoids frustration. Always leave 5-8 cm at the top for a solid seal.
If you prep a lot, pre-measure and cut a bunch of bags ahead of time. It saves hassle when you’re busy.
Step-by-Step Guide to Using Your Cordless Vacuum Sealer
Getting a good seal starts with a charged device and knowing how yours works. Here’s how we do it: charge up, place your bag right, hit the seal button, and sometimes double-seal if you want extra peace of mind.
Setting Up the Device and Ensuring Charge
Before sealing, make sure your cordless vacuum sealer has enough battery. Most models have a little LED that shows green when charged and red when low. We usually charge it fully before the first use, it takes about 2-3 hours.
Set the sealer on a flat surface while it charges. Some models work while plugged in, but honestly, battery power is way more flexible for sealing snacks or leftovers on the fly. Check the battery before a big sealing session so you don’t run out halfway through.
Keep the charging cable handy in the kitchen. If the battery’s low, you won’t get enough suction, and your bags might not seal tight.
Bag Placement and Portioning Tips
Getting the bag set up right makes all the difference. Always leave 5-8 cm of space between the food and the bag’s opening. That way, moisture or crumbs won’t mess up the seal.
For snacks like nuts or crackers, portion them into single servings so you’re not opening and resealing the same bag over and over. For leftovers, flatten them a bit to push out extra air before sealing.
Slide the open end of the bag into the sealing chamber and make sure it’s lying flat, no wrinkles or folds. If you’re sealing small daily portions, use pre-cut bags that fit, instead of wasting big bags on tiny servings.
Operating the Sealer Properly
Once the bag sits in place, we close the lid firmly until it clicks. We press and hold the seal button to kick off the vacuum sealing. The device pulls out the air, and you’ll see the bag shrink around whatever you’ve packed.
Most cordless sealers just need a single button, but a few models split vacuum and seal into two. If yours has a pulse vacuum, we use that for delicate snacks, chips or crackers especially, since full suction can crush them. The seal bar heats up and makes the airtight closure, which usually takes about 6-10 seconds.
Don’t rush to open the lid right after sealing. Wait for the indicator light to show it’s done and for the bar to cool a bit. Opening too soon can pull the seal apart.
Double Seal and Seal Button Use
For liquids, moist leftovers, or foods we want to freeze for a while, we always double seal. After the first seal finishes, we move the bag up just a bit, about half a centimeter, and press the seal button again to add a second line.
Double sealing gives extra protection against leaks and freezer burn. We do this for marinated meats, soups, or any snack with leftover moisture. Hold the seal button down until the indicator light says it’s finished.
If the first seal looks thin or patchy, just add a second one right away. It only takes a few seconds and really helps keep food fresh longer.
Best Practices for Sealing and Storing Snacks and Leftovers
A little prep and the right storage tricks make the difference between food that stays good for weeks and food that spoils fast. Getting the temperature right before sealing, keeping things organized, and using smart freezer habits all help you keep things fresh and avoid waste.
Cool and Prep Food for Sealing
We always let hot or warm food cool to room temperature before sealing. Sealing warm food creates steam, which messes with the seal and can let bacteria grow. Most leftovers need about 30 minutes on the counter to cool off.
For really liquid foods like soup, sauces, or marinades, we like to pre-freeze them for an hour or two before sealing. That stops the liquid from getting sucked into the machine. Tilting the bag up while sealing can also help keep moisture away from the seal.
Portion food into single servings or meal-sized amounts before sealing. That way, you only thaw what you need. For snacks like nuts or chips, split them into portions you’ll actually finish in one go.
Pat down moist foods with a paper towel to get rid of extra moisture. This helps the seal hold and keeps liquid out of the machine.
Label and Date for Easy Organization
Every bag you seal should have what’s inside and the date. We just use a permanent marker or freezer-safe labels that don’t peel off in the cold.
If something needs special reheating, jot that on the label too. It saves time later when you can’t remember what you packed.
We keep a simple inventory on our phone or a notepad on the fridge. Cross things off as you use them so you don’t end up with mystery bags.
Group similar items together. All snacks in one bin, proteins in another, meals in their own spot. This makes it faster to find what you want and helps you use older stuff first.
Freezer Storage and Preventing Freezer Burn
Vacuum sealing cuts down freezer burn by pulling out the air that causes ice crystals. We freeze vacuum-sealed food flat first, then stand the bags up to save space.
Vacuum-sealed meats last two to three years in the freezer, way longer than the six months you get with regular packaging. Cooked leftovers stay good for two to three months, and snacks like nuts can last over a year. Fruits and veggies hold up for one to two years if you seal them right.
Keep your freezer at -18°C or colder. Warmer temps speed up spoilage even if the food is vacuum sealed.
Lay bags flat on a baking sheet while they freeze. Once solid, you can stack or file them however you want. This keeps bags from freezing in weird shapes that waste space.
Check your seals now and then for leaks. If a bag goes loose, reseal it or plan to eat it soon.
Tips for Maximising Versatility in Daily Meal Prep
A cordless vacuum sealer isn’t just for storage. You can use it for sous vide, keeping snacks fresh, and even for quick meal prep, if you keep up with cleaning and maintenance.
Sous Vide Cooking and Marinating
Vacuum sealing changes the game for sous vide at home. The tight seal keeps water out during the slow cook. We like to seal proteins, chicken, salmon, pork chops, with a little seasoning and oil before dropping them in the water bath.
Vacuum sealing also speeds up marinating. What used to take hours now takes maybe 15-30 minutes. The vacuum forces marinade into the meat way faster.
Use the pulse function for liquids or marinades. That keeps liquid from getting sucked into the machine and making a mess. If your sealer has dry and moist modes, always switch to moist for anything saucy.
If the marinade is thin, pre-freeze the meat and marinade together for about an hour before sealing. That keeps things contained and saves your drip tray from overflow.
Managing Small Portions and Snacks for On-the-Go
Portioning out snacks and daily servings stops the grab-bag problem where you overeat or waste half-opened packs. We seal single servings of nuts, dried fruit, granola, and crackers in small bags that fit in lunch boxes or backpacks.
Vacuum-sealed cut veggies, carrots, celery, peppers, stay crisp for 7-10 days in the fridge. We toss in a folded paper towel to soak up extra moisture. Cheese portions stay soft without drying out, and deli meats last twice as long when sealed right after shopping.
Single-serve dips like hummus or guacamole work great when sealed in small portions. Pre-portioning also keeps meal prep on track since each bag is one serving.
Cordless sealers make this easy because you’re not tied to an outlet. Keep a stack of small bags handy for your go-to snacks.
Addressing Common Pitfalls and Cleaning
The drip tray catches liquid, but you have to empty and clean it regularly or it’ll start to smell. Take it out every few sealing sessions, especially after sealing moist foods. Warm soapy water does the trick.
Moisture in the vacuum chamber causes weak seals and sometimes mold. Wipe down the chamber after sealing moist foods, and leave the machine open to dry out. If you see condensation, let it rest before sealing more.
Food bits along the seal line can cause leaks. We always wipe the inside top of the bag before sealing to keep it clean. If a seal fails, it’s usually from crumbs, oil, or moisture right where the heat bar needs to work.
Cordless units can lose suction when the battery drops below 40%. Charge it up before big prep days, and watch for the low battery light. Wipe the seal strip with a damp cloth every month to keep it working well.
Frequently Asked Questions
Cordless vacuum sealers are simple to use once you know which foods, bags, and settings work best for small daily portions.
What foods work best with a cordless vacuum sealer for quick snacks and small portions?
Firm, low-moisture foods work best. Nuts, crackers, pretzels, cheese cubes, deli meats, cut vegetables, dried fruit, granola, and cooked proteins are great options for quick portions and meal prep.
How do you seal softer foods like sandwiches, berries, or baked goods without crushing them?
Use the pulse or gentle setting so you control the suction. For berries or soft baked goods, freeze them first on a tray, then seal once firm.
Do you need special bags or containers, and how do you choose the right size for daily portions?
Yes. Use vacuum sealer bags, rolls, or compatible reusable bags. Small bags work best for snacks, medium bags for sandwiches, and larger bags for leftovers or freezer portions.
What is the best way to vacuum seal leftovers like pasta, curry, or soups without making a mess?
Cool food first and keep the seal area dry. For soups, sauces, or curry, freeze until slightly firm before sealing. For moist foods, use pulse mode and leave extra space at the top of the bag.
How long do sealed snacks and leftovers typically stay fresh in the fridge or freezer?
Dry snacks can stay fresh for weeks longer than opened packaging. Fridge leftovers usually last a few extra days, while freezer portions can last several months when sealed and stored properly.
What are the most common sealing issues like weak suction or leaks, and how do you fix them fast?
Weak suction is often caused by wrinkles, moisture, crumbs, or a low battery. Smooth the bag, wipe the seal area dry, recharge the unit, and add a second seal if needed.
Teilen:
How to Vacuum Seal Lunch Portions for Work, School, and Busy Weekdays
How to Choose the Right Vacuum Sealer Bag Size for Lunches, Snacks, and Leftovers