

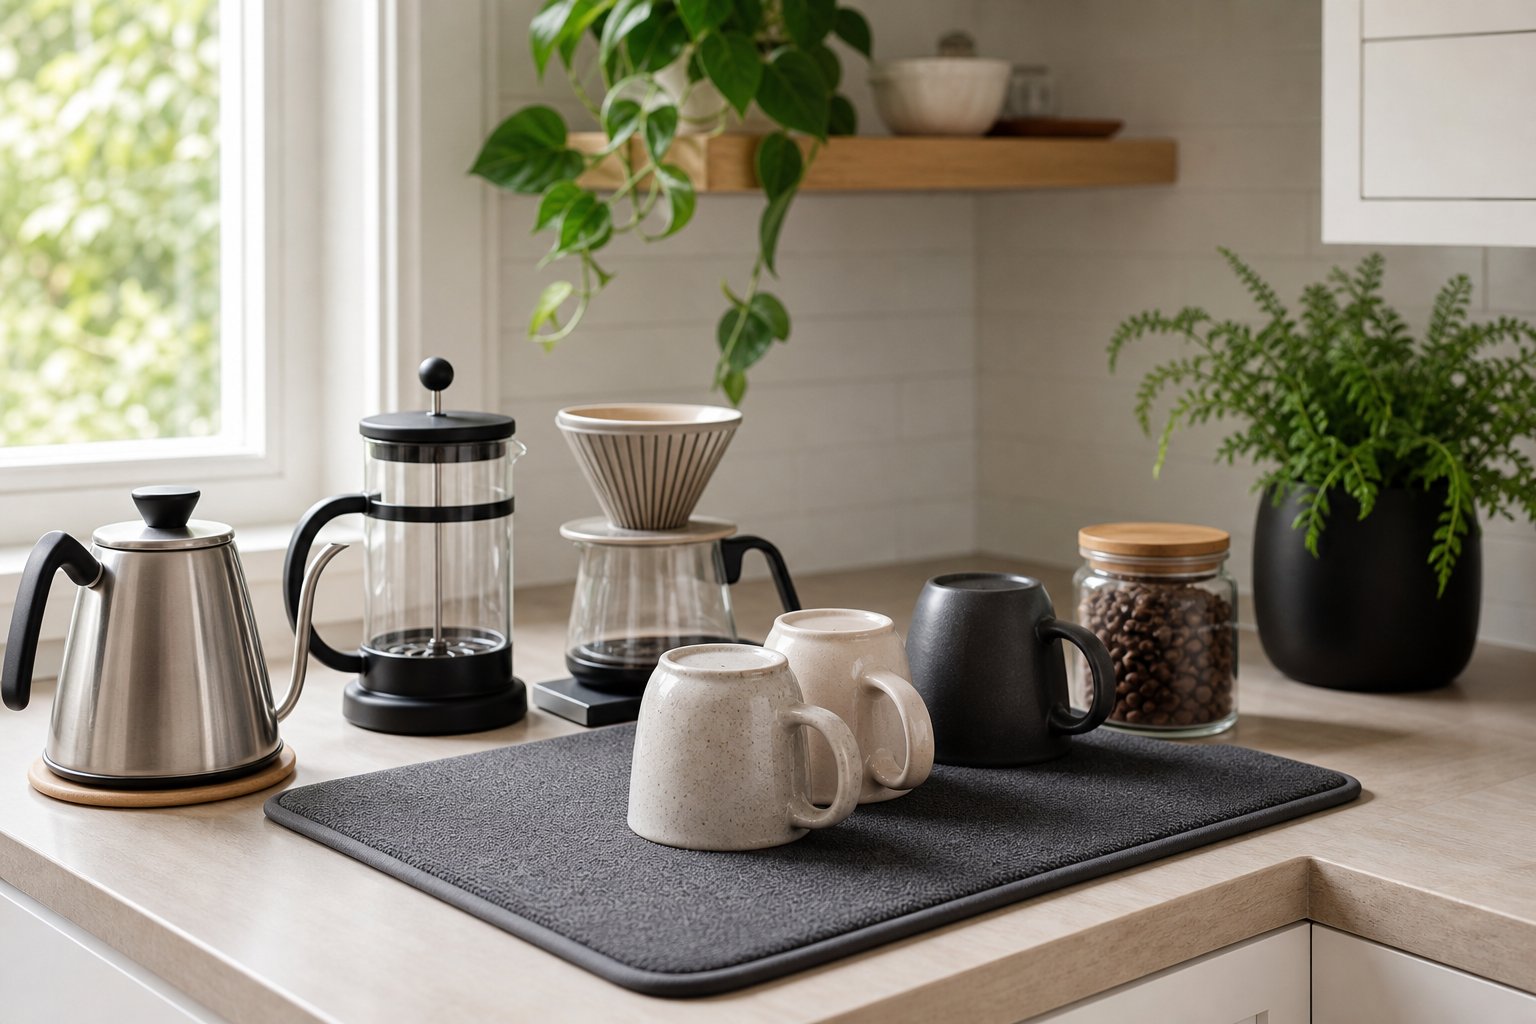
Check out our latest drying mats collection!
A cluttered coffee station can slow down even the simplest morning brew. A stone drying mat gives wet mugs, pitchers, and brewing tools a dedicated place to dry while helping protect the counter from everyday drips and water rings.
With the right placement, storage, and care routine, the mat can become a practical part of a clean, efficient coffee setup. This guide explains how to choose the best location, organize essential equipment, position and maintain the mat, and create a coffee station that fits your space and brewing habits.
Key Takeaways
- Put your stone drying mat next to your espresso machine to create a spot for wet tools and freshly rinsed cups
- Pick a coffee station area with at least 18 inches of counter width and electrical outlets within 3 feet
- Keep things running with a quick 60-second daily reset: wipe the mat, empty drip trays, and put tools back where they belong
Choosing the Perfect Space for Your Coffee Station
Where you put your coffee station shapes how easy your mornings feel and, honestly, how often you’ll use it. I’ve noticed that access to power, counter space, and your daily traffic patterns matter way more than just picking the prettiest spot.
Finding the Right Location in Your Home
Your coffee station should fit naturally into your morning flow. Most folks set up along a kitchen counter near the sink, but dining room corners, pantries, or even a converted bar cabinet can work surprisingly well.
Think about how you move first thing in the morning. If you’re making coffee while prepping breakfast, put your setup close to the fridge and stove. I’ve seen some beautiful coffee bars that, in practice, make you walk across the entire kitchen for milk. Trust me, that gets old fast.
Pay attention to traffic patterns too. Avoid spots where people will bump into you while you’re brewing. A corner or a little nook keeps your coffee station out of the way during those busy mornings.
Natural light is nice, but not critical. If your station gets a ton of direct sun, store beans in opaque containers or a cabinet to keep them fresh.
Coffee Station Layout Options: Countertop, Cabinet, and More
Countertop setups are the go-to for most home coffee bars. You’ll want about 60-90 cm of space for your machine, grinder, and stone drying mat. Trays or runners help define the area and catch spills.
Coffee bar cabinets hide everything when you’re not using it. Perfect if you like a cleaner look or have an open-plan space. An appliance garage keeps your machine handy but tucked away. Just make sure there’s enough ventilation.
Rolling carts come in handy for small spaces. You can move your coffee setup wherever you want and stash it away after. Look for carts with locking wheels and make sure they’re sturdy enough for your espresso machine.
Built-in coffee and wine bar combos make use of corners or empty walls. They take more planning but give you a dedicated beverage station that feels intentional and, honestly, pretty cool.
Power and Water Considerations
Your coffee station needs a grounded outlet you can trust. Espresso machines and grinders shouldn’t share circuits with power-hungry appliances like toasters or microwaves. Otherwise, you risk tripping breakers during that morning rush.
Count your devices. If you’re running a machine, grinder, kettle, and milk frother, you’ll need either several outlets or a high-quality power bar designed for kitchens. Don’t daisy-chain extension cords.
Easy water access is a game changer. Being close to the tap or having a dedicated water line for plumbed machines saves trips back and forth. Some folks keep a big glass dispenser at their coffee bar to cut down on refills.
If your station is far from water, get a machine with a larger reservoir and keep a pitcher nearby for easy refills.
Essential Equipment and Brewing Tools
You need the right gear for a smooth coffee station, from the brewer itself to the grinder that unlocks all that fresh flavor. I’ve noticed that pairing solid equipment with practical accessories makes your daily routine so much easier, especially when you keep everything organized around a stone drying mat that keeps counters dry and tools close.
Coffee Makers and Espresso Machines
The brewing device you use shapes your whole station and workflow. Espresso machines need 18-24 inches of counter depth for portafilter clearance and usually want their own 15-20 amp circuit with a GFCI outlet. Even compact machines need space to breathe and vent heat.
Drip coffee makers are simpler. A standard 12-cup drip maker takes up about 12 inches of width and fits most counters. Keep it near your stone mat so you can set the carafe down after brewing. I recommend putting any brewer where the drip tray or carafe can rest briefly on the mat.
Pour over setups like V60 or Chemex need less space since you’re just storing the dripper itself. French press and AeroPress fans can get away with even less, but you’ll want a spot for filters, stirrers, and the brewer. Single-serve machines fit tight spaces but can make more waste unless you use refillable pods.
If you steam milk a lot, keep your frother close to where you add milk and sugar. The stone mat’s especially handy here as a landing spot for wet steam wands and milk pitchers between drinks.
All About Grinders: Burr, Manual, and More
Fresh grinding makes a bigger difference than just about anything else. Burr grinders give you even grounds for better flavor, while blade grinders, well, don’t. Put your grinder in the prep zone since it’s usually the first thing you reach for.
Electric burr grinders need some counter space (usually 6-8 inches wide) and a handy outlet. Flat burr and conical burr models both work for home use. Conical burrs tend to run quieter and stay cooler. Grind settings matter more than you’d think since espresso needs fine grounds and French press needs coarse.
Manual grinders are quiet and don’t need power, so they’re perfect for small spaces or early mornings when you don’t want to wake anyone up. Grinding 18 grams for espresso by hand takes about a minute. Some people find it relaxing, others, not so much. These stow away in drawers when you’re done.
Keep your grinder clean and put it where spilled grounds are easy to wipe up. The stone mat can sit nearby to catch messes, but try not to grind directly over it because grounds can get stuck in the texture.
Must-Have Accessories for Daily Brewing
A coffee scale takes the guesswork out of brewing. Digital scales that measure to 0.1 grams help you dose beans and track brew ratios. I keep mine next to the grinder since you’ll weigh beans before and after grinding.
Espresso setups need a few extra tools that earn their place. A WDT tool (Weiss Distribution Technique) breaks up clumps in the portafilter for even shots. Tamping mats protect your counter and usually have slots for your tools. Knock boxes let you dump spent pucks without running to the trash every time.
The stone drying mat is your hub for wet tools. Portafilters, milk pitchers, WDT tools, spoons, and scales all need a place to dry between uses. The mat pulls moisture away and keeps your counter safe from water rings and coffee stains.
Other handy accessories include shot timers for consistent pulls, thermometers for steaming milk, and brushes for cleaning. Keep travel mugs close to your “consumption zone” so you can grab and go. Microfibre cloths are a must because coffee stations seem to attract spills, and they spread fast on smooth counters.
Organising Your Coffee Gear Efficiently
Good coffee station organization starts with grouping things by how often you use them and storing everything within easy reach of your brewing zone. The right mix of shelves, drawer inserts, and storage keeps mugs, beans, grinders, and accessories handy without making your counter a mess.
Storage Solutions for Mugs, Beans, and Tools
The best mug storage gives you easy access without hogging counter space. Wall hooks or under-shelf racks keep your favorite cups right where you can see and grab them. If you like things hidden, a coffee bar cabinet with adjustable shelves lets you stack mugs vertically and stash extras out of sight.
Coffee beans and grounds last longer in airtight containers near your brewing gear. Glass or ceramic jars with rubber seals keep beans fresh and show you when you’re running low. Label each one if you rotate through different roasts or decaf.
Small tools like spoons, tampers, and stirrers do well in drawer organizers or countertop caddies. A bamboo utensil holder or magnetic strip on the side of your cabinet keeps essentials together. The stone drying mat becomes the perfect landing spot for freshly washed pour-over cones, French press parts, and milk frothers, so they stay organized while they dry.
Utilising Floating Shelves and Cabinets
Floating shelves turn empty wall space into useful storage without bulky cabinets. I suggest installing two or three shelves at different heights above your coffee area to create layers of storage. The top shelf works for decorative stuff or backups, while the lower shelves hold daily gear like your grinder, sugar jar, and mugs.
Coffee station cabinets hide clutter and keep equipment dust-free. Upper cabinets work for light things like filters and tea, while lower cabinets or a coffee bar cabinet with pull-out shelves can hold your coffee maker when you’re not using it. This is a lifesaver in smaller kitchens where counter space is tight but you want a full coffee bar at hand.
Drawer, Tray, and Basket Ideas
Deep drawers near your coffee station turn into efficient storage with adjustable dividers. I use these for organizing coffee pods, backup filters, and different sweeteners. A drawer organizer with compartments keeps small stuff from sliding around and makes it easy to see what you’ve got.
Counter trays and lazy Susans keep related items together and make cleanup easier. A simple tray corrals your daily gear (kettle, grinder, sugar bowl), so you can wipe underneath in seconds. Rotating trays work well for syrups, powders, and other extras that might otherwise clutter things up.
Woven or wire baskets on shelves or inside cabinets hold bulkier items like bags of beans, tea boxes, or cleaning supplies. Label the front so everyone can find what they need and put things back in the right spot. This keeps your coffee bar organized without fancy custom solutions.
Integrating a Stone Drying Mat in Your Setup
A stone drying mat makes your coffee station workflow easier by keeping mugs, portafilters, and steam wands dry, and it looks clean, too. Placement and a little upkeep help the mat do its job without eating up precious counter space.
Why Use a Stone Drying Mat for Mugs and Tools
Stone drying mats, usually made from diatomaceous earth, soak up water instantly thanks to tiny pores in the material. This natural, silica-based surface pulls moisture away from wet mugs and brewing tools in seconds, which means no more puddles like you get with towels or plastic trays.
I’ve found these mats especially helpful for espresso setups. You’re always rinsing portafilters, wiping steam wands, and setting down damp cups. The material is food-safe and naturally resists bacteria, which is important when you’re placing items that touch your drinks right on the surface.
Towels stay soggy and rubber mats trap water, but a stone mat dries itself through evaporation. That means your coffee station stays cleaner and you won’t have to wash as many damp cloths.
Best Placement Tips and Sizing Advice
Keep your stone drying mat within easy reach of your espresso machine or brewing area. I usually put mine between the grinder and the machine, or right next to the kettle if I'm brewing pour-over or French press. That way, everything stays close, and I don't end up dripping water all over the place.
For most home setups, a 30 cm × 40 cm mat easily fits two or three mugs and some small tools like tampers or milk pitchers. If you're tight on space or just making coffee for yourself, a 20 cm × 30 cm mat does the trick for one mug and a portafilter.
Try not to set the mat directly under something that's constantly dripping. It's absorbent, sure, but works best when you place damp, not soaking, items on it. Leave a couple of centimeters around the edges to let air flow and help the mat dry out.
Daily Care and Cleaning Recommendations
Wipe the stone mat with a damp cloth every few days to get rid of coffee oils and residue. When it needs a deeper clean, rinse it under warm water and stand it upright until it’s bone dry before putting it back on the counter.
If you use the mat a lot, aim to clean it once a week. Light stains from coffee or tea usually come off with a gentle scrub and just water. Skip the soap because it can clog the pores and make the mat less absorbent.
Let it air dry fully between heavy uses. If you’ve piled on a bunch of wet stuff, prop it up for 15-20 minutes so it can breathe. If you’re taking a break from your coffee station for a few days, store the mat somewhere dry.
Styling Your Coffee Bar for Atmosphere and Function
A good coffee bar feels intentional, not cluttered. Mixing visual appeal with a practical layout makes the morning routine smoother and just a bit more enjoyable. The right details, like your stone mat, pull double duty, blending into the style while keeping things neat.
Choosing a Cohesive Look: Minimalist, Farmhouse, or Modern
From experience, sticking to one style keeps things from looking chaotic, especially if you’re working with limited space. Minimalist setups use clean lines, neutral colors, and only the essentials out on the counter. The stone mat fits right in here because it adds texture without making a fuss and keeps things organized.
Farmhouse coffee bars feel warm and homey with wood accents, open shelves, and vintage canisters or mugs. Natural stone mats and woven baskets for filters or extra beans fit right in. I’d suggest matching metal finishes, whether brushed nickel, matte black, or copper, across your kettle and grinder for a tidy look.
Modern stations lean into sleek appliances, geometric shapes, and bold (but not too many) colors. Picture a matte black espresso machine, white ceramic storage, and maybe a colorful French press as the centerpiece. The stone mat becomes the landing spot for mugs and tools, keeping the area looking deliberate, not messy.
Decor and Lighting for Everyday Enjoyment
Lighting makes a huge difference. If you can, set up near a window for natural light. If not, under-cabinet LED strips or a small pendant light make those early mornings much easier. I like warm white bulbs (2700-3000K) for a cozy vibe with no harsh glare before you’ve had coffee.
Decor should help, not get in the way. A small plant like a pothos or succulent adds some life without hogging space. I keep extras limited to a tray, maybe a piece of wall art, or a chalkboard for jotting down roast dates. When you arrange mugs and tools thoughtfully on the stone mat, it becomes part of the decor too.
Don’t ignore vertical space. Floating shelves or a pegboard keep your most-used items handy and free up counter space for actual brewing.
Personalized Touches and Creative Displays
Your coffee bar should match how you actually drink coffee, not just look good for Instagram. I hang my favorite mugs for easy grabbing, with the stone mat underneath to catch drips. If you switch between pour-over, French press, and espresso, keep those tools out where you can reach them instead of buried in a drawer.
The little details matter. Maybe you have a vintage scoop, beans in glass jars with handwritten labels, or a mug collection you love. Some folks hang coffee origin maps, set aside a spot for their grinder, or even add a small speaker for morning music.
The stone mat ends up as the gathering spot for all these personal touches. It marks your brewing zone, protects the counter, and lets you arrange things in a way that fits your routine without worrying about water rings or scratches.
Maintaining and Upgrading Your Coffee Station Over Time
Your coffee station needs regular attention to stay both useful and inspiring. A bit of daily care, the occasional tweak, and a few smart upgrades go a long way as your habits change.
Cleaning Routines for Equipment and Surfaces
Daily upkeep takes just a few minutes but really pays off. Wipe down your stone mat after each use to keep coffee oils and minerals from building up. A quick rinse and some air drying between uses go a long way.
Give your coffee scale a weekly once-over. Wipe the platform with a damp cloth and check the battery because coffee grounds and water can mess with accuracy, and I’ve seen scales get finicky when grime piles up.
Once a month, go deeper. Descale your coffee maker as the manufacturer suggests (usually every 30-90 days, depending on your water). Wash storage containers, tidy up your organizer, and check that travel mug seals don’t leak or smell weird.
The stone mat likes a monthly scrub with mild soap and a soft brush. Skip harsh chemicals because they can wreck the mat’s absorbency.
Refreshing Your Layout and Accessories
Small changes can solve daily annoyances. If you’re always reaching across the bar for the grinder, move it closer to where you stand. I like testing new setups on weekends when I have time to fuss with things.
Replace worn-out accessories before they drive you nuts. Swap out frayed towels, upgrade your organizer if it’s overflowing, or add a second stone mat if you’re making lots of drinks. These fixes don’t cost much, but they make a difference.
Every season, give your space a little refresh. Rotate your mugs so favorites are easy to grab, move syrups or tools you rarely use, and check if your setup still matches how you actually brew. It’s easy to collect gear that just sits around gathering dust.
Adapting to Changing Coffee Habits
Your coffee habits shift, and your station should too. If you’ve switched from drip to pour-over, bring your gooseneck kettle and filters front and center. Store the drip machine elsewhere if it’s just taking up space.
New equipment means rethinking storage. A new espresso machine can eat up counter space, so maybe add shelves or move less-used travel mugs to a cabinet.
Instead of buying everything at once, budget for one meaningful upgrade a year. Fix the biggest annoyance first, whether that means a better grinder, a real tamping mat, or more storage. Targeted improvements always beat random shopping sprees.
Before making big changes, track what you actually use for a month. You might realize you never bother with the milk frother, or that a second stone mat would be way more useful than another gadget.
Frequently Asked Questions
Stone drying mats can simplify cleanup and keep wet coffee tools off the counter. Here are clear answers to common setup and care questions.
What's the best spot in the kitchen to set up a coffee station that stays tidy during busy mornings?
Place the station near the sink and a grounded outlet, but away from the stove and busy walkways. A corner or side counter often keeps brewing convenient without blocking the main kitchen work area.
How do you size a stone drying mat so it fits mugs, a pour-over dripper, and the daily tools without crowding the counter?
Choose a mat based on what needs to dry at the same time. A 16 by 12 inch mat suits two mugs and a pour-over dripper, while larger espresso setups may need at least 18 by 14 inches. Keep 4 to 6 inches of counter space free for prep.
What's the easiest way to organise coffee tools like scoops, filters, scales, and stir sticks so they're actually easy to grab?
Store tools in the order you use them. Keep scoops and stir sticks upright in a small container, filters in a dry drawer or holder, and the scale near the grinder.
How do you clean and maintain a stone drying mat so it stays fresh and doesn't hold onto coffee smells?
Wipe the mat regularly, hand wash it with warm water and mild dish soap when needed, and let it dry completely. For odors, use a gentle baking soda paste and avoid acidic cleaners unless the manufacturer approves them.
Will a stone drying mat protect quartz, laminate, or wood counters from water rings and heat from just-rinsed gear?
It helps protect quartz, laminate, and wood from everyday drips and water rings. It can handle warm rinsed coffee gear, but it should not be used as a trivet for very hot cookware.
How can you set up a small-space coffee station that still has room for mugs to dry and tools to air out properly?
Use wall shelves or tiered organizers for beans, filters, and extra mugs. Keep a compact stone mat on the counter as the drying zone, and move it slightly when you need more brewing space.
Partager:
How Does a Stone Drying Mat Work, and What Can You Safely Dry on It?
How to Clean and Maintain a Stone Drying Mat Without Reducing Its Absorbency