

Check out our latest golf collection!
A golf hitting mat can help you develop better low-point control, but only if you understand how mats behave differently from natural turf. The key is to use feedback drills, such as ball-position markers, towels, and other simple checkpoints, to train ball-first contact instead of letting a forgiving surface disguise heavy strikes. Once you know what to look for, a hitting mat becomes a useful diagnostic tool rather than a source of false confidence.
It is easy to hit balls into a net at home, feel good about the strike, and then struggle with heavy iron shots on the course. That gap between mat practice and on-course performance often comes down to how forgiving artificial turf can be. Some mats allow the club to glide or bounce through impact even when the swing bottoms out too early, reducing the feedback you would normally get from grass.
Below, we cover how to set up your mat station for repeatable practice, which drills can help move your low point forward, how to evaluate your contact, and how to structure a productive home practice session.
Key Takeaways
- Mats can disguise some heavy strikes, so understanding how the surface reacts helps you practice more accurately.
- Feedback drills using markers, towels, and tees can help develop a more consistent forward low point.
- A thoughtful mat setup and practice routine can support more reliable ball-first contact on the course.
Why Mats Can Hide Poor Strikes
Mats and grass react to mishits differently. Understanding that difference can help explain why a shot may feel imperfect yet still produce an acceptable result from a mat.
The Bounce Effect Behind Fat Shots
Many driving range mats sit on a firm or resilient base that does not allow the clubhead to dig into the surface the way natural turf does. When the club contacts the mat behind the ball, the surface may allow it to skid or bounce forward rather than dig into the ground.
As a result, the club can still reach the ball with enough speed to produce a reasonable shot even though the low point occurred too early. On grass, the same heavy strike would typically contact the ground first, reducing clubhead speed before impact.
This is one reason fat shots can be harder to identify on a mat. The surface may not provide the same resistance or visible feedback as natural turf.
How Fat and Thin Shots Show Up on Natural Turf
Natural turf provides clear ground-contact feedback. A fat shot contacts the ground before the ball, often producing a divot and reducing energy before the club reaches the ball. The resulting shot is usually shorter than intended.
A thin shot contacts the ball too high on the clubface or near its equator, often producing a lower trajectory and a different feel. Both mistakes can be easier to recognize on grass because the interaction between the club, turf, and ball changes the outcome more noticeably.
Mats can soften some of these signals. Without a divot or the same level of resistance, certain heavy strikes may look more similar to solid contact, making low-point feedback especially important.
What a Descending Blow Should Produce
With most iron shots, the clubhead is still travelling downward when it reaches the ball. This allows the ball to be struck before the club reaches the lowest point of the swing.
On grass, a well-struck iron shot often produces a divot that begins at or just beyond the ball's original position. On a mat, there is no divot pattern to examine, so you need other ways to evaluate where the club contacted the surface.
Feedback drills, strike-location checks, ball flight, and occasional practice from natural turf can all help confirm whether your mat practice is producing the contact you intend.
Set Up for Repeatable Iron Contact
Before focusing on swing mechanics, establish a repeatable setup. Ball position, balance, posture, and alignment all influence how consistently the club returns to the ball.
Ball Position and Weight Distribution
Ball position varies by club and swing style, and the consistent surface of a mat can make it easy to overlook small setup changes.
For many mid-irons and short irons, a useful starting point is near the center of the stance or slightly forward of center. Wedge position can vary depending on the shot being played, so avoid moving the ball excessively back simply to force a steeper strike.
Start from a balanced position and allow pressure to move toward the lead side as the downswing develops. Avoid deliberately hanging back through impact, since that can make consistent ball-first contact more difficult.
Posture, Spine Angle, and Shoulder Alignment
Posture influences how easily you can rotate and return the club to the ball, so it is worth checking at the beginning of each practice session.
Bend comfortably from the hips while maintaining a natural spine position. Your exact posture will vary with your build and club length, so avoid forcing an exaggerated tilt or bend simply to create a downward strike.
As a general setup reference, keep your shoulders and feet aligned consistently with your intended target line unless you are intentionally practising a different shot shape.
| Setup Fault | Possible Effect on Contact |
|---|---|
| Standing too upright | Can make consistent ground contact more difficult |
| Shoulders aimed away from the intended line | Can influence swing direction and start line |
| Pressure remaining too far on the trail side | Can contribute to inconsistent low-point control |
Build a Simple Target-Line Station
Do not rely on the edges of the mat to determine your target line. The mat itself may not be positioned squarely toward your target.
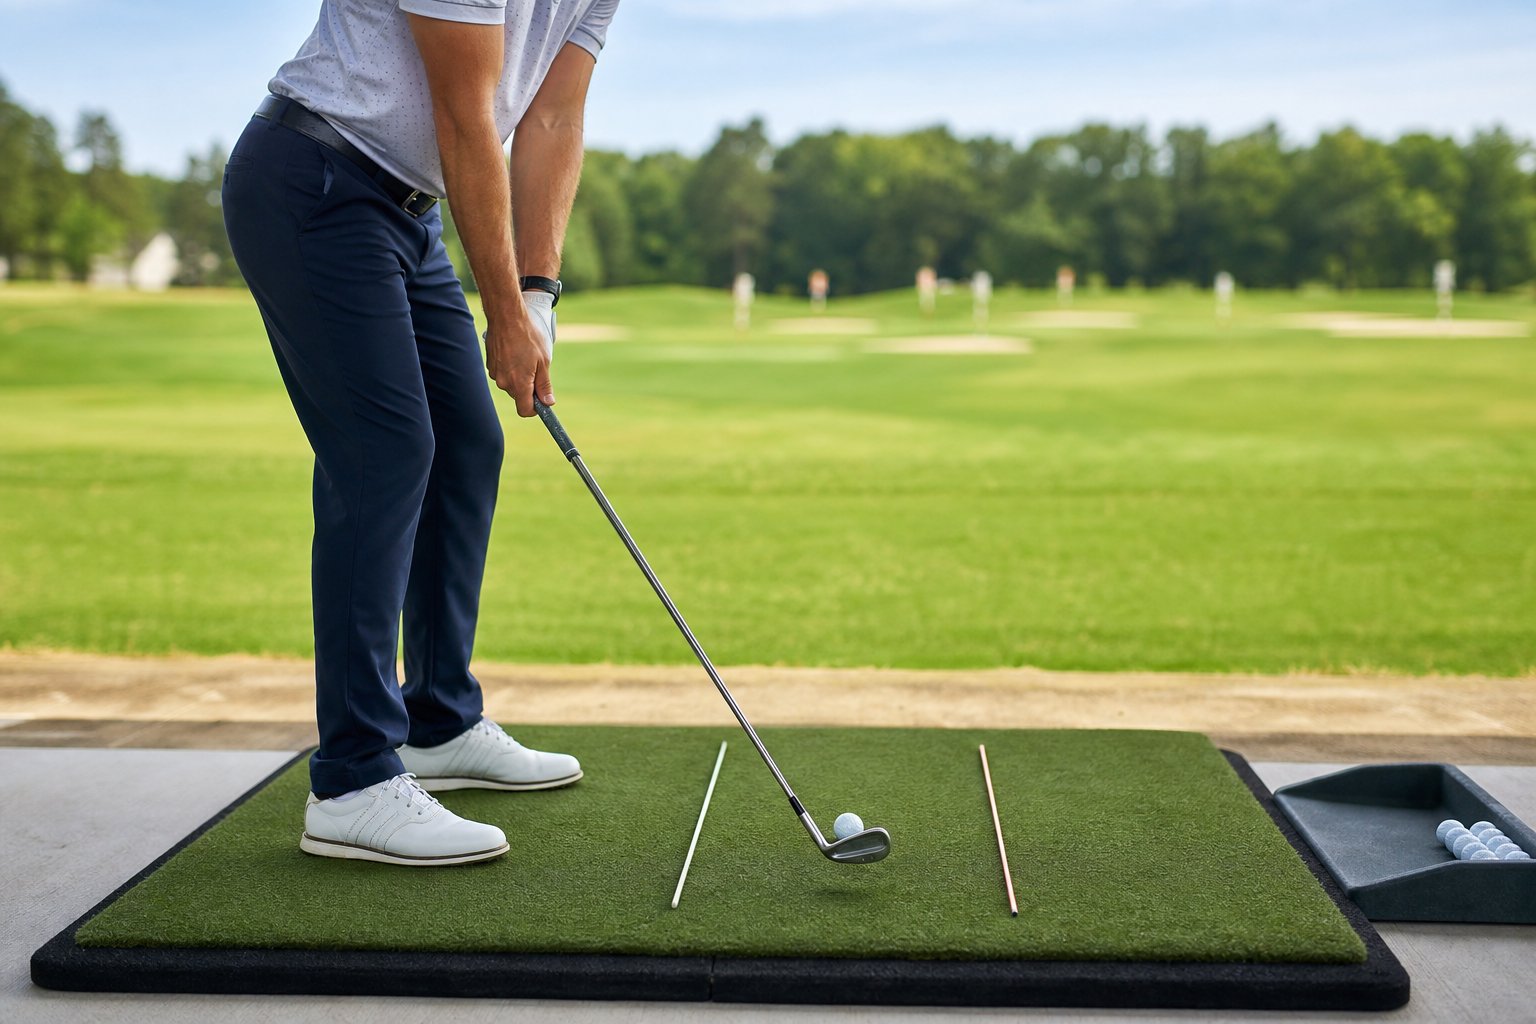
Place an alignment stick on the ground outside the hitting area and parallel to your intended ball-to-target line. A second stick can be placed along your foot line, parallel to the first, to help you check alignment. Keep all rigid training aids safely outside the path of the clubhead.
This simple setup removes some of the guesswork and gives you a repeatable reference for both alignment and shot direction.
Train a Forward Low Point With Feedback Drills
A hitting mat becomes more useful for low-point practice when it is paired with clear feedback. The following drills use visual or physical checkpoints to help you recognize whether the club is reaching the ball before the ground.
Use the Towel Drill to Reduce Heavy Contact
The towel drill provides a simple consequence for contacting the surface too far behind the ball. Fold a small towel and place it several inches behind the ball, making sure it is far enough away to use safely, then make controlled swings without touching it.
If the club catches the towel before reaching the ball, the low point is occurring too early. This feedback is particularly useful on mats because the surface itself may disguise a slightly heavy strike.
As your contact improves, you can gradually move the towel closer while continuing to make controlled swings. Avoid placing it so close that it interferes with a normal or safe swing.
Practice the Line Drill for Ball-Then-Mat Contact
A line drill gives you a visual reference for where the club contacts the mat. Use a removable marker, tape, or an existing reference line that is suitable for your mat.
Position the ball at the reference line and focus on contacting the ball before the club brushes the mat beyond that point. If the club consistently contacts the mat well behind the line, the low point is occurring too early.
Use the following as a general reference:
- Contact beginning beyond the ball: generally supports a ball-first strike.
- Contact beginning behind the ball: may indicate that the low point is too far back.
- Little or no surface contact: may indicate a very shallow strike, so confirm the result with strike location and ball flight.
Use a Gate Drill to Improve Strike Location
A gate drill can help you improve how consistently the clubhead returns to the ball. Place two flexible tees or other soft practice markers on either side of the intended clubhead path, leaving enough clearance for the club to pass through safely.
Make controlled swings through the gate without contacting either marker. Repeatedly clipping one side can highlight inconsistencies in delivery or strike location.
Because a gate drill primarily provides directional and strike-location feedback, combine it with a towel or line drill when your main goal is improving low-point control.
Build Impact Skills With Half Swings and Punch Shots
Half swings and controlled punch shots reduce the complexity of a full swing and allow you to focus more closely on contact. Start with the club moving through a shorter range of motion and make smooth, controlled swings while paying attention to where the club meets the ball and mat.
Focus on producing repeatable ball-first contact rather than forcing a particular wrist or shaft position. Your impact position will vary with the club and shot being played.
Once you can repeat the shorter motion consistently, gradually lengthen the swing while maintaining the same contact quality.
Check Whether Your Contact Is Actually Improving
A hitting mat gives you a place to practice, but improvement is easier to evaluate when you track strike location, ball flight, and shot patterns rather than relying on feel alone.
Read Clubface Strike Patterns
Impact tape or a golf-specific strike spray can help show where the ball contacts the clubface. Apply the product according to its instructions, then check the mark after each shot or short group of shots.
If the marks consistently cluster toward the toe, heel, top, or bottom of the face, you have a repeatable strike pattern worth investigating. A centered pattern that becomes tighter over time is a useful sign of improving face contact.
Track Start Line, Carry Distance, and Dispersion
Strike location tells you where the ball met the face. Start line, carry distance, and dispersion show you what happened after impact.
Choose one target and hit a small group of balls toward it. Evaluate the pattern as a whole instead of judging your swing from a single shot. More consistent start lines, carry distances, and dispersion can indicate that your delivery is becoming more repeatable, although each result can be influenced by several swing and impact variables.
Keep a simple practice record that includes:
- Start line: left, right, or on target
- Carry distance: consistent or variable
- Miss pattern: repeating or changing
Tracking the same information over multiple sessions makes it easier to identify trends in your practice.
Use Video and Launch Data Without Chasing Numbers
A launch monitor can provide information such as ball speed, club speed, launch angle, and spin, depending on the device. These measurements can add useful context when evaluating changes in strike and ball flight.
Metrics such as smash factor should not be interpreted in isolation because they vary by club, delivery, and shot type. Use launch data alongside strike location, ball flight, and video rather than treating one number as proof of a good or bad swing.
Video can also help you compare setup and movement over time. Use it as a reference tool rather than trying to make every frame match a single ideal position.
Structure a Productive Mat Practice Session
A productive mat session usually follows a simple progression. Begin with controlled swings, focus on one clear objective, and increase swing length or club length gradually.
Warm Up With Wedges Before Moving to Irons
Start with a wedge or short iron and make easy half swings before increasing speed. Shorter, controlled swings give you time to loosen up while checking your tempo and contact.
Once the half swings feel comfortable, progress to three-quarter swings and then full swings. Move into longer irons only after you feel physically ready and your contact is reasonably consistent.
Repeatedly striking a firm mat at high speed can place additional stress on the hands, wrists, and elbows, particularly if the mat has limited cushioning. Stop if you feel pain or unusual discomfort.
Use One Swing Priority Per Practice Block
Trying to change your grip, takeaway, low point, and tempo at the same time can make it difficult to determine what is actually improving.
Choose one main priority for each practice block. You might work on low-point control with the towel drill, check strike location with impact tape, or focus on producing a smoother tempo. Keep that priority consistent long enough to evaluate the results.
A focused session makes it easier to compare shots and identify whether a specific adjustment is helping.
Progress From Controlled Swings to Fairway Woods and Hybrids
After working with your irons, you can move into fairway woods and hybrids if they are part of your practice plan. These clubs are generally played with less downward ground interaction than shorter irons, but consistent strike location and low-point control still matter.
Use the same measured approach by starting with controlled swings before progressing to full speed. You can also vary targets or swing lengths to practise distance control.
If your practice area is safely designed for driver shots, introduce the driver only after you are fully warmed up. Because the ball is teed, ground contact becomes less important, allowing you to focus more on centered contact and shot direction.
Choose a Safer and More Useful Home Practice Setup
The mat you use affects both practice feedback and comfort. A stable surface with appropriate cushioning can make repeated practice more useful while reducing unnecessary impact from the floor beneath it.
Select a Mat That Reduces Shock and Slipping
When choosing a mat, consider both cushioning and stability. A very thin mat placed directly over a hard surface may transmit more impact to your hands and arms, particularly on heavy strikes.
Look for a hitting surface that provides appropriate cushioning and remains stable during the swing. If the mat moves under your feet or club, it can affect both safety and the consistency of your setup.
The condition of the turf also matters. Worn, compressed, or damaged hitting areas can change how the club interacts with the surface, so inspect the mat periodically and replace worn sections when necessary.
Know When to Practice on Grass Instead
Mats are useful for convenient, repeatable practice, but they cannot fully reproduce the way a club interacts with natural turf.
When possible, practise on grass occasionally to compare your results. With many iron shots, consistent ball-first contact produces turf interaction that begins at or just beyond the ball's original position.
Grass practice can help confirm whether improvements made on a mat are transferring to real playing conditions.
Adjust for Tight Lies and Course Transfer
Some mats hold the ball slightly higher than a closely mown fairway or other tight lie. That difference can make certain strikes feel easier than they would from a lower natural-turf lie.
If you want to practise from a lower artificial lie, use a purpose-built, low-profile golf hitting surface that still provides adequate cushioning and stability. Avoid removing necessary padding or hitting directly from an unprotected hard floor simply to make the lie more demanding.
Compare how your strike changes as you practise from different suitable surfaces. If contact becomes less consistent from a tighter lie, use that information to identify what still needs work before taking the swing to the course.
Frequently Asked Questions
These are some of the most common questions about using a golf hitting mat to practise low-point control and cleaner contact.
How can I tell if I am striking the ball before the mat during practice?
Use a towel, removable line, or another safe reference point behind or beneath the ball. Ball-first contact should occur before the club brushes the mat beyond the ball. If you repeatedly contact the mat or towel behind the ball first, your low point is likely occurring too early.
What drills can help improve low-point control on a golf hitting mat?
The towel drill and line drill are two simple options. A strike-location gate can also help improve consistent club delivery, although it is more useful for face contact and path feedback than for measuring low point directly.
Can a golf hitting mat help reduce fat and thin shots?
Yes. A mat can support better contact when you use feedback tools that reveal heavy or inconsistent strikes. Towels, reference lines, and strike-location aids make it harder for the mat's forgiving surface to disguise mistakes.
Where should I place the ball on the mat to practice clean iron contact?
Use the same general ball position you would use on the course with that club. For many mid-irons, a useful starting point is around the center of the stance or slightly forward. Then use a consistent reference point on the mat to check your setup from shot to shot.
Do I need an impact strip or strike board to check my low point accurately?
No. A towel or reference line can also provide useful low-point feedback. A purpose-built impact strip or strike board can show where the club contacts the ground relative to the ball, while face tape or strike spray is better for checking where the ball contacts the clubface.
How can I use alignment sticks with a hitting mat to improve ball-first contact?
Place an alignment stick safely outside the hitting area and parallel to your target line. A second stick can help establish your foot line. Consistent alignment will not control low point by itself, but it can make your setup more repeatable and reduce unnecessary compensations during the swing.
Partager:
Golf Practice Net vs Driving Range: When Does At-Home Practice Make More Sense?
How to Practice Iron and Driver Accuracy With a Golf Practice Net at Home