

Check out our latest collection of compact vacuum sealer for food!
Prepped ingredients can save your weeknight meals, but only if they stay fresh, flavorful, and easy to use. When food is stored the wrong way, freezer burn, ice crystals, and dull texture can quickly undo all that prep work.
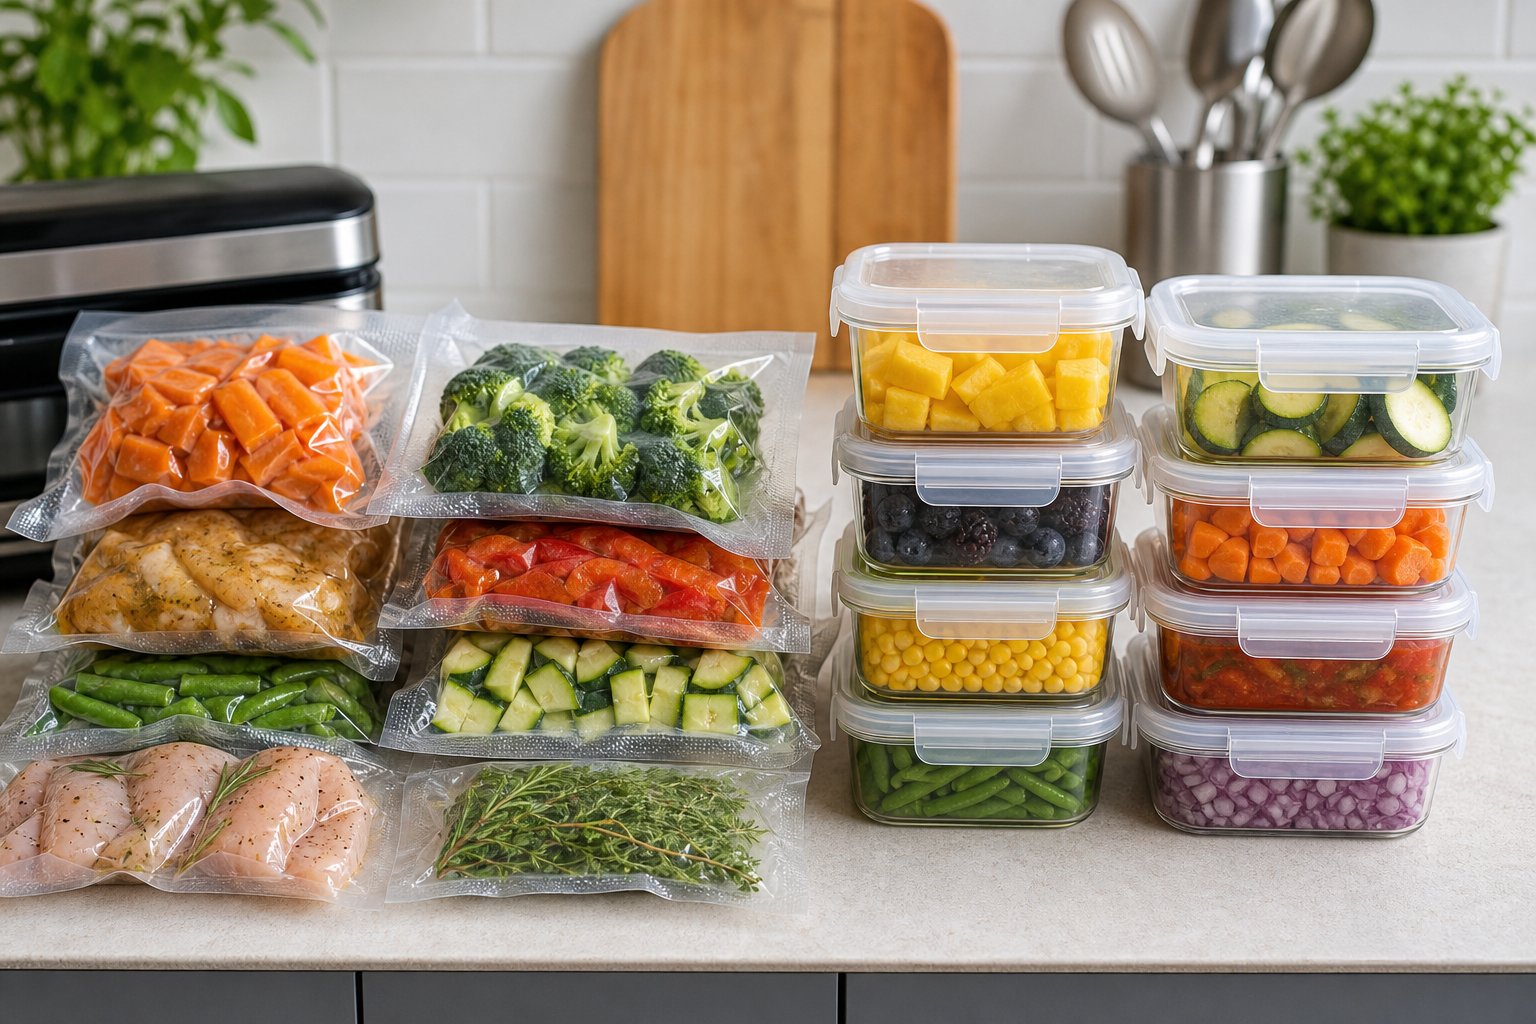
That is why the choice between vacuum sealing and freezer containers matters. Vacuum sealing removes air to help protect food from moisture loss and freezer burn, while freezer containers are useful for liquids, delicate foods, and quick grab-and-go storage.
In this guide, you will learn how each method works, which one is best for different ingredients, and how to choose the right storage option for better freshness, easier organization, and less food waste.
Key Takeaways
- Vacuum sealing is way better at stopping freezer burn and gives you a much longer shelf life than containers or bags.
- You’ll want to pick your storage method based on what you’re freezing. Vacuum sealing is best for meats and solid foods, while containers are easier for liquids.
- Freezing and vacuum sealing together give you the best shot at keeping food fresh and saving space.
How Vacuum Sealing Works
Vacuum sealing is all about sucking the air out of special bags and sealing them up tight. That keeps out oxygen and moisture, which are basically the enemies of good-tasting frozen food.
What Is Vacuum Sealing?
Vacuum sealing means you pull the air out of a bag and then melt the plastic shut with a hot strip. No air, no oxygen, no moisture sneaking in, so bacteria can’t really get going and fats don’t go rancid. If you’ve ever had grey, dried-out patches on forgotten frozen food, that’s freezer burn from air and moisture hanging around.
When you vacuum seal, you’re stripping away the stuff that makes food go bad. Oxygen lets bacteria multiply and fats break down, while cold air dries stuff out. With vacuum sealing, you can keep food in the fridge for a few days or the freezer for months (even years). We’ve had the best luck with proteins, veggies, and anything you want to portion out for the week. It’s especially handy for meal prep, with no weird smells and less cross-contamination.
How Do Vacuum Sealers Work?
Vacuum sealers aren’t complicated, but they do the job well. You stick your food in a special bag, leave one end open, and slide that end into the machine. Hit the button, and the pump sucks the air out until it’s almost a vacuum in there. About 99% of the air is gone. Then a heated strip melts the plastic together, sealing it up tight in just a few seconds.
External sealers use textured bags so the air can get out easily. Chamber sealers put the whole bag inside, suck out the air, and then seal it. The heat strip usually gets pretty hot, around 160 to 180°C, to make sure the seal holds.
Types of Vacuum Sealers
External (Suction) Vacuum Sealers are what most people have at home. They sit on your counter, pull air out through the end of the bag, and seal it. You need those bumpy, textured bags for these. If you’re just freezing a few portions at a time, this is probably all you need.
Chamber Vacuum Sealers are bigger and more expensive, but they’re awesome if you do a lot of meal prep or want to seal soups and marinades. The whole bag goes inside, the machine pulls out the air, and then it seals. No mess, even with liquids.
Handheld Vacuum Sealers are small, portable, and easy to use with special zipper bags or containers. They’re not as strong as the countertop ones, but they’re handy for quick jobs or when you don’t want to drag out a big machine.
Understanding Freezer Containers and Freezer Bags
Freezer containers and bags are the old-school way to freeze food. They’ve got their place, especially if you’re dealing with stuff that’s fragile or needs to stay upright. Rigid containers keep things from getting crushed and stack nicely, while bags are great for squeezing into tight spaces.
Types of Freezer Containers
Rigid plastic containers with locking lids are the go-to for things like chopped veggies, cooked grains, and sauces. They don’t squish your food, and you can stack them without worrying about leaks. Glass containers with tight lids are awesome for soups or anything you want to reheat straight from the freezer.
Standard plastic containers (the kind without a gasket) let in more air, so they’re better for food you’ll use up in a few weeks. They work for leftovers, but for long-term freezing, they just don’t cut it.
Silicone containers are pretty cool. They’re flexible, don’t stain, and collapse down when you’re not using them. They’re perfect for soups, stews, or anything you want to freeze in portions.
| Container Type | Best For | Storage Duration |
|---|---|---|
| Rigid plastic with gasket seals | Chopped vegetables, cooked grains | 3-6 months |
| Glass with locking lids | Sauces, liquids, reheatable meals | 3-4 months |
| Silicone | Soups, stews, flexible storage needs | 2-4 months |
When to Use Freezer Bags
Freezer bags really shine when you’re freezing stuff that’s oddly shaped or you want to lay flat. Think chicken breasts, ground meat, berries, or chopped herbs. They mold around the food and, if you squeeze out the air (or use the water displacement trick), you get pretty good results.
We use freezer bags a lot for batch prepping. Just portion things out, lay them flat, and freeze. They stack up neatly and thaw quicker than big containers. If your freezer is tiny or you want to defrost stuff fast, this is the way to go.
For anything you’ll use in under three months, regular freezer bags are fine. After that, you’ll probably notice the quality drops off, even if you’re careful about air.
Airtight vs Standard Containers
Airtight containers have rubber or silicone seals that keep air and moisture out. That makes a big difference if you’re storing stuff for more than a couple of months. Foods just look and taste better when they’re sealed up tight.
Standard containers (the ones without a fancy seal) let a bit of air in, which means you get more freezer burn over time. They’re fine for leftovers you’ll eat soon, but not for long-term storage.
If you’re freezing expensive cuts of meat or ingredients you spent a lot of time prepping, airtight containers are worth it. They keep food from drying out, help hold color, and stop ice crystals from forming.
Preventing Freezer Burn: What Makes the Real Difference?
Freezer burn happens when air gets to your food and sucks out the moisture, leaving those nasty dry, grey patches that ruin everything. The trick is to keep air away, whether you’re using vacuum-sealed bags or containers.
Causes of Freezer Burn
Freezer burn comes from two things: losing moisture and exposure to oxygen. When food freezes, water molecules move from the food’s surface toward colder parts of the freezer. That leaves dry, frosty patches. If you leave air in the packaging, oxygen speeds up the breakdown of fats and proteins, so things lose color and taste old. Big temperature swings make it worse, growing and shrinking ice crystals that tear up the food’s texture.
How bad it gets depends on how well you’ve sealed things and how long you leave them. Loose lids or gaps let air in and moisture out, and after a few weeks, you’ll see freezer burn, especially on foods with lots of water, like meat, bread, or veggies.
Vacuum Sealing vs Freezer Containers for Freezer Burn
Vacuum sealing pulls almost all the air out, so you don’t get much moisture loss or oxidation. We’ve pulled vacuum-sealed meat out of the freezer after two years and it still tasted fresh. The tight seal keeps things from drying out or getting icy.
Freezer containers work differently. They keep food from getting smashed and stack well, but there’s always some air trapped inside. That air holds moisture and oxygen, so freezer burn still happens, just more slowly. You can help by filling containers as full as you can or pressing plastic wrap right against the food before you put the lid on.
If you’re freezing chopped veggies, diced onions, or portions of meat for a long time, vacuum sealing is just better. Containers are fine if you’ll eat the food soon or want to grab things quickly. Both are better than just tossing food in a bag, but vacuum sealing keeps things fresher for a lot longer.
Role of Headspace, Air, and Ice Crystals
Headspace is just the empty area between your food and the top of the container. More headspace means more air, which means more freezer burn. Half-filled containers trap air that turns into frost on your food.
Vacuum sealing gets rid of headspace by molding the bag right around the food. There is no room for air or moisture to move. That’s why you don’t see big ice crystals in vacuum-sealed bags.
To cut down on headspace in containers:
- Fill them almost to the top. Leave just a little room (about 1 cm).
- Press plastic wrap right onto the food before sealing.
- Use containers that fit your portions, not ones that are way too big.
- Skip oversized containers for small amounts of food.
Ice crystals form when moisture leaves the food and refreezes on the outside. Tiny crystals are okay, but big, chunky frost means you’ve got air leaks or your freezer isn’t cold enough. Keep your freezer at -18°C, seal food well, and you’ll see fewer ice crystals.
Shelf Life and Quality: How Long Can You Keep Prepped Ingredients?
How long your prepped ingredients stay good really depends on how you store them. Vacuum sealing almost always gives you two or three times the shelf life of standard containers. Keeping moisture in and air out is the name of the game if you want food that still tastes and feels right after months in the freezer.
Extending Shelf Life
Vacuum sealing zaps the oxygen, so bacteria and oxidation slow way down. We’ve had vacuum-sealed food last two or three years in the freezer, while the same stuff in containers starts to go downhill after six to twelve months.
For stuff in the fridge, vacuum sealing can stretch shelf life to a week or two. Standard containers usually only buy you three to five days, so if you’re meal prepping on Sunday for the whole week, vacuum sealing is a big help.
Even dry goods like flour, rice, or nuts last longer when vacuum sealed. We’ve kept them fresh for a year or two, while containers only keep them good for six to eight months. The big win is no moisture sneaking in and no pantry bugs.
Of course, you’ve got to start with fresh, clean ingredients. Vacuum sealing isn’t magic if the food’s already on its way out.
Texture and Flavour Preservation
Freezer burn is the fastest way to ruin texture. Vacuum sealing stops moisture from escaping and keeps ice crystals from forming, so chicken, beef, and other proteins stay juicy instead of getting tough and grey.
We’ve seen the biggest difference with delicate foods, berries, herbs, leafy greens. Vacuum-sealed herbs keep their color and smell for months. The same herbs in containers wilt and lose flavor fast.
Flavor sticks around longer when you keep oxygen out. Fats in nuts, cheese, and marinated meats go rancid if they’re exposed to air. Vacuum sealing really slows that down, so things taste fresher, longer.
Moisture Retention and Loss
Losing moisture can make flavors weirdly strong or just turn food dry and tough. Even tightly sealed containers let some moisture escape, especially if you open and close the freezer a lot.
Vacuum-sealed bags trap the moisture inside. Marinated meats stay juicy, veggies keep their crunch, and cooked grains don’t dry out.
One thing to watch out for: vacuum sealing can crush soft foods if you’re not careful. For things like berries or soft cheese, use the gentle setting or freeze them first before sealing. That way, you keep the shape and the moisture.
Real-World Use: Batch Prep, Delicate Produce, and Special Cases
Vacuum sealing really shines in some meal prep situations, but rigid containers definitely have their place. Berries and greens? They need a different approach than proteins. And let’s be honest, freezer space often decides what actually works best in your kitchen.
Best Methods for Meal Prep and Batch Cooking
Vacuum sealing just makes batch-prep easier, especially for marinades, portioned proteins, and sous vide. When we portion out 5 kg of chicken breasts on a Sunday, vacuum bags let us add different marinades to each portion, stack them flat in the freezer, and thaw only what we want. That tight seal keeps flavors from mixing. No one wants teriyaki chicken in their lemon herb bag.
But for cooked meals like chili, curry, or soup, freezer containers are just more practical. We fill them hot (after a quick cool-down), stack them up, and reheat straight from the container. If you want to vacuum seal liquids, you have to freeze them first or use a chamber sealer, which is honestly a hassle.
Where vacuum bags work best:
- Raw proteins with marinades
- Single portions of meat or fish
- Blanched veggies for long-term storage
- Sous vide meal prep
Where containers make more sense:
- Cooked soups and stews
- Casseroles and lasagna
- Rice and grain-based meals
- Anything you’ll microwave
Handling Berries, Leafy Greens, and Delicate Ingredients
If you try to vacuum seal fresh berries, they’ll just turn to mush. We usually spread strawberries, blueberries, or raspberries on a tray, freeze them solid for a few hours, and then vacuum seal. That way, they keep their shape and don’t get freezer burn for a year or two.
Leafy greens and lettuce? Forget it. They don’t vacuum seal well at all. The water content turns them mushy, and freezing doesn’t help. For herbs, we chop them, toss them in containers with a little oil, and freeze. Mushrooms need a quick cook or blanch before vacuum sealing, otherwise you risk gas buildup and, honestly, some safety issues.
Soft cheeses, fresh mozzarella, and ripe avocados all get squished under vacuum. Rigid containers just do a better job keeping their texture, at least for short fridge storage.
Space-Efficient Storage for Busy Freezers
Vacuum-sealed bags really do save space, probably 40-50% more than containers, since they squish down and stack flat. We’ve managed to fit eight vacuum-sealed chicken breast portions in a spot where only three containers would go.
The trick is making flat rectangles. Flatten ground meat, press air out of veggies, and keep everything in a single layer before sealing. We always label the top with a permanent marker so we know what’s what when digging through the freezer.
Rigid containers are better when you need quick access to ingredients you use all the time. We keep things like shredded cheese or chopped onions in containers at the front, and stack vacuum-sealed proteins in the back for long-term storage. Mixing both methods based on how often you grab something and how long you want to store it just makes freezer organization work.
Vacuum Sealing and Freezing for Sous Vide and Modern Cooking
Sous vide really depends on precise temperature and an airtight seal for consistent results. Vacuum sealing creates the right environment for this, while freezer containers play a different part in the prep process.
Sous Vide: Why Vacuum Sealed Bags Matter
Vacuum sealed bags make sous vide possible by removing air pockets that would mess up heat transfer. When we drop food into a water bath, any trapped air creates insulation and keeps the food from cooking evenly.
A good vacuum seal also keeps water out of the bag during those long sous vide sessions. With a proper seal, food stays in contact with the bag’s surface, so heat moves through everything evenly.
Vacuum sealing before freezing also makes meal prep smoother. We seal proteins or veggies in portions, freeze them flat, and toss the frozen bags right into the water bath when it’s time to cook. No need to thaw first for most things.
Temperature Control and Texture
Precision matters with sous vide. Sometimes we’re talking about just a few degrees between medium-rare and medium steak. Vacuum sealing removes variables by keeping air out, so heat spreads evenly. You get that perfect, edge-to-edge doneness instead of gradients.
The sealed bag also prevents moisture loss. Proteins stay juicy, veggies keep their bite, and delicate things like fish don’t get mushy like they do with regular freezing.
Freezer Containers for Sous Vide Prep
We use freezer containers for parts of the meal that won’t go straight into the water bath. They’re great for veggies that need blanching first, marinated things that need to drain, or sauces and stocks to pair with the main dish.
Rigid containers protect delicate food in the freezer and prevent crushing that can happen with bags stacked on top of each other. They’re also handy for portioning ingredients that we’ll vacuum seal later, right before cooking.
Most of the time, we use both methods. Containers hold prepped stuff in the freezer, and we vacuum seal individual portions as needed during the week. This way, we keep things flexible without having to seal everything in advance.
Frequently Asked Questions
Which option keeps prepped veggies and fruit tasting fresher after a month in the freezer?
Vacuum sealing usually keeps fruits and vegetables fresher because it removes air and helps reduce freezer burn. For delicate produce like berries, freeze them on a tray first, then seal them to help protect their shape.
How much freezer burn protection do you actually get with each method for meats and seafood?
Vacuum sealing gives stronger freezer burn protection because it removes most of the oxygen around the food. Containers can still work for short-term storage, but some air remains inside, which can affect texture over time.
What is the real time difference for packing and labelling a week of meal prep using each approach?
Containers are faster to fill and label. Vacuum sealing takes a few extra minutes because you need to portion, seal, and check the bag, but it can save space and preserve food longer.
Which storage style is easier to portion and stack neatly in a small freezer without turning into a jumbled mess?
Vacuum-sealed bags are easier to stack in a small freezer because they freeze flat and take up less room. Containers are better when you want rigid, grab-and-go storage.
How do costs compare over a year when you factor in bags, lids, and replacing worn-out pieces?
Containers usually cost less upfront and can be reused for years. Vacuum sealing costs more at the start and requires bags, but it may reduce food waste if you freeze ingredients often.
Which method works better for sous vide meal prep and quick weeknight reheating straight from frozen?
Vacuum sealing works best for sous vide because the sealed bag can go straight into the water bath. Containers are more convenient for microwave or oven reheating, especially for soups, grains, and cooked meals.
Partager:
Which Budget-Friendly Golf Gear Upgrades Deliver The Most Value For Beginners
Reusable Vacuum Bags vs Disposable Storage Bags: Which Makes More Sense for Weekly Food Prep?