

Check out our latest collection of compact vacuum sealer for food!
Your compact vacuum sealer works hard to keep your food fresh, but it needs some love to keep performing well. If you skip maintenance, even the fanciest vacuum sealers start leaking air, smelling funky, and just don’t last as long—which means your food storage plans can go sideways fast.
Regular cleaning, gasket maintenance, and odor control can stretch your vacuum sealer’s life by years and keep those seals tight. Let’s be honest, nothing’s more annoying than a vacuum sealer that suddenly won’t seal right—hello, leaky bags and wasted food.
This guide covers the maintenance basics for compact vacuum sealers. We’ll dig into cleaning, gasket care, and what to do about weird smells. You’ll get hands-on steps to dodge the usual headaches and get the most from your machine.
Key Takeaways
- Maintenance keeps your vacuum sealer working longer and saves you money on repairs
- Cleaning and replacing gaskets regularly means your food stays fresher, longer
- Odor control is simple and stops flavors from mixing between foods
Why Maintenance Matters for Compact Vacuum Sealers
How well your compact vacuum sealer preserves food—and how long it survives—comes down to how you treat it. Neglect it, and it’ll start acting up, plain and simple.
Impact on Food Preservation and Appliance Longevity
If you don’t clean your vacuum sealer, you’re risking your food’s freshness and maybe even its safety. Food bits and bacteria build up in the sealing chamber and can mess with future batches.
Vacuum sealing only works if you get a solid, airtight seal. Gunk on the sealing strips or moisture in the chamber ruins that.
A clean machine helps you:
- Keep air out for longer-lasting food
- Avoid cross-contamination from batch to batch
- Pull stronger vacuums for better preservation
Take care of your sealer and it might last a decade. Ignore it, and you’ll be shopping for a new one in a few years.
Common Performance Issues from Poor Maintenance
When your vacuum sealer starts failing, it’s usually because you’ve skipped some basic care.
Failed seals are the number one hassle. Bits of food on the sealing strip mess up the heat, so you get weak, leaky spots.
Overheating can crop up if you never clean out the vents or inside parts. Compact models especially don’t have much room for heat to escape.
If your machine starts to smell, it’s probably old food rotting inside. That stink can get into everything you seal after.
You might also notice the suction isn’t what it used to be. That’s often because the gasket’s worn out or there’s too much buildup in the chamber.
How Vacuum Sealing Process Relies on Regular Care
Vacuum sealing is a team effort—lots of parts need to work together. Keep them clean and your compact sealer should give you reliable results.
Key maintenance spots:
| Component | Maintenance Need | Impact on Process |
|---|---|---|
| Sealing strips | Daily cleaning | Even heat and strong seals |
| Gaskets | Monthly check | Keeps vacuum pressure up |
| Chamber | After each use | Stops contamination |
If the sealing strip’s dirty, you’ll get uneven seals. Gaskets that aren’t in good shape let air sneak in. And a messy chamber just makes everything harder for the pump.
Essential Tools and Supplies for Vacuum Sealer Upkeep
You’ll need a few specific tools and cleaners to keep your vacuum sealer happy. Nothing fancy, but the right stuff makes a difference—and it helps to have it all in one spot.
Selecting the Right Cleaning Materials
Soft cloths and microfiber towels are your best bet for wiping down surfaces. Paper towels can scratch or leave lint.
Cotton swabs are great for tight corners and cleaning around buttons—super handy for those tiny spots.
Skip anything abrasive. Steel wool or rough sponges will scratch plastic and mess up sealing strips.
Soft-bristled brushes (an old toothbrush works!) help with stubborn gunk.
For inside the machine, use little detailing brushes—ones meant for electronics are perfect.
Lint-free cloths are ideal too, since regular towels can leave fibers behind that mess with sealing.
Recommended Cleaning Agents and Their Uses
Mild dish soap and warm water is usually all you need. It’s gentle and gets rid of most food residue.
A bit of white vinegar mixed with water (about a tablespoon per cup) works as a natural sanitizer and gets rid of smells.
Don’t use bleach or ammonia. They’ll crack plastic and ruin rubber gaskets over time.
For stains, a baking soda paste (three parts baking soda, one part water) is gentle but effective.
70% isopropyl alcohol disinfects without leaving a residue, and it dries fast. Just use it sparingly and keep it away from electrical parts.
Never use anything petroleum-based—it’ll wreck rubber seals and could contaminate food surfaces.
Storage Tips for Maintenance Supplies
Give your cleaning supplies their own spot—maybe a drawer or a bin. Keeps things organized and avoids mixing with harsh household cleaners.
Airtight containers keep your cloths and swabs clean and dry. Clear bins make it easy to see what you’ve got.
Store liquids away from heat and sunlight so they don’t go bad.
Whenever possible, keep cleaners in their original bottles for safety info.
Label any homemade cleaners with what’s in them and when you made them. Vinegar mixes are fine for months, but it’s easy to forget.
A quick checklist taped inside your storage area helps you remember what you’re running low on.
Step-by-Step Guide to Cleaning Your Compact Vacuum Sealer
Start by unplugging your machine and pulling out any removable bits. Clean the outside first, then focus on the inside—especially the chamber and sealing bar where food gunk builds up.
Unplugging and Disassembling the Unit Safely
Always unplug your vacuum sealer before cleaning. Don’t risk it.
Most compact models have removable parts like drip trays or gasket covers. Your manual should say what comes out.
Take out the drip tray first. Some have little clips, so don’t force it.
If the chamber cover comes off, look for little buttons or sliders.
Lay all the pieces on a clean towel so nothing rolls away.
If you’re worried about putting it back together, snap a quick photo before you start. It’s a lifesaver if you forget where something goes.
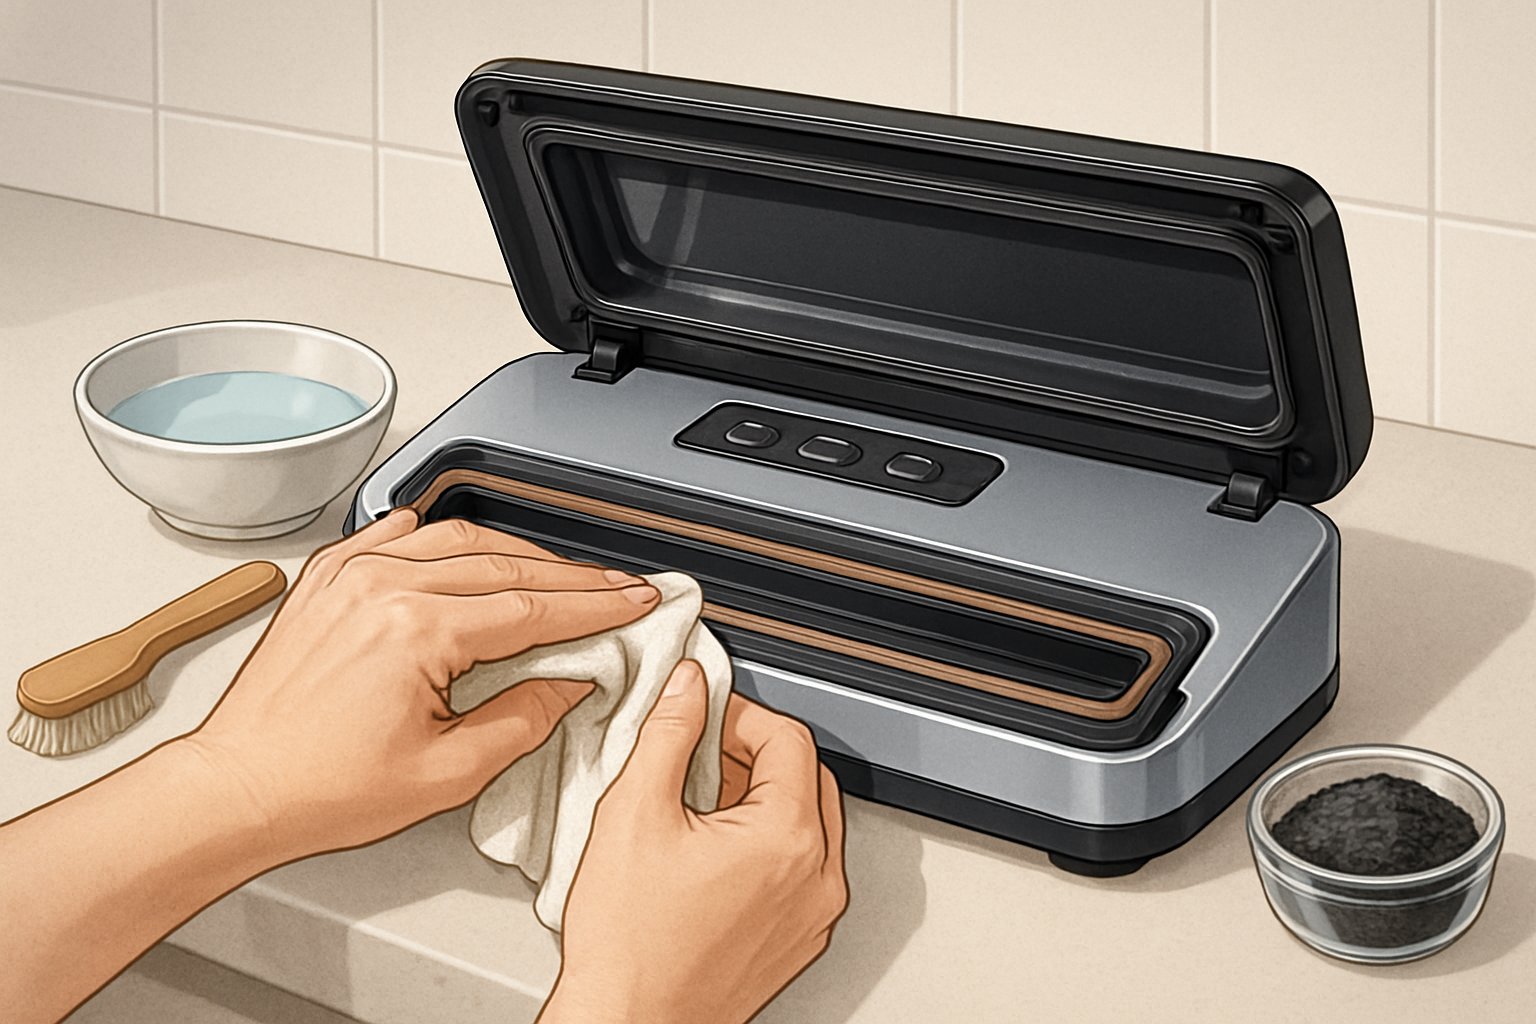
Cleaning the Exterior and Control Surfaces
Mild dish soap and warm water works for the outside. Don’t use harsh stuff—plastic scratches and stains easily.
Dampen a microfiber cloth and wring it out so it’s not dripping.
Wipe everywhere, especially around buttons and controls—food loves to hide there.
For stubborn spots, let the cloth sit on the area for about half a minute.
Use cotton swabs for tight areas around buttons or display screens.
Dry everything right away with a clean cloth. Water spots can leave ugly marks.
Sanitizing the Vacuum Chamber and Sealing Bar
The chamber gets the messiest and needs the most attention.
Wipe out crumbs and bits with a damp cloth first.
Sanitize with a mix of one part white vinegar to three parts water. Wipe down every surface, especially the corners.
Clean the sealing bar with a cotton swab dipped in soapy water. Don’t soak it—just enough to get the gunk off.
Never dunk the sealing bar or use a lot of water. A barely damp swab is plenty.
If your machine smells, leave a bowl of baking soda in the chamber overnight before cleaning. It soaks up smells naturally.
After you’re done, go over everything with a clean, damp cloth to remove any leftover soap or vinegar.
Gasket and Seal Gasket Care for Airtight Performance
The gasket’s the real MVP for airtight sealing. Check it often, keep it clean, and replace it when it’s looking tired.
How to Inspect Your Seal Gasket
Check your gasket before each use if you can. Look for cracks, tears, or spots that are hard and brittle.
Run your finger along it—does it feel smooth? Any rough or missing bits?
Press down gently in a few spots. It should spring back, not stay squished.
What to watch:
- Corners (they get the most stress)
- Where the lid closes
- Around the seal bar
Gunk in the gasket grooves will mess up your seal. Get it out right away.
If the gasket’s loose or not sitting right, it’s time to fix or replace it.
Cleaning and Replacing Gaskets
Wash the gasket every few uses with warm soapy water. Skip harsh chemicals—they’ll ruin the rubber.
Use a soft brush for the grooves. Corners usually need the most attention.
Quick cleaning steps:
- Take out the gasket (check your manual)
- Soak it in soapy water for 5-10 minutes
- Gently scrub with a brush
- Rinse well and let it air dry
Plan on replacing gaskets every 12-18 months. If you use your sealer a lot, maybe every 6-8 months.
When you put in a new gasket, make sure it sits flat and isn’t twisted. If it’s not in right, you’ll get leaks.
Order replacements from the manufacturer if you can—fit matters.
Spotting Signs of Wear or Damage
If your sealer’s losing vacuum or bags aren’t staying sealed, check the gasket first.
Look for cracks, weird shapes, or rubber that’s turned hard. White or chalky stuff on the gasket means it’s breaking down.
Replace it if you see:
- Dents that don’t bounce back
- Cracks or splits
- Hard, brittle spots
- A loose fit
If you see melted or burned spots, that’s usually from overheating.
If the gasket still stinks after cleaning, it’s probably absorbed too much oil and needs to go.
To test, seal an empty bag and see if it holds vacuum for a few hours.
Odor Control Strategies for Fresh-Working Vacuum Sealers
Keeping odors at bay means your vacuum sealer won’t stink up your kitchen or transfer weird flavors. Knowing where smells come from, cleaning regularly, and storing the machine right all make a difference.
Causes of Odors in Vacuum Sealers
Food bits are the main reason your vacuum sealer might start to smell. Tiny pieces get stuck in the chamber, around the heating element, or in the gasket grooves.
Stuff like fish, garlic, and onions really linger. Those smells soak into plastic and rubber during sealing.
Moisture is another culprit. If you don’t dry parts well after cleaning, you’ll get musty or even moldy smells.
Top odor sources:
- Food residue in sealing areas
- Grease on heating strips
- Moisture trapped in chambers
- Mixing strong-smelling foods
Vacuum sealing can actually make smells worse by trapping them inside. That’s why regular cleaning is extra important, especially with compact machines.
Routine Odor Removal Techniques
It's best to clean your vacuum sealer after each use so odors don't have a chance to settle in. Unplug the unit first, then sweep away any food bits with a soft brush.
Mix up some mild dish soap with warm water and wipe down all the surfaces. This gets rid of grease and food gunk without harming the plastic.
For odors that just won't quit, isopropyl alcohol is a lifesaver. Dab some on a microfiber cloth and go over the sealing chamber and gaskets.
Weekly deep cleaning steps:
- Take apart any removable parts
- Soak drip trays in soapy water
- Use cotton swabs to clean the gaskets
- Sanitize everything with an alcohol solution
The heating element area is a sneaky spot for trapped food. Dip a cotton swab in alcohol and work it into the nooks around the sealing strip.
Let everything air dry before putting the sealer back together. If you rush, moisture gets trapped and you'll end up with new odor issues.
Long-Term Odor Prevention with Proper Storage
Stash your vacuum sealer somewhere clean and dry, far from strong odors. Avoid kitchen cabinets near heat sources—they just add moisture and heat, which your sealer hates.
Leaving the lid a bit open in storage helps air flow and keeps gaskets from getting squished flat.
Storage best practices:
- Stick to cool, dry spots
- Avoid places with big temperature swings
- Keep away from cleaning chemicals
- Store with the lid slightly open
Activated charcoal or baking soda nearby can help absorb lingering smells. They work quietly in the background and won't mess with your machine.
Swap out vacuum sealer bags regularly. Never reuse bags that held strong-smelling foods—it's just not worth the risk of flavor transfer.
Maximizing Bag and Accessory Quality for Reliable Sealing
Good bags and well-kept accessories make all the difference for vacuum sealing. The right combo saves you from headaches like failed seals and extends your machine's life.
Choosing Compatible Vacuum Bags and Rolls
Not every vacuum bag fits every machine. You've got to check your sealer's requirements.
Textured vs. smooth bags—there's a real difference. Textured bags pull air out better thanks to their channels. Smooth bags often don't seal well with most home sealers.
Thickness counts too. Most bags are 3-4 mil thick. Thicker ones are better for sharp or frozen foods. Thin bags? They rip and ruin your seal.
Pre-cut bags vs. rolls—each has perks. Rolls let you pick the size you need and cut down on waste. Pre-cut bags are quick but less flexible for odd portions.
Skip generic bags if they don't say they're compatible. They're usually made with cheap materials and give you weak seals. Look for food-grade, multi-layer bags with a nylon outer layer—they hold up much better, especially with weird-shaped foods.
Avoiding Overfilling and Bag-Related Mishaps
Overfilling is the main culprit behind sealing fails. Give yourself 3-4 inches of empty space at the top so food and liquids don't mess up the seal.
Sharp stuff like bones or pasta? Wrap them in a paper towel before sealing to avoid punctures.
Sealing something wet? Freeze soups or marinades for an hour or two before vacuuming. That way, the liquid stays put.
When sealing delicate foods like bread, stop the vacuum early and use manual sealing to avoid crushing them.
Double-sealing is a smart move for important stuff. Two seal lines, a little gap between them—if one fails, the other keeps things fresh.
Watch the sealing process. If you see moisture creeping toward the sealer, hit stop and dry the bag opening.
Proper Care for Accessories and Components
Clean accessories just work better and last longer. Regular maintenance keeps things running and avoids cross-contamination.
Wash hose attachments and jar sealers with warm soapy water after each use. Dry them well before storing, otherwise you'll get mold.
Check gaskets once a month. Look for cracks, stuck-on food, or hardening. Swap out damaged gaskets right away to keep the vacuum strong.
Store attachments in labeled boxes or the original packaging so they're protected and easy to find.
Wipe sealing strips with a damp cloth every few uses. If the Teflon cover gets burned or torn, replace it.
We keep the stuff we use every day close by, while specialty attachments go in their own spot. It saves time and prevents damage from digging through junk drawers.
Temperature matters—don't store accessories somewhere too hot or cold. Room temperature and dry is the way to go.
Frequently Asked Questions
Taking care of your compact vacuum sealer keeps it working well and sidesteps problems like odors, seal failures, and worn parts. Here are some practical answers about cleaning, gasket swaps, and knowing when to replace components.
How do you keep a compact vacuum sealer clean and free from nasty odors?
We clean our compact vacuum sealers every few uses to keep odors away. Pull out the drip tray and wash it with warm soapy water.
Wipe down the vacuum chamber with a damp cloth and mild cleaner. Focus on the sealing area, where food likes to hide.
If stubborn smells linger, we use a diluted white vinegar solution on a soft cloth. Skip harsh chemicals—they can mess up the sealing strip or internal parts.
Let everything air dry before putting it back together. Trapped moisture leads to mold and funky smells.
Store the sealer in a dry place with the lid slightly open. That way, air can circulate and musty odors don't build up.
Can you give me the rundown on the best practices for maintaining my compact vacuum sealer?
We wipe the sealing strip after every use to clear away food and grease. This keeps the seals strong.
Check gaskets monthly for cracks, tears, or stiffness. Replace them right away if they look worn or the seal isn't holding.
Stick to bags made for your model. Generic bags can cause sealing problems and might even damage the heating element.
Store the unit with the lid slightly open—this keeps the gasket from getting squished and helps avoid odors.
Keep the air intake vents free of dust. Blocked vents make the sealer overheat and lose suction.
Don't run the sealer for long stretches without a break. Short cycles prevent overheating and help the motor last longer.
What are the signs that it's time to replace parts on my vacuum sealer, and where can I find them?
If bags lose vacuum quickly or won't seal, it's probably time for new gaskets.
Weird noises like grinding or clicking could mean something's up with the motor or pump. If you hear those, reach out to the manufacturer.
If the sealer overheats quickly, first check the vents for dust. If that's not it, the motor might need service.
Get replacement parts from the manufacturer's website or authorized dealers for the best fit and warranty protection.
Amazon and kitchen supply shops usually have common parts like gaskets and sealing strips. Double-check compatibility before buying.
Keep your model number handy—it’s usually on a label under the unit.
Are there any compact vacuum sealer models that outperform the rest in terms of easy maintenance?
Some high-end brand models usually make maintenance a breeze, and you can find replacement parts almost anywhere. Swapping out gaskets and sealing strips? It’s quick—no fuss.
Some models come with drip trays you can just pop out and rinse, plus the chambers are easy to reach for a proper clean. Their gaskets snap in and out, and you don’t even need tools. That’s a relief.
Other compact units feel solid and last a long time, though you’ll need a bit more know-how to keep them running smoothly. They’re clearly designed for folks who use their sealer a lot.
Honestly, I’d steer clear of those super cheap models. If you can’t find parts when something breaks, it’s just not worth the hassle. Spending a bit more upfront? You’ll thank yourself later.
If you want to make your life easier, focus on models with dishwasher-safe parts and instructions that actually make sense. A few brands even toss in video tutorials for repairs—which, let’s be real, can save you from a lot of frustration.
Share:
7 Budget‑Friendly Meal‑Prep Ideas Using a Small Vacuum Sealing Machine
Travel & Camping Meal Safety: Keeping Food Fresh With a USB‑Powered Vacuum Sealer