

Check out our latest compact vacuum sealer for food collection!
Most of us get caught up in recipes and fancy techniques, but honestly, there’s a step that happens way before the stove is even warm that can make or break your dinner.
How you store your ingredients totally changes their moisture, nutrition, and texture, so proper storage isn’t just some afterthought, it’s the bedrock of good cooking. If your veggies are limp or your meat’s got freezer burn, you’re already starting at a disadvantage, no matter how many hours you’ve clocked watching cooking shows.
We’ve all pulled out soggy peppers or dried-out chicken and thought, “Maybe I can save this?” Usually, not so much. Ingredients that lose moisture in storage won’t brown right, and once nutrients break down, they’re gone for good.
The right containers, temperatures, and a bit of kitchen organization don’t just keep food from going bad, they actually help ingredients taste better and cook the way they’re supposed to.
Smart storage isn’t about having the latest gadget or some over-the-top system. It’s more about knowing what your food actually needs to stay fresh, which containers are worth using, and setting up your kitchen so you’re ready to go when it’s time to cook.
Once you realize how much storage impacts everything from cooking times to nutrition, you’ll probably start to wonder why we all obsess over knife skills first.
Key Takeaways
- Good storage keeps ingredients moist, nutritious, and full of texture, so they cook and taste better
- Different foods need their own temperature, humidity, and container setup to last longer and stay high quality
- Organization, labeling, and rotating what you’ve got cuts waste and makes sure you’re cooking with the freshest stuff
How Smart Storage Sets the Stage for Cooking Success
Good storage isn’t just about avoiding that science experiment in the back of your fridge. It keeps your food tasting great, makes meal prep easier, and helps you waste less before you even start cooking.
The Connection Between Storage and Food Quality
How you store your ingredients decides whether they’ll actually work for you in the kitchen. If your veggies dry out in the fridge, they won’t caramelize—they’ll just steam and go limp. Proteins that get too warm or sit around too long end up tasting off and feeling weird, no matter how much seasoning you throw at them.
Temperature matters more than most folks think. Keep your fridge between 34-38°F and you’ll slow down those enzymes that mess with flavor and texture. Fish kept cold stays firm and sweet, but let it warm up for even an hour and it starts to break down.
Storage protects nutrients, too. Vitamin C in bell peppers, for example, drops by half if you leave them in bad conditions for a week. But stash them in an airtight container in the crisper and you can hang onto 80-90% of those vitamins. You can’t cook nutrition back into food once it’s gone.
Influence of Storage on Cooking Flow and Prep Readiness
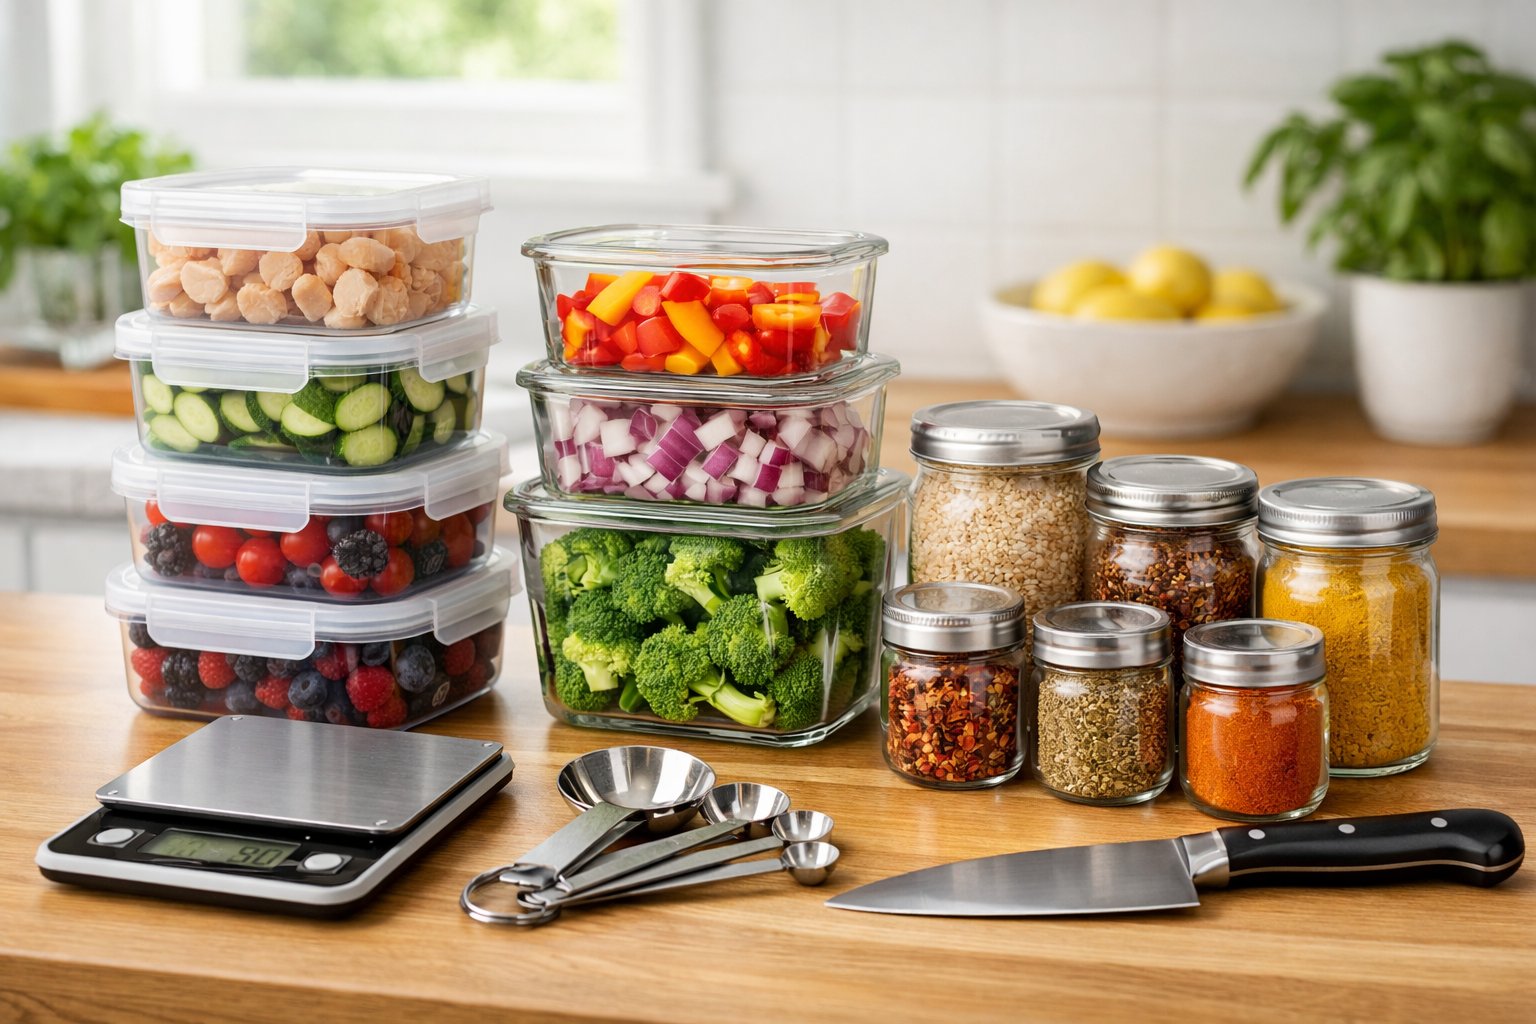
Smart storage makes meal prep way less stressful. If you’ve already washed, chopped, and portioned your veggies into clear containers, you’re not scrambling to find or prep stuff when it’s go time. Honestly, prepping produce after shopping and storing it well can cut your actual cooking time by a third, maybe even more.
Letting meat come up to room temp for 20-30 minutes before cooking helps it cook evenly—no more raw middles and burnt outsides. But that only works if you stored it properly in the first place.
If you group ingredients by how you’ll cook them (like stir-fry stuff together, roasting veggies in another spot), it’s easier to grab what you need. Labeling with dates means you’re using things at their best, instead of discovering something fuzzy and unidentifiable later.
Reducing Food Waste for Better Meals
It’s wild, but about a third of household food gets tossed, often because we store it wrong. Wilted herbs, freezer-burned meat, slimy produce—it’s not just money down the drain, it’s also a lost chance at a good meal.
First-in, first-out rotation helps right away. Buy new rice or canned beans? Move the older stuff to the front so you actually use it.
Switching to clear containers for pantry staples made a huge difference—you can see what you have and stop buying doubles. Visibility means you actually use what you’ve got.
Different foods want different storage conditions. Leafy greens like high humidity and a damp towel in a sealed container. Onions and garlic do better in a dry, cool spot with some airflow. Tomatoes don’t love the fridge but spoil fast on a hot counter—they’re happiest around 55-60°F. Getting these details right can stretch shelf life by days or weeks, and that means more good food ends up in your meals instead of the trash.
Choosing the Right Storage Containers and Tools
The containers you pick matter for food quality, how smoothly you prep, and how much you end up throwing away. Material, sealing, and even eco-friendliness all play a role in keeping ingredients fresh and your kitchen running smoothly.
Airtight Containers and Their Advantages
Airtight containers keep out oxygen, lock in moisture, and stop flavors from mingling. Dry goods like flour, sugar, and grains last weeks or even months longer in a good container compared to flimsy packaging.
Glass containers are great—they don’t stain or hold onto smells, and most go straight from fridge to oven (up to about 450°F). Plus, being able to see what’s inside at a glance is honestly underrated.
Plastic containers are lighter and good for lunches or meal prep. Just look for BPA-free ones with snap-lock lids that actually seal. They’re usually microwave- and dishwasher-friendly, at least on the top rack.
Stackable designs save space. Straight sides nest better than curvy ones, and if you can get lids that fit multiple sizes, you’ll cut down on clutter.
It’s worth spending a bit more on containers that seal well. You’ll toss less food and have fewer mystery leftovers hiding in the back.
Vacuum Sealing and Freezer-Safe Options
Vacuum sealing pulls the air out before storage, which slows down spoilage and stops freezer burn. Meat in vacuum-sealed bags can stay good in the freezer for two or three years—compare that to six months in regular packaging.
It’s especially handy if you buy in bulk, freeze seasonal produce, or like to batch-cook. Portion proteins before freezing and you’ll have weeknight dinners ready to go, with faster thawing than if you froze a whole brick.
Freezer-safe containers need to handle cold without cracking. Tempered glass and certain plastics do the job, but always let hot food cool before freezing to avoid breaking the container.
Some commercial-style systems swap oxygen for nitrogen or CO₂, but now there are even a few home gadgets that do similar things for specialty foods.
Vacuum sealers aren’t cheap, but they usually pay for themselves pretty quickly since you stop wasting so much food and can stock up when things go on sale.
Eco-Friendly and Smart Storage Solutions
Reusable silicone bags are a solid swap for disposable plastic—they’re flexible, see-through, and can handle the freezer, oven (up to 400°F), or even sous vide.
Stainless steel containers are tough, don’t stain or smell, and stack well, though you can’t stick them in the microwave.
Choosing containers that last—like tempered glass or good stainless—means you’ll buy less over time and cut down on waste.
Smart storage habits count just as much as the containers. Label everything with what it is and when you stored it, use up older stuff first, and try to match the container size to the amount of food to cut down on air exposure.
Buying in bulk reduces packaging waste, especially if you have the right containers to keep things fresh. Fewer grocery runs, less trash, and you usually save some cash too.
Key Factors That Impact Food Freshness and Nutrition
Temperature, humidity, and knowing how to read dates are the backbone of keeping food fresh and nutritious. Nail these, and you’ll cook with ingredients at their best.
Optimal Storage Temperatures
Every 10°F you go up in storage temp, you cut shelf life in half. So, keep your fridge at or below 40°F (4°C) and your freezer at 0°F (-18°C) to slow down bacteria and enzyme action that wrecks nutrients.
Raw meat, poultry, and seafood are happiest between 32°F and 40°F, and it’s safest to store them on the bottom shelf to avoid drips. The crisper drawer runs a bit warmer and more humid (32-50°F), which is perfect for fruits and veggies.
Room temp is fine for potatoes, onions, and whole tomatoes if you keep it between 50°F and 70°F. Stick bread on the counter for a few days, but if you need to keep it longer, freeze it—otherwise, it goes stale or moldy fast.
Controlling Humidity and Light Exposure
Most fruits and veggies like high humidity—think 85-95%—but not so much that they get moldy. The crisper can usually be adjusted, and leafy greens especially want it humid, while peppers and squash are fine with less.
Light breaks down vitamins, especially A, C, and B2. Keep olive oil in dark bottles away from the sun, and stash dried herbs in opaque containers inside cupboards.
Oxygen’s not great for most foods, either. Airtight containers help limit both air and light. Glass with rubber seals is great for dry goods; for produce, bags with tiny vents strike a balance between airflow and protection.
Understanding Expiration Dates and Shelf Life
Expiration dates are confusing. “Use by” means don’t eat it after that date, especially for dairy and meat. “Best before” just means it’s at its peak then, but it’s usually fine for a while if stored right.
Pantry staples often last way past their printed date if you keep them cool and dry. Canned foods can be safe for years, though the nutrition drops over time. Trust your eyes and nose, not just the date.
Labeling containers with when you bought or stored things helps keep your kitchen running smoothly. It’s a simple habit that cuts waste and makes sure you’re cooking with ingredients that are still worth eating.
Food Preservation Methods That Improve Cooking Results
Preservation isn’t just about not getting sick—it’s about whether your food actually tastes and cooks the way it should. Temperature, moisture, and storage conditions all decide if your ingredients will make your meal shine or fall flat.
Refrigeration Best Practices
Keep your fridge between 35°F and 38°F for best results. Most fridges run a bit warm, which speeds up spoilage and makes food taste off.
Raw meats go on the bottom shelf in a pan—safest spot, and it’s the coldest. Leafy greens do best in the crisper drawer with high humidity, while fruits that give off ethylene gas (like apples) need low humidity.
Don’t pack your fridge too full. Air needs to move around to keep temps steady. The door is the warmest spot, so stick condiments or other stable stuff there—not milk or eggs.
Freezing and Preventing Freezer Burn
Freezer burn happens when air hits your food, sucking out moisture and leaving weird, dry patches. Get rid of as much air as possible before freezing—vacuum sealing is best, but you can also use freezer bags or wrap things tightly in plastic and then foil.
Keep your freezer at 0°F or lower. Even quick temperature swings can mess up texture by making bigger ice crystals, especially in meat or produce. Label everything with dates, because even the best-frozen food loses quality over time.
Dry Storage for Dry Goods and Whole Grains
Dry goods really do best in cool, dark spots with low humidity—otherwise, you’re just inviting rancidity and pests. Whole grains, in particular, need more attention than refined ones because their natural oils go bad faster.
Whole grains still have their bran and germ, both loaded with oils that’ll oxidize if you leave them exposed to heat, light, or air. We stash ours in airtight containers in the fridge or freezer. It’s a game-changer: in the fridge, they last up to six months instead of just one or two, and in the freezer, you can stretch that to a year.
Refined grains—think white flour or white rice—are less fussy. Airtight containers at room temp will do. Glass or food-safe plastic with snug lids keeps out moisture and bugs way better than those flimsy bags from the store. We steer clear of heat sources like ovens or dishwashers, since temperature swings cause condensation, which leads to mold or clumps.
Advanced Preservation Techniques for Home Cooks
If you get the hang of preservation methods like canning, fermentation, and dehydration, you open up a whole new world. Suddenly, you’re not just storing food—you’re transforming it. There’s something satisfying about pulling out a jar of home-canned tomatoes or a batch of tangy kraut in the middle of winter.
Canning and Water Bath Methods
Water bath canning means heating up sealed jars in boiling water to kill off microbes and create a vacuum seal. It’s safe for high-acid foods—fruits, pickles, jams, and tomatoes (with a little extra acid thrown in).
You don’t need fancy gear: a big pot with a rack, canning jars with two-part lids, and a jar lifter. The steps? Prep your food, pack it into sterilized jars (leave some headspace), get rid of air bubbles, clean the rims, slap on the lids, and boil according to a trusted recipe.
Safety tips:
- Stick to tested recipes from sources like the National Center for Home Food Preservation
- Use pressure canning for low-acid foods—never a water bath
- After cooling, check that the lids are concave and don’t flex
- If a jar’s lid is bulging or leaking, or smells weird, toss it
When you do it right, canned goods last a year or more and are ready for soups, sauces, or whatever you’re cooking. The high acid keeps botulism at bay, so it’s safe—assuming you follow the guidelines.
Fermentation: Sauerkraut, Kimchi, and Beyond
Fermentation is all about letting good bacteria turn sugars into lactic acid, which drops the pH and keeps bad stuff out. You’re basically giving beneficial microbes a head start by salting and keeping things anaerobic.
For sauerkraut, just massage shredded cabbage with 2-3% salt by weight until it gets juicy, then pack it into a jar so it’s submerged in its own brine. Kimchi is kind of the same deal, but with more flavor—garlic, ginger, spices, sometimes fish sauce. Let it ferment at room temp for a week or more, depending on how tangy you like it.
What matters most:
- Salt: 2-3% is the sweet spot—enough to keep out bad bacteria, but not so much it stops fermentation
- No oxygen: Use weights or special lids to keep veggies under the brine
- Temperature: 65-75°F is best; hotter temps speed things up but can get funky
Fermentation isn’t just for preserving. It brings out new flavors, bumps up vitamins, and adds probiotics. Fermented veggies add crunch and zing to anything—grain bowls, tacos, sandwiches, stir-fries. If you haven’t tried it, you’re missing out.
Dehydration, Sun-Drying, and Other Techniques
Dehydration’s all about removing moisture until there’s not enough left for microbes to grow. Electric dehydrators are the gold standard—steady heat, good airflow, and you can set the temp.
Slice fruits and veggies to about 1/4 inch for even drying. If you’re drying apples, pears, or bananas, a quick dip in lemon juice or ascorbic acid keeps them from turning brown. Most stuff dries at 125-135°F for 6-12 hours—herbs do better at lower temps so the flavor doesn’t disappear.
Sun-drying works, but only if you’ve got hot, dry weather (over 85°F, low humidity, decent breeze). Cover food with cheesecloth to keep bugs out, and bring it in at night or it’ll soak up moisture again.
How to store dried foods:
- Let them cool before sealing up
- Use airtight containers with oxygen absorbers
- Keep them somewhere dark and cool (50-60°F is ideal)
- Properly dried, they last 6-12 months
Dehydrated foods save space and pack a flavor punch. Toss them into soups, grind them for spice blends, or eat them straight for snacks.
How Storage Practices Affect Nutrition and Cooking Outcomes
Storing food isn’t just about avoiding spoilage—it’s about what’s left when you finally cook it. The containers you pick, the temps you set, even how much light hits your food—all of it affects whether those nutrients actually make it to your plate.
Nutrient Retention and Loss During Storage
Water-soluble vitamins, like vitamin C and the B’s, are fragile and vanish fast if you leave food exposed to air, heat, or light. Ever opened a bag of spinach after a week and found it limp and pale? That’s not just sad greens—that’s lost vitamins.
Temperature matters a lot. Every 10°C you drop slows the reactions that destroy vitamins by about half. Leafy greens keep their vitamin C best just above freezing. Tomatoes, though, lose flavor and nutrients if you chill them too much.
Fat-soluble vitamins (A, D, E, K) have their own issues. Air and light break them down, so nuts and oils can go rancid. Beta-carotene fades along with its nutrition if you let it sit too long.
How long you store food is just as important as how. Fresh produce can lose up to half its vitamin C in a week. Minerals like iron and calcium hold up better, but bad storage—like letting things dry out or bruise—can still mess with them.
Packaging Choices and Nutrient Stability
Packaging is your shield against oxygen, light, and moisture swings. Airtight glass or BPA-free plastic slows down vitamin loss way better than leaving things in their store packaging or covering them loosely.
Vacuum-sealing is a game-changer for produce. We’ve noticed vacuum-sealed veggies keep 80-95% of their vitamin C after a week, while regular containers only manage 60-70%. That’s a big deal if you’re meal-prepping.
Dark or opaque containers matter for light-sensitive vitamins (like riboflavin and vitamin A). Store foods in clear containers on a sunny counter, and you could lose half those nutrients in just a few days.
| Container Type | Vitamin C After 7 Days | Best Use Case |
|---|---|---|
| Open air, room temp | 20-40% retained | None recommended |
| Standard fridge container | 60-70% retained | Daily-use produce |
| Airtight, refrigerated | 80-90% retained | Prepped ingredients |
| Vacuum-sealed, cold | 90-95% retained | Bulk storage, meal prep |
Humidity counts too. Too much moisture can leach vitamins right out of your food.
Bioavailability and Nutritional Quality After Storage
Keeping nutrients is one thing, but your body still has to absorb them. Storage can actually help sometimes—breaking down cell walls or turning compounds into forms you digest more easily.
Storing veggies cold, then cooking them gently, usually keeps both the amount and quality of nutrients higher than just letting them sit out. We’ve seen that veggies cooked right after refrigeration hold onto more usable nutrients than those left on the counter.
Frozen produce often outperforms “fresh” stuff from the store. If it’s frozen at peak ripeness, it locks in nutrients that would otherwise fade during shipping and shelf time. Studies even show frozen broccoli can have more vitamin C than “fresh” broccoli that’s been sitting around.
Bottom line: proper storage means better browning, deeper flavor, and more nutrition in your finished dish. If storage wipes out B vitamins and antioxidants, you can’t cook them back in.
Storing and Reusing Leftovers for Better Meals
Storing leftovers right keeps them safe and turns them into handy ingredients for quick meals. How you store, label, and reuse cooked food can make a real difference in meal quality and how smoothly your kitchen runs.
Best Practices for Storing Leftovers
Get leftovers in the fridge fast—within two hours, ideally. The “danger zone” is 40°F to 140°F, where bacteria multiply like crazy.
Use shallow containers. Big pots of soup cool slowly, so the middle can stay warm long enough for bacteria to grow. Divide food into containers no more than 2-3 inches deep so it chills quickly.
Airtight containers keep leftovers from drying out or picking up weird fridge odors. Resist the urge to just toss a plate in uncovered—air exposure speeds up spoilage.
How long to store:
- Most cooked leftovers: 3-4 days in the fridge
- Uncooked ground meat/poultry: 1-2 days
- Uncooked steaks/roasts: 3-5 days
- Cured meats: up to 7 days
Keep sauces and starches (like pasta or rice) separate. No one likes soggy noodles, and this also helps both last longer.
Labeling and Organization Tips
We label everything with the date and what’s inside, usually with tape and a marker. What seems obvious now becomes a “mystery tub” by the weekend.
Try setting aside a “leftover zone” in the fridge, so nothing gets lost behind the milk. Check this spot first when you’re figuring out what to eat.
Simple labeling:
- Date made
- What it is
- Any plans for it (“taco filling,” “soup base,” etc.)
Freeze leftovers in portions. If you freeze a whole batch together, you’re stuck thawing all of it when you just want a single serving. Smaller containers make meal prep and portioning easier.
Clear containers help, too. If you can see what’s inside, you’re less likely to forget about it.
Creative Uses for Stored Ingredients
Leftover proteins are building blocks for grain bowls, tacos, salads—whatever you’re in the mood for. Roasted chicken goes into sandwiches, pasta, or fried rice. We don’t just reheat leftovers; we reinvent them.
Cooked veggies blend into soups, frittatas, or pasta sauces. That lonely roasted broccoli? Toss it with eggs or puree it into soup.
Quick ideas:
- Mashed potatoes → pancakes or gnocchi
- Cooked grains → fried rice or salads
- Roasted veggies → blended soups or pizza toppings
- Plain pasta → pasta frittata or cold salad
Don’t toss leftover cooking liquid. We save pasta water, blanching water, and braising juices—they’re flavor bombs for sauces and soups.
Stale bread? Croutons, breadcrumbs, or panzanella. Herbs that are starting to wilt? Chop and freeze them in oil in an ice cube tray. These little tricks stretch your ingredients and make meal prep way easier.
Frequently Asked Questions
Storage questions pop up all the time—why doesn’t my spinach last, how do I organize my pantry, why do my leftovers taste off? Here’s what we’ve figured out.
How does organizing your pantry impact your meal preparation efficiency?
A tidy pantry saves you real time. Group similar items—baking stuff, grains, canned goods—in their own spots. You’ll spend less time searching and more time actually cooking.
Seeing what you have helps, too. Clear containers let you spot when you’re running low. Labeling with dates might seem over the top, but it saves you from sniffing mystery jars.
When your pantry’s logical, you waste less. No more buying a third jar of paprika because you forgot about the other two hiding in the back.
Can you describe the relationship between proper ingredient storage and food quality?
How you store ingredients completely changes how they cook. Veggies kept at the right temp and humidity hold their structure—they brown instead of steaming into mush.
Proteins are even fussier. Fish stored well stays firm and flavorful. Let it get warm or bounce between temps, and it gets mushy or off-tasting before it even looks spoiled.
Nutrients drop off fast if storage isn’t right. Leafy greens lose vitamin C quickly without cold and darkness. Once it’s gone, even gentle cooking can’t bring it back.
In what ways does a clutter-free refrigerator contribute to a smoother cooking process?
A clean, organized fridge means you don’t lose ingredients in the back. When you can actually see what’s inside, you’re more likely to use things up before they expire, and you’re less likely to come home with doubles after a grocery run.
Temperature zones matter way more than you’d expect. The back’s the coldest spot, so that’s where dairy and eggs go. The door stays warmer, so that’s for condiments—not milk. When stuff’s in the right spot, it lasts longer and honestly just tastes fresher.
Airflow gets overlooked, but it’s crucial. If you jam everything in, you block the cold air and end up with warm corners where food spoils fast. We try not to overfill shelves—it just makes life easier when you’re reaching for something, too.
What tips can you share for maximizing the shelf life of spices and dry goods through storage solutions?
Light wrecks spices and dried herbs, so we stash them in dark jars or hide them away in cabinets. Never on the counter, never by the window. Heat’s another flavor killer, so even if it’s tempting, don’t keep spices next to the stove.
Airtight containers really do make a difference for grains, flour, nuts, and beans. Oxygen ruins oils and lets bugs in, so we use glass jars with decent seals or BPA-free plastic that actually closes tight.
Cool and dry wins every time. If you’ve got a basement, it usually beats the kitchen cabinet. Under 70°F and low humidity is the sweet spot. Whole spices can last for years if you store them right; ground ones—maybe a year, tops.
How can innovative storage solutions assist in reducing food waste in the kitchen?
Vacuum sealers aren’t just for pros anymore—they’re pretty affordable and, honestly, they work. We seal meats and fish before tossing them in the freezer, which keeps freezer burn away and makes food last way longer than if you just wrap it up.
Produce keepers with vents let you tweak the air and moisture inside. We’ve kept strawberries fresh for almost two weeks, which feels like magic compared to the usual three-day window. It’s all about managing the moisture.
Our simplest trick? Wash and chop veggies right after shopping, then throw them in airtight containers. Prepped food actually gets eaten; the stuff you leave whole just sits and goes slimy. That one tweak cut our produce waste in half, no joke.
What role does container selection play in preserving the freshness of your ingredients?
Different foods call for different containers. Glass jars with rubber seals? They're a go-to for pantry staples like flour, sugar, coffee, and dried herbs. They block out air and won't pick up weird smells.
When it comes to the fridge, I usually grab BPA-free plastic containers. They're lighter, easy to stack, and work for things like prepped veggies or marinated meats. But honestly, if the lid doesn't seal tight, you're just letting in moisture and air—so double-check that.
Some produce needs to breathe. Leafy greens want high humidity but also a bit of airflow, or they turn slimy. I like containers with adjustable vents, or sometimes I just poke a couple holes in the bag and call it good. Mushrooms are fussier—they need dry air and plenty of it, so paper bags win over plastic every time.
Share:
Why Cooking Efficiency Starts With Storage Habits
Why Cooking Efficiency Starts With Storage Habits