

Check out our latest collection of compact vacuum sealer for food!
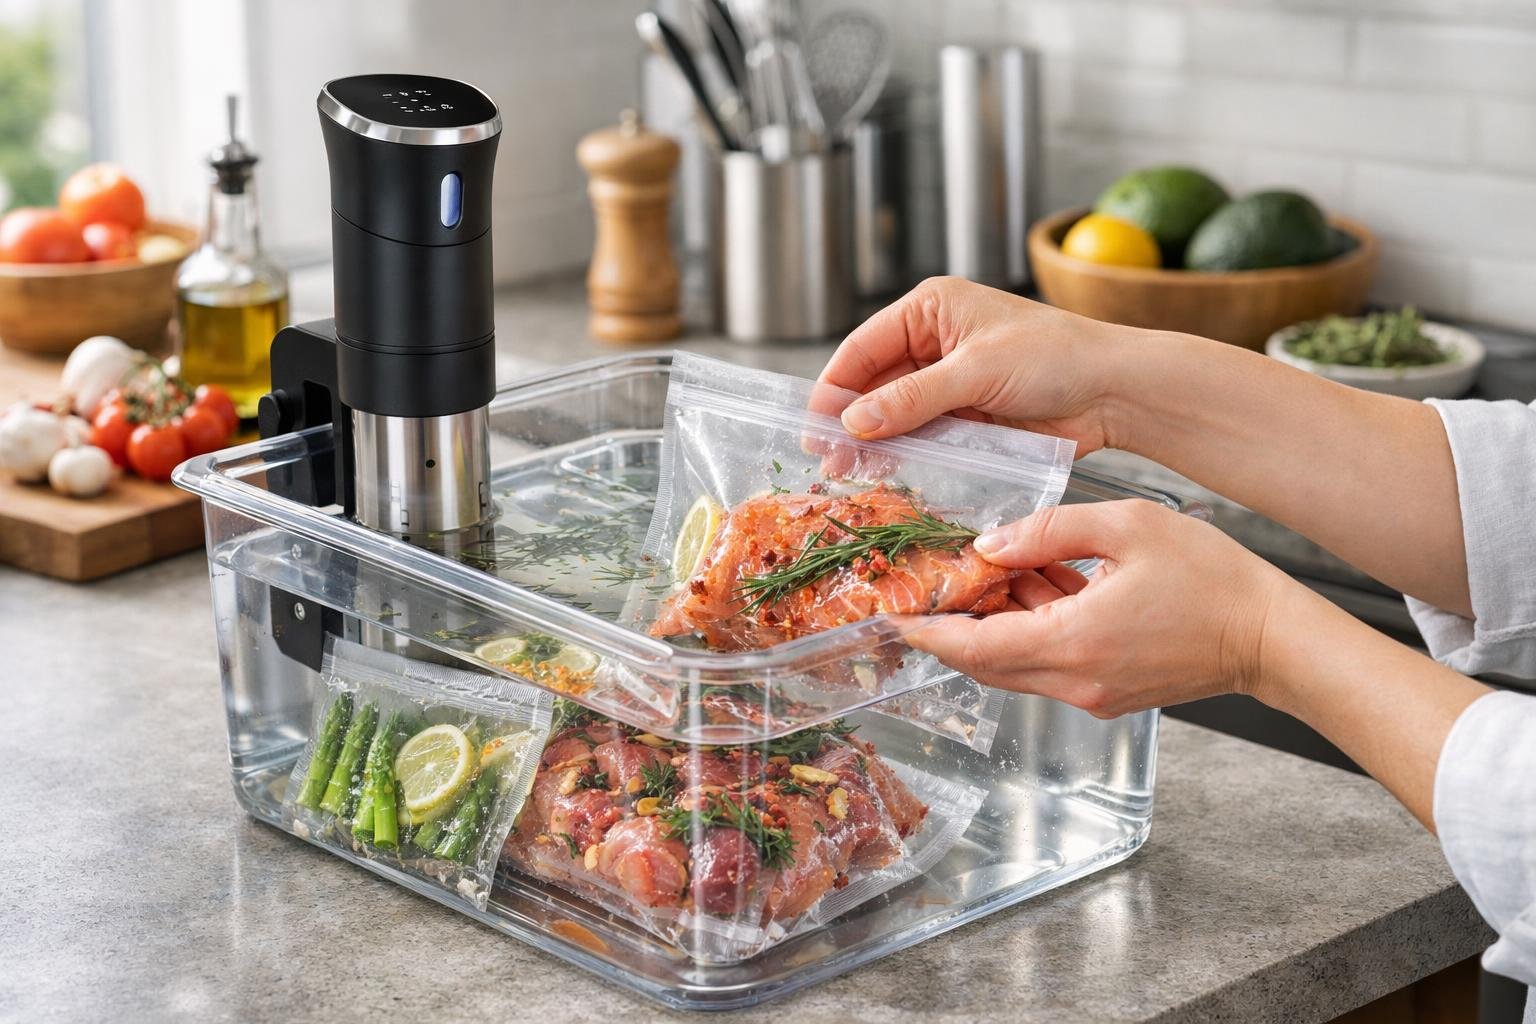
Busy weeknights get easier when dinner is already cooked, portioned, and ready to finish. Sous vide meal planning helps you prepare proteins, vegetables, and full meal components with precise temperature control, so every portion comes out tender, consistent, and easy to reheat.
Sous vide meal prep makes home cooking more efficient by letting you cook multiple servings at once, store them safely, and bring them back to serving temperature with minimal hands-on work. Instead of starting from scratch every night, you can batch-cook once or twice a week, seal portions neatly, and build meals around what is already prepared.
This guide explains the essential gear, batch cooking workflow, storage tips, reheating methods, and practical meal planning strategies that help sous vide cooking save time without sacrificing freshness or quality.
Key Takeaways
- Batch-cook multiple portions with sous vide and get consistent results, all while slashing your weekly cooking time
- You’ll need an immersion circulator, a sealing method (vacuum sealer or freezer bags), and a few basic accessories
- Sous vide meals last 5-7 days in the fridge or up to a year frozen, and reheat perfectly in the water bath, no loss in quality
Understanding the Sous Vide Approach
Sous vide uses precise temperature control in a water bath to deliver reliable results every time. It takes most of the guesswork out of cooking proteins and veggies, and it’s a real game-changer for batch cooking and meal prep.
What Makes Sous Vide Unique
So what’s sous vide, really? You seal food in bags and drop them into a water bath held at a specific temperature, anywhere from 130°F to 185°F, depending on what you’re cooking.
Unlike grilling or roasting, you can’t really overcook things here. Chicken breasts won’t dry out, steaks won’t turn leathery, because the water never gets hotter than your target temp. The food just chills at the perfect doneness until you’re ready.
Those vacuum-sealed or zip-top bags keep everything cooking in its own juices. Seasonings soak in deeper, and nothing dries out. You get that restaurant-level texture without babysitting the stove or timing things down to the second.
How Temperature Control Improves Results
Sous vide’s precision means you don’t get those hot-and-cold spots you see with grilling or pan-frying. A steak on the grill gets a crust but is cooler inside; with sous vide, it’s the same doneness from edge to center.
Some go-to sous vide temps:
- Chicken breast: 145°F-150°F
- Medium-rare steak: 129°F-134°F
- Pork chops: 140°F-145°F
- Salmon: 120°F-125°F
The gentle heat keeps nutrients around that would otherwise break down with high temps. Proteins stay tender, since you avoid that tough, overcooked texture. And you can hold food at serving temp for hours, super handy if you’re juggling multiple dishes.
Why Batch Cooking Works So Well
Sous vide shines when you batch-cook. If proteins need similar temps, toss them all in at once, chicken, pork, sturdy veggies, each in their own bag.
Instead of cooking every night, you just invest a chunk of time once and let the machine do its thing. Portion everything into bags, set the circulator, and walk away. You can prep sides or just relax.
Storage is easy: after cooking, chill the bags fast in an ice bath. Food lasts longer than with most other methods, and it’s already portioned. Reheating is a breeze, water bath, microwave, or a quick pan sear, and it tastes like you just made it.
Must-Have Tools and Gear
To get rolling with sous vide meal prep, you really just need three things: a solid immersion circulator, a way to seal your food, and a few accessories to keep things running smoothly.
Choosing the Right Sous Vide Machine
The circulator is the heart of the setup. It clips onto a pot or container and keeps water at a set temp for hours.
When shopping, wattage is worth checking, higher wattage means faster heating and better temp recovery when you add cold food. Look for a home sous vide machine in the 1000 to 1200 watt range if you want faster heating and steady temperature recovery.
Container compatibility matters, too. Some circulators use clamps, others magnets. Compact models work well for smaller kitchens, while larger units may be better for bigger batches and deeper containers.
Smart features? If you like tech, some models connect via Bluetooth or WiFi. You can start things from another room or check progress on your phone.
Vacuum Sealing Essentials
A good seal keeps water out and flavors in. You’ve got two main options.
Vacuum sealers are the gold standard for batch cooking. They suck out all the air and make a tight, waterproof seal. It’s great for prepping several meals at once and stacking them in the freezer.
If you’re watching your budget, heavy-duty freezer bags work, too. Heavy-duty freezer bags with the water displacement method can work well. Lower the bag into water to push the air out, then seal it carefully. It’s cheaper but you’ll need to be a bit more careful to avoid leaks.
Sous vide-specific bags made for high heat give extra peace of mind for longer cooks.
Accessory Add-Ons for Smarter Prep
A few extras make sous vide meal prep even easier.
Dedicated sous vide containers beat stock pots. Clear polycarbonate ones with lids help keep water from evaporating, and lots have cutouts for the circulator. Being able to see inside helps when you’re juggling multiple bags.
Weighted accessories keep bags from floating. Weights or stainless steel balls do the trick, and some folks use magnets to pin bags down.
Bag clips or racks help organize different portions in the water bath. If you’re cooking several proteins for the week, keeping them separated saves hassle later.
An instant-read thermometer is handy for double-checking doneness, especially if you plan to sear proteins. Labels and permanent markers are a must for tracking dates and contents.
Smoothing Out Weekly Meal Planning
For sous vide meal planning to actually save you time, you’ve got to portion proteins right, build a schedule that matches your real life, and keep everything labeled. These steps turn batch cooking into a real system.
Portioning and Organizing for Efficiency
Portioning proteins before sealing makes weeknights a breeze. If you cook four chicken breasts, seal them individually or in meal-sized packs, whatever fits your household.
Single-portion bags go straight from the bath to containers. Great for lunches or if everyone eats at different times. For family dinners, portion 2-4 servings per bag.
Some smart portioning ideas:
- Individual proteins (4-6 oz chicken breasts, salmon fillets, pork chops)
- Family-style packs (1-2 lbs for stews, roasts, shredded meats)
- Snack-size (3-4 oz for bowls or salads)
Organize your fridge or freezer by protein type and cooking temp. Chicken at 145°F in one spot, beef at 131°F in another. This way, you won’t grab the wrong thing when you’re in a rush.
Building a Realistic Weekly Meal Plan
Start with your actual schedule. Got soccer practice Tuesday? That’s not the night for a 4-hour brisket.
Assign proteins to days based on cook time and what your family likes. Monday could be reheated sous vide chicken, Saturday might be a slow-cooked beef roast.
Example weekly plan:
| Day | Protein | Cook Time | Meal Idea |
|---|---|---|---|
| Monday | Chicken | Reheating | Chicken bowls |
| Tuesday | Pork chops | 1-2 hours | Chops with veggies |
| Thursday | Salmon | 30 min | Fish tacos |
| Saturday | Beef roast | 8-24 hours | Sunday meal prep |
Batch-cook proteins on Sunday and Wednesday. This keeps things fresh and gives you options without cooking every night.
Labeling, Tracking, and Staying on Schedule
Label every bag with the protein, target temp, cook time, and date sealed. Permanent markers work better than sticky notes, which just fall off.
Labeling should include:
- Protein and weight (Chicken breast, 6 oz)
- Temp and time (145°F, 90 min)
- Sealed date (04/20/2026)
- Use-by date (04/27/2026 for fridge, 07/20/2026 for freezer)
A simple fridge checklist helps track what’s ready and what meals you’ve planned. It keeps you from forgetting about food or scrambling at dinnertime.
For frozen portions, write the use-by date, three months is safe for most proteins. Thaw in the fridge overnight, and move tomorrow’s protein to thaw each evening during cleanup.
Step-By-Step Sous Vide Meal Prep Workflow
Sous vide meal prep is really just three phases: prepping and seasoning, sealing for cooking, and then cooling and storing safely. Each step sets you up for meals that stay fresh and taste great all week.
Ingredient Prep and Seasoning
Start by portioning proteins into servings, uniform sizes cook more evenly. Label bags before filling. Write contents, temp, time, and date so you’re not guessing later.
Go easy on seasoning. Flavors get more intense in sous vide, so use about half your usual amount. Fresh herbs, garlic, citrus zest, they all work great. For fish, a quick salt and sugar cure (10 minutes) before bagging really helps texture.
Add a splash of olive oil or a pat of butter to veggies or fish to prevent sticking. For delicate stuff like burger patties, freeze them for 10-15 minutes before sealing so they keep their shape.
Trim some fat off proteins but leave enough for flavor. Score fish skin if you plan to sear it. This little bit of effort up front makes a big difference later.
Packing and Sealing Strategies
Vacuum sealing pulls out air that can mess with heat transfer and cause uneven cooking.
If you’re using a vacuum sealer, try the cuff technique: fold the bag’s top outward before filling, so the seal area stays dry. This is especially handy with marinades or oily foods.
BPA-free freezer bags are fine for short cooks (under 4 hours). Use water displacement: lower the filled bag slowly into water, let the pressure force air out, then seal just before the opening goes under.
| Sealing Method | Best For | Storage Time |
|---|---|---|
| Vacuum Sealer | Freezing and bulk prep | Up to 3 years (raw meat) |
| Water Displacement | Same-day or weekly prep | 5-7 days in fridge |
Clip bags to the pot’s rim to keep seals above water. Use a heavy bowl or weights to keep bags submerged, veggies especially like to float.
Cooking, Chilling, and Safe Storage
Group your ingredients by cooking temperature, it just makes life easier. Chicken and root vegetables both do great at 150°F, so you can knock out a couple of components at once.
Rapid chilling is a must for food safety. Move cooked bags straight into an ice bath (equal parts ice and water). This cook-chill step drops the temp below 41°F in about 30-60 minutes, which halts bacteria in its tracks.
Don’t skip the ice bath. If you leave food sitting out, even in sealed bags, bacteria can multiply.
Once chilled, vacuum-sealed meals last 5-7 days in the fridge for chicken and eggs, 5-6 days for beef or pork, and 4-5 days for veggies. If you freeze vacuum-sealed portions, they’ll stay good for up to a year. You can also season and vacuum-seal raw proteins before freezing, they’ll keep for up to three years.
Store bags flat in the fridge for easy stacking. Cooking from frozen? Just add 30-60 minutes to your usual sous vide time.
Go-To Recipes for Batch Cooking Success
Having a solid lineup of sous vide recipes makes meal prep so much easier. You want proteins, veggies, and maybe even breakfast stuff that actually taste good after a few days in the fridge.
Sous Vide Chicken and Pork Staples
Chicken breasts at 145°F for 1.5 hours are a meal prep staple. They stay juicy and slice easily for salads, sandwiches, or grain bowls. We usually season a few bags differently in one go: maybe garlic and herbs in one, BBQ rub in another, Mediterranean spices in a third.
Pork tenderloin at 140°F for 2 hours comes out super tender and juicy, great for quick dinners with roasted veggies or rice. Pork chops work at the same temp, but we cut the cooking time to 1.5 hours for better texture.
Both proteins get a quick sear before serving. Just pat them dry after reheating and toss them in a hot pan for about a minute per side to get that golden crust.
Steak, Vegetables, and Classic Sous Vide Options
Medium-rare steak at 130°F? Restaurant quality, honestly. We like thicker cuts like strip steaks or ribeyes, 2 hours, then portion and store. Searing from frozen actually works well and saves fridge space.
Root veggies like carrots, beets, and sweet potatoes do their best at 183°F for an hour. They keep their shape and soak up seasoning better than if you just boiled them. Asparagus and green beans? 180°F for 15 minutes, crisp-tender every time.
Vacuum-sealed bags keep everything fresh for 5-7 days. We always label with the contents and cooking date to avoid mystery meals.
Breakfasts and Even Sous Vide Desserts
Egg bites at 172°F for an hour are our grab-and-go breakfast. Fill small mason jars with eggs, cheese, veggies, and sausage, protein for days. They reheat in 30 seconds and taste like you just made them.
Creme brulee and cheesecake jars? Surprisingly easy with this method, 176°F for 1.5 hours. The gentle heat gives you that silky texture you just can’t get from baking.
Steel-cut oats at 140°F overnight save precious time in the morning. Portion them out, add toppings, and breakfast is ready all week. No standing over the stove, either.
Tips, Tricks, and Meal Prep Troubleshooting
Sous vide meal prep works best when you know the usual pitfalls and have a routine that fits your life. Let’s talk about what can go wrong, how to store and reheat meals, and ways to make sous vide actually fit into your week.
Batch Cooking Pitfalls to Avoid
Overcrowding the water bath is the classic mistake. If bags touch or overlap, water can’t circulate, and you get uneven cooking.
Leave space between bags. If you need to, cook in two rounds. Another issue: poor sealing, which lets water leak into freezer bags during long cooks. Try the water displacement method for zipper bags, just make sure you get all the air out before submerging.
Don’t assume every protein cooks the same. Chicken breasts need 145°F for 1.5 hours, pork chops want 140°F for 2 hours.
Common batch cooking mistakes:
- Mixing different proteins in one bath
- Reusing bags without checking for holes
- Forgetting to label with cook dates
- Skipping the ice bath, which lets bacteria grow
Salt pulls out moisture over time, so go easy on seasoning at first. Add more when reheating if you need it.
Reheating, Portioning, and Assembling Meals
Portion before or after cooking, it depends on your style. We find pre-portioning into freezer bags is easier for grab-and-go, but family-style works if you’re feeding a crowd.
For reheating, sous vide wins, sealed portions in a 130°F bath for 30-45 minutes. This keeps the texture right and avoids the rubberiness microwaves cause.
Reheating options, best to worst:
- Sous vide bath (keeps texture)
- Steaming (gentle, good for veggies and meat)
- Stovetop with a little liquid (restores moisture)
- Microwave at 50% power (fast, but texture suffers)
We usually assemble meals after reheating instead of before freezing. Proteins stay in their bags, and we prep fresh sides or sauces. This keeps things interesting and avoids freezer burn on delicate stuff.
Store vacuum-sealed meals flat in the freezer. They thaw faster and don’t hog space like big containers.
Making Sous Vide Work for Your Lifestyle
We pick one or two cooking sessions a week, depending on space and how many mouths we’re feeding. Sundays work for a lot of people, but any slot you can stick to is fine.
Start with proteins you already like. Batch-cook chicken, pork chops, or salmon, stuff that goes with anything.
You don’t need fancy equipment. A basic immersion circulator and some reusable silicone bags will do most jobs. We use a big container or stockpot for the water bath, fits more bags, no problem.
Keep a running list of what’s in your freezer. Label bags with the contents, cook date, and reheating time using a permanent marker. Otherwise, you’ll forget what’s in there.
Stay flexible. Some weeks we cook three proteins, other times just one if that’s what’s on sale or we’re busy. The point is to have ready-to-eat options so you don’t have to cook from scratch every night.
Frequently Asked Questions
Sous vide meal planning is easier when you know how to batch, chill, store, and reheat food safely. Here are quick answers to common questions.
How do I batch-cook proteins with sous vide so weeknight dinners are basically on autopilot?
Group proteins by similar cooking temperatures, season them, seal them in meal-sized portions, and label each bag with the date, temperature, and contents. After cooking, chill the bags in an ice bath and store them in the fridge or freezer.
For dinner, reheat the sealed portion in a water bath, then sear if needed for better texture and flavor.
What's the safest way to chill, freeze, and reheat sous vide meals without sacrificing texture?
Move cooked bags straight into an ice bath until fully chilled, then refrigerate or freeze them flat. Vacuum-sealed portions help reduce air exposure and freezer burn.
To reheat, place the sealed food back in a water bath at the original cooking temperature or slightly lower. Reheat once for the best texture and safety.
Which foods actually benefit most from sous vide for meal prep, and which ones are not worth the water bath?
Chicken breast, steak, pork chops, salmon, eggs, and tougher cuts of meat benefit most because sous vide keeps them tender and consistent.
Foods that need crisp texture, such as fried foods or roasted vegetables, are better finished with dry heat. Delicate greens and very thin seafood may not be worth the extra setup.
How can I plan a week of one-bag sous vide meals to cut dishes and cleanup time?
Pair proteins and vegetables that cook well at similar temperatures. Cut ingredients evenly, season lightly, seal each meal in one bag, and label it by day.
Do not force ingredients with very different cooking needs into one bag. Keep them separate when texture or doneness would suffer.
Is sous vide energy efficient compared with using the oven or stovetop for the same meals?
Sous vide can be efficient because the circulator heats water to a steady temperature and then cycles on and off to maintain it. It also lets you cook several portions at once, which can reduce repeated cooking sessions during the week.
Share:
What Mistakes Shorten The Shelf Life Of Prepared Meals In Cold Storage
Which Golf Training Aids Help Beginners Build More Consistent Contact