

Check out our latest compact vacuum sealer for food collection!
A chaotic freezer wastes your time, money, and good food. When stuff gets shoved to the back or you find yourself pulling out frost-caked mystery blobs, you’re way more likely to buy doubles or toss things you could’ve eaten. If you set up a rotation system and organize your freezer, you’ll use up older items first, cut down on waste, and make meal prep a whole lot easier.
Wouldn’t it be nice to open your freezer and just, I don’t know, grab what you need without digging through a leaning tower of frozen stuff? It’s not just about making it look Instagram-worthy. It’s about setting up something that fits the way you actually cook and eat, so food stays fresh and you can actually find it.
Here’s the thing: you don’t need fancy gadgets or a weekend off to get your freezer under control. Just a few tweaks to how you stash and track things, and suddenly your freezer becomes a real kitchen tool, not a food graveyard.
Key Takeaways
- Group similar foods in bins and label everything with contents and dates so you always know what’s inside
- Put newer items behind older ones and freeze foods in smaller portions for quicker use and better space
- Check for expired or freezer-burned stuff regularly and toss what’s past its prime
Start Fresh: Purge, Clean, and Assess Your Freezer
Before setting up any system, you’ve got to empty the freezer and see what you’re actually working with. That means pulling out every last thing, figuring out what’s worth keeping, and giving the inside a solid clean.
Remove and Sort All Items
Pull everything out at once. It’s a pain, but you’ll finally see what’s been lurking in the back. Make piles on the counter—raw meats here, veggies there, meals somewhere else, you get the idea. If it’s hot outside, a cooler with ice packs is your best friend.
While you’re sorting, check dates and labels. If something’s been in there for three months or more and you don’t know when you froze it, set it aside for a closer look. Notice which types of food are taking up the most space, that’ll help you figure out storage zones later.
Identify and Discard Food with Freezer Burn
Freezer burn looks like grayish patches on meat or ice crystals on veggies. It means air got in, and the food’s probably lost its best texture and flavor.
Look for torn packaging or anything that’s just... off. Meat that looks discolored or leathery? Toss it. If you can’t ID something or remember freezing it, it’s time to let go.
And hey, don’t feel bad about tossing things you haven’t used in six months. If you haven’t eaten it by now, you’re probably not going to.
Wipe Down Surfaces for a Clean Slate
Once everything’s out, spray down shelves, drawers, and walls with a mix of warm water and white vinegar. That’ll cut through gunk without leaving chemical residue.
Let tough spots soak for a few minutes if you need to, then wipe everything clean. Don’t forget the door seal and bins. Let the interior air dry or towel it off—any leftover moisture just turns into frost later.
Choose the Best Storage Solutions for Your Freezer
The right bins and containers can turn your freezer from a black hole into something that actually works for you. You want stuff that lets you see what’s inside, uses every inch of space, and keeps food safe for months.
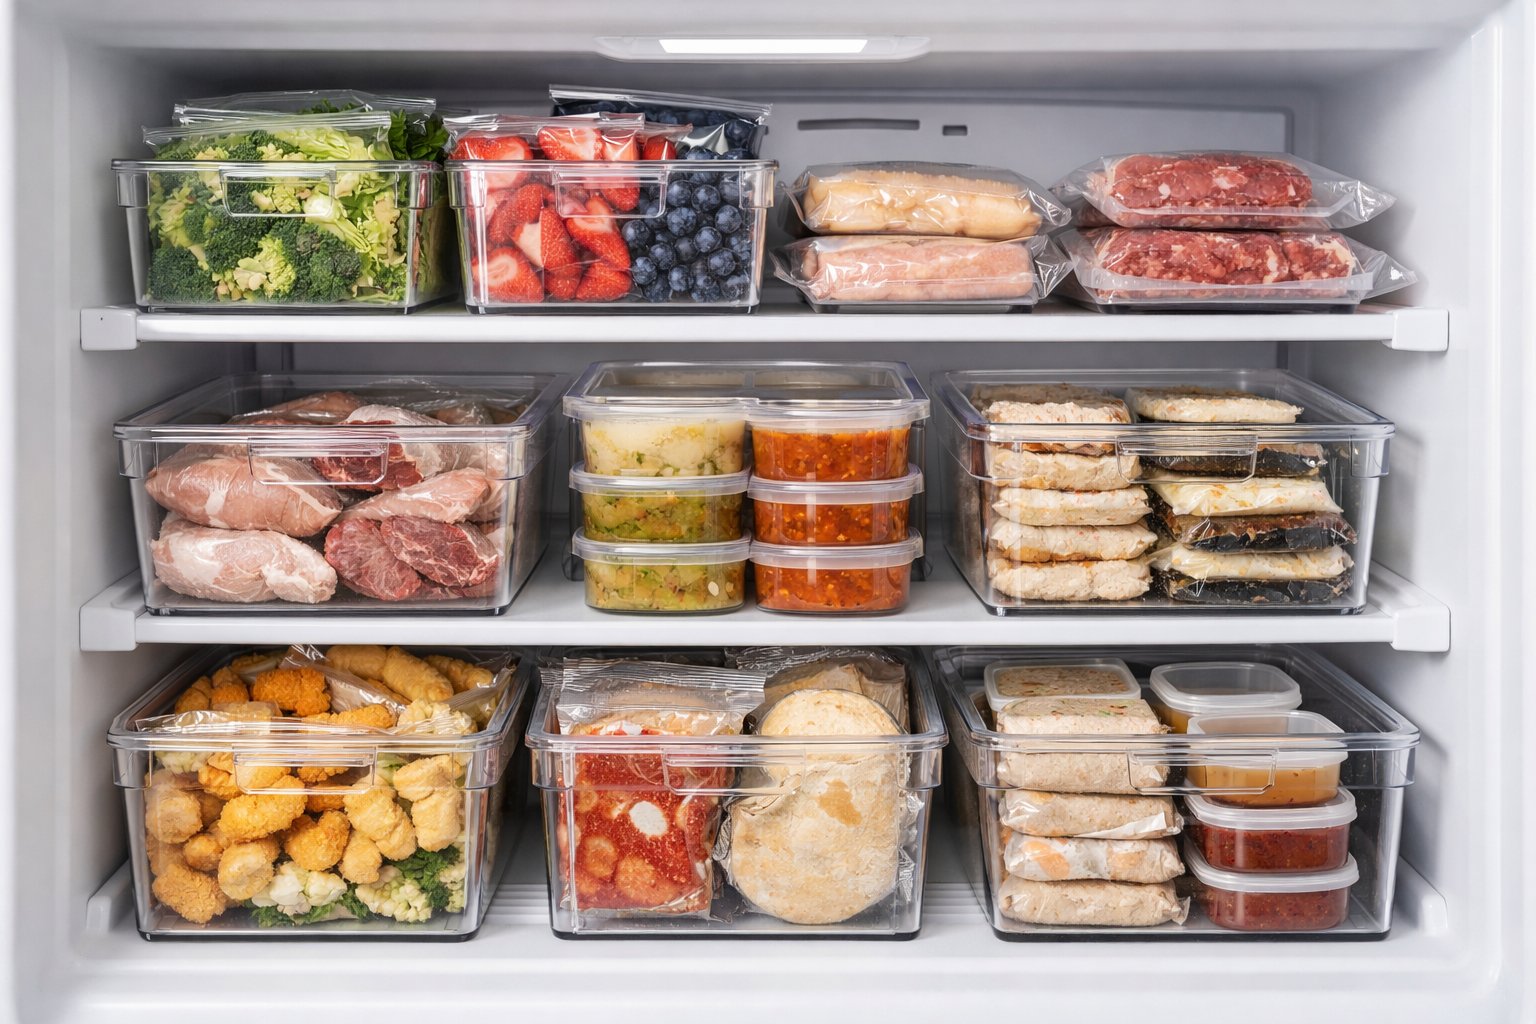
Clear Bins for Quick Identification
Clear bins are a game changer. When you can see what’s inside without pulling everything out, you save time and keep the cold air in.
Try to get freezer organizer bins made from plastic that won’t crack in the cold. Group like with like—proteins in one, veggies in another, meals in a third. Label the bins on the front and top so you can tell what’s in them at a glance. Rectangular bins fit better than round ones, so measure your freezer before buying.
Stackable Containers for Vertical Space
Stackable containers let you use vertical space, which is key in both upright and chest freezers. Square or rectangular ones stack better than round, and don’t wobble as much.
Look for containers with flat lids that can handle weight. Stack a few layers without squishing your food or creating a leaning tower. Reusable silicone bags work well for things like marinated meat or soup, freeze them flat, then stand them upright like files. That’s especially helpful for chest freezers.
Freezer-Safe Containers and Bags
Not all containers are made for the freezer. Look for freezer-safe containers (usually marked with a snowflake or temp rating).
Freezer bags work for odd shapes and portions. Squeeze out as much air as you can before sealing to keep ice crystals away. Heavy-duty bags hold up better than the regular kind.
Glass containers are fine for soups and sauces, but don’t fill them all the way—leave room for expansion, or you’ll end up with cracks. Plastic freezer-safe containers with tight lids are lighter and less likely to break.
Plan the Perfect Freezer Layout for Easy Access
A smart layout makes it simple to grab what you need, fast. The trick is to create zones that fit how you actually use food, not just wherever things fit.
Group Like with Like
Keep similar items together in their own zones. All proteins in one spot, veggies in another, fruit in its own place, and meals somewhere else. No more digging through frozen chicken to find peas.
Common freezer zones:
- Raw proteins (beef, chicken, pork, seafood)
- Vegetables and sides
- Fruits and smoothie stuff
- Prepared meals and leftovers
- Breads and baked goods
- Desserts and ice cream
Within each group, break it down even more—beef, poultry, seafood, etc. Use clear bins or baskets to keep things from drifting between zones.
Zone by Frequency and Type
Put the stuff you use most at eye level or in the most accessible spot. Bulk buys and rarely used things go deeper or lower. If you grab frozen veggies every week, keep them front and center. Specialty stuff? That can hide in the back.
In upright freezers, top shelf is perfect for grab-and-go things like smoothie packs or breakfast sandwiches. Middle shelves are for your regular rotation. Bottom shelves or drawers are for bulk or long-term storage. With chest freezers, use hanging baskets for things you want often, and layer bins below for everything else.
The door’s a bit warmer, so stash items you’ll use soon there—not your long-term stuff.
Utilize Door Space and Drawers
Door shelves are handy for small, often-used things like butter, frozen herbs, bacon, or single-serve snacks. Just don’t overload them or block the door from closing.
Drawers work best if you file things vertically instead of stacking. Frozen pizzas, veggie bags, and vacuum-sealed meats can stand up so you can flip through them. Assign each drawer a category—top for ready meals, middle for veggies, bottom for proteins. Dividers help keep things from sliding around.
Master Freezer Inventory, Labeling, and Dating
Knowing what you have and when you put it there saves money and makes dinner decisions a breeze. A basic inventory and clear labels turn freezer chaos into something you can actually use.
Keep a Freezer Inventory
A freezer inventory helps you avoid buying doubles and wasting food. It doesn’t have to be fancy—a list taped to the door works, with categories like meats, veggies, meals, and baking stuff. Cross things off as you use them.
If you’re more digital, a spreadsheet or notes app keeps things on your phone. Sort by date, category, or where it’s stored. The best system is the one you’ll actually keep up with.
| Inventory Method | Best For | Maintenance Level |
|---|---|---|
| Paper list on freezer door | Quick visual check | Low |
| Whiteboard or chalkboard | Frequent updates | Medium |
| Digital spreadsheet | Detailed tracking | High |
| Notes app | On-the-go access | Medium |
At a minimum, jot down the item, how many you have, and the date you froze it. That way, you’ll know what needs to be used first.
Label and Date Everything
Every item going in your freezer should say what it is and when you froze it. Seriously, don’t skip this step.
Write directly on freezer bags with a permanent marker, or use cold-proof labels. Include contents, portion size if it matters, and the date. For cooked meals, add reheating instructions so you don’t have to guess later.
Flat bags are easiest to label before filling. For containers, label the top and one side. No more mystery meals.
Use Color Coding or Category Labels
Color coding makes finding stuff even faster. Give each food group a color—maybe red for meats, green for veggies, blue for meals, yellow for baking ingredients. This is extra helpful in chest freezers where you’re looking down at bins.
Category labels on bins or baskets help too. Grab the whole “breakfast” bin or the “soups and stews” basket when you need them. Combine color and label for the ultimate in freezer organization, especially if other people are putting groceries away.
Use Smart Storage Habits for Max Efficiency and Freshness
Good freezer habits beat expensive organizers every time. With simple rotation, smart packing, and the right bins, you’ll waste less and make your freezer work for you.
First-In, First-Out for Easy Rotation
The first-in, first-out rule keeps older food from getting lost or going bad. Put new stuff behind older items, so you always grab the oldest first. It’s simple but it works.
Write the freeze date on everything, including the contents and the month and year. Proteins usually stay good for 4 to 12 months, vegetables for 8 to 12 months, and prepared meals for 2 to 3 months.
Keep each food type in its own zone. Raw chicken in one bin, ground beef in another, veggies in their own spot. When you need something, grab from the front where the oldest is waiting.
Flat-Pack and File Vertically
Freezing food flat in bags before storing it upright totally changes the game for freezer space. We just spread soups, sauces, marinated meats, and cooked grains in a thin layer inside freezer bags, squeeze out the air, and seal them up. After they freeze solid, those slim rectangles stand up like folders in a filing cabinet—takes up way less room than clunky containers.
With this filing method, everything’s right there in plain sight. We can flip through our frozen “files” and grab what we need—no more digging or shifting piles. Plus, the flat shape thaws faster since there’s more surface area.
We toss flat-packed bags into bins or prop them up with bookends, sorting by category. Labeled tops facing forward means we spot what’s inside instantly. This is a lifesaver for meal prep, leftovers, or breaking down bulk buys into meal-sized portions.
Optimize with Organizers and Trays
Clear bins and baskets turn the black hole of a deep freezer into something you can actually manage. We like stackable containers to build layers in chest freezers, and sliding baskets that hang from the sides to use up every inch. For upright freezers, wire baskets keep things separated but let cold air move around.
Ice cube trays? They’re not just for water. We freeze leftover wine, coffee, herbs in oil, tomato paste, and stock in small portions. Once solid, we pop the cubes into labeled bags for longer storage. No more tossing half-used ingredients.
Drawer dividers and little bins keep tiny things—like frozen ginger, bay leaves, or nuts—from vanishing. One container holds backup smoothie bananas, another corrals baking bits. Clear bins let us see what’s inside so we’re not letting out cold air just to check.
Prevent Freezer Burn and Maximize Freshness
Keeping food fresh in the freezer is mostly about keeping moisture in and air out. Good sealing, sturdy containers, and letting air flow around your food all help keep freezer burn at bay.
Vacuum Sealer Benefits
A vacuum sealer sucks out nearly all the air from bags before freezing, which makes a huge difference in keeping food from drying out or getting freezer-burned. Meat, fish, and prepared meals stay fresh for much longer—sometimes double or triple the time of regular freezer bags.
Vacuum-sealed bags also take up less space than containers, so we can stack and organize everything more efficiently. They mold around odd shapes, so we don’t waste space on air pockets.
The upfront cost for a vacuum sealer? Honestly, it pays off fast if you hate food waste. Food keeps its texture, color, and flavor for months. If you’re into meal prep or buying in bulk, it’s a tool you’ll end up using all the time.
Choosing Quality Bags and Containers
Not all freezer bags are up to the job. Cheap ones let in air over time, and that’s how you get those nasty ice crystals and weird textures.
Go for BPA-free, freezer-specific bags—they’re thicker and tougher than your average sandwich bag. Heavy-duty bags resist punctures and keep their seal, even at sub-zero temps. For containers, make sure they’re labeled freezer-safe and have tight-fitting lids.
Glass containers are great for soups and leftovers, but remember to leave a little space for things to expand. Silicone trays work well for freezing soup or sauce portions you can pop out and bag later. It is best to avoid yogurt tubs and flimsy takeout containers because they crack and leak air.
Avoid Overcrowding to Promote Air Flow
Stuffing the freezer to the brim blocks air from circulating, which can lead to uneven freezing and partial thaws when you open the door. Cold air needs to move around to keep everything truly frozen.
We try to space things out when first freezing, then stack them closer once they’re solid. Not packing bins and shelves too tightly also makes it easier to rotate food. If you can see and reach everything, you’re way more likely to use it before it gets freezer-burned.
A freezer that is about 70 to 80 percent full runs best. It stays cold without overworking, and you’re not digging through a mountain of frozen stuff just to find dinner.
Frequently Asked Questions
Freezer organization brings up all kinds of practical questions about containers, space, and keeping track of what’s in there. Here’s what’s actually worked for us with different freezers and storage headaches.
What's the scoop on basket systems for keeping an upright freezer in tip-top shape?
Basket systems are a lifesaver for upright freezers—they give you zones so stuff doesn’t topple or get lost in the back. We use clear plastic bins or wire baskets that slide in and out, so you can see what’s inside without pulling everything out.
Label each basket: one for proteins, another for veggies, one for meals, and a separate one for snacks or desserts. That way, similar things stick together and meal planning gets way easier—you can just grab a whole basket and check your options.
If you can, stack baskets vertically. It makes the most of your freezer’s height and keeps things easy to reach.
Any nifty tricks for maximizing space in a freezer without shelves, so my ice cream doesn't play hide and seek?
Chest freezers or those without shelves? They’re tricky because everything wants to settle at the bottom. Try stackable bins or baskets to make your own shelves, so you can lift one out and get to what’s underneath.
Freeze stuff flat in bags first, then stand them up like files when solid. That “filing” approach is magic for soups, sauces, and marinated meats.
Tape a freezer inventory to the lid or door so you always know what’s hiding inside. Update it when you add or pull something, and you’ll never have to dig through frostbitten mystery bags again.
Can you dish out the secret to creating an organized freezer—what goes where for top-notch flow?
Top shelf or top section? That’s for your grab-and-go stuff: frozen fruit, ice cream, waffles, breakfast things—whatever you reach for most.
Middle shelves are best for proteins and dinner ingredients—chicken, beef, fish, all labeled with freeze dates.
Bottom shelves or deeper bins hold bulk buys, meal prep containers, or backup stuff you don’t need as often. Think extra stock, casseroles, or holiday leftovers.
The door (if you have one) is perfect for small stuff like herbs, butter, yeast, or ice packs. Just keep in mind, the door’s temperature swings more, so don’t put anything super perishable there.
Got a strategy for rotating frozen foods to keep my meal prep as fresh as daisy?
The “first in, first out” rule is key. Newer stuff goes behind or underneath older things. When you add groceries, push what’s already there forward so you use it first.
Label everything with the freeze date—freezer-safe markers or masking tape work fine. Most things keep their quality for three to twelve months, so dates help you decide what to use next.
Do a quick freezer check once a week, maybe before shopping. Pull out anything getting close to three months old and plan your meals around those.
What's the best way to play Tetris with my frozen goods to ensure easy access and no frostbitten fingers?
Freeze liquids and soft foods flat in bags, then stand them up vertically once frozen. You’ll end up with neat, uniform shapes that stack easily and let you flip through like you’re browsing files.
Stick with square or rectangular containers—they fit together without wasted space. Clear containers help you spot what’s inside right away.
Leave a little space between items for air to move around. Overpacking slows the freeze and makes it a pain to grab what you want in a hurry.
Mind sharing a blueprint for the perfect freezer organization chart that'll make my kitchen pals green with envy?
Start with a simple inventory chart split into categories—proteins, veggies, fruits, prepared meals, baked goods, and a catch-all for the random stuff. Jot down each item, when you froze it, and how much is left.
Stick this chart right on your freezer door. Use a dry-erase board, a laminated sheet, whatever works and doesn't get buried under magnets. Cross things off or add new stuff as soon as you move things in or out. Seriously, don't wait until "later"—you'll forget.
Add a little note section for meal ideas or recipes you want to try using what you've got. That way, your chart isn't just a list—it's actually helping you plan dinner and cut down on waste.
Share:
What Happens to Flavor When Stored Food Is Repeatedly Exposed to Air
What Happens to Flavor When Stored Food Is Repeatedly Exposed to Air