

Check out our latest collection of compact vacuum sealer for food!
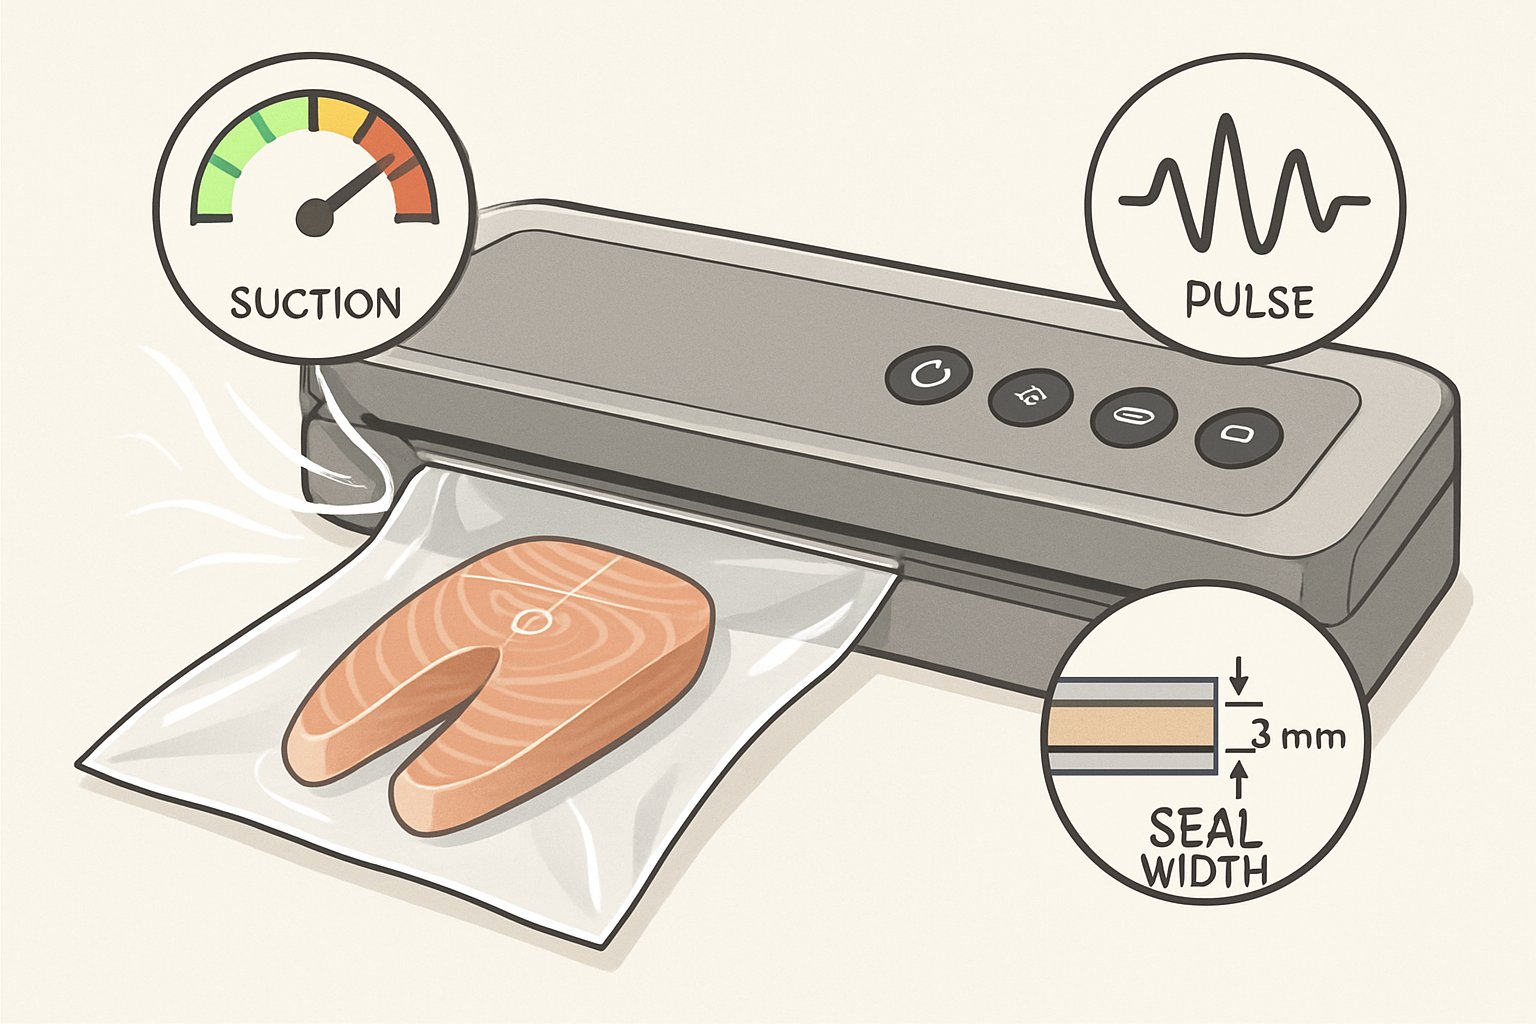
Navigating vacuum sealer specs can feel like deciphering a secret code when you're just trying to find something that works for your kitchen. Specs like suction power, seal width, and pulse mode actually do matter, but not always in the ways you’d expect. I’ve definitely found myself staring at those product pages, trying to figure out if 28 HG is better than 26, or if that “pulse” button is just a gimmick.
The specs really do affect how your vacuum sealer handles different foods. Delicate stuff? You’ll want gentler sealing. Big cuts of meat? You need more oomph. Sometimes it’s about finding the machine that doesn’t make you want to throw it out the window after a few failed seals.
Let’s break down the specs—no jargon, just what actually matters when you’re picking a vacuum sealer for your kitchen. I’ll try to keep it real and skip the guesswork.
Key Takeaways
- Suction power and seal width play a big role in how well your vacuum sealer works for different foods
- Pulse mode and special functions help you avoid crushing delicate foods or making a mess with liquids
- Comparing models gets a lot easier once you know which specs actually matter for your needs
Decoding Vacuum Sealer Suction Power
Suction power tells you how well your machine pulls air out of bags. Makers usually list this in kPa, bar, or inHg. The air extraction rate shows how quickly it works, but both numbers matter in practice.
Understanding Vacuum Pressure (kPa, Bar, InHg)
You’ll see three main units for vacuum pressure. Kilopascals (kPa) are pretty common—most home sealers sit around 60-80 kPa.
Bar isn’t as common, but it’s easy to convert: 1 bar is 100 kPa. Home sealers usually run at 0.6-0.8 bar.
Inches of mercury (inHg) is the old-school measurement. Good home sealers hit about 18-24 inHg.
| Unit | Typical Range | Conversion |
|---|---|---|
| kPa | 60-80 | 1 kPa = 0.295 inHg |
| Bar | 0.6-0.8 | 1 bar = 29.53 inHg |
| inHg | 18-24 | 1 inHg = 3.386 kPa |
Don’t just chase the highest number. If you’re sealing something fragile, too much suction can squash it.
Air Extraction Rate Explained
Air extraction rate is just how fast the machine pulls air out, measured in liters per minute (L/min) or cubic feet per minute (CFM). Most home models do 8-15 L/min.
A higher rate means you finish sealing faster. That’s handy when you’re doing a pile of bags at once.
What affects extraction rate?
- The motor’s strength
- Pump design
- Bag size and type
- How much air is in there to begin with
Commercial machines can go over 20 L/min, but budget ones sometimes crawl along at 5-8 L/min. You’ll notice the difference with big bags or big batches.
Some machines let you control the speed. That’s nice if you’re sealing a mix of foods.
Real-World Impact on Vacuum Sealing
Stronger suction means a tighter fit around your food, fewer air pockets, and usually faster sealing. If you’re working with marinated meats or things with weird shapes, that helps a lot.
But gentle suction is better for stuff like bread or berries. That’s where pulse mode saves the day—you control how much air gets pulled out, so you don’t wreck your food.
Liquid-rich foods are tricky. Even with strong suction, you have to use the right technique or you’ll end up with a mess.
What you’ll notice:
- Bags hug the food better
- Less air left behind
- Quicker sealing
- Fewer problems with things like soup or stews (if you have the right machine)
You don’t always need max power, but having options is great. Some foods just need a lighter touch.
Seal Width and Its Importance
Seal width is all about how strong and reliable your bags are after sealing. Most sealers give you anywhere from 2mm up to 12mm. Wider seals mean tougher bags, which is good for heavy stuff or long-term storage.
Standard Seal Widths by Model
Entry-level sealers usually have 2-3mm seals. That’s enough for veggies or leftovers, and you’ll see it on most cheap models.
Mid-range machines bump it up to around 5mm. That’s the sweet spot for most households.
Commercial and high-end sealers go for 8-12mm. These wide seals are for serious use—think restaurant kitchens or big meal preppers.
A few machines let you adjust the seal width, but you’ll pay extra for that. It’s handy if you’re sealing all kinds of stuff.
Effect on Bag Strength and Food Storage
Wider seals mean your bags are less likely to tear or pop open. If you’re sealing sharp bones or frozen veggies with edges, a 10mm seal is a lot tougher than a skinny one.
Thicker bags, like Mylar or heavy-duty pouches, really need a wide seal—at least 5mm—to get a good bond. Regular poly bags can get by with 2-3mm.
For long-term freezer storage, wider seals hold up better. Thin seals might fail after a few months, especially if you’re constantly moving stuff around.
You do lose a tiny bit more bag with a wide seal, but unless you’re sealing hundreds of bags a week, it’s not a big deal.
Choosing the Right Seal Width for Your Needs
If you’re just storing stuff in the fridge for a few days, 2-3mm is fine. For the freezer, especially over six months, go for 5mm or more.
Think about what you seal most. Bread and chips are fine with narrow seals. Meat, soup, or anything heavy? Go wider.
Some bags—especially textured ones—need a wider seal to work well. Smooth bags don’t care as much.
Wider-seal machines cost more. If you’re not sure, 5mm is a solid middle ground. It’ll handle almost anything you throw at it.
Pulse Mode and Specialty Sealing Functions
Pulse mode is a lifesaver for fragile foods. It gives you control over the vacuum, so you don’t end up with crushed bread or berry mush. Specialty functions make sealing easier for wet, dry, or delicate foods.
How Pulse Mode Works
Pulse mode works by pulling air out in short bursts instead of one long suck. You hold the pulse button, watch the bag compress, then let go when it looks good.
This way, you decide exactly how much air comes out. No more guessing or hoping your croissants survive.
Most machines need you to hold the pulse button for each burst. When you’re happy, just hit seal.
Why use pulse mode?
- Stops you from crushing soft stuff
- Lets you control how much liquid gets sucked out
- Keeps food looking like food, not a pancake
- Gives you just the right vacuum level
Best Uses for Pulse and Manual Modes
Pulse mode shines with fragile foods—fresh berries, bread, pastries. You keep their shape instead of making a mess.
It’s also great for foods with sharp bits, like pasta or nuts. Aggressive vacuuming can poke holes in bags, but pulse mode helps avoid that.
When to use pulse:
- Berries, grapes, and other fruits
- Baked goods and soft breads
- Herbs and leafy greens
- Pointy or sharp foods
- Small portions of liquids
Manual seal mode is for making custom bag sizes or sealing without vacuuming. Handy for dry goods or prepping bags in advance.
Some machines have a marinate mode, which cycles the vacuum on and off to help food soak up marinades faster.
Other Food-Specific Settings
Newer vacuum sealers have modes for different foods. Dry mode is for solid stuff—meats, veggies, frozen things.
Moist mode uses less suction and a longer seal, so you don’t end up sucking liquid into the machine.
Common modes:
| Mode | Purpose | Best For |
|---|---|---|
| Dry | Max vacuum | Meat, veggies, solid foods |
| Moist | Gentle, longer seal | Soups, marinades, wet foods |
| Sous Vide | Just enough vacuum | Cooking prep |
| Liquid | Minimal vacuum | Sauces, broths, liquids |
Sous vide mode pulls just enough air for water bath cooking, without smashing your food.
Some sealers let you adjust vacuum strength beyond these presets, which is nice if you’re picky or sealing weird stuff.
Comparing Vacuum Sealer Models and Types
There are three main types: external suction, chamber, and handheld. External models are best for home and dry foods. Chamber models handle liquids and big jobs. Handhelds are for light use.
External Suction vs Chamber Vacuum Sealer
External suction models pull air out through the bag’s open end. They’re small, affordable, and fit most kitchens.
You’ll usually spend under $200 for these, and they’re fine for everyday stuff. The pump pulls air, then seals the bag.
Chamber vacuum sealers are a different beast. They pull air out of both the bag and the chamber around it. This gives you more control and lets you seal liquids without a mess.
| Feature | External Suction | Chamber Vacuum |
|---|---|---|
| Price Range | $50-$300 | $800-$3000+ |
| Best For | Dry foods, home use | Liquids, commercial use |
| Size | Compact | Bulky |
| Liquid Handling | Not great | Excellent |
Chamber models are perfect for soups, marinades, and delicate stuff. Plus, you can use cheaper bags, which saves money long-term.
When to Choose a Chamber Vacuum Sealer
Go for a chamber sealer if you’re serious about food prep, seal a lot of liquids, or run a small food business. They handle messy foods without leaks.
If you’re sealing 20+ pounds of food a week, prepping sous vide meals, or catering, it’s worth the investment. These machines are built for heavy use and don’t overheat easily.
Chamber sealers make sense when:
- You seal lots of soups, stews, or marinades
- You process big batches regularly
- You want perfect sous vide bags with liquid
- You’re running a meal prep or catering side hustle
The upfront cost is high, but you’ll save on bags and headaches. Commercial units can run all day without a fuss.
Key Features Beyond Basics
Vacuum sealers aren’t just about sucking air and melting plastic. Bag compatibility and storage options can make your life easier—or more annoying.
Bag Compatibility and Storage Options
Not every bag works with every sealer. External sealers need textured bags so the air can escape. Chamber models can use both textured and smooth bags, which is nice for saving money.
Pre-made bags are fast but cost more. Rolls let you cut custom sizes, which saves waste—especially for weird-shaped foods. Many machines come with built-in cutters, which is a small thing but super convenient.
Some sealers have ports for jars and canisters, so you can vacuum-seal leftovers, dry goods, or marinate stuff right in a container. Always check which bags and accessories your machine supports before buying.
If you seal a lot, pay attention to storage. Bigger bag compartments mean fewer refills, but take up more counter space. Compact models save room but might need more frequent maintenance.
Drip Trays, Built-in Roll Storage, and Accessory Ports
Drip trays catch any liquids that sneak out during sealing, keeping the machine’s insides safe from messes. If you’re sealing juicy meats or fresh produce, a removable tray makes cleanup way less annoying.
Built-in roll storage keeps your bag material handy and tangle-free. When paired with a built-in cutter, this setup makes it easy to go from measuring to sealing without hunting for scissors or extra bags.
Accessory ports let you hook up extras like jar sealers or wine stoppers, so you can do more than just seal bags. Manufacturers use different port sizes and connectors, so it pays to double-check that your attachments will actually fit.
Some models throw in a marinade mode that cycles between vacuum and air, helping flavors soak in faster. Others have a gentle setting for foods that get squished easily.
Advanced Specs and Considerations
Once you get past the basics, a few technical details can really shape how well a vacuum sealer fits your kitchen. Things like transformer power, pump design, and noise levels all come into play.
Transformer Power (Wattage)
Transformer wattage tells you how much muscle a sealer has for heating and sealing. Most home models run between 100 and 200 watts. If you’re looking at commercial options, those can go way above 400 watts.
More watts mean the heating element gets hot faster and the sealing bar works better. For example, a 150-watt sealer usually heats up in 15-20 seconds, while a 100-watt one might make you wait twice as long between seals.
Wattage breakdown:
- 100-120W: Best for light, occasional use
- 130-180W: Handles thicker bags and frequent sealing
- 200W+: Built for heavy commercial use
If you drop below 110 watts, expect slowdowns and more waiting between seals, especially with thick bags. We’ve noticed that low-wattage sealers just can’t keep up during big jobs.
Wattage also matters for seal width. Stronger units keep the heat even across wider bars, so you get a tight seal even on bigger bags.
Cycle Time, Continuous Use Limits, and Oil vs Dry Pump
Cycle time is basically how long it takes to vacuum and seal one bag. Most home machines finish in 15-45 seconds, depending on bag size and vacuum level.
Dry pump systems use pistons and don’t need oil. They’re quieter and less hassle to maintain, but usually take longer per cycle and aren’t great for marathon sealing sessions.
Oil pump systems move faster and pull stronger vacuums, so they’re better for non-stop use. On the flip side, they need oil changes and tend to be noisier.
How many bags can you seal in a row? It depends:
- Entry-level: 3-5 bags, then a cool-down break
- Mid-range: 10-15 seals before stopping
- Commercial: 50+ bags, no sweat
Most machines will shut down automatically if they overheat. It’s a lifesaver for your sealer, but can be a pain if you’re working through a big batch.
Noise, Size, and Portability Factors
Vacuum sealers aren’t silent. Dry pumps usually hum along at 60-70 decibels, while oil pumps can hit 70-80 dB—about as loud as a vacuum cleaner.
Size matters for storage:
- Compact: 15"×6"×4", easy to stash in a small kitchen
- Standard: 18"×8"×6", decent trade-off between size and function
- Commercial: 20"×12"×8"+, big and powerful, but needs space
Weight can sneak up on you too. Simple models weigh 3-5 pounds, but the heavy-duty ones can go over 10.
If you don’t use your sealer every day, storage is a big deal. Some models come with cord storage and a compact footprint for easy cabinet stashing. Others pretty much demand their own spot on your counter.
Don’t forget ventilation. Give the machine at least a couple inches of breathing room around the vents, especially if you’re sealing a lot in one go.
Frequently Asked Questions
Vacuum sealer specs can get overwhelming fast. Here are some questions that actually matter when you’re just trying to keep your food fresh.
What's the scoop on suction power and why does it matter for my vacuum sealing game?
Suction power is all about how much air your sealer can yank out of the bag. More suction equals longer-lasting food and less freezer burn.
Most home sealers hit 0.6 to 0.8 bars of vacuum pressure. Commercial ones can go up to 0.95 bars, which is great for dense stuff like meat and cheese.
If your sealer’s weak, you’ll struggle with liquids and soft foods. Bags might lose their vacuum, and you’ll notice your food doesn’t keep as long.
Can you spill the beans on seal width and its impact on my food preservation adventures?
Seal width is just how wide the heated strip makes your bag’s closure. Most sealers go from 3mm to 6mm wide. Wider seals are tougher and less likely to leak.
Narrow seals are fine for dry snacks. If you’re dealing with anything juicy or moist, a wider seal helps keep the mess inside.
For most home use, 5mm is a nice middle ground. It’s strong enough without wasting a ton of bag material.
Pulse mode's great, but how do I use it without turning my kitchen into a science experiment gone wrong?
Pulse mode lets you control the vacuum in short bursts, so you don’t crush fragile foods. Just press and hold for a couple seconds, check your bag, and repeat until you’re happy.
Use pulse mode for soft stuff—think berries, bread, or cookies. It helps keep them looking and tasting right, instead of turning into a pile of crumbs.
I've got a truckload of steaks; should I go for dry or moist settings to keep them fresh as daisies?
Raw steaks are juicy, so the moist setting is your friend. It extends the sealing time to handle any liquid that gets pulled out.
Dry mode works best for cooked or pre-frozen meats, since most of the moisture is already locked in.
If your steaks are extra juicy, give them a quick pat with paper towels first. It’s a simple move that helps any setting work better.
Dry mode and I are pals, but what's the real difference when eyeballing meats and delicate snacks?
Dry mode runs a shorter, hotter sealing cycle—ideal for stuff without much moisture. It snaps shut fast, so it's great for crackers, pasta, or seasoning mixes.
Meats? You want the moist setting. They naturally hold onto liquid, and that can mess with the seal. The moist setting takes a bit longer and runs a little cooler to handle all that.
For delicate snacks like chips or cookies, I usually reach for pulse mode along with the dry setting. That way, I can nudge the vacuum strength just right and still get a solid seal on dry treats.
Share:
Seasonal Produce Preservation Calendar for Vacuum Sealer Owners
Seasonal Produce Preservation Calendar for Vacuum Sealer Owners