

Check out our latest collection of compact vacuum sealer for food!
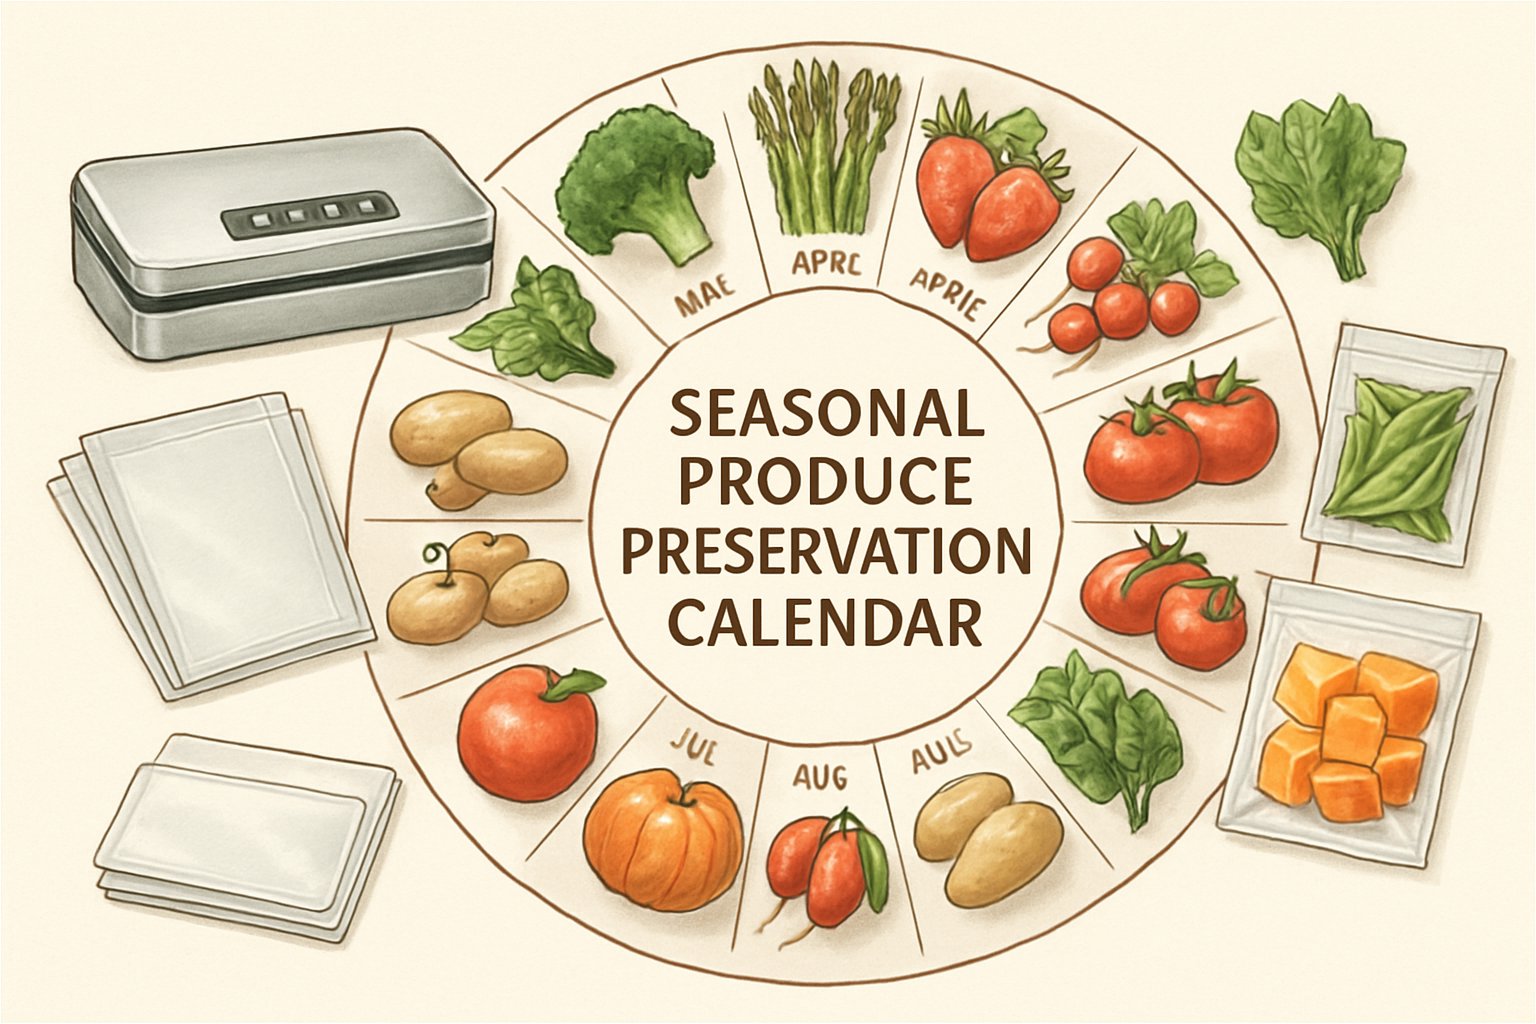
Preserving seasonal produce doesn’t have to feel like a juggling act between Mother Nature’s timing and your family’s appetite. A well-planned seasonal produce preservation calendar helps vacuum sealer owners maximize their harvests by timing preservation activities with peak ripeness and optimal storage conditions throughout the year. We’ve all been there—drowning in summer tomatoes one week, then paying premium prices for lackluster grocery store versions in January.
The beauty of vacuum sealing seasonal produce is how it locks in peak flavor and nutrients when fruits and veggies are at their absolute best. From spring’s tender asparagus to autumn’s hearty root vegetables, every season brings its own preservation opportunities and, let’s be honest, a few challenges. Knowing when to harvest, how to prep, and which vacuum sealing tricks actually work for different produce types can turn that overwhelming abundance into year-round culinary gold.
This guide walks you through monthly preservation strategies, equipment tips, and storage solutions to transform your vacuum sealer into a food-saving powerhouse. We’ll talk about proper blanching for summer squash, the best ways to seal and stash winter root veggies, and labeling systems that might actually make sense six months down the line.
Key Takeaways
- Timing your vacuum sealing with peak seasonal ripeness preserves flavor, nutrients, and seriously extends storage life
- Proper prep—like blanching and drying—makes all the difference for vacuum sealing different produce
- Smart labeling and storage organization help you keep track of what’s what and rotate your stash before anything gets lost in the freezer abyss
Why Use a Vacuum Sealer for Seasonal Produce?
Vacuum sealing really changes the game for preserving seasonal produce. It can extend shelf life up to five times longer, all while keeping nutrition and flavor intact. You’ll save money by buying in bulk during peak season and cut down on food waste—way more than with old-school storage methods.
Benefits of Vacuum Sealing Over Other Preservation Methods
When you stack vacuum sealing up against traditional methods, the perks are obvious. Regular freezing in bags or containers traps air that causes freezer burn and ruins texture. Vacuum sealing sucks out the air so freezer burn doesn’t stand a chance.
Canning uses heat that destroys delicate vitamins. With vacuum sealing, you keep up to 95% of the nutritional value because there’s no heat involved. The texture and color stick around too, which is honestly a big deal.
Dehydrating is great for space, sure, but it changes the character of the food. Vacuum sealing lets you keep produce as it is—crisp bell peppers, juicy berries, all that good stuff.
Space-wise, vacuum-sealed bags take up about half the room compared to rigid containers. You can stack and organize them so much more efficiently.
And you don’t need a bunch of extra stuff. Just the machine and bags—no salt, sugar, or weird preservatives.
Impact on Shelf Life and Food Quality
Let’s talk numbers. Fresh berries last 3-5 days in the fridge, but vacuum seal them and you get 2-3 weeks—that’s not a typo.
Leafy greens like spinach, kale, and lettuce hold their crispness for 10-14 days instead of wilting in just a few.
In the freezer, the differences get wild:
| Produce Type | Regular Freezing | Vacuum Sealed |
|---|---|---|
| Berries | 6-8 months | 2-3 years |
| Vegetables | 8-12 months | 2-3 years |
| Herbs | 3-4 months | 1-2 years |
I’ve pulled out vacuum-sealed corn from last summer that still had crunch. Regular frozen corn? Usually mushy and a little sad.
Flavor stays put because vacuum sealing blocks oxidation. Those essential oils and aromas don’t escape, so you taste the difference right away compared to the usual frozen stuff.
Reducing Food Waste and Saving Money
The average household tosses out about 30-40% of their food, with produce leading the charge. Vacuum sealing gives you way more time to use what you buy.
During peak season, you can buy 20 pounds of tomatoes at farmer’s market prices and skip those overpriced winter tomatoes. The math is obvious—summer tomatoes at $2/pound beat $5/pound in January.
You can buy in bulk without the fear of spoilage, so sales and harvest seasons become real opportunities. Your grocery bills drop, especially in the off-season.
Sealing individual portions means you only thaw what you need. No more half-used bags of freezer-burned veggies.
And since vacuum-sealed bags take up less space, you can fit a bigger variety into the same freezer. I’d say you can fit about three times as much now compared to using containers.
The initial cost of a vacuum sealer pays off fast. Most folks make it back in 3-4 months just from cutting waste and buying in bulk.
How a Seasonal Produce Preservation Calendar Works
A seasonal produce preservation calendar basically maps out when fruits and veggies hit their peak in your area and matches them with the best vacuum sealing methods. It helps you get the most out of your vacuum sealer by targeting the freshest, most affordable produce all year.
Month-by-Month Overview for Vacuum Sealer Users
Spring brings asparagus, peas, and early greens that are perfect for vacuum sealing. Portion asparagus spears into meal-sized bags and freeze for up to 8 months.
Summer is the big one—berries, stone fruits, garden veggies. Strawberries vacuum seal best when hulled and laid out in a single layer. Peaches and plums? Slice and pre-freeze before sealing.
Fall is apple, root veg, and winter squash season. Vacuum seal apple slices after a quick lemon juice dip to keep them from browning. Carrots and parsnips work well raw or blanched.
Winter is for citrus and stored root veggies. Whole citrus doesn’t vacuum seal well, but lemon zest and orange segments do great in small portions.
Every month brings its own chances to fill the freezer with vacuum-sealed produce at peak quality and the lowest prices.
Timing Your Preservation Efforts
You want to preserve when there’s abundance, not when you’re scraping the bottom of the barrel. Plan your vacuum sealing for weekends during harvest peaks when prices drop.
Early morning is usually best for prepping fruits and veggies. The sooner you process after picking or buying, the better the results.
Batch processing saves time. Dedicating a Saturday each month to vacuum sealing a bunch of seasonal produce is way easier than doing it piecemeal.
For delicate items like berries, pre-freeze them for a few hours before sealing to avoid crushing. That step really helps.
Humidity can mess with vacuum sealer performance, so try to pick dry days if you can.
Aligning with Local Harvest Seasons
Growing seasons vary a lot depending on where you live. Don’t trust national charts—find out what’s actually in season near you.
Farmers markets are gold mines for local timing. Vendors know exactly when crops peak.
Agricultural extension offices often have regional harvest calendars. These can get pretty specific, even down to the variety.
U-pick farms usually announce harvest dates online or in newsletters, giving you time to get your sealer and freezer ready.
Weather throws curveballs, so update your calendar each year based on what actually happens, not just old data. That way, you’ll catch the best produce at its peak.
Essential Equipment and Preparation Tips
Getting great results from vacuum sealing starts with the right gear and proper prep. Let’s break down what you’ll need, from sealers to bags to prep tricks that make a difference.
Choosing the Right Vacuum Sealer
Most home cooks do just fine with a traditional external vacuum sealer. These pull air out of special bags and seal them tight.
Chamber vacuum sealers are a step up for wet stuff—think tomatoes or marinated veggies. They pull air from both the bag and the chamber, so you don’t end up with tomato juice in your machine.
For small jobs or occasional use, handheld vacuum sealers are handy. They’re great for mason jars or little batches.
Look for features like:
- Pulse setting for fragile berries and soft fruits
- Multiple seal widths for different bags
- Built-in bag storage (no more hunting for rolls)
- Drip tray to catch any runaway moisture
Adjustable suction power is a lifesaver. It lets you seal everything from tough carrots to delicate herbs without smashing anything.
Recommended Bags and Accessories
Good bags matter—textured vacuum sealer bags pull out air better than the smooth ones.
You’ll want:
- Quart bags for smaller portions
- Gallon bags for big hauls
- Roll bags you can cut to size
Vacuum sealer canisters are perfect for leafy greens or herbs—no crushing, just fresh.
Always keep freezer-safe labels around for dates and names. Trust me, you do not want mystery bags piling up.
Pre-cut bag assortments are a time-saver when you’re processing a lot at once. Having options ready to go makes things run smoother.
Cleaning and Preparing Produce Before Sealing
Start by rinsing all your produce under cool running water—even stuff you plan to peel.
Drying is non-negotiable. Use towels or a salad spinner to get rid of every last drop. Moisture messes with the seal and can cause freezer burn.
Blanching veggies like green beans, broccoli, and carrots helps them keep their color and texture. Boil briefly, then dunk in ice water.
Prep steps to remember:
- Remove stems, pits, or damaged bits
- Cut into serving sizes
- Pre-freeze soft fruits on baking sheets before sealing
- Group similar items to speed up the process
Seriously, don’t skip drying. Even a little water can ruin your hard work.
Spring Produce: Preservation and Storage
Spring means tender veggies and delicate fruits, which need some special handling to stay tasty and fresh once vacuum sealed. Knowing which ones to seal and how to store them makes all the difference.
Best Spring Fruits and Vegetables for Vacuum Sealing
Asparagus does great after blanching for 2-3 minutes. This stops enzymes from breaking it down. Sealed and frozen, it’ll keep its snap for up to 8 months.
Fresh peas lose sweetness fast. Shell, blanch for 90 seconds, then vacuum seal. Sugar snap and snow peas work well too.
Spring berries like strawberries and early raspberries should be pre-frozen on trays before sealing. That way, they don’t get squished.
| Produce | Prep Method | Storage Life |
|---|---|---|
| Asparagus | Blanch 2-3 minutes | 8 months frozen |
| Fresh peas | Shell, blanch 90 seconds | 6-8 months frozen |
| Strawberries | Pre-freeze on trays | 10-12 months frozen |
| Spring onions | Chop, no blanching | 4-6 months frozen |
Early spinach and tender greens seal up nicely when bone dry. I usually wrap them in paper towels to soak up any leftover moisture.
Optimal Storage Conditions
Spring produce needs a bit of tailoring when it comes to storage. Most blanched veggies do best vacuum sealed and frozen at 0°F.
Refrigerate vacuum-sealed leafy greens at 32-35°F. They’ll last 2-3 weeks, which is a huge improvement.
Freezer storage is best for most spring veggies after proper prep. Keep that freezer cold and steady to avoid ice crystals.
Pre-freezing delicate stuff like berries stops them from getting crushed. Just a couple hours on a baking sheet before sealing does the trick.
Moisture control is huge for spring produce. Too much water leads to ice and sad, soggy veggies. Always dry thoroughly after washing and blanching.
Foods to Avoid or Handle Differently
Fresh herbs like basil and cilantro turn black if you vacuum seal them raw. Try freezing chopped herbs in olive oil in ice cube trays, then seal the cubes instead.
Soft mushrooms get slimy if vacuum sealed fresh. Sauté or dehydrate morels and other spring mushrooms before sealing to keep the texture.
High-water veggies like lettuce and radishes don’t do well vacuum sealed. Their cell structure just can’t handle it—better to use other methods.
Artichokes need trimming and blanching in acidulated water before sealing, but honestly, the effort rarely pays off compared to other ways to store them.
Fresh garlic scapes can develop botulism in air-free environments. Always blanch them first or skip vacuum sealing raw—better safe than sorry.
Summer Bounty: Vacuum Sealing Tips by Month
Summer’s peak harvest means you’ve got delicate berries, water-packed veggies, and stone fruits all needing a little extra thought. Every month throws a new curveball—too much moisture, fragile skins, you name it.
Early Summer: Berries, Peas, and Herbs
Berries are summer’s little gems, but wow, they bruise so easily. Freeze strawberries, blueberries, and raspberries on baking sheets before vacuum sealing—otherwise, you’ll just end up with a mashed mess.
Pat those berries bone-dry with paper towels first. Any leftover moisture turns to ice and ruins the texture.
Fresh peas need a quick 2-3 minute blanch, then straight into an ice bath. That locks in their green color and sweetness.
Seal blanched peas in meal-sized bags, and they’ll stay tasty for up to a year.
Herbs like basil, cilantro, and parsley? Wash, dry, then freeze in ice cube trays with a splash of water before sealing. It’s a little fussy, but you’ll thank yourself later.
| Produce | Prep Method | Storage Time |
|---|---|---|
| Berries | Flash freeze first | 10-12 months |
| Peas | Blanch 2-3 minutes | 8-12 months |
| Herbs | Ice cube method | 6-8 months |
Midsummer: Tomatoes, Corn, and Zucchini
Tomatoes are tricky with all that juice. Blanch whole tomatoes for a minute or two to slip the skins off, then dunk in ice water.
For sauces, seal up blanched whole tomatoes. If you’ve got cherry tomatoes, halve and pat them dry before sealing.
Corn kernels need a 4-5 minute blanch, then cut them off the cob before sealing. Whole ears work too—just remember, they’ll hog freezer space.
Zucchini goes mushy if you freeze it raw. Slice into rounds, salt for half an hour, then pat dry.
Blanch zucchini slices for a minute or two to help them keep their shape. Grated zucchini for baking? Measure it out and seal without blanching.
With all these watery veggies, get rid of as much moisture as you can before sealing. That’s your best shot at avoiding freezer burn.
Late Summer: Peaches, Plums, and Beans
Stone fruits like peaches and plums need to be ripe but still a bit firm. Mushy fruit just gets worse after sealing.
Blanch peaches for under a minute to peel them easily. Slice, toss with lemon juice, and seal.
Plums can go in whole if they’re small, or halve and pit them. Their waxy skin helps protect them in the freezer.
Use the gentle or pulse setting on your vacuum sealer for these—otherwise, you’ll crush the fruit.
Green beans need a 3-4 minute blanch to keep them snappy and bright. Trim the ends first.
Lima beans and other shell beans should be shelled, blanched for 2-3 minutes, then sealed. They hold up really nicely.
Beans freeze well in family-sized portions, perfect for quick dinners.
Stone fruits keep for 10-12 months if you seal and freeze them right.
Autumn and Winter Harvests: Maximizing Preservation
When the weather cools, you get heartier veggies and late fruits—ideal for vacuum sealing. Root veggies, squash, and sturdy greens last for months if you prep and seal them properly.
Key Fall Produce to Store
Apples are a fall favorite. Slice, toss with lemon juice so they don’t brown, and seal in portions. They’ll last 8-10 months in the freezer.
Winter squash like butternut or acorn needs a different approach. Cube, blanch for a couple minutes, then seal. Raw squash goes mushy, but blanched cubes hold up.
Brussels sprouts do great after a quick 3-minute blanch. Trim stems, peel off the outer leaves, and seal. They actually keep their shape better this way.
Cranberries are the easiest—just seal them fresh, no prep needed. They’ll last up to 2 years and are always ready for baking.
Pears are a bit picky. Choose firm, barely underripe fruit, slice, treat with ascorbic acid, and seal right away.
Winter Vegetables and Long-Term Freezing
Kale and collards need a 2-minute blanch. Strip the stems, chop, blanch, and seal. They’re actually better in smoothies after freezing.
Cauliflower and broccoli work best as uniform florets, blanched for 3 minutes. Shock in ice water, drain well, and seal. Moisture’s the enemy here.
Carrots can go in raw for up to 6 months, but for longer, blanch whole small carrots for 4 minutes or slices for 2.
Leeks need extra care. Slice, wash out grit, blanch for 2 minutes, drain, and seal. They’re perfect for winter soups.
Cabbage shreds easily for sealing without blanching. Or you can blanch and seal whole leaves for stuffed cabbage later.
Special Handling for Root Vegetables
Potatoes need a partial cook—parboil for 5-7 minutes or roast until just tender. Raw potatoes just go black and taste weird.
Sweet potatoes are similar. Bake until just tender, cool, then seal whole or sliced.
Beets need to be fully cooked before sealing. Roast, cool, peel, slice or cube, and seal. The flavor gets even sweeter.
Turnips and rutabagas work best cubed and blanched for 3-4 minutes. They’re surprisingly good sealed and frozen.
Parsnips should be cut and blanched for 2-3 minutes. Their sweetness really comes out when you cook them from frozen.
Smart Storage and Labeling Strategies
Good organization and labeling turn your freezer from a black hole into a year-round pantry. A little planning means you’ll actually use what you’ve worked to preserve.
Organizing Your Freezer or Pantry
Try setting up zones for different produce—maybe a fruits section, veggie area, and prepared foods. It saves hunting through a pile of bags.
Clear bins or baskets help group things together. Label each bin with broad categories like "Summer Berries" or "Root Veggies." That way, small bags don’t just vanish into the freezer abyss.
Square containers use space better than round ones. Stack bags flat—they freeze faster and fit tighter.
Tape a freezer inventory list to the door. Update it as you add or use stuff. It’s a small step, but it beats buying duplicates or finding ancient, forgotten bags.
Freezer shelf organizers or wire baskets can make a huge difference. They keep things from tumbling out every time you open the door.
Effective Batch Labeling and Dating
Always label before sealing—seriously, mystery bags are no fun. Write the item, date sealed, and use-by date on waterproof labels.
Permanent markers or freezer labels work best. Make it big enough to read without squinting in the cold.
Try a simple code for preservation methods:
- VS-F: Vacuum sealed fresh
- VS-B: Blanched then sealed
- VS-C: Cooked then sealed
Add quantity, like "2 cups diced tomatoes" or "serves 4," to help with meal planning. If you’re preserving your own harvest, note the date you picked it.
Color-code labels by season: green for spring, yellow for summer, orange for fall, blue for winter. It’s a quick visual cue for rotating stock.
Rotating Stock for Year-Round Enjoyment
Use the "first in, first out" (FIFO) method. Put newer items behind older ones so nothing gets lost.
Check your inventory monthly for things nearing their use-by date. Plan "use-it-up" weeks when you notice a pile-up.
Keep a running list of what’s expiring soon and post it where you plan meals.
Group items by use-by timeframe—within 3, 6, or 12 months. It makes rotation a no-brainer.
Plan menus around what you’ve got. Summer’s berries make great winter smoothies, and fall squash turns into spring soups.
Frequently Asked Questions
Vacuum sealing brings up a lot of practical questions. Here are some real-world answers about techniques, gear, and keeping things tasty.
What's the skinny on freeze-drying fruits and veggies with a vacuum sealer?
Let’s be clear—vacuum sealers aren’t freeze-dryers. Freeze-drying needs special machines that pull moisture out by sublimation.
Vacuum sealers just suck out air and seal the bag tight. That keeps food fresher way longer than tossing it in a regular bag.
For fruits, flash-freeze them on trays first so they don’t get crushed. With veggies, blanching before sealing keeps them colorful and tasty.
How do you avoid freezer burn when preserving your garden's bounty?
Freezer burn happens when air hits frozen food and dries it out. Vacuum sealing fixes this by removing the air.
Get a good seal—make sure the bag edges are clean and dry. Any leftover moisture or crumbs can mess things up.
After sealing, give the seam a gentle tug. If it holds and there are no bubbles, you’re good.
For fragile stuff, double-bagging adds an extra layer of protection.
Is it really worth it to vacuum seal fresh herbs, or am I just suckin' air?
Herbs are worth sealing, but you’ve got to be careful. They crush easily if you’re not gentle.
Flash-freeze herbs first, then use your sealer’s “delicate” or “moist” setting if it has one.
Try sandwiching herbs between paper towels before sealing. That soaks up extra moisture and cushions them.
Sealed herbs keep their flavor and color for months. We’ve pulled out basil in December that tasted like summer.
Can you give me the rundown on the best vacuum-sealer bags for different types of produce?
Textured bags are the go-to for most produce since they let air escape better.
For sharp veggies like asparagus, go for thicker bags—regular ones can get punctured.
Smooth bags are fine for soft, pre-frozen stuff like berries and are usually cheaper.
Keep a mix of quart and gallon sizes handy—quart for small batches, gallon for things like corn or beans.
BPA-free bags are worth it for peace of mind. Plenty of brands offer them without breaking the bank.
Got any tips for keeping my vacuum-sealed veggies tasting garden-fresh longer?
Blanching is the secret for most veggies. It stops enzymes that dull flavor and color.
Blanch for 1-3 minutes (depends on the veggie), then straight into ice water. That locks in texture and color.
Label everything with veggie type, blanch time, and seal date. Saves a lot of confusion later.
Keep your freezer at 0°F or below. That’s key for taste and texture.
Never seal warm produce—let it cool completely first, or you’ll get condensation inside the bag.
What's the deal with using vacuum sealers for sous-vide cooking with seasonal picks?
Vacuum-sealed produce fits right into sous-vide cooking. The airtight setup keeps flavors locked in and helps everything cook evenly.
We like to toss in seasonal veggies with some herbs and maybe a splash of oil or a pat of butter. It’s a simple move, but the flavors come together in a way that’s honestly hard to beat.
Root veggies—carrots, beets, that sort of thing—are especially good for this. They hold onto their sweetness and texture.
You can usually use the same bags for storage and sous-vide, as long as they’re safe for the temps you’re working with.
Vacuum sealing makes it easy to prep ahead, too. Just portion out your seasoned veggies, seal them up, and stash them until you’re ready to cook.
Share:
How to Read Vacuum Sealer Specs: Suction Power, Seal Width, Pulse Mode & More Explained
How to Read Vacuum Sealer Specs: Suction Power, Seal Width, Pulse Mode & More Explained