

Check out our latest home & kitchen collection!
A disorganized kitchen doesn’t just waste space, it eats up your time, drains your energy, and can turn a simple meal into a full-blown scavenger hunt.
We’ve all been there: digging for that one pan, shoving aside expired spices, or losing precious counter space to gadgets we never use. Here’s the thing: you don’t need a remodel or a professional organizer to make your kitchen work better for you.
Set up zones for prep, cooking, and cleanup, and keep your most-used stuff close at hand. With a few practical tweaks, like creating work zones, decluttering with intention, and squeezing more out of your storage, you can build a kitchen routine that fits the way you actually cook.
No need to overhaul everything in a day. Small changes, shifting where you keep your tools, rethinking the pantry, or deciding which items deserve that prime counter spot, can make your kitchen feel bigger, easier, and honestly, just nicer to be in.
Key Takeaways
- Set up zones for prep, cooking, and cleaning so you’re not zigzagging all over the place
- Declutter often—keep what you use most close by, stash the rest up high or out of the way
- Use drawer dividers, shelf organizers, and keep trash/recycling near prep spots to make life easier
Planning the Transition to an Organized Kitchen
Don’t just start shuffling things around. Take a beat. Figure out how you actually use your kitchen, what you own, and what you’re hoping to fix. That keeps you from just moving the mess from one drawer to another.
Assess Your Kitchen Workflow
Watch how you use your kitchen for a few days. Where do you stand to chop veggies? Where do you reach for mugs every morning? If you’re always running across the room for a spatula while something’s sizzling, there’s your first clue.
Jot down the spots you use most and where things get jammed up. Are you bumping into the dishwasher while reaching for the trash? Is your baking stuff nowhere near your mixing bowls? Take notes.
Don’t forget the non-cooking stuff. If you pack lunches, sort mail, or charge your phone at the counter, those need a spot too.
Inventory and Categorize Kitchen Items
You can’t organize what you don’t know you have. Start pulling things out—just one section at a time so you don’t drown in clutter.
Pile like with like: spatulas here, containers there, all the spices in one spot. You’ll probably find duplicates you forgot about or gadgets you haven’t touched in years.
Group things in a way that makes sense for you. Some common categories:
- Cooking utensils (spatulas, whisks, tongs)
- Baking supplies (measuring, mixing, pans)
- Food storage (containers, wraps, bags)
- Dishes and glassware
- Small appliances
- Pantry staples
Be honest: if you haven’t used it in a year, are you really going to start now?
Set Clear Organization Goals
“Be more organized” is too vague. Pin down the top three things that drive you nuts. Maybe you’re always hunting for a pot lid, or breakfast is chaos because stuff’s scattered everywhere. Those are your goals.
Write goals that fix real problems, not just “make it look nice.” “Keep all breakfast stuff near the coffee maker” is way better than “make the pantry pretty.”
Break it down into small chunks. Maybe tackle the utensil drawer tonight, save the pantry for the weekend. Baby steps keep you from burning out.
Decluttering for Efficiency
Clearing out what you don’t need—and keeping what you actually use—makes the kitchen work for you, not against you. Less clutter means less mess, less searching, and less frustration.
Purge Expired and Unneeded Items
It’s time to be ruthless. Check every spice, condiment, and pantry staple. Spices lose their punch after a year or so, and that sticky soy sauce from 2023? Just let it go.
Pull everything out so you can see what’s lurking in the back. You’ll probably find mystery cans and three bottles of the same spice. Group similar stuff together—all baking in one spot, all cans together.
Toss chipped dishes and scratched pans without a second thought. Be real about duplicates. If you use one wooden spoon, why keep three? Same for that pasta maker you swore you’d use but haven’t touched.
Make three piles: keep, donate, and trash. Don’t overthink it.
Prioritize Everyday Essentials
An organized kitchen keeps your daily go-tos close. Coffee maker, favorite spatula, cutting board—those get the best spots.
Store things where you use them. Coffee filters by the coffee maker, oils by the stove, dish soap at the sink. It just makes sense.
Stash seasonal or rarely used stuff in lower cabinets or up high. That fondue set? Holiday platters? No need for them to hog space. Drawer dividers and clear bins help keep stuff sorted and stop the chaos from creeping back.
If you share the kitchen, label shelves or containers. Saves everyone the “where does this go?” headache.
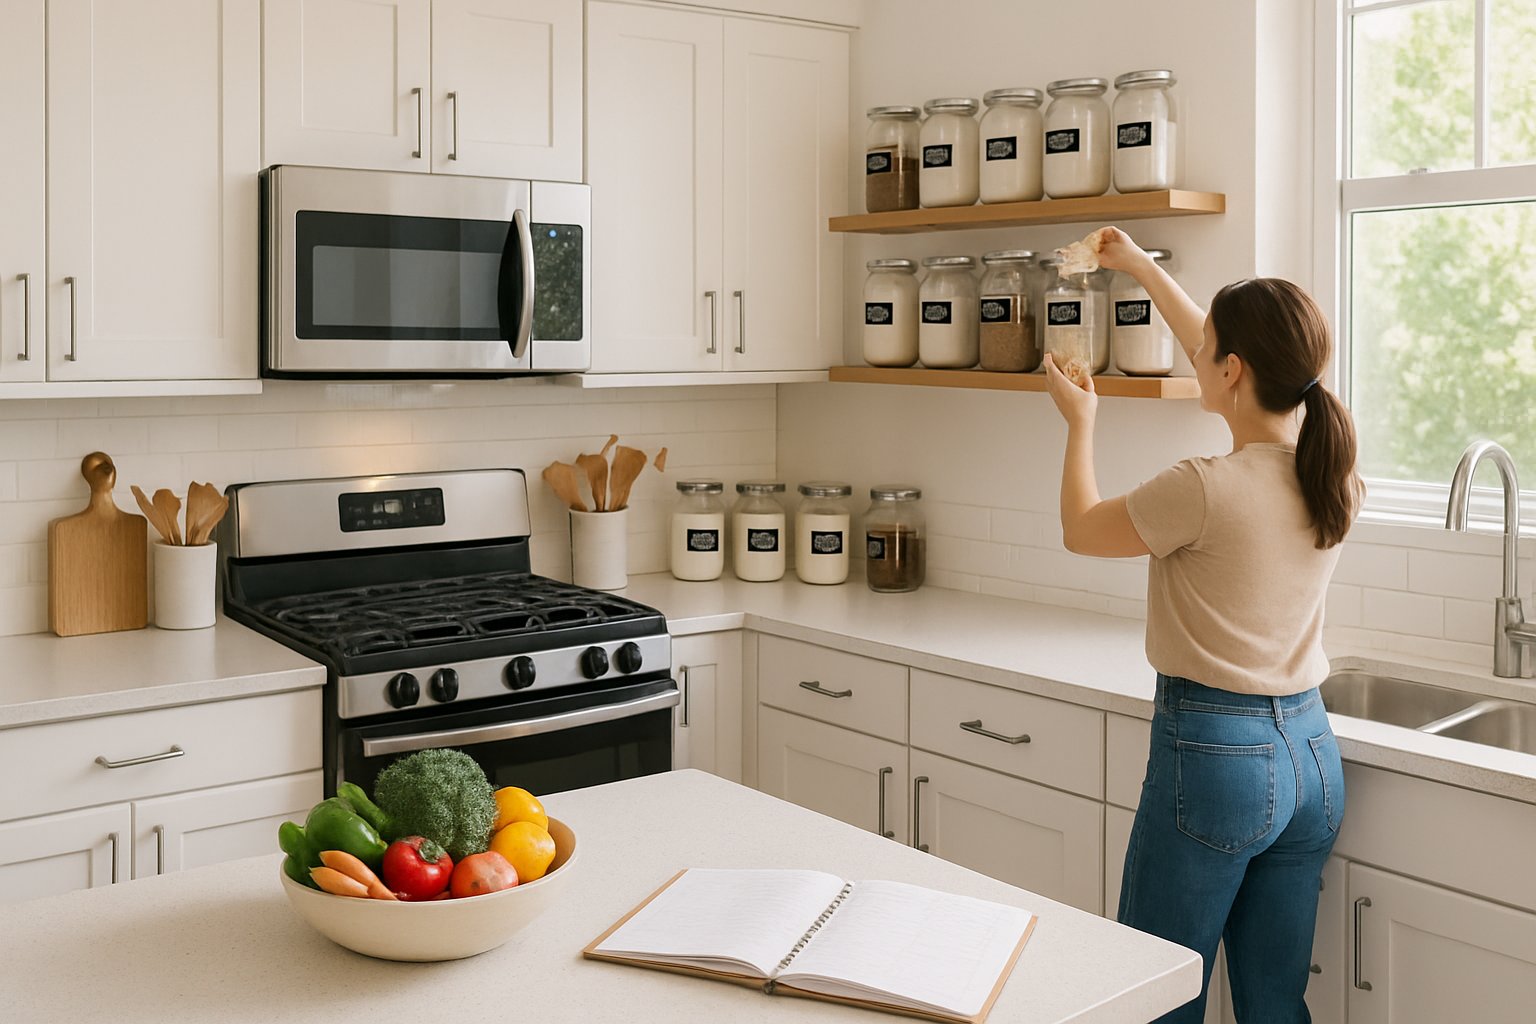
Creating Functional Kitchen Zones
Breaking your kitchen into zones for specific tasks keeps you from running all over the place and makes meal prep smoother.
Designate Work Zones
Set up dedicated spots for what you do most. Cooking zone? Pots, pans, utensils, and spices near the stove. Baking? Mixing bowls, measuring cups, and baking sheets near your counter workspace.
Put glasses, mugs, and coffee stuff near the fridge for a beverage zone. For prep, keep cutting boards, knives, and containers close to the sink.
Cleaning stuff—dish soap, sponges, cleaners—belongs under or next to the sink. When everything’s grouped by task, you’re not zigzagging around while cooking.
Essential zones:
- Cooking zone – pots, pans, seasonings by the stove
- Prep zone – cutting tools and containers by the counter
- Beverage zone – glassware and drink supplies near the fridge
- Cleaning zone – all the washing stuff by the sink
Arrange for Cooking, Prep, and Cleaning Tasks
Keep things where you use them. Plates and flatware between the dishwasher and table make unloading and setting easier. Cutting boards and knives should be near where you prep, not buried in a random drawer.
Store containers by the fridge for quick leftover packing. Group like with like: all baking pans together, all mixing tools in one spot, all cleaning stuff in one cabinet.
If you make smoothies every day, keep the blender, protein powder, and cups together. The goal is to match storage to your actual routine—so you don’t waste time or energy hunting for stuff.
Maximizing Cabinet and Drawer Space
You can turn even the messiest cabinets into efficient storage with two moves: dividing up the space and making everything easy to reach. Suddenly, it’s much harder for stuff to get lost in the shuffle.
Install Drawer Dividers and Organizers
Drawer dividers are a lifesaver. No more digging for a spatula or chasing rolling gadgets. Adjustable dividers let you make compartments for everything, so flatware and tools stay put.
For utensil drawers near the stove, try forks on the left, knives in the middle, spoons on the right—makes unloading the dishwasher a breeze.
Organizers aren’t just for silverware. Toss in small containers to corral bag clips, measuring spoons, or those random corn holders that always disappear. For food storage containers, stack the bottoms and keep all the lids in one tray—no more avalanches when you open the cabinet.
Deep drawers work better with inserts that hold pots and pans upright, so you don’t have to unstack everything to get what you need.
Utilize Pull-Out Drawers and Shelves
Pull-out drawers and shelves save you from losing stuff in the back of deep cabinets. One quick slide and everything’s right there.
Add pull-out shelves to base cabinets to turn wasted space into storage you’ll actually use. Look for ones with a lip to keep things from falling off. Heavy cookware? Get sturdy hardware that can handle the weight.
Corner cabinets can be tricky, but a lazy Susan or multi-tier turntable makes those awkward spaces useful. Narrow cabinets by the stove? Add pull-out racks for spices or a turntable for oils and vinegars.
Under the sink, work around the pipes with sliding shelves, stackable bins, or door-mounted storage. It’s usually wasted space, but with a few tweaks, it’s surprisingly handy.
Smart Kitchen Storage Solutions
A couple of clever tricks—rotating platforms, using vertical space, or sneaking storage into odd spots—can save you tons of time searching for things and make your kitchen look way less cluttered.
Use Lazy Susans and Turntables
A lazy Susan in a cabinet corner means no more lost jars or awkward reaching. Just spin and grab.
Best spots for turntables:
- Deep corners where stuff disappears
- Fridge shelves for condiments and jars
- Pantry shelves for cans and baking supplies
- Under the sink for cleaning products
Match the size to the space—a 12-inch fits most corner cabinets, smaller ones work for the fridge. Two-tier turntables double the storage for things like spices and vitamins.
Group items by use: breakfast stuff on one, baking supplies on another. That way, you’re not hunting for things when you’re in a rush.
Implement Hidden and Vertical Storage
Hidden storage uses those ignored spaces, and vertical storage gives you more room without adding clutter.
Toe-kick drawers under base cabinets are perfect for baking sheets or platters you barely use. Pull-out pantry shelves between appliances or in narrow gaps turn dead space into storage for spices, cans, or bottles.
Vertical storage ideas:
- Magnetic knife strips on the wall or cabinet sides
- Hanging pot racks on the wall or ceiling
- Vertical dividers in cabinets for pans and lids
- Wall rails for utensils and tools
Don’t forget the inside of cabinet doors. Add racks for spices, measuring cups, or foil. It keeps stuff organized, doesn’t take up shelf space, and you see everything as soon as you open the door.
Upgrading Pantry and Food Storage Systems
A solid storage system can take your pantry from chaos to something you’ll actually want to use. It’s all about grouping essentials by category and using containers that make it easy to see and grab what you need.
Organize Pantry Essentials
Start by grouping similar items together—baking supplies in one spot, canned goods in another, breakfast stuff in its own section. This way, we don’t end up buying extras just because something got buried in the back.
Put the things you use most at eye level, between your waist and shoulders. Save those high shelves for the once-in-a-while stuff, like holiday baking ingredients or bulk buys. Heavier things—big bags of rice or flour—fit best on the bottom shelves.
Try setting up zones based on meal type or how you prep. Keep all the snacks together so everyone knows where to look. Spices and seasonings belong near your prep area, not shoved in a random corner.
Essential organization zones:
| Zone | Items | Shelf Height |
|---|---|---|
| Daily Essentials | Coffee, cereal, snacks | Eye level |
| Baking Station | Flour, sugar, baking soda | Mid-level |
| Bulk Storage | Rice, pasta, canned goods | Lower shelves |
Incorporate Wicker Baskets and Clear Bins
Clear bins let us see exactly what's inside without having to open every single container. It’s a lifesaver when you’re rushing through meal prep. Wicker baskets bring in some warmth and keep loose things—snack bars, packets, little bags—from looking like a mess.
Use airtight clear containers for dry goods like flour, sugar, and pasta. Square or rectangular shapes stack better, and honestly, who wants to waste shelf space on awkward round tubs?
Wicker baskets are perfect for lower shelves, especially for things you grab a lot—potatoes, onions, bread. They keep everything together but don’t make your pantry feel cold or sterile. Label both the bins and baskets so the rest of the family can actually keep the system going without you having to nag.
Group like items within each container. All baking stuff goes in matching clear bins; use baskets for grab-and-go breakfasts or snacks.
Organizing Cookware and Kitchen Tools
Getting pots, pans, spices, and daily tools under control makes cooking way less stressful. Here are a few strategies that actually make a difference, at least for us.
Hang Pots and Pans Efficiently
Hanging pots and pans frees up cabinet space and puts your go-to cookware right where you need it. A wall-mounted rack with hooks near the stove means you can grab what you need mid-recipe—no digging.
If you’ve got high ceilings, a ceiling rack works too, but only hang the stuff you use all the time. No need to display every dusty pan you own.
Short on wall space? Try a tension rod inside a cabinet with S-hooks for lids. Or mount a pegboard on a free wall and move hooks around as your collection changes.
Create a Dedicated Spot for Spice Racks
Spices need a real home where you can see every jar—no more rummaging. Mount a narrow shelf or a multi-tier organizer inside a cabinet door, so you’re not buying cumin three times because you couldn’t find the first two.
A drawer insert with angled tiers lets you read labels at a glance—way better than stacking jars. Magnetic spice containers can stick to the fridge or a metal strip under cabinets if you’re short on space.
Sort spices alphabetically or by cuisine—whatever stops you from pawing through the whole lot. If you keep them in a drawer, label the tops. It saves a ton of time.
Utilize Rolling Carts for Flexible Storage
A rolling cart gives you storage that goes where you need it. Park it by the stove while cooking, then wheel it out of the way when you’re done.
The top shelf is for your most-used stuff—oils, utensils. Middle tier? Cutting boards or mixing bowls. The bottom holds heavy appliances or pull-out drawers with kitchen linens.
Wire basket carts let you see everything, so nothing gets lost. Some folks like solid shelves that double as extra counter space for big cooking days.
Frequently Asked Questions
Kitchen organization always brings up practical questions—placement, timing, workflow. Here’s what’s worked for us (and sometimes what hasn’t).
What are the best ways to determine what goes where when organizing kitchen cabinets?
Watch how you actually move around your kitchen for a few days. Where do you reach for things? What do you use the most? That tells you more than any organizing book.
Keep everyday dishes close to the dishwasher. Coffee mugs should live near the coffee maker, not across the room. Group things by task: baking together, breakfast together, oils near the stove.
We use about 20% of our stuff 80% of the time. Those favorites deserve the best spots—eye level and within easy reach. The fondue set? Stick it up high.
Test your setup for a week before buying drawer dividers or fancy organizers. Sometimes what makes sense in theory just doesn’t work in practice.
Can you really organize your kitchen effectively in just one day, and if so, how?
You can, but only if you keep it realistic. This isn’t about deep-cleaning every inch or building new shelves—just organizing what’s there.
Pull everything out of one zone at a time. Emptying the whole kitchen at once is a recipe for chaos (and takeout). Tackle each cabinet: pull out, wipe down, group similar items, ditch the extras, and put back only what you actually use.
Set a timer for each cabinet or drawer. Thirty-minute bursts with five-minute breaks work for us. Most kitchens have 15-20 cabinets and drawers, so you can get it done in a day if you stay focused.
Make decisions fast. If you haven’t used that panini press in two years, you’re not going to suddenly become a panini person now, right?
Could you outline the seven essential steps for restructuring kitchen cabinets for better access?
Start by emptying one cabinet and wiping it down. Next, sort everything: keep, donate, toss, or move to another room.
Measure the cabinet and note any weird corners or shelf heights. Add simple tools like risers, lazy Susans, or tension rods for lids before putting stuff back.
Put daily-use items at eye level, weekly items lower, occasional stuff up high. Label shelves or bins if you share the kitchen—no one remembers your system after a week.
Set a reminder for three months from now to reassess. Sometimes the system works, sometimes it doesn’t, and that’s fine.
What are some creative kitchen organization ideas that work wonders for small spaces?
Magnetic knife strips free up counter and drawer space. Mount them on any vertical surface—even inside cabinet doors for small tools.
Tension rods are magic. Use them between cabinet walls to stand up cutting boards, under sinks for spray bottles, or in drawers as dividers. Cheap, easy, no tools needed.
Rolling carts give you extra workspace that disappears when you don’t need it. Store baking stuff, breakfast things, or bar gear, then roll it out of the way.
Command hooks inside cabinet doors hold pot holders, aprons, measuring cups. Stackable clear bins let you use vertical space in deep cabinets and still see everything. If you’re feeling ambitious, use the toe-kick space under cabinets for flat stuff like baking sheets with special drawers.
How would you design a kitchen layout to enhance cooking efficiency, especially with zones and islands?
We think in three main zones: prep, cooking, and cleaning. The prep zone gets cutting boards, knives, bowls, colanders, and measuring cups—right by your main counter.
Cooking zone centers on the stove. Spices go in a nearby drawer or rack, utensils in a crock, pots and pans below, oils and pot holders close at hand.
Cleaning zone is all about the sink. Dish soap, sponges, cleaning sprays under the sink or in a nearby cabinet. Keep trash and recycling within a step of the prep area.
If you’ve got a moveable island, keep it near your prep area but out of the main walkway. You want at least 36 inches around it. When you’re solo, run it parallel to the counters; if you’ve got company, turn it perpendicular for a galley feel. Makes a big difference.
What are some tips for keeping your kitchen organized while whipping up your culinary creations?
We swear by the "clean as you go" mindset. If something's simmering or baking, that's your cue—wash a few prep bowls, stash away ingredients, and chip away at the mess before it gets out of hand. Nobody wants to face a mountain of dishes after dinner. That's how you end up scrolling for takeout instead.
Grab a big bowl or even a grocery bag for scraps and trash right on the counter. It sounds simple, but making one trip to the garbage at the end is so much better than trekking back and forth every time you chop something.
Put things back as soon as you're done with them. Yes, it’s basic advice, but honestly, it works. If you pull out the olive oil, toss it back in the cupboard before you even start sautéing. Otherwise, stuff just piles up everywhere.
Wipe down your counters in between tasks—not just at the very end. A quick swipe here and there keeps things from getting sticky or crusty. We also try to run the dishwasher before starting a big cooking session so it’s empty and ready, making cleanup way less annoying.
Share:
The Benefits of Matching Kitchen Storage Systems
The Benefits of Matching Kitchen Storage Systems