

Check out our latest collection of compact vacuum sealer for food!
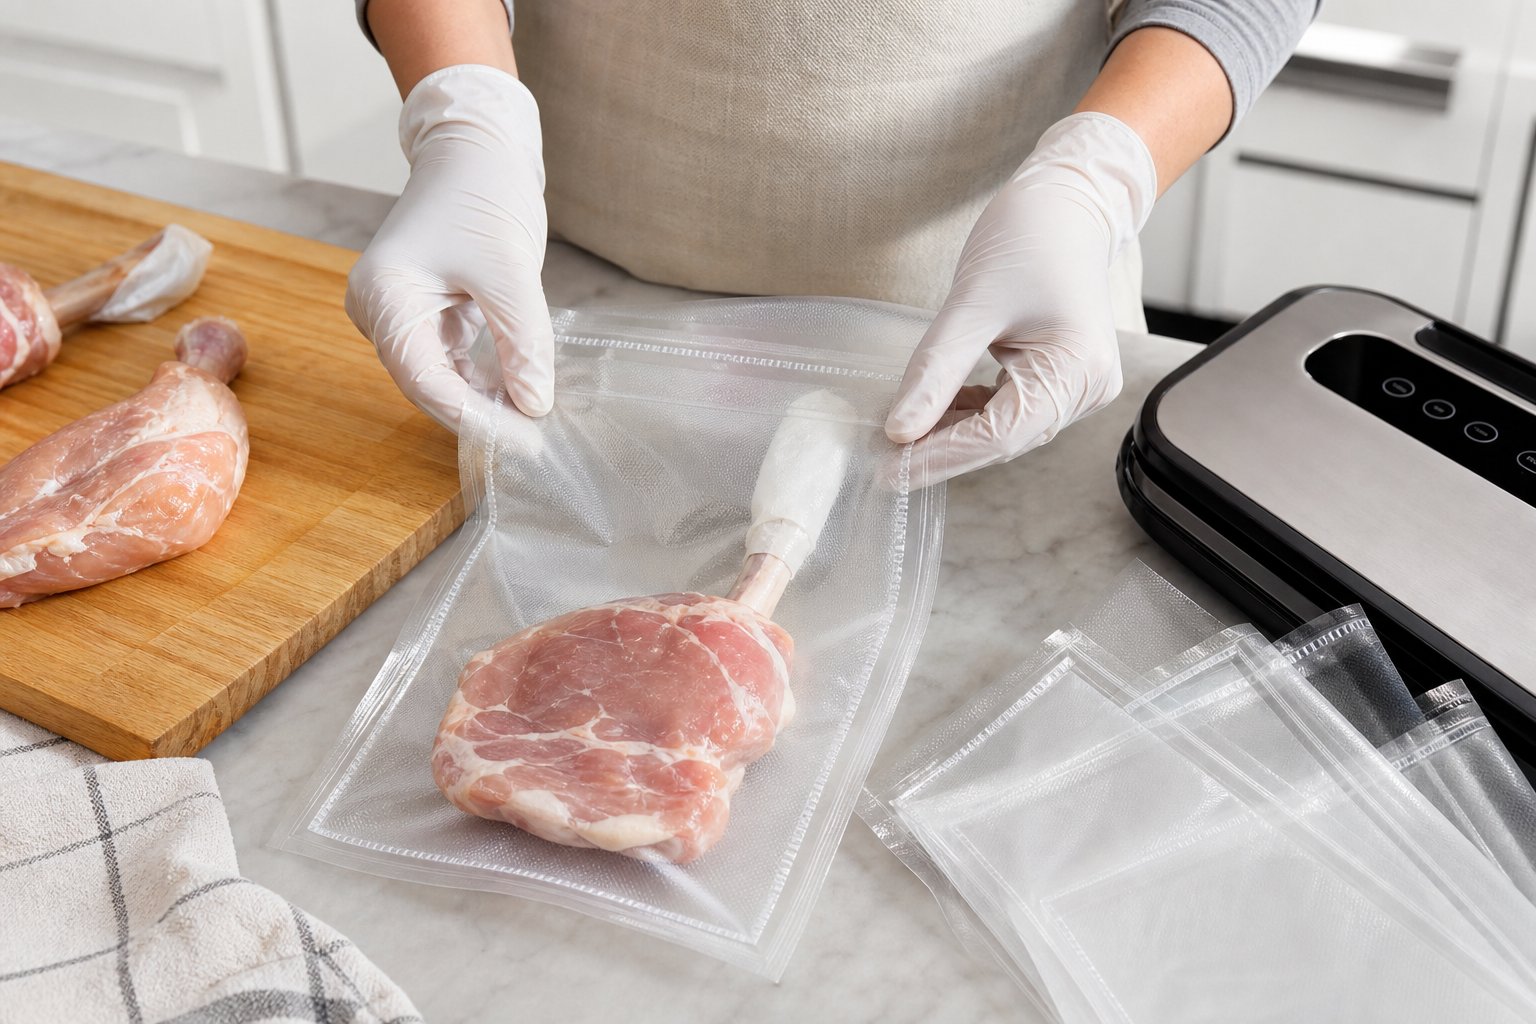
Bone-in cuts can be challenging to package in reusable vacuum bags. Sharp edges from T-bones, chops, and rib racks can press against the bag during vacuum sealing, and even a small puncture can cause the package to lose its seal in the freezer. The key is to use a durable, compatible bag, keep sharp bones away from the seal area, and add a food-safe protective barrier where needed.
A few careful adjustments to how you prepare, position, and seal bone-in meat can significantly reduce the risk of punctures. The following steps cover bag selection, preparation, sealing, leak checks, freezer storage, and techniques for other foods with sharp edges.
Key Takeaways
- Choose freezer-safe, puncture-resistant vacuum bags that are compatible with your sealer.
- Position sharp bones away from the seal area and protect exposed points with a food-safe barrier.
- Inspect each package before freezing and avoid stacking pressure on exposed bone points.
Choose Bags That Can Handle Sharp Edges
Not every reusable vacuum bag is suitable for bone-in meat. Bag durability, construction, freezer compatibility, and compatibility with your vacuum sealer all affect how well the package withstands pressure from sharp bones.
Compare Bag Thickness and Multi-Layer Materials
Bag durability is especially important when packaging cuts with exposed bones. Thin storage bags intended for sandwiches or general food storage may not withstand the pressure created during vacuum sealing.
Look for vacuum bags specifically designed for freezer storage and repeated use. Multi-layer films may provide greater puncture resistance and better barrier performance, depending on their construction.
Always follow the bag manufacturer's instructions regarding freezer use, reuse, and compatibility with raw meat.
Match Bag Styles to Your Vacuum Sealer
Vacuum bags are not universally compatible with every type of machine. Many edge-sealing vacuum sealers require embossed or channelled bags that allow air to move toward the vacuum port.
Chamber vacuum sealers operate differently and typically work with smooth chamber-compatible bags. Check your machine's instructions before purchasing bags, especially if you plan to seal bone-in meat regularly.
Using the correct bag type helps the machine remove air and create a reliable seal without unnecessary stress on the packaging.
Know When Reusable Bags Are No Longer Safe to Use
Reusable vacuum bags can wear over time, and sharp bone edges may accelerate that wear. Inspect each bag carefully after washing and before reuse.
Look for pinholes, stretched areas, damaged seams, deep creases, or thinning where a bone previously pressed against the material. Persistent odours or other signs that a bag cannot be properly cleaned are also reasons to stop using it for food storage.
If the bag is damaged or no longer holds a reliable vacuum, replace it.
Prepare Bone-In Cuts Before They Go in the Bag
Careful preparation can reduce the chance of a bone puncturing the bag. Pay particular attention to exposed bone points, surface moisture, and how the cut will sit once the vacuum cycle begins.
Trim, Tuck, and Position Protruding Bones
Start by identifying any bones that protrude from the cut. Racks, T-bones, and split cuts can have exposed edges that press directly against the bag as air is removed.
When possible, position the meat so the sharpest bone points face the bottom or side of the bag rather than the seal area. Avoid forcing exposed or splintered bone edges tightly against the film.
This positioning technique can be useful for poultry, pork chops, beef cuts, venison, and other irregular bone-in cuts.
Dry the Surface and Manage Meat Juices
Excess moisture near the bag opening can interfere with sealing. Before bagging, gently pat the outside of the meat dry with a clean paper towel.
Position the meat so juices remain as far from the sealing area as possible during the vacuum cycle. If your machine has settings intended for moist foods, use them according to the manufacturer's instructions.
Keeping the seal area clean and dry helps the bag form a more consistent seal.
Protect Sharp Points With a Food-Safe Buffer
If a bone cannot be repositioned, cover the sharp point with a food-safe protective barrier. A small folded piece of parchment paper or butcher paper can help prevent the bone from pressing directly against the bag.
For racks or cuts with several exposed points, protect each high-pressure area rather than wrapping more of the meat than necessary.
The goal is simple: create a smooth surface between the sharp bone and the vacuum bag without interfering with the seal.
Seal the Package Without Forcing Bones Through the Film
A reliable seal depends on adequate headspace, controlled vacuum pressure, and careful positioning. These steps reduce the chance of the film being pulled tightly over a sharp bone.
Leave Enough Headspace for a Strong Seal
Leave sufficient empty bag above the food so the material can sit smoothly across the sealing area. Avoid packing the meat directly against the seal bar or bag opening.
Extra headspace also helps keep juices and fat away from the sealing surface, reducing the chance of an incomplete seal.
Follow your bag and sealer manufacturer's guidance for the amount of headspace required.
Use Gentle Suction and Moist-Food Settings
If your vacuum sealer offers pulse, manual, or gentle vacuum control, it can be useful for cuts with exposed bones. Slowing or manually controlling the vacuum allows you to stop before the film is pulled excessively tightly around a sharp point.
If your machine includes a moist-food setting, use it when appropriate and follow the manufacturer's instructions. On some machines, this setting affects sealing rather than suction strength.
For marinated or particularly moist foods, keeping liquid away from the sealing area remains important regardless of the setting selected.
Double-Bag High-Risk Cuts for Added Protection
For especially sharp cuts, such as T-bone steaks or racks with pointed rib ends, a second compatible bag can provide additional protection.
Where your bag system and vacuum sealer allow it, place the sealed package inside a second bag and seal it again. The outer layer can provide backup protection if the inner bag is damaged during handling or freezer storage.
Double-bagging is optional and should not replace proper bone positioning and puncture protection.
Check for Leaks and Store Packages Safely in the Freezer
Before freezing bone-in meat, inspect the package for leaks, weak seals, and areas where the bone is pressing heavily against the bag. Careful freezer placement can help protect the package after sealing.
Spot Pinholes, Weak Seals, and Lost Vacuum
Inspect the bag immediately after sealing. The material should remain closely fitted around the food without obvious air pockets or loose areas that indicate a loss of vacuum.
Hold the package under good lighting and inspect the following areas:
- The seal strip: Look for gaps, wrinkles, moisture, or uneven bonding.
- Areas around exposed bones: Check anywhere a sharp edge presses against the film.
- Corners and folds: Inspect creased areas that may have been stressed during sealing.
If the package has lost its vacuum or appears damaged, repackage the meat in a sound bag before freezing.
Freeze Flat Before Stacking Packages
When practical, place freshly sealed packages flat in the freezer until they are firm before stacking them. This helps the package maintain a stable shape and reduces pressure from heavier items.
Once frozen, place heavier packages underneath lighter ones and avoid positioning another package directly over a protruding bone point.
Careful stacking can help prevent punctures caused by compression during freezer storage.
Prevent Ice Crystals, Oxidation, and Freezer Burn
Removing excess air and maintaining an intact seal can help limit oxidation, moisture loss, and freezer burn. However, vacuum sealing does not replace proper temperature control or safe food-handling practices.
Freezing is what inhibits microbial growth during storage. If a package loses its vacuum, the meat may be more exposed to air and moisture loss, which can reduce quality even when it remains continuously frozen.
Check stored packages periodically for damaged seals, excessive frost inside the bag, or areas where the film has pulled away from the food.
Handle Fish, Seafood, and Other Puncture-Prone Foods
Bone-in meat is not the only food that can damage vacuum bags. Fish spines, shells, dried pasta, and other hard or pointed foods can also create punctures if they press against the film.
Package Whole Fish and Salmon With Fins Protected
Whole fish can have sharp fins and spines, while fillets may contain pin bones or other hard edges. Remove or protect protruding points before placing the fish in a vacuum bag.
If a sharp area cannot be removed, place a small piece of parchment paper or another suitable food-safe barrier between the point and the bag.
Keep excess moisture away from the sealing area and follow appropriate food-safety guidance for storing and thawing vacuum-packed fish.
Adapt the Method for Shell-On Seafood
Shrimp shells, crab legs, and lobster tails can have hard, jagged edges that place significant pressure on vacuum bags. Treat these areas much like exposed bones.
- Cover sharp shell tips or claw edges with a small food-safe protective barrier.
- Arrange pieces so pointed shells are not directed toward the seal area.
- Leave adequate headspace so hard edges do not press against the seal during vacuuming.
These steps help protect the bag while keeping the sealing surface clear.
Use Extra Care With Dry Goods and Hard Edges
Dried pasta, nuts, and other foods with hard or pointed surfaces can also wear through vacuum bags during storage and handling.
Use a durable bag, avoid overfilling it, and arrange particularly sharp pieces away from seams and corners. For higher-risk foods, an additional protective layer or compatible second bag may provide extra protection.
The same principle applies across these foods: reduce direct pressure between sharp edges and the bag material.
Use Machine-Free Methods When a Vacuum Sealer Isn't Handy
A vacuum sealer is not the only way to remove excess air from a food-storage bag. Manual methods can be useful for some applications, although they generally do not remove as much air as a dedicated vacuum sealer.
Try the Water Displacement Method for Sous Vide Bags
For compatible sous vide or freezer bags, the water displacement method can remove much of the surrounding air. Place the food in the bag and close most of the zipper, leaving a small opening near the top.
Slowly lower the bag into water while keeping the opening above the waterline. The water pressure pushes air upward and out of the bag. Once most of the air has escaped, close the remaining section of the zipper.
With bone-in cuts, make sure sharp edges are protected and are not pressing heavily against the bag as it is lowered into the water.
Use the Straw Method for Dry Foods
For dry foods, a straw can be used to remove some air from a zipper-style storage bag. Insert the straw near one corner, close the rest of the bag, draw out the air, then remove the straw and immediately close the remaining opening.
Do not use this mouth-suction method with raw meat, seafood, or other foods where contact could create a food-safety risk. Reserve it for suitable dry pantry foods.
Know the Limits of Manual Air Removal
Manual air-removal methods generally leave more residual air than a vacuum sealer and may not provide the same level of protection against oxidation and freezer burn.
They can be useful for short-term applications or certain cooking methods, but they should not be assumed to provide the same storage performance as a properly vacuum-sealed package.
Keep perishable foods properly chilled during preparation and refrigerate, freeze, or cook them promptly.
Frequently Asked Questions
How can I protect sharp bones from puncturing a reusable vacuum-seal bag?
Cover exposed bone points with a small piece of food-safe parchment or butcher paper and position them away from the seal area. Use a durable, freezer-safe bag that is compatible with your vacuum sealer.
What materials work best for cushioning bone ends before vacuum sealing?
Parchment paper or food-safe butcher paper can provide a simple barrier between a sharp bone and the bag. Use only enough material to protect the exposed point without interfering with the seal.
Can I vacuum seal bone-in meat for freezer storage without damaging the bag?
Yes. Use a puncture-resistant bag, protect sharp bone points, leave adequate headspace, and avoid pulling the film excessively tightly around exposed bones.
Should I use a double seal when packaging bone-in cuts?
A second seal line can provide extra protection against seal failure if your machine and bag instructions allow it. However, it will not prevent a bone from puncturing another part of the bag, so sharp points still need protection.
How long does vacuum-sealed bone-in meat stay fresh in the freezer?
Storage quality varies by the type of meat, freezer conditions, packaging, and whether the seal remains intact. Vacuum sealing can help protect quality, but it does not create a universal storage period. Follow recommended freezer-storage guidance for the specific cut.
Are reusable vacuum-seal bags safe to use with bone-in meat for sous vide cooking?
Only use reusable bags specifically rated by the manufacturer for sous vide cooking at your intended temperature. Protect exposed bones before sealing and follow the bag manufacturer's cleaning and reuse instructions.
Share:
How Many Times Can You Reuse Vacuum Sealer Bags Before Replacing Them?
Do You Need to Pre-Freeze Food Before Vacuum Sealing? When It Helps and When It Does Not