

Check out our latest home & kitchen collection!
Opening a container to find your flour clumped together, your brown sugar rock-hard, or your crackers mysteriously soft and stale? It’s annoying, right?
Most of us have reached for an ingredient only to realize moisture somehow snuck inside what we thought was a secure, dry space. Turns out, it’s not just chance, there’s real science behind why this happens.
Moisture builds up in stored ingredients when water vapor from the food, temperature swings, or humid air gets trapped in containers, setting the stage for spoilage, weird textures, and lost freshness.
Sometimes it’s because we store warm food in sealed containers. Other times, we use the wrong storage material. Even just opening and closing containers in a muggy kitchen can introduce enough moisture to cause headaches over time.
Being aware of what causes moisture issues lets us make smarter storage choices and keep our pantries stocked with ingredients that aren’t ruined.
Whether you’re storing basics like cereal or more niche baking stuff, preventing moisture problems will save you money, cut down on waste, and keep your meals on track.
Key Takeaways
- Moisture gets trapped in containers from food releasing water vapor, temperature swings, and humid air sneaking in
- The container type and sealing method can either help or hurt, depending on what you’re storing
- Using food-safe desiccants, letting things cool before sealing, and picking the right containers for each ingredient can keep things dry and extend shelf life
The Science Behind Moisture Buildup in Storage
Moisture builds up in stored ingredients through a few main routes: we trap humid air when sealing, foods themselves slowly release water, and changes in temperature cause water vapor to condense on cool surfaces.
How Moisture Gets Trapped in Food Containers
When we seal a container, we’re locking in whatever air is inside at that moment. If the air is humid—say, you open a bag of flour on a sticky summer day—that moisture stays put once the lid’s on. The container becomes a closed system, and water vapor has nowhere to go.
Temperature is sneaky here. If you put warm ingredients straight into a container, you trap heated air that holds more water vapor than cooler air can. As things cool down in the pantry, that extra moisture condenses into droplets on the container walls—or worse, right on your food.
Even foods we think of as “dry” release small amounts of moisture over time. Rice, beans, grains—they all contain some water that slowly evaporates into the air inside the container. If there’s no way for that humidity to escape, it just keeps building up.
Understanding Water Activity and Moisture Content
Water activity (aw) tells us how much water in food is available for microbes to use, on a scale from 0 to 1. This is different from moisture content, which just means the total amount of water present. Foods can have high moisture content but low water activity if the water is tightly bound to other stuff in the food.
Most bacteria need an aw above 0.90 to grow. Molds can get by at 0.70 or higher. That’s why dried pasta (aw around 0.20) lasts for ages, but cooked pasta spoils fast—the cooking process raises water activity, making it a playground for microbes.
| Food Type | Water Activity (aw) | Storage Risk |
|---|---|---|
| Dried herbs, crackers | 0.10-0.30 | Very low |
| Flour, dried fruit | 0.60-0.70 | Moderate (mold risk) |
| Bread, cheese | 0.80-0.90 | High (mold and bacteria) |
| Fresh produce, cooked foods | 0.95-1.00 | Very high (rapid spoilage) |
The Role of Relative Humidity and Temperature Swings
Relative humidity (RH) measures how much water vapor is in the air compared to what it could hold at a given temperature. Warm air can hold more moisture than cold air—hence, condensation when things cool down.
Kitchens are full of temperature swings. Opening the fridge, running the dishwasher, cooking—all these create little microclimates. If you set a cold container of flour on a warm counter, the outside warms up faster than the inside. That temperature difference hits the dew point, and suddenly there’s condensation inside.
Even a 10-15°F temperature swing can cause trouble. Basements and garages are especially bad for this, since they go through big day-night temperature changes. We might think these spots are “cool and dry,” but honestly, the temperature rollercoaster can be worse than a slightly warm but stable pantry.
Common Causes of Moisture Problems in Stored Ingredients
Moisture problems in stored ingredients come from temperature shifts, humid environments, bad container seals, and leftover water on the food itself. Sometimes one factor is enough; other times, they gang up to make a mess.
Condensation from Temperature Changes
Temperature swings are probably the biggest culprit. Moving containers between different temperature zones—like taking flour from a cool pantry to a warm kitchen—can make the container surface drop below the dew point. Water vapor in the air condenses into droplets, which can soak into your ingredients.
This also happens if you store stuff near heat sources or in spots where the temperature isn’t steady. A bag of rice by the stove, a canister of sugar in the sun—constant heating and cooling brings on new condensation each time.
Letting ingredients reach room temperature before opening containers helps. Keeping things away from appliances, windows, or uninsulated walls is smart. A little insulation between storage areas and the outside world can make a big difference.
High-Humidity Environments
Storing food in humid places naturally leads to moisture creeping in. Kitchens pump out a ton of water vapor from cooking, dishwashing, and hot water. That humid air wants to balance out with the drier stuff, so your flour, sugar, and spices start sucking up moisture.
Basements and pantries without good ventilation just trap humidity from all over—foundation leaks, plumbing, even air from outside. Once relative humidity goes over 60 percent, dry ingredients start pulling in water like sponges.
You can fight this by airing out spaces during dry weather, running exhaust fans when cooking, or using a dehumidifier. Don’t stash food right next to sinks or dishwashers, either.
Improper Sealing or Airflow
If a container’s seal isn’t airtight, humid air gets in and messes with your food. Damaged gaskets, worn-out threads, or lids that aren’t fully closed all let air sneak in. Every time you open a container in a muggy room, you trap some of that moisture when you close it again.
Cramming containers together or against walls kills airflow. Without ventilation, humidity pools in those dead zones, and moisture just sits there.
Good sealing means:
- Clean, undamaged gaskets
- Containers meant for dry goods
- Tightening lids properly
- Checking and swapping out worn seals
Give containers some breathing room, too. Air needs space to move, or else moisture just hangs out in the cracks.
Residual Water in Ingredients
Putting away food that’s still wet is a recipe for moisture buildup. If you wash rice, beans, or produce and don’t let them dry fully, that leftover water will evaporate inside the sealed container and then re-condense—sometimes right onto the food.
Even stuff that looks dry can have moisture on the surface, especially if it was stored in a humid warehouse or shipped in a cold truck. You might not notice, but you’re introducing extra water into your storage.
The fix? Let ingredients dry completely before sealing them up. Washed foods should air dry on towels—sometimes for a whole day, especially beans. If you buy in bulk, let things breathe a bit before transferring them to containers.
Impact of Moisture on Food Quality and Safety
Too much moisture in storage creates a playground for mold, ruins texture and flavor, and lets bacteria take over. These issues can wreck your food’s edibility and safety.
Mold Growth and Spoilage
Mold loves moisture. Once water activity goes above 0.60, it’s game on. Who hasn’t opened a bag of flour or spices to find fuzzy spots that mean tossing the whole thing?
Most molds show up within a day or two if conditions are right. Grains, nuts, dried fruit, and powders are especially at risk since their porous structures trap water. Some molds even make toxins that stick around after the mold is gone, so it’s not worth the risk.
And it’s not just gross—it’s costly. One moisture mishap can ruin a whole batch of stored goods, especially if you buy in bulk. Plus, you’ve got to clean everything and restock.
Loss of Texture, Taste, and Aroma
When ingredients soak up moisture, their texture and flavor often take a hit. Crackers go soft, spices clump, and nothing tastes quite right.
Some common changes:
- Powders like flour or sugar cake up and stick together
- Crackers, cereal, and pasta lose their crunch
- Nuts and seeds turn limp
- Honey and syrups crystallize
- Dried fruit gets sticky
Sugar, especially brown sugar, pulls in moisture and can turn rock-hard or lumpy. Salt does the same, going from free-flowing to a solid chunk.
And don’t get me started on spices and herbs—moisture saps the oils and aromas, so you end up needing more to get the same flavor.
Shortened Shelf Life
Moisture speeds up the breakdown of food, making ingredients spoil much faster than they should. Things that should last months or years can go bad in weeks if humidity gets in.
Higher water activity means microbes grow faster. Above 0.85, bacteria multiply like crazy. Between 0.60-0.85, yeasts and molds take over. But foods kept below 0.60 water activity can last a long time.
| Ingredient Type | Optimal Moisture Content | Typical Shelf Life (Proper Storage) | Shelf Life (Excess Moisture) |
|---|---|---|---|
| All-purpose flour | 12-14% | 6-8 months | 2-4 weeks |
| White rice | 12-14% | 1-2 years | 1-3 months |
| Dried beans | 10-12% | 2-3 years | 3-6 months |
| Dried herbs | 8-10% | 1-3 years | 2-4 weeks |
Temperature swings make this worse by causing condensation inside containers. That’s why stuff kept in garages or basements often spoils faster than what’s in a climate-controlled pantry.
Food Safety Risks
Moisture creates the perfect environment for bacteria that cause food poisoning—Salmonella, E. coli, and Clostridium botulinum all need enough water activity to multiply and produce toxins.
Bacteria grow fastest above 0.90 water activity, but some can survive drier conditions. Once they get going, they can multiply quickly in warm, moist spots. You might not even see any signs, making moisture-damaged ingredients risky.
Cross-contamination is another worry. Moisture on containers or shelves can move bacteria from one food to another. One wet storage area could compromise a bunch of ingredients at once.
Some foods are riskier than others. Dried milk, egg powder, and protein supplements can support fast bacterial growth once they get damp. Low-acid foods like grains and beans can harbor C. botulinum spores that wake up in moist, low-oxygen environments.
If you notice any signs of moisture damage—bad smells, mold, weird colors, or odd textures—just toss the ingredient. It’s not worth the risk.
Types of Containers and Their Role in Moisture Buildup
The type of container you use has a huge impact on how much moisture gets in or builds up around your stored ingredients. The material, seal quality, and how you control the environment all play a role in keeping your food dry or letting condensation take over.
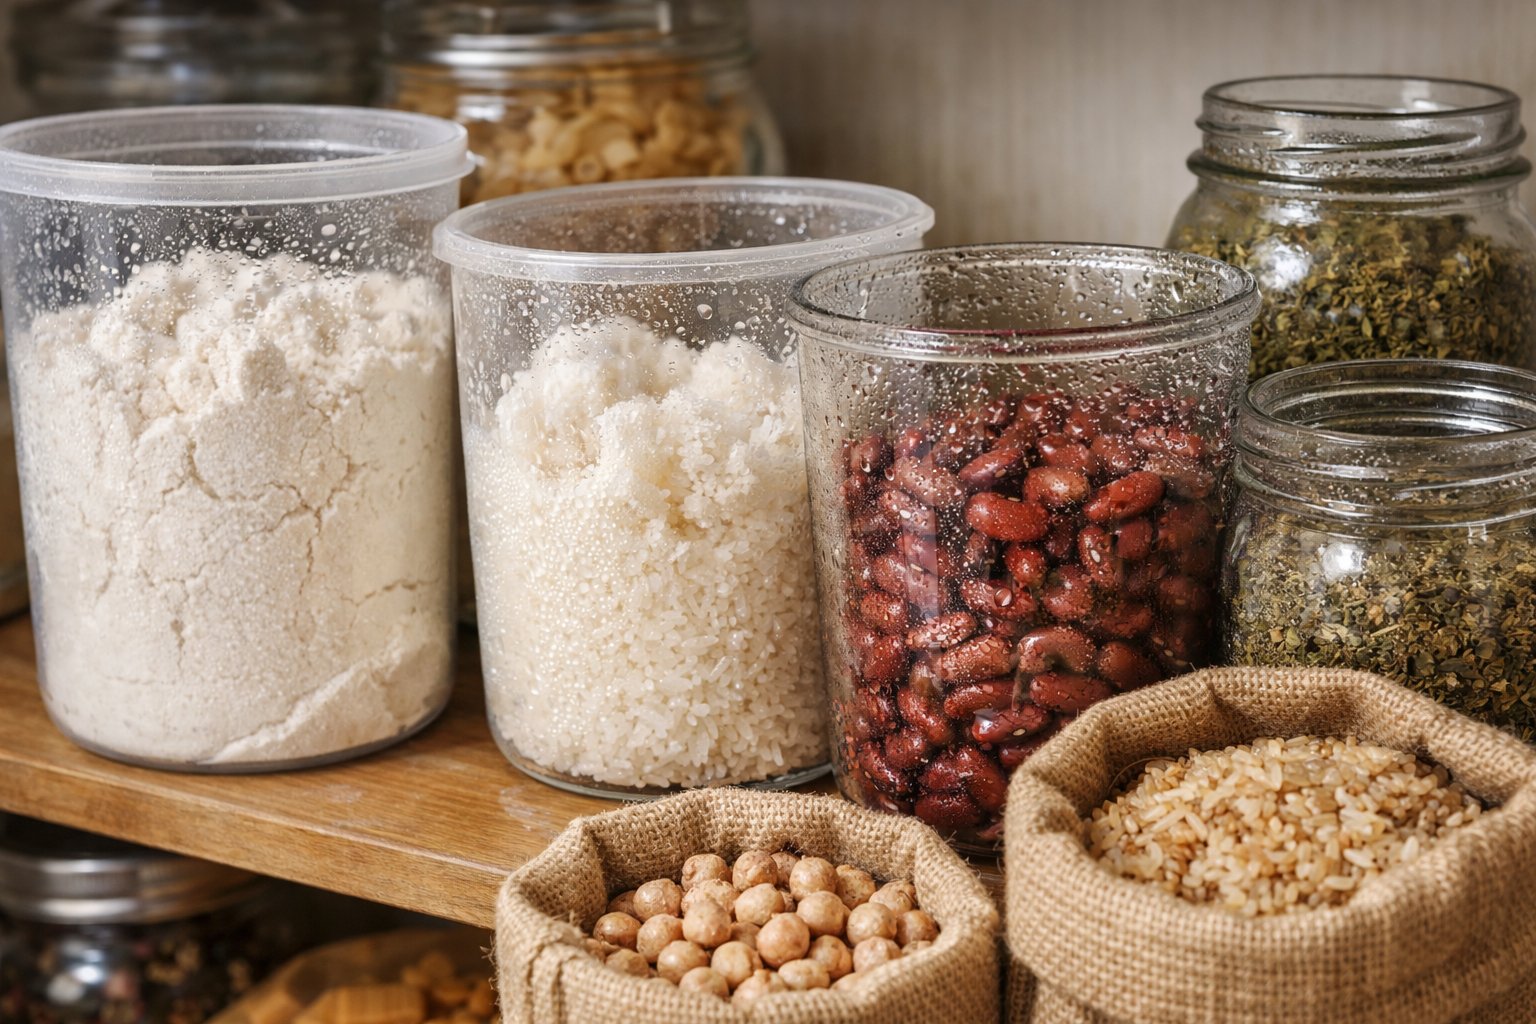
Plastic Versus Glass Containers
Plastic containers are handy and light, but they’re not all equal when it comes to keeping moisture out. Cheaper, thinner plastic can let small amounts of air and moisture sneak through over time. Honestly, the lid seal matters more than whether it’s plastic or glass.
Glass containers have a non-porous surface, so moisture can’t get through the walls at all. In my experience, glass keeps the inside environment more stable—it doesn’t heat up or cool down as quickly as plastic, which is a nice bonus. Plus, glass doesn’t soak up odors or stains, which could otherwise trap moisture.
Either material can work if the lid seals well. Rubber or silicone gaskets in the lids are what really keep humidity out. The truth is, the seal’s quality usually matters more than whether you’re using plastic or glass.
How Airtight and Vacuum-Sealed Bags Help
Airtight containers keep outside moisture away from ingredients and stop humidity inside from escaping and then condensing on cooler surfaces. They basically lock in consistent conditions by blocking air exchange.
Vacuum-sealed bags go a step further by pulling out all the air. No air means no oxygen for mold and no humidity to cause clumping or spoilage. I use vacuum sealing for things like flour, sugar, dried herbs—anything that hates moisture and is going to hang around a while.
Vacuum sealing also compresses stuff, so you save space. These bags really shine in the freezer, where temperature swings would otherwise lead to frost and freezer burn.
Benefits of Dehumidifiers and Proper Insulation
A dehumidifier helps control the overall moisture in storage areas, which is important no matter how good your containers are. If you keep pantry humidity below 60%, you cut down on condensation and stop moisture from sneaking in when you open containers.
Insulating storage spaces keeps temperatures steady, so there’s less chance for condensation. Uninsulated spots can swing wildly between hot and cold, especially with changing seasons, and that’s just asking for moisture trouble. Insulated pantries or storage rooms hold a more even temperature, so less condensation forms.
I’d suggest putting a small dehumidifier in basement pantries, garages, or anywhere that tends to get damp. It’s a solid investment that protects everything you’re storing, not just what’s in the best-sealed containers.
Effective Moisture Control Methods for Home Kitchens
Keeping moisture in check in the kitchen takes a mix of absorption, humidity control, and smart storage. It’s not just about one trick—combine these to keep your ingredients fresh, dry, and safe from clumping or mold.
Desiccants: Silica Gel Packets and Calcium Chloride
Those little packets you find in shoe boxes and vitamin bottles? Total lifesavers in the kitchen. Silica gel packets suck up moisture with their millions of tiny pores—great for spice jars, dried herbs, and big bins of flour.
You can actually recharge silica gel packets. Just dry them in a low oven (about 200°F for a couple hours) when the crystals change color—usually blue to pink means they’re full.
Calcium chloride pulls in even more moisture than silica gel. It’s better for bigger spaces like pantries or cabinets with sugar, salt, or baking supplies. It turns into liquid brine as it works, so you’ll need to keep it in a container that won’t leak.
For everyday use, I’d toss two or three rechargeable silica gel packets into each container holding anything sensitive to moisture. Swap them out or recharge every few months, depending on how humid your kitchen gets.
Dehumidification and Humidification Systems
Kitchen exhaust fans rated at 100 CFM per linear foot of range width do a good job pulling out moisture-laden air while you cook. Running the fan for 15-20 minutes after cooking helps keep steam from settling into cabinets or the pantry.
Small electric dehumidifiers work well in pantries or under-sink cabinets where you keep dry goods. Most pull out 8-16 ounces of moisture a day and shut off automatically when they’re full.
Aim for kitchen humidity between 30-50%. Below 30%, bread and produce dry out too fast. Go above 50%, and you’ll start seeing mold or clumping.
Whole-house dehumidifiers, if you’re up for the investment, keep things steady everywhere and save you from juggling a bunch of little units.
Proper Storage Techniques to Prevent Moisture
Airtight containers with rubber seals are your first defense against moisture. Glass and thick plastic containers with locking lids beat thin bags or cardboard every time for storing flour, sugar, or grains.
Don’t put dry ingredients right on concrete floors or against exterior walls. Those spots get cold and cause condensation. Elevate containers on wire shelves for better air flow and to keep them off chilly surfaces.
Container Material Performance:
| Material | Moisture Barrier | Best For |
|---|---|---|
| Glass with rubber seal | Excellent | Sugar, flour, spices |
| Heavy plastic (HDPE) | Very good | Bulk grains, pasta |
| Metal tins with gaskets | Excellent | Coffee, tea, dried herbs |
| Vacuum-seal bags | Excellent (temporary) | Long-term freezer storage |
Move ingredients out of flimsy packaging and into proper containers as soon as you get them home. Paper bags and thin plastic just don’t keep moisture out, and humidity can sneak in within days of opening.
Preservation Methods and Ingredient Preparation Tips
Drying, dehydrating, and canning all help you keep ingredients longer and avoid spoilage from excess moisture.
Air Drying, Sun Drying, and Oven Drying
Air drying is best for herbs and small peppers. Just hang them in bunches somewhere airy and out of direct sun. If there’s too much humidity, mold can take over before things dry.
Sun drying works for things like tomatoes, apples, or apricots. Lay them out in the sun for a few days—only if it’s hot and dry (over 85°F and under 60% humidity). Bring them inside at night to keep dew from undoing your work.
Oven drying gives you more control. Set your oven to the lowest temperature (usually 140-170°F) and leave the door cracked for air flow. It works for fruits, veggies, and herbs, but it does use more energy.
You want foods to feel leathery or brittle when they’re done, with no wet spots hiding inside.
Using a Dehydrator for Long-Term Storage
Food dehydrators keep temperatures steady (95-165°F) and circulate air for even drying. You can dry several trays at once and don’t have to worry about the weather or tying up your oven.
Most dehydrators let you pick the right temp: herbs at 95-115°F, fruits at 135°F, veggies at 125-135°F. That helps prevent the outside from drying too fast and trapping moisture inside.
Once dried and stored in airtight containers with moisture absorbers, these foods can last 6-12 months at room temp. Slice everything evenly for best results, and check that fruits bend (not snap) and veggies snap cleanly before storing. Vacuum sealing dried foods keeps them even longer by blocking oxygen.
Canning and Advanced Storage Ideas
Canning preserves moist foods by heating them to kill microorganisms and sealing them in a vacuum. Water bath canning works for acidic foods like tomatoes and pickles. For low-acid foods (veggies, meats), you’ll need a pressure canner.
Vacuum sealing pulls air out of packages to prevent moisture and oxidation. It’s especially good for flour, sugar, dried fruits, and bulk grains.
Freezing locks in moisture and stops microbes cold. Portion food into freezer-safe containers, squeeze out as much air as you can, and put a layer of plastic wrap right on the surface before sealing for extra protection.
Mixing methods is often best—like blanching veggies before freezing, or vacuum sealing dried foods for the longest shelf life.
Frequently Asked Questions
Moisture builds up when warm air hits cold surfaces, when food isn’t fully dry before storage, or when containers trap humidity from temperature changes. Keeping both your ingredients and your storage space dry is key.
Why do my food containers get all misty inside, even when they're sealed tight?
That fog happens when warm, moist air gets trapped and hits the cooler container walls. Sealing up hot food, or anything freshly washed but still damp, just invites condensation inside.
The same airtight seal that keeps food fresh also keeps that moisture locked in. If you put hot pasta or wet veggies straight into a container, you’re basically setting up a little greenhouse.
Got any tricks to keep the fog at bay in my food storage?
Let hot foods cool to room temperature before sealing. That way, you don’t trap a bunch of steam inside.
For washed produce or other damp ingredients, dry them thoroughly with a towel or use a salad spinner. Even a little moisture adds up if it’s trapped.
Sometimes I leave containers slightly open for the first hour or so, just to let any leftover moisture escape before sealing them up for good.
What's with my pantry items feeling damp? How can I keep them dry and cozy?
Pantry humidity sneaks in through temperature swings or leaky packaging. Grains and beans like it at about 10% moisture; powders need it even lower.
Toss a silica gel packet or food-safe desiccant into storage containers to soak up extra moisture. Move anything you open into airtight glass jars or metal tins with snug lids.
Keep your pantry cool, and avoid spots near stoves, dishwashers, or exterior walls. Leaving a little space between containers helps air circulate and keeps temps more consistent.
Could my chilly fridge be the culprit behind my soggy sandwich bread?
Fridges are cold boxes in warm rooms, so opening the door lets in warm air, which then condenses on cold surfaces—including your food.
Honestly, bread doesn’t belong in the fridge. Cold temps make it go stale faster (it’s a weird starch thing). Store bread at room temp in a bread box or bag, or freeze it if you need to keep it longer.
Is my sealed food packaging secretly throwing a pool party without me?
If food went into packaging while still warm or wasn’t dried enough, moisture will condense inside as it cools. Even factory-sealed items can get condensation if they go through big temperature swings in shipping or storage.
Once condensation shows up, perishable foods with leftover moisture become perfect for bacteria and mold. Check that packages are intact and that storage temps stay steady.
Any pro tips for banishing unwanted moisture from my stash of snacks?
Try tossing a few food-safe desiccant packets into your chip or cracker containers. Those little silica gel packs really suck up humidity from the air inside sealed jars or bags.
Honestly, splitting snacks into smaller portions helps a lot. Every time you open a big container, you let in fresh humid air. Single-serving containers? Way less risk—you’re only exposing a little at a time.
If your snacks have already gone a bit soft, toss them in a low oven (think 200-250°F) for a few minutes to dry them out. Once they’re crisp again, stash them somewhere with some moisture protection so they actually stay that way.
Share:
Why Proper Storage Matters More After Food Is Opened
How Storage Container Size Impacts Food Freshness