

Check out our latest home & kitchen collection!
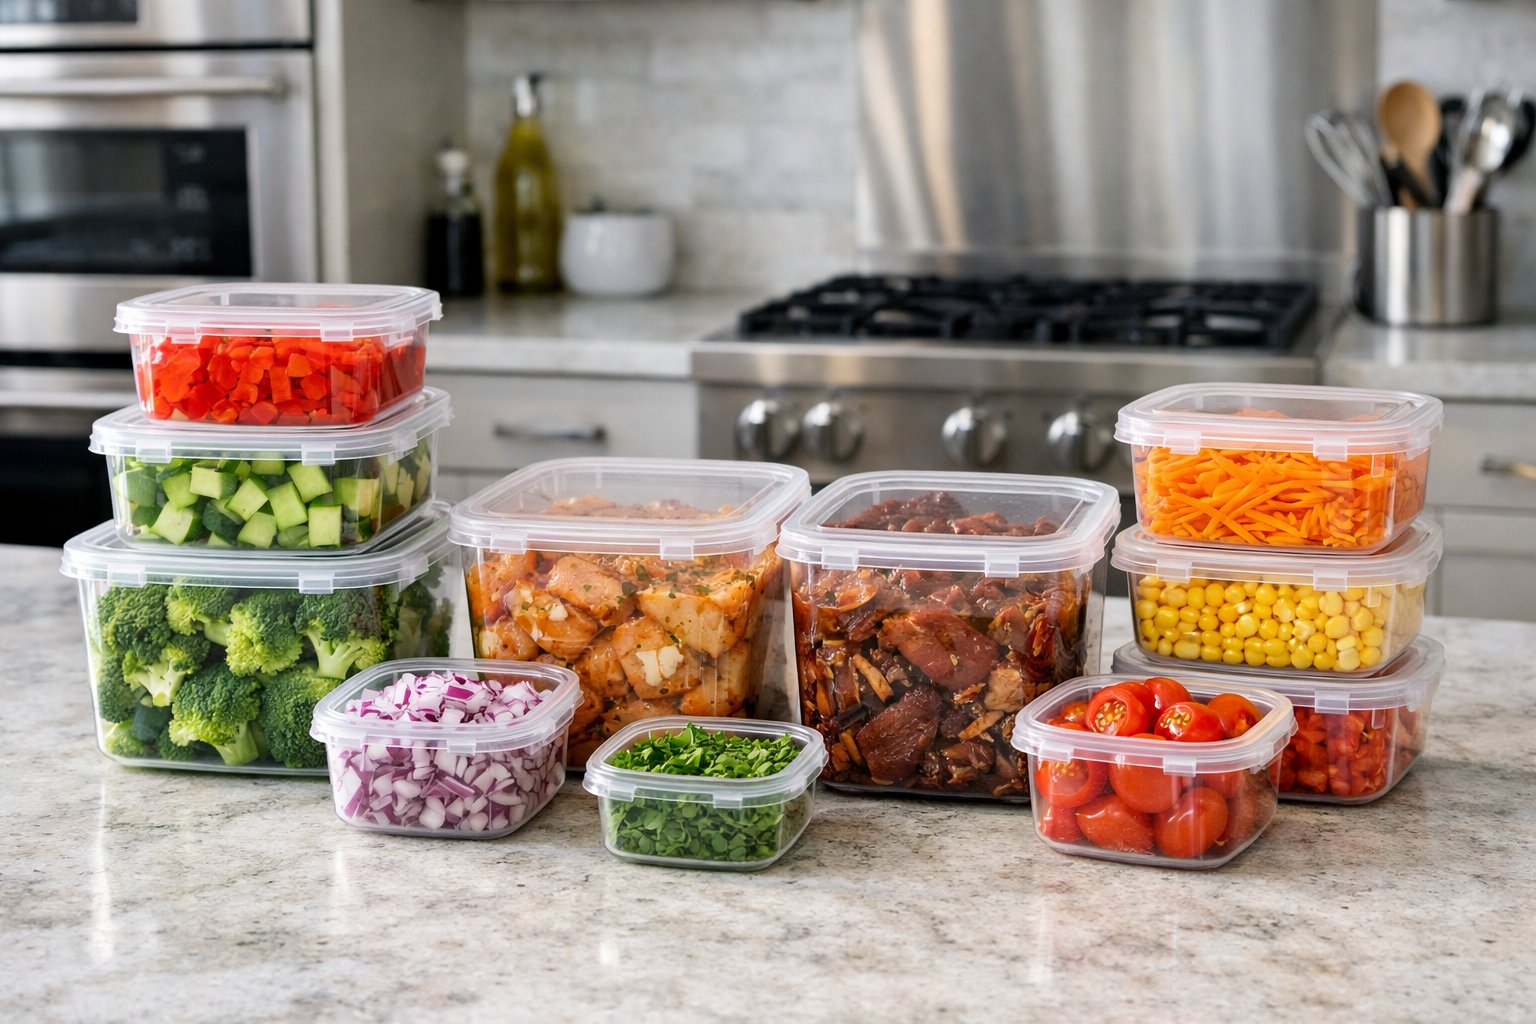
Meal prepping can totally change up your week, but there's a catch. All those chopped veggies and marinated proteins? They won't stay fresh if you just toss them into random containers and hope for the best. Honestly, who hasn't opened the fridge to find limp lettuce or chicken that smells... questionable by Wednesday?
How you store prepped ingredients decides if they stay safe, keep their nutrients, and actually taste good when it's time to eat. The difference between food lasting three days or turning soggy in a few hours? It usually comes down to the right container, cooling food properly, and knowing a bit about food safety. Skip these basics, and all that prep work could just end up in the trash.
Let's walk through the storage habits that keep your prepped ingredients fresh and safe. From containers that actually do their job to organizing your fridge so you can find things, these tips will help you get more from your meal prep, without all that guesswork or food waste.
Key Takeaways
- Airtight containers and proper cooling keep bacteria away and make ingredients last longer
- Different foods need different storage conditions; most prepped stuff lasts 3-5 days in the fridge if you do it right
- Simple systems like FIFO (first in, first out) and clear labels help you waste less and keep things running smoothly
The Importance of Proper Storage for Prepped Ingredients
When we prep ingredients ahead, how we store them really impacts their taste, safety, and nutrients. The difference between crunchy veggies and soggy ones—or safe food and a stomach ache—usually comes down to storage.
Preserving Freshness and Flavor
Good storage keeps those prepped ingredients tasting as if you just cut them. Chopped veggies, herbs, or fruits lose moisture and develop weird flavors fast when they're exposed to air. Airtight containers stop this by blocking out air.
Temperature matters, too. We need to keep prepped stuff at or below 40°F (4°C) in the fridge. That slows down the browning and mushiness.
Not every ingredient wants the same treatment. Leafy greens stay crisp with a paper towel to soak up extra moisture. Apples and avocados? A little lemon juice keeps them from browning. Onions and garlic should go in sealed containers so their smell doesn't take over the fridge.
Ensuring Food Safety and Reducing Foodborne Risks
Once we chop or prep ingredients, food safety jumps to the top of the list. Prepping creates more surfaces for bacteria to grow. If we don't store things right, we basically give germs a free pass.
Bacteria love the "danger zone"—between 40°F and 140°F (4°C to 60°C). We have to keep prepped food out of that range. Most prepped stuff is safe for three to five days in the fridge, but anything with raw meat or seafood needs extra care.
Food safety basics for meal prep:
- Keep raw proteins on the bottom shelf so nothing drips onto other foods
- Use separate containers for everything to avoid cross-contamination
- Label everything with prep dates
- Toss anything that smells off or looks moldy
If you won't use something in a few days, just freeze it at 0°F (-18°C). That stops bacteria cold and lets you keep it for weeks or months.
Impact on Nutritional Value and Meal Quality
Nutrients start breaking down as soon as you cut ingredients. Water-soluble vitamins like C and B go first. Good storage slows this, but doesn't stop it.
Light makes vitamins break down even faster. Opaque containers or putting clear ones in the back of the fridge helps. Airtight seals also protect antioxidants from oxygen.
Texture matters, too. No one wants mushy peppers or slimy herbs. The right moisture level is key—too much, and you get soggy veggies; too little, and everything dries out.
Even with perfect storage, you'll notice flavor and texture changes after a few days. Herbs lose their punch fast, and cut fruits start leaking liquid. Planning your prep around how long things actually last helps you eat them at their best.
Core Food Storage Principles
Three things really matter for food storage: using the right technique for each ingredient, keeping the fridge cold enough, and keeping raw and cooked foods apart.
Understanding Storage Techniques
Different foods need different storage. Raw proteins go straight into sealed containers on the bottom shelf—no exceptions. Chopped veggies like a bit of airflow, so breathable containers or perforated bags are best.
Cooked food should cool down within two hours before you stick it in the fridge. If you cooked a big batch, portion it into shallow containers so it cools faster. Dry stuff like flour and grains just need airtight containers, away from heat and moisture.
Quick storage breakdown:
- Raw meats: Bottom shelf, sealed up tight
- Cooked proteins: Cool fast, store on upper shelves
- Cut produce: Breathable or airtight, depending on the veggie
- Grains: Airtight, only after they're cool
Temperature Control and Refrigerator Guidelines
Keep your fridge at or below 40°F (4°C). Stick a food thermometer inside—don't just trust the built-in one.
Freezer should be 0°F (-18°C). The back of the fridge is coldest; the door is warmest (so skip those egg holders). Milk and eggs do best in the back.
Never put hot food straight into the fridge. Let it cool a bit first, or use an ice bath if you're in a rush. Hot containers can warm up everything else and that's risky.
Minimizing Cross-Contamination
Use separate cutting boards for raw meat and everything else. Color-coded boards make this easy—red for meat, green for produce, white for cooked food.
Always store raw stuff below cooked or ready-to-eat foods. Wrap everything well, and seal those containers. Wash hands, knives, and boards with hot soapy water after raw meat—no shortcuts.
Containers need a real wash between uses, even if they look clean. And don't reuse marinades that touched raw meat unless you boil them first.
Choosing the Right Storage Containers
The container you pick makes a huge difference in how long your food stays fresh. Material, how well it seals, and whether it can handle cold or heat all matter for keeping food safe.
Airtight Containers and Their Role
Airtight containers are a must for meal prep. They block air and keep moisture in, which slows bacteria and keeps things from drying out.
Air causes oxidation, which ruins vitamins and messes with flavor and texture. A good seal keeps everything as you left it—crisp veggies, herbs that don't wilt.
Look for containers with silicone gaskets or snap-lock lids. Quick test: flip it upside down over a paper towel. If nothing leaks, you're good.
Glass, Plastic, and Silicone Comparison
Each type has its ups and downs:
| Material | Pros | Cons |
|---|---|---|
| Glass | Won't stain or smell, dishwasher/microwave safe, tough | Heavy, breakable, pricier |
| Plastic | Light, cheap, shatterproof, lots of sizes | Can stain, might hold smells, wears out faster |
| Silicone | Flexible, collapses for storage, freezer-to-oven safe | Not as sturdy, fewer sizes |
Glass is perfect for acidic stuff or reheating. We like it for leftovers, honestly.
BPA-free plastic is great for carrying meals and dry goods. It's practical, but can get cloudy.
Freezer-Safe and BPA-Free Options
Not every container can handle the freezer. Freezer-safe ones are thicker and flex a bit so they don't crack.
BPA-free is non-negotiable for anything you might microwave or heat. Always check the label.
Meal prep containers made for freezing usually have thicker sides. Freezer bags are awesome for soups and sauces—just lay them flat to save space.
Always leave a little space at the top for liquids to expand. Glass jars for freezing should have straight sides, not shoulders, to avoid cracking.
Best Practices for Storing Different Foods
Every food group has its own storage quirks. Knowing what each needs helps keep things fresh and cuts down on waste.
Storing Fresh Produce and Berries
Fresh produce is delicate. Store berries in breathable containers with a paper towel to soak up moisture—this keeps mold away and they'll last up to a week.
Most veggies like the crisper drawer (it's more humid). Leafy greens last longer if you wrap them in paper towels before bagging them. That keeps them from getting soggy.
Produce storage tips:
- Whole veggies and fruit last way longer than cut ones—sometimes up to two weeks more
- Cut produce? Add a paper towel to soak up moisture
- Keep apples and bananas away from veggies—they speed up ripening (and spoiling)
- Don't wash produce until you're ready to eat it
Some things—tomatoes, onions, potatoes—do better at room temp, out of the sun.
Guidelines for Dairy, Meats, and Seafood
Dairy, meats, and seafood spoil fast. Fridge should be below 40°F, ideally 35-38°F.
Dairy tips:
- Milk and yogurt go on shelves, not the door
- Cheese does best wrapped in wax or cheese paper
- Rotate stuff and check dates often
Red meat, poultry, and seafood are only good for three to five days in the fridge. Always put them on the bottom shelf. If you see weird colors or smells, toss them.
For longer storage, freeze it. Raw meat keeps for months at 0°F—ground meat for about four months, whole poultry up to a year.
Handling Prepped Meals, Grains, and Snacks
Always use airtight containers for prepped meals. They keep air and moisture out, which means fewer bacteria and fresher food.
Let hot food cool about 30 minutes before sealing and refrigerating—don’t wait too long, though. Bacteria love that lukewarm zone.
Meal prep storage tips:
- Glass containers for soups and liquids
- Plastic for grains, rice, proteins
- Label with prep dates
- Put new stuff behind old stuff
Cooked grains, pasta, and cheesy meals last three to five days in the fridge. If you freeze meals, portion them out first—thawing and refreezing ruins the texture. Plastic works best for freezing, unless your glass is made for it.
Dry snacks and pantry staples like it cool and dry. Move them to airtight containers after opening, and write down the original expiration date somewhere.
Meal Prep and Batch Cooking Storage Tips
Getting meal prep storage right really comes down to cooling, freezing, and portioning. If we don’t handle these basics well, our ingredients just won’t last, and the taste or texture can go downhill fast.
Cooling Methods for Prepped Ingredients
Hot food needs to cool off before we stash it in the fridge, but there’s a bit of an art to it. If we let things sit out for about 30 minutes with the lids off, that helps avoid sogginess from condensation. But we can’t just forget about it—food left out too long gets risky, since bacteria love that 40°F to 140°F zone.
It’s best to cool food until it’s not steaming, then seal it up and refrigerate before it hits full room temp. For big batches, splitting food into shallow containers helps it cool down faster—surface area is our friend here.
Some quick ways to cool food:
- Spread it out on baking sheets
- Use an ice bath under pots or pans
- Portion into smaller containers right away
- Stir now and then to help heat escape
Once everything’s cooled, stash containers on the middle or lower shelves in the fridge—those spots keep a steadier temp than the door.
Freezing Tips and Preventing Freezer Burn
Freezing buys us a lot more time, but only if we’re careful. Keep the freezer at 0°F (-18°C) to stop bacteria in their tracks and lock in food quality.
Plastic containers and resealable bags work best for freezing—glass can crack from the cold unless it’s specially made for the freezer. Freezer burn is the real enemy here; it sneaks in when moisture escapes and crystals form on the food.
How to fight off freezer burn:
- Stick with airtight containers
- Push out extra air from bags before sealing
- Always cool food fully before freezing
- Don’t open containers more than you need to
Different foods last different lengths in the freezer—cooked meats go about 2-3 months, soups and stews can hang in there for 4-6 months. Label everything with the date so you don’t have to guess what’s still good.
Portioning and Portion Control Strategies
Freezing one giant block of food sounds clever until you want just a serving and have to thaw the whole thing. It’s way easier to portion meals before freezing—no need to refreeze, and the quality stays better.
Single-serve portions are usually the way to go. Muffin tins, ice cube trays, or little containers work great for this. Once things are frozen solid, toss the servings into a bigger bag for storage.
Some handy portioning tips:
- Pre-measure into meal-size amounts
- Use containers that fit your typical serving size
- Stack similar containers to save space
- Keep newer stuff in the back, older up front
This makes it easy to grab just what you need. For things like cooked rice or chopped veggies, freeze them flat in bags—that way you can break off a chunk later.
Smart Organization and Minimizing Waste
A bit of organization goes a long way. If we can see what we have and when it was made, we’re less likely to forget things until they’re past their prime. A solid system for storage and labeling keeps food fresh and waste down.
FIFO and Labeling Containers
FIFO—First In, First Out—is a simple but effective trick. Put new stuff behind the old, so you use up what’s been there longest. In practice, just shift older containers forward when you add new ones to the fridge or pantry.
Labels are a must. Without dates, we’re just playing a guessing game. Masking tape and a Sharpie work fine, or you can get fancy with removable labels for glass containers.
Jot down what’s inside, the prep date, and a use-by date. For example: “Cooked chicken - 01/02/26 - Use by 01/05/26.” It takes seconds and saves a lot of hassle later.
If an ingredient could affect shelf life, note it. “Rice with butter” won’t last as long as plain rice, thanks to the dairy.
Reducing and Minimizing Food Waste
Storing food in airtight containers keeps air out and flavors in, stretching shelf life by a few days. Smaller portions also help—if you open a big container for just a little, the rest can go bad faster. Plus, small portions cool quicker, which is safer.
Freeze what you won’t use soon. Things like prepped veggies, cooked grains, and proteins freeze well for a couple of months if sealed up tight. Better to have a backup plan than let food go to waste.
Clear containers are a lifesaver—you can see what’s inside without opening them. Every time we open a container, we let in air and warmth, which speeds up spoilage.
Preserving Expiration and Use-By Dates
Once we prep ingredients, the original expiration dates don’t mean much. For instance, if we cook chicken on January 2nd, we need to eat it within 3-4 days, even if the package said it was good until January 10th.
Knowing how long different foods last helps set realistic use-by dates. Cooked veggies usually last 3-5 days; cooked meats, 3-4 days. Raw cut veggies vary—a carrot will stick around for a week, but spinach might only make it 2-3 days.
It’s smart to check the fridge temp often—it should stay below 40°F (4°C). A cheap thermometer can give you peace of mind. If the temp creeps up, even perfectly stored food won’t last as long.
If you mix things with different shelf lives, go by the shortest one. If a grain bowl has chicken (3 days) and quinoa (5 days), eat it within 3 days to be safe.
Frequently Asked Questions
Everyone has questions about storage—how long things last, what goes where, and how to avoid common pitfalls. Here’s a quick rundown.
What's the scoop on the shelf life of pre-chopped veggies?
Pre-chopped veggies usually last 3-5 days in the fridge if sealed tight. Carrots, celery, and peppers tend to last longer; zucchini or mushrooms, not so much—maybe 2-3 days tops.
A paper towel in the container can soak up extra moisture and help things stay crisp. Broccoli and cauliflower hold up better than leafy greens, which wilt fast once cut.
Keep the fridge under 40°F to slow down bacteria and keep veggies fresh.
How do I dodge the mold and spoilage in my prepped fruit stash?
Keep berries unwashed until you’re ready to eat—they mold fast if wet. When you do prep them, dry them well and use a paper towel in the container.
For cut fruits like apples, pears, or avocados, a little lemon or lime juice keeps browning at bay and slows spoilage. Airtight containers are a must to keep oxygen out.
Store bananas and apples away from other fruits—they give off ethylene gas that speeds up ripening and can spoil nearby produce.
Got any cool hacks to keep my spice mixes from clumping up?
A few grains of uncooked rice in your spice jar can soak up moisture and keep things loose.
Glass containers with tight lids work best. Keep spices away from the stove—heat and steam just make clumping worse.
If you’ve got silica gel packets from vitamin bottles, you can toss one in your spice jar for extra protection, but make sure it’s food-safe first.
Can you spill the beans on preventing cross-contamination in my meal prep?
Use separate cutting boards and containers for raw meats and ready-to-eat foods. Color-coding helps—one set for proteins, another for veggies and cooked stuff.
Always keep raw meats on the fridge’s bottom shelf so they can’t drip onto anything else. Use sealed containers or set meat on a plate or tray for extra safety.
Wash hands and surfaces between handling different foods. Store prepped veggies and cooked items away from raw proteins in the fridge.
Why does my 'ready-to-cook' meat need to chill out in the fridge?
Bacteria multiply super fast between 40°F and 140°F—the “danger zone.” Keeping meat below 40°F slows them down and keeps things safe.
Raw meat should get cooked within a day or two of prepping, or just freeze it if you won’t use it soon. Marinating in the fridge actually helps the flavor, so it’s a win-win.
Cool cooked meat within two hours of making it. Split big portions into shallow containers so they chill faster before going in the fridge.
What are some nifty ways to keep my prepped grains from turning into mush?
Let your cooked grains cool all the way before you stash them. I usually spread them out on a baking sheet—it speeds things up and stops moisture from pooling in the container.
If you know you'll reheat them later, try storing grains a little underdone. That way, when you warm them up, they finish cooking without going soft or mushy.
A quick drizzle of oil before storing works wonders. It keeps the grains from clumping and helps the texture hold up. Most cooked grains last about 4-6 days in an airtight container in the fridge.
Share:
How Storage Choices Affect Cooking Consistency
How Storage Choices Affect Cooking Consistency