

Check out our latest compact vacuum sealer for food collection!
When we stash ingredients in our kitchens, most of us obsess about temperature or container type and totally forget about something just as important: headspace. That’s the empty area inside a storage container, the gap between your food and the lid.
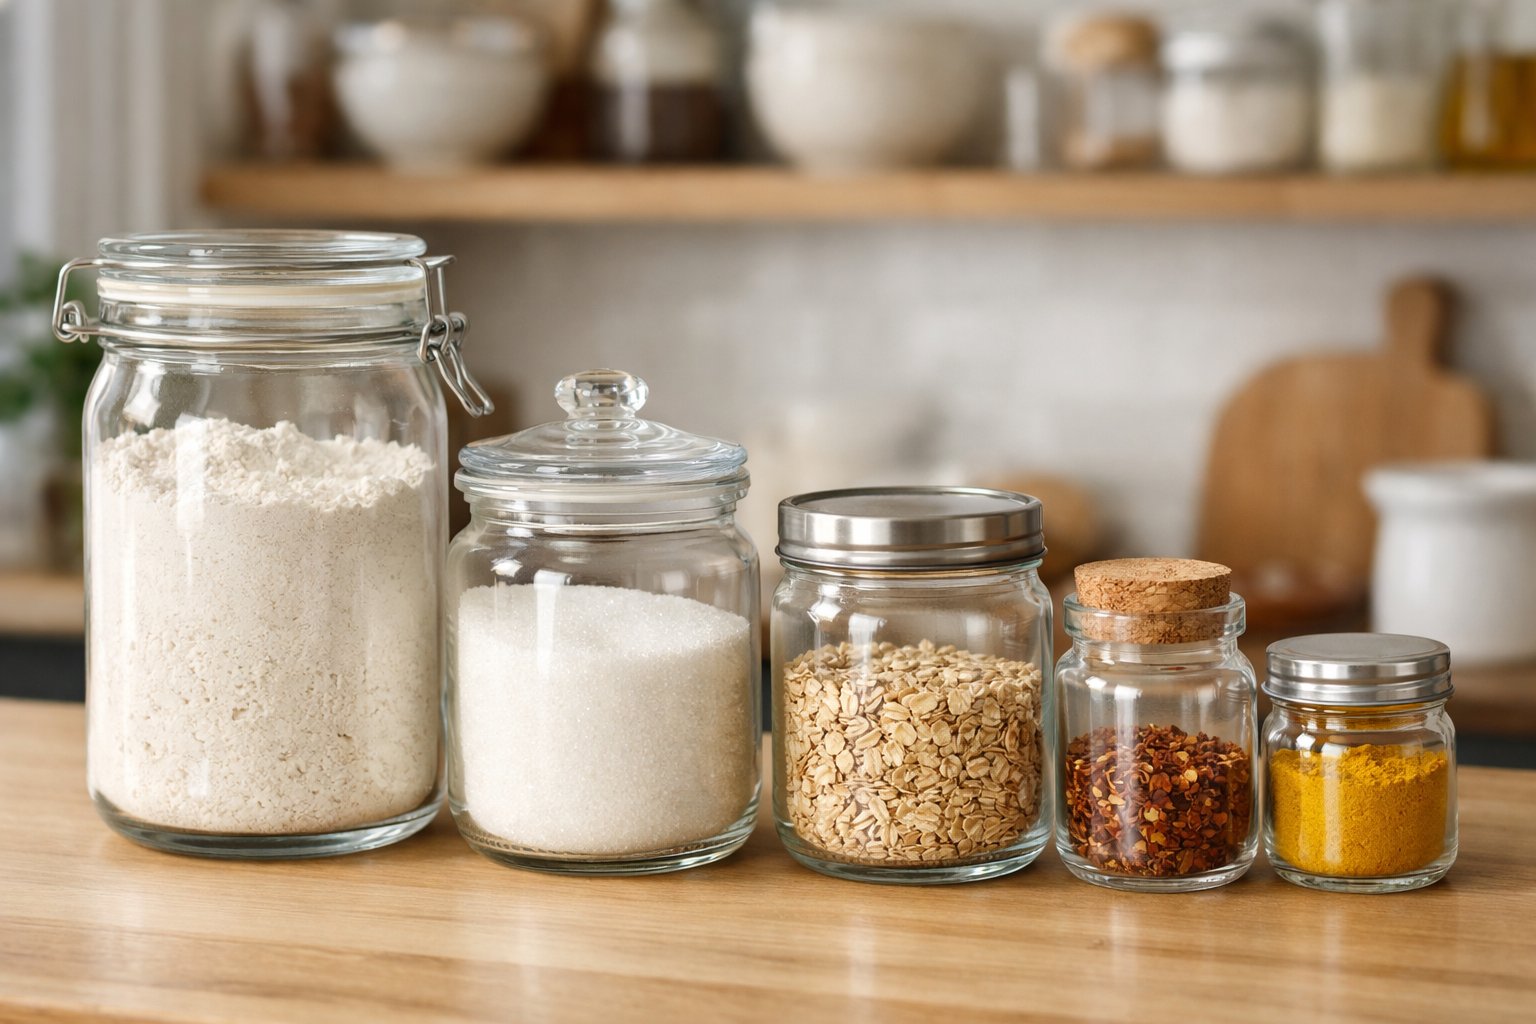
This little pocket of air can make or break ingredient freshness because it controls how much oxygen and moisture get to your food. Whether you’re tossing dried herbs in a mason jar or keeping flour in a canister, that air gap between the ingredient and the lid creates an environment that either keeps things tasty or speeds up spoilage.
Headspace matters because oxygen in that space triggers oxidation, moisture shifts, and chemical reactions that mess with flavor, texture, and nutrients. Research on dried fruit storage shows that oxygen in package headspace is a main culprit for food spoilage, and biological reactions double or triple for every 10°C temperature bump.
So, if you leave your coffee beans in a half-empty container, they’ll lose freshness way faster than if the jar’s nearly full, and it’s even worse if you’re storing them somewhere warm.
If we know how container size and fill level play into storage conditions, we can make smarter choices and get more mileage out of our ingredients without fancy gadgets. Just matching container size to what you’re storing and thinking about how fast you’ll use it can make a big difference.
Key Takeaways
- Headspace oxygen speeds up ingredient breakdown through oxidation and moisture shifts
- Using the right-sized container for your ingredient keeps headspace small and freshness high
- Storage temperature and how airtight your packaging is both matter, but headspace is a big player in shelf life
What Is Headspace and Why It Matters
Headspace is just the empty space between the top of your food and the lid of its container, but this overlooked gap has a big say in how long your food stays fresh and safe.
Understanding Headspace in Food Storage
Headspace is the air gap at the top of any food storage container. In canning, it’s the distance between the food and the underside of the jar lid. In everyday storage, it’s the same deal—just any sealed container in your pantry or fridge.
Why do we leave it? Food and liquids expand and shrink with temperature swings. When we heat things up (like during canning or cooking), they need room to expand without busting the seal or popping the lid. When they cool, they contract, and that headspace helps keep the pressure in check.
Different foods call for different headspace. High-acid stuff like tomatoes and fruits usually need about 1/4 inch in canning. Lower-acid foods—meats, veggies—need closer to an inch. For regular storage, the exact measurement isn’t as crucial as just getting the concept.
How Storage Size Relates to Headspace
Container size totally changes how much headspace you’re dealing with. Bigger containers mean more air above your food, which isn’t always good. If you keep a small amount of food in a huge container, you leave a lot of unnecessary headspace that exposes your ingredients to more air and moisture.
The flip side? Stuffing too much food into a tiny container leaves no headspace at all. The trick is to match the container size to what you’re storing. A half-full gallon jar of flour gets more air exposure than two quart jars filled up right.
For dried goods—grains, beans, pasta—keep headspace low to cut down on air exposure. If something might expand (like rice in humid weather), give it a little room. The goal: a container that fits the food, with just enough space for any expansion.
Proper Headspace Versus Too Little or Too Much
If you get headspace right, you dodge a bunch of storage headaches. Too little headspace in canned goods can cause seals to fail, spills during processing, or even blown-out jars from pressure. You ever see those bulging lids? Not a good sign.
Too much headspace isn’t great either. All that air speeds up oxidation, so oils go rancid and dried foods lose flavor and nutrients. It also lets in moisture and gives contaminants more room to mess with your ingredients. In canning, too much headspace can even stop a proper seal from forming as the jar cools.
The sweet spot depends on what you’re storing. Pressure canning needs about 1 inch of headspace since high temps make food expand more. Water bath canning usually calls for 1/4 to 1/2 inch depending on what’s inside. For everyday storage, shoot for as little air as possible without squishing delicate stuff or making lids hard to close.
How Headspace Affects Ingredient Shelf Life
Headspace, the gap between food and lid, has a direct impact on how long our ingredients stay fresh. It’s all about how much oxygen and moisture get in, and how that affects shelf life.
Oxygen Exposure and Oxidation
The more air you trap in the headspace, the faster oxidation breaks down your ingredients. Leaving too much headspace is like giving oxygen a VIP pass to react with fats, vitamins, and colors in your food.
Oxidation turns fats rancid, fades the color of herbs and spices, and breaks down vitamins like C and E. You know that funky taste in old nuts or stale oil? That’s oxidation at work.
Common oxidation effects by ingredient:
- Oils and fats: Rancid smell, bitter flavor
- Dried herbs: Dull color, lost aroma
- Nuts and seeds: Stale, less crunchy
- Whole grains: Musty flavor from fat breakdown
If you pick containers that fit your ingredient amount or use vacuum-sealing, you can slow down oxidation a lot. Sometimes, this extends shelf life by weeks or even months for stuff that’s sensitive to air.
Chemical Degradation and Stability
It’s not just oxygen. The moisture and air in headspace can set off other chemical changes that mess with ingredient quality. Water vapor can make powders clump, trigger enzyme breakdown, and generally cause things to fall apart over time.
Some ingredients have natural enzymes that keep breaking them down when exposed to air and moisture—think fresh-ground spices or dried fruit.
For food preservation, you want to balance enough space for expansion (like in freezing) with as little air as possible (for dry storage). You can’t totally get rid of headspace, but you can get pretty close by choosing the right container and packing style.
Nutritional Value and Freshness Impact
Headspace also affects how well ingredients hang on to their nutrients. Vitamins—especially A, C, and some B’s—break down faster when there’s too much oxygen in the container.
Fresh stuff loses its nutritional punch at a steady rate. Leafy greens in big-headspace containers lose vitamin C way faster than those packed snug. Dried beans and grains keep their protein quality longer if stored with minimal air.
Taste and smell depend on headspace, too. Flavor compounds escape into the air gap, so stuff tastes bland. Coffee beans, for example, lose their aromatic oils in days if you leave too much headspace, but they stay tasty for weeks in a properly filled jar.
So when we manage headspace, we’re saving more than just shelf life—we’re protecting flavor, aroma, and nutrition.
Headspace Guidelines for Different Storage Methods
Different ways of storing food call for different headspace. Canning usually needs between 1/4 inch and 1 1/4 inches depending on what you’re preserving. Freezing needs 1/2 inch to 1 1/2 inches for liquids to expand.
Canning and Home Canning Best Practices
Measuring headspace right in home canning is key for getting a good seal and avoiding spoilage. The space between food and lid decides if your jars seal up tight and stay safe.
Typical headspace for canning:
- 1/4 inch: Jams, jellies, preserves
- 1/2 inch: Fruits, tomatoes, pickles, relishes
- 1 inch: Low-acid veggies and meats
- 1 to 1 1/4 inches: Poultry, red meats
Too little headspace, and food might bubble out during processing, wrecking the seal. Too much, and you leave extra air that can discolor food and weaken the vacuum. Best bet? Use a ruler instead of guessing, since jar shapes can throw you off.
High-acid foods need less headspace than low-acid ones. The type of food, how hot you pack it, and the processing temperature all change how much space you’ll need in the end.
Refrigeration and Freezing Essentials
Freezing’s a bit different—liquids expand, so you’ve got to leave enough headspace to keep containers from cracking or lids from popping off.
For fruits in syrup, use 1/2 inch in wide-mouth pint jars and 1 inch in wide-mouth quarts. Narrow jars need 3/4 inch for pints and 1 1/2 inches for quarts. Fruit juices go with 1 1/2 inches in narrow jars.
Dry-packed stuff? Minimal headspace is fine. Fruits and veggies frozen without liquid just need 1/2 inch. Loose veggies like broccoli or peppers don’t need extra space since there’s already air between the pieces.
In the fridge, minimize headspace to cut down on oxidation and moisture loss. Fill airtight containers close to the top to keep things fresher.
Measuring and Controlling Headspace Like a Pro
If you want your ingredients to last, measuring headspace accurately is the way to go. You can use fancy tools or just eyeball it—either works if you’re consistent.
Using a Headspace Gauge
A headspace gauge gives you exact measurements. Just stick it into the container to see the distance between your food and the lid.
Most gauges have 1/4 inch marks, so you can hit the right amount for different foods. For oils or broths, 1/4 inch is about right. Solids like dried herbs or nuts do better with 1/2 inch.
You’ll find these gauges at canning supply stores or online, and they last forever. To use it, stick it vertically into your jar until it touches the food, then read the measurement at the rim.
Visual and Practical Tips for Measurement
Honestly, you don’t need special tools. Your eyes and a ruler work just fine for most storage jobs.
For a quick check, look for about a thumb’s width for dried goods—roughly 1/2 to 3/4 inch. You can use a pencil (about 1/4 inch wide) or a chopstick for deeper jars.
Consistency is what matters. Mark your favorite containers with tape or a permanent marker at the ideal fill line. That way, you don’t have to think about it every time you refill.
Choosing the Right Container and Packaging Materials
The type of container and how well it seals decide how much oxygen sneaks in, while picking the right size keeps headspace low and your food fresher.
Airtight Containers Versus Loose Lids
Oxygen is the main enemy of ingredient longevity. Airtight containers keep it out, protecting your food’s flavor and shelf life. The quality of the seal matters—a lot.
Glass jars with rubber gaskets and metal containers with tight lids block oxygen way better than loose plastic lids or worn-out seals. When you compare packaging, glass and some food-grade plastics have low oxygen transmission, while porous materials let air flow in.
Container Material Comparison:
- Glass: Non-porous, doesn’t react, blocks oxygen well
- Food-grade plastic: Depends on type; some are good, some let air in
- Metal: Total oxygen barrier if sealed right
- Ceramic: Good if glazed all the way
Check your seals often. If the container holds a vacuum or you hear a pop when you open it, you’re good. If not, your storage system might need an upgrade.
Container Size and Headspace Optimization
Headspace is just the air gap between your ingredients and the lid. You want to keep this space as small as possible—oxygen in that gap can really mess with freshness, even if your container’s sealed.
For dry goods like flour or spices, try to fill containers to about 90-95%. That leaves enough space for easy scooping but not so much that you’re inviting in excess air. With less oxygen trapped, most of it gets used up pretty quickly, and things settle down after that.
Oversized containers? Not your friend. If you leave something half-full in a big jar, there’s just way more air in there, and that means more oxidation over time. It’s better to move your ingredients into smaller containers as you use them up, instead of letting them sit in a giant, mostly empty one.
Optimal Fill Guidelines:
- Dry ingredients: 90-95% full
- Oils and liquids: 95-98% full
- Fresh herbs: 80-85% full (they need a bit of air circulation)
Storage Conditions and Ingredient Longevity
Temperature and humidity are the big players here. If you get these wrong, your ingredients go downhill fast—sometimes shockingly fast. Honestly, these basics matter way more than fancy jars or expensive shelf-stable blends.
Temperature and Humidity Control
Most pantry staples do best between 20°C and 25°C. The main thing is to keep that temperature steady. No need for a high-tech setup, just avoid the hot spots near your stove or those sunny windowsills.
Keep humidity below 60% if you can—dry goods hate moisture. Once flour or dried herbs start soaking up water from the air, you’ll notice clumping, faded flavors, maybe even some mold. Airtight containers help, but they can’t fix a damp storage area.
Cooler temps (2°C to 8°C) help keep moisture-rich stuff and things that oxidize quickly, like fresh herbs or certain oils, in good shape for longer. The cold slows down chemical breakdown, but it doesn’t stop it entirely.
Different ingredients have different quirks. Dried spices don’t mind room temp but hate humidity. Nuts go rancid in the heat, so they last longer in the fridge or freezer. It’s all about matching storage to what the ingredient actually needs.
The Role of Temperature Fluctuations
Moving ingredients between warm and cold spots? That causes condensation inside your containers—exactly what you don’t want. Moisture like that speeds up spoilage.
Every 10°C jump in temperature basically doubles the rate of chemical reactions that break down your food. That’s not just a guess; it’s chemistry 101, proven over years in food science.
Temperature cycling causes specific problems:
- Nut butters separate
- Chocolate gets that weird white bloom
- Honey and jams crystallize
- Seals can fail
- Fats oxidize faster
The worst is when stuff goes back and forth from pantry to fridge, or sits in a room that heats up and cools down every day. Honestly, a steady 23°C is way better than bouncing between 18°C and 28°C.
Expiration Dates and Quality Control
Expiration dates only work if you’re storing things right. If you keep flour at 30°C instead of 20°C, that “12-month” shelf life? More like six months, realistically.
Before you buy more, check what you’ve already got. Look for color changes in spices, off smells in nuts, or weird textures in dried fruit. Usually, you’ll notice these before food safety becomes a real worry for shelf-stable stuff.
With fresh and wet ingredients, safety is a bigger deal. Bacteria love temps between 4°C and 60°C, so refrigeration isn’t optional for dairy, fresh herbs, or anything that could spoil fast. For these, expiration dates really matter—quality loss turns into a safety risk.
Rotate your stock so you use older stuff first. It’s simple, but it saves you from finding expired ingredients after you’ve already restocked. Plus, it gives you a better sense of what you actually use up.
Frequently Asked Questions
Container size, packing, and air exposure make a real difference in how long ingredients stay good. Storage conditions can seriously stretch or shrink shelf life.
What's the scoop on container size impacting my spices' shelf life?
Honestly, smaller containers just work better for spices. If you stash a little bit of spice in a big jar, there’s way too much air, and every time you open it, you’re letting in more. That speeds up the loss of those nice volatile oils and aromas.
So, match your container size to what you’re actually storing. If your jar’s half-empty, your spices are hanging out in a cloud of oxygen, which just isn’t great for them.
Can you dish out the details on how packing density affects my pantry items?
Packing density matters more than you’d think. Loosely packed stuff—like flour or grains—has more surface area touching air, so it’s more likely to soak up moisture or oxidize. Tighter packing cuts down on those air pockets and slows down spoilage.
But don’t go overboard with delicate things like herbs. Squishing them can bruise them and release oils before you’re ready to use them.
Is there a secret ingredient to maximizing the freshness of my dry goods during storage?
If there’s a secret, it’s this: minimize headspace and keep moisture out. Fill containers about 90% full so you’re not leaving a big air gap, but you’re not cramming things in either.
And don’t forget temperature—keep things cool and steady (50-70°F is a good range). That helps prevent the condensation and moisture jumps that can happen if your storage area heats up and cools down a lot.
In the storage world, what's the recipe for keeping my ingredients fresh longer?
Start with airtight containers that actually seal (not just snap shut). Good seals keep out oxygen and moisture, which are the main reasons things go stale.
Opaque or dark containers are great for ingredients that hate light, like oils or whole spices. And definitely keep your storage away from stoves and dishwashers—heat just speeds up spoilage.
Oh, and label everything with when you bought or opened it. That way, you can use up the old stuff first and avoid surprises.
Could you spill the beans on ideal conditions for storing my bulk food purchases?
Bulk buys need a cool, dark, dry spot—think 50-70°F and under 60% humidity. Move bulk items out of their original packaging and into containers that actually fit the amount you have.
For stuff like rice, beans, or pasta, it’s smart to split big bags into smaller portions. That way, you’re only exposing a little at a time to air, not the whole batch.
Vacuum sealing is fantastic for long-term storage. It gets rid of oxygen and can stretch shelf life three to five times longer than regular storage.
How crucial is the role of air circulation in maintaining my food's pantry performance?
Air circulation keeps moisture and heat from building up in your pantry. We're really talking about the general movement of air—not blasting your ingredients with a fan. Decent ventilation helps stop condensation from forming on your containers and the walls.
I try not to stack containers right up against outside walls or cram them in corners, since that's where air just sits and things can get musty. If you leave small gaps between items, air can move around and the temperature tends to stay more even.
But don't get me wrong—each container still needs to be sealed up tight. The airflow should stay outside, not sneak inside where it could mess with your food by letting in humidity or oxygen.
Share:
How to Prevent Cross-Contamination During Storage
How to Prevent Cross-Contamination During Storage