

Check out our latest collection of compact vacuum sealer for food!
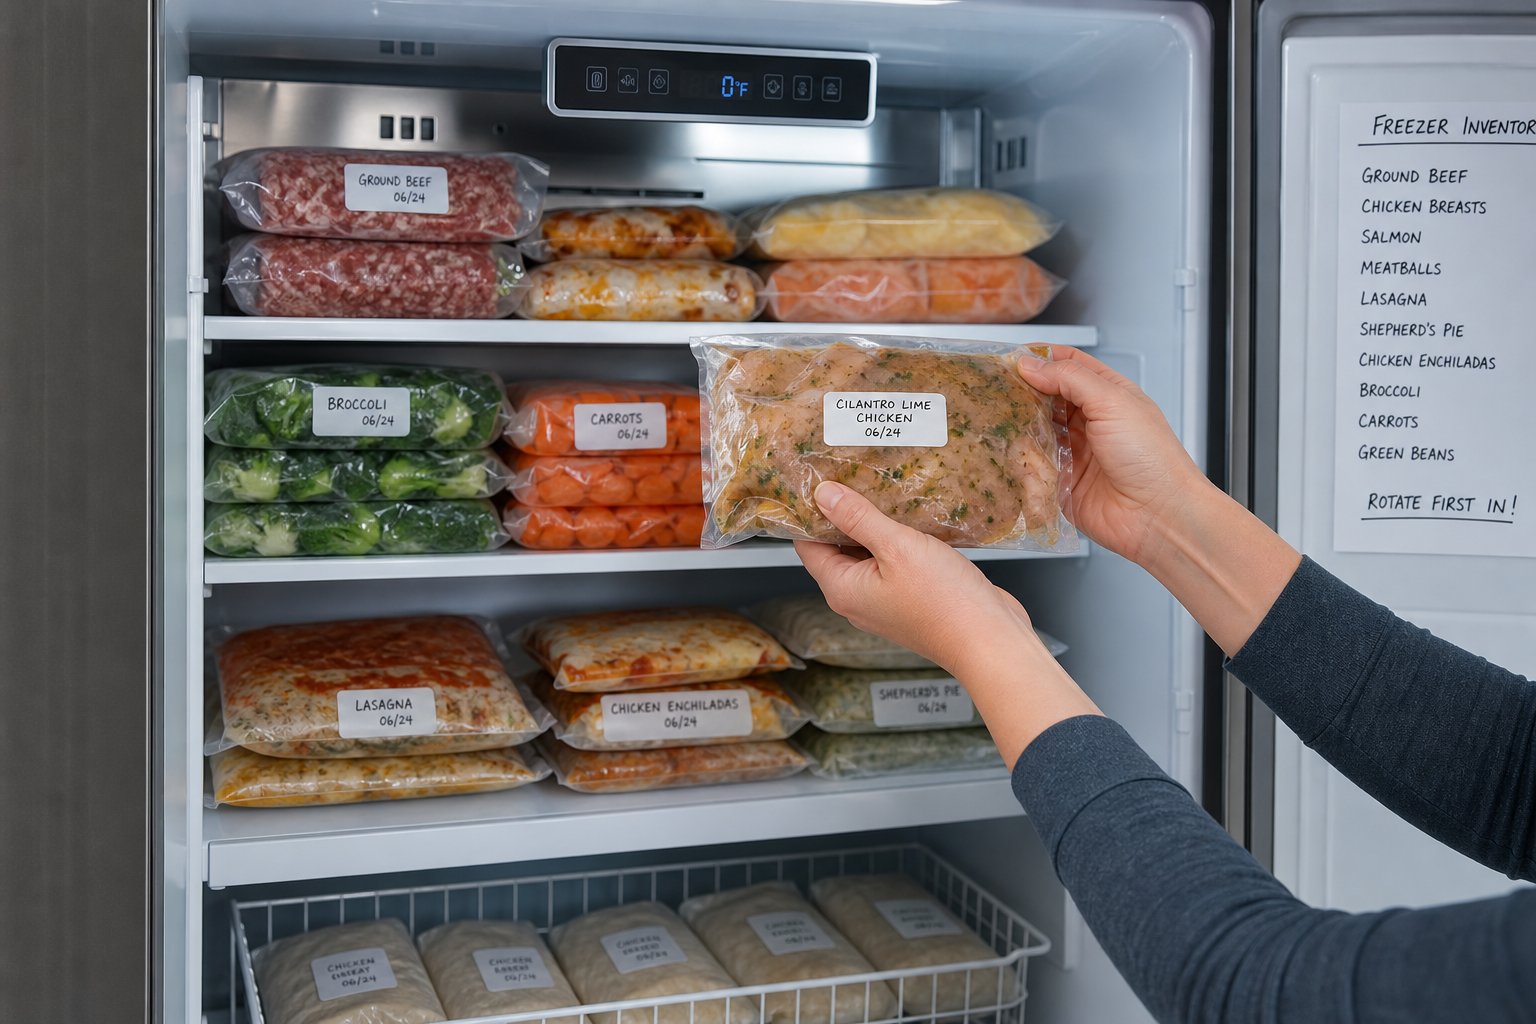
A family freezer should make dinner easier, not hide forgotten food in the back. With vacuum-sealed portions, clear labels, and a simple first-in, first-out routine, you can keep meals organized, reduce waste, and make busy weeknights feel more manageable.
You do not need a complicated system to start. A vacuum sealer helps create slim, stackable portions that protect food from freezer burn and make it easier to see what you have. Add a few bins, readable labels, and a weekly check, and your freezer becomes a reliable meal planning tool.
In this guide, you will learn how to choose the right setup, portion food for your family, label everything clearly, organize freezer zones, and rotate meals so older items get used first.
Key Takeaways
- Vacuum sealing and first-in, first-out rotation keep your freezer tidy and cut down waste
- Labelling with dates and contents speeds up meal planning and helps you use older stuff first
- Consistent layout, clear sections, and regular checks keep everything fresh and easy to grab
Fundamentals of Vacuum Sealing for Freezer Organisation
Vacuum sealing pulls air out of special bags and seals them tight, protecting food from freezer burn and oxidation. Once you get how it works, pick the right sealer, and know which foods actually do well in the freezer, you’re already halfway there.
How Vacuum Sealing Preserves Food
A vacuum sealer pulls air from the bags and seals them airtight, which really slows down the oxygen-driven stuff that ruins food. Since there’s barely any oxygen, those pesky enzymes and bacteria take ages to break things down. That’s why vacuum sealing keeps meat, veggies, and even leftovers tasting like you just made them.
Meat that’s vacuum-sealed? It can last two to three years in the freezer, compared to maybe six months in regular wrap. Veggies and fruit stick around for a year or two, instead of turning sad after eight months.
Just remember, vacuum sealing doesn’t magically kill the bacteria that’s already there. Always handle food safely and keep it cold. Anaerobic bacteria like botulism can hang around in low-oxygen spots, so we always thaw vacuum-sealed fish outside the bag and don’t skip safe food handling.
Choosing the Right Vacuum Sealer and Bags
Vacuum sealers for home use run the gamut, $50 for a basic model, or you can spend a few hundred on a commercial-style one. Cheap plastic ones work fine for dry stuff but usually don’t have moisture settings or much staying power. The $100 to $200 range usually gets you wet/dry settings, which matter if you’re sealing meats or anything juicy.
Here’s what we look for:
- Moisture settings for messy or marinated stuff
- Manual seal so you can make custom bag sizes
- Built-in bag cutter to keep things moving
- Strong seal bar for fewer leaks
Bags come as rolls or pre-cut. Rolls are flexible for weird sizes, but pre-cuts are faster. Good bags have those little channels that help suck out all the air. Cheaper bags sometimes don’t seal well or might even leak after a few weeks in the freezer.
Best Foods for Vacuum-Sealed Storage
Raw meat, poultry, and fish are perfect for vacuum sealing, since they need the most protection from freezer burn. We usually buy in bulk, portion it out, and seal it up for easy meals later.
If you’re doing veggies, blanch them first, quick boil, ice bath, dry off, then seal. This stops the enzymes that make them turn mushy or lose color. We’ve had great luck keeping green beans, broccoli, and carrots crisp this way.
Stuff that vacuum seals well:
- Raw and cooked meats
- Hard cheeses
- Blanched veggies
- Berries (freeze them on a tray first!)
- Bread and baked goods
- Dry goods and grains
Stuff that needs extra care:
- Soft fruits (freeze first so they don’t get crushed)
- Liquids and soups (leave room and use the moisture setting)
- Delicate fish and shellfish (go easy on the vacuum power)
Skip vacuum sealing soft cheeses, mushrooms, and garlic, these can go bad in low-oxygen if you leave them at room temp.
Setting Up an Easy-to-Maintain Freezer Layout
A smart freezer layout lets you find what you need fast and keeps things from getting lost. Assign zones, stack portions flat, and use bins with your vacuum-sealed bags, suddenly, freezer organization isn’t a chore.
Zoning and Grouping Items for Fast Access
Divide your freezer into zones by food type or meal category. Keep proteins separate from veggies, stash ready-to-cook meals away from raw stuff, and put the things you use most at eye level.
In upright freezers, try giving each shelf a job. Top shelf for grab-and-go stuff (think breakfast or lunch), middle shelves for dinner proteins and veggies, and the bottom for bulk or backup items.
If you’ve got a chest freezer, baskets or dividers are your friend. Put the newest stuff at the bottom or back, and move older stuff forward as you add more. That way, you always use the oldest first and nothing gets buried.
Label your zones with tags or even just masking tape. If everyone knows where the chicken lives, things go back to the right spot after meal prep.
Maximising Space With Flat Stacking and Bins
Vacuum-sealed bags make flat stacking super easy. We freeze portions flat on a baking sheet first, then stack them upright like files in a drawer. This works great in bottom freezers or chest freezers.
Standing bags up in bins lets you flip through them without messing up the whole stack. Pick bins that fit your freezer, just enough clearance to slide in and out.
To get the most out of your space:
- Use clear bins so you can see what’s inside
- Bins about 7 to 10 cm high work well for chest freezers, so nothing gets lost
- Match bin width to your shelf or drawer
- Don’t stack bins more than two high, or you’ll lose track of what’s in there
Shallow bins (under 8 cm) are great for smaller portions like a couple chicken breasts or burger patties. Deeper bins can handle bigger cuts or whole meals that don’t stack as neatly.
Using Freezer-Friendly Containers With Vacuum-Sealed Bags
We like pairing vacuum-sealed bags with freezer-safe bins or containers. The bags keep food fresh, and the bins keep things sorted.
Stick with sturdy plastic or vinyl-coated steel containers, they won’t crack in the cold. These protect your vacuum-sealed bags from getting poked or torn, especially if you’re stacking heavier stuff.
Reusable silicone bags work well for little things like chopped herbs, shredded cheese, or sauces. They’re flexible and squeeze into odd spots around your bigger bags.
We label both the vacuum-sealed bag and the outer bin. Write the contents, portion size, and freeze date right on the bag with a permanent marker. Add a matching label to the bin so you know what goes where. This double-labelling helps keep your inventory straight, even if the kids or your partner help put stuff away.
Effective Labelling and Portion Control Techniques
Clear labels and consistent portions can turn a messy freezer into a meal-prep lifesaver. We stick to tough labels, smart tracking, and visual cues to keep things moving and portions predictable.
Freezer Labels and Durable Marking Methods
Most labels and pens just don’t survive in the freezer. The cold and moisture make regular tape peel and ink fade.
We use freezer-safe labels that actually stick in the cold. Masking tape works if you’re in a pinch, but it doesn’t last long. Permanent markers can rub off slick plastic, so we write on matte tape before sealing.
Here’s our trick: label the bags before you fill and seal them. The vacuum can squish the writing if it’s not in the right spot. Keep your label near the top, away from the seal line.
For reusable containers, dry-erase markers on rigid plastic or a dry-erase label on the lid and side both work. Labelling both spots helps when lids get mixed up.
Always include:
- Specific item name (“ground beef tacos” beats just “meat”)
- Freeze date (YYYY-MM-DD)
- Portion size (grams or servings)
- Quantity left if you batch-portion (like 2/4)
Date and Content Tracking for Rotation
To keep your system working, you need to know what you froze and when. We write freeze dates so we can follow the FIFO rule and keep things from getting old.
Raw ground meats are best within 3 to 4 months, casseroles about 2 to 3 months. Vacuum sealing buys you a little time, but you still want to track dates for taste and texture.
We add a “best quality by” date based on when we froze it. So, chicken frozen on 2026-05-20 gets a target of 2026-11-20. That goes on the label, maybe in small print or as a colored dot.
A simple inventory sheet on the freezer door or a shared digital list keeps things straight. Every time we freeze a batch, we log what it is, when it went in, where it is, and how many portions. When we use something, we mark it off. A quick weekly check keeps the list up to date and flags anything that needs to be used soon.
Colour-Coding for Fast Identification
Colour coding makes it easy to spot what you need without digging. We use colored dots, tape, or marker highlights to sort by food type or urgency.
For big freezers, try category coding:
- Blue = raw proteins
- Green = cooked meals
- Yellow = veggies and fruit
- Purple = breads and baked goods
For rotation, urgency coding works:
- Red dot = use within one week
- Orange dot = use within one month
- No dot = you’ve got time
Urgency coding fits family life best, let’s be honest, most of us just want to know what needs using up. A red dot on pork chops means it’s dinner soon, while undotted berries can wait.
Put dots where you can see them, on the label, not tucked away. If you use colored tape, wrap it around the bag’s edge so it’s visible.
Creating Consistent Portion Sizes
Consistent portions make thawing and cooking way easier. We usually vacuum seal single-meal or per-person portions, depending on the family.
For us, that means:
- Proteins: 120 to 170g per adult
- Casseroles/stews: 350 to 450g per meal
- Soups: 300 to 500ml per serving
- Ground meat: 450g (one pound) per bag
Flat-freezing in vacuum bags saves space and thaws fast. We lay bags flat on a tray, freeze, then file upright in bins.
Batch recipes in uniform sizes. If we’re sealing six chicken breasts, we portion each to about 180g, not two big and four small. That way, everything thaws at the same rate and there’s no guessing.
Label each bag with the weight or serving count. When someone grabs a meal, they know exactly what’s inside.
Building a Family-Friendly Meal Planning Routine
A freezer rotation system only works if your meal planning fits real life, not some perfect schedule. We’ve found that prepping veggies ahead, planning meals one week at a time, and staying flexible are the keys to making freezer meal prep work for families.
Batch Cooking and Blanching Vegetables Before Sealing
Blanching veggies before vacuum sealing keeps their color, texture, and nutrients way better than just freezing them raw. I usually bring a big pot of water to a rolling boil, toss in the vegetables for 2-4 minutes (depends on how dense they are), then scoop them straight into an ice bath. That ice bath really stops the cooking fast.
Broccoli, cauliflower, and carrots need about 3-4 minutes in the boiling water. Leafy greens or snap peas? Just a minute or two does the trick. After they cool off, I dry them well, portion them out for meals, and vacuum seal.
Honestly, the prep only happens once, but you’ll appreciate it for months. Most weekends, I’ll spend about 90 minutes on a Sunday afternoon blanching 4-6 different kinds of veggies. After that, I have ready-to-cook portions that go from freezer to pan without turning mushy like raw frozen vegetables tend to do.
Week-By-Week Meal Prepping
Planning out meals a week at a time keeps things manageable. At the start of each week, I check what’s already in the freezer and build my meal plan around those vacuum-sealed foods before making a shopping list for fresh stuff.
Usually, I prep 3-4 full meals and 2-3 protein portions each weekend. I label each package with the meal name and date, then organize them in the freezer by week, week one in front, week two behind, and so on.
This setup really works for families because you’re not locked into a strict month-long plan. If you’re just not feeling Tuesday’s chicken stir-fry, swap it with Thursday’s tacos. Since portions are individually sealed, you don’t have to use a whole batch at once.
Flexible Rotation to Accommodate Changing Schedules
Let’s be real, life rarely sticks to your meal prep plan. That’s why I organize vacuum-sealed portions by protein type and veggie variety instead of locking myself into specific recipes. It’s much easier to mix and match based on what everyone feels like eating.
Keep a simple inventory list on the freezer door. When someone’s running late or suddenly wants breakfast for dinner, you can just check what’s available and adjust, no need to throw off the whole week’s plan.
Following a first-in, first-out system keeps things moving smoothly. I move newer additions to the back and pull meals from the front. In my experience, vacuum-sealed cooked proteins stay at their best for 2-3 months, and blanched veggies last 8-12 months, so you’ve got plenty of wiggle room for schedule changes.
Mastering Freezer Inventory and First-In, First-Out (FIFO) Rotation
If you keep track of what you’ve frozen and use it in order, you’ll waste less, save money, and always have food at its best. A simple inventory and FIFO rotation make it easy to stay on top of your vacuum-sealed meals without losing track of anything.
Simple Inventory Tools and Logs
I like to keep a freezer inventory list on my phone, or just stick a magnetic notepad on the freezer door. Some people use a basic spreadsheet. Every time I add vacuum-sealed portions, I jot down the item, how many there are, and the date.
It doesn’t have to be fancy. Something like this works:
| Item | Portions | Date Sealed |
|---|---|---|
| Chicken thighs | 4 | 2026-05-15 |
| Beef stew | 3 | 2026-05-10 |
Cross things off as you use them. After a week or two, updating the log becomes second nature.
Some folks write right on the bags with dry-erase markers for quick reference. Others use a whiteboard that matches their freezer layout. Just pick a method you’ll actually stick with, overly detailed systems usually get abandoned fast.
FIFO Strategies for Reducing Waste
FIFO, using your oldest vacuum-sealed items first, is the most effective way I’ve found to cut down on food waste. Whenever I add new portions, I always put them behind the older ones.
I keep the oldest stuff at the front or on top so I can’t miss it. Every bag gets labeled with what’s inside and the sealing date, using a permanent marker or freezer label.
Vacuum sealing really extends shelf life, but nothing lasts forever. Most meats stay good for 2-3 years, and veggies keep their quality for 1-2 years. I check my inventory once a month and move anything nearing those limits to the front.
If I notice I’m stockpiling too much of something, I plan meals to use it up. A quick Sunday inventory check helps me build the week’s meal plan around what needs to get eaten first.
Quick Checks to Avoid Overbuying
Before I hit the grocery store or start meal prep, I spend a few minutes checking my freezer inventory. This little habit stops me from buying duplicates and helps me use what I already have.
I look for gaps, like if I’m low on chicken but have plenty of ground beef. That shapes my shopping list and keeps me from overfilling the freezer.
I count vacuum-sealed portions by category. If I’ve got eight dinners’ worth of protein, there’s no need to prep another four pounds. I try to keep about two weeks of main proteins on hand for flexibility but not chaos.
It helps to track what actually gets eaten. If those salmon portions have been sitting for six months, maybe it’s time to skip salmon and focus on proteins everyone really likes.
Real-World Tips for Long-Term Freshness and Low Waste
Keeping a vacuum-sealed freezer system running smoothly means staying on top of seals, labels, and getting the family involved. Regular check-ins catch problems early, and a little troubleshooting saves food from going to waste.
Audit and Adjust Your System Over Time
I do a full freezer audit every three months to make sure the rotation system still works. I pull everything out, check the labels and dates, and look for any signs of freezer burn or bad seals.
During these audits, I notice which meal types get used up quickly and which ones just sit there. If chicken fajitas linger for months while meatloaf disappears, I adjust how much of each I prep. No point in filling the freezer with meals nobody eats.
I compare my inventory log to what’s actually in the freezer. If things don’t match, someone probably forgot to update the list. Regular audits really do cut food waste, sometimes by up to 30%.
I check my freezer temperature with a thermometer every audit. It should stay at -18°C to keep vacuum-sealed food at its best.
Troubleshooting Bag Failures or Label Smudges
Seal failures usually show up within the first day, so I always double-check new batches. I look for tiny air bubbles along the seal or bags that start to puff up. If I spot issues early, I reseal or switch to a new bag.
If seals keep failing, I check the sealer’s gaskets and heating element. Food crumbs or moisture can mess with the seal, so I clean those parts with rubbing alcohol after each session.
Label smudges are annoying. Permanent markers can fade in the freezer, making it tough to tell what’s inside. I switched to freezer tape or adhesive labels rated for cold, and I use oil-based markers that resist moisture.
If a label smudges, I’ll rewrap with plastic and slap on a new label instead of guessing. Having a backup inventory list with descriptions helps too, just in case.
Encouraging the Whole Family to Participate
Getting everyone involved turns freezer rotation into a family habit. Kids can help write dates, and older kids can run the vacuum sealer with some supervision.
A simple visual chart helps everyone know which shelf holds what. I use color-coded bins so it’s easy for anyone to put portions back in the right spot.
Make restocking a shared activity. Weekend meal prep where everyone helps portion and seal food teaches good habits and lightens the load. Kids who help with sealing are more likely to use the system and not let things expire.
We do a “first person to spot an expiring item” reward, makes it a bit of a game and keeps everyone paying attention. Even small incentives, like picking the next meal, keep people engaged and help cut food waste.
Frequently Asked Questions
Here are quick answers to common questions about organizing vacuum-sealed freezer portions.
What's the simplest way to set up a first-in, first-out freezer system that the whole family will actually follow?
Use clear zones and make the oldest food easiest to reach. Place new portions behind older ones, label each bag with the item and date, and keep categories in simple bins like chicken, beef, vegetables, and ready meals.
How should I portion and vacuum-seal meals so they stack neatly and thaw quickly on busy weeknights?
Pack food in flat, even layers about 2 to 3 cm thick. Use family-size bags for full meals and smaller bags for single servings. Leave extra space at the top so each bag seals cleanly and stacks neatly.
Which freezer labels and date formats make it easiest to spot what to use next at a glance?
Use freezer-safe labels or write directly on the bag before filling. Add the meal name, portion size, and a clear date such as May 20, 2026. Color-coded tape can also help separate proteins, sides, and cooked meals.
What's the best way to organise vacuum-sealed portions in drawers, bins, or shelves so nothing gets lost at the bottom?
Store bags upright in bins like files, with the oldest items at the front. Give each bin one clear category and keep a simple inventory list on the freezer door or in your phone so you know what is inside without digging.
How do I prevent freezer burn and seal failures when vacuum-sealing soups, sauces, and other wet foods?
Freeze liquids flat before sealing them fully. Use the moist setting if your sealer has one, leave 7 to 8 cm of space at the top, and keep the seal area dry so the bag closes tightly.
Teilen:
How to Organize Small Pantry Items With Clear Jars, Labels, and Refill Zones
How to Prevent Freezer Burn With Proper Sealing, Labeling, and Portion Size