

Check out our latest glass jars collection!
Small pantry items can create clutter fast, especially when bags, boxes, and half-open packages start stacking up. The good news is that a small pantry can still feel calm, clean, and easy to use when every item has a clear place.
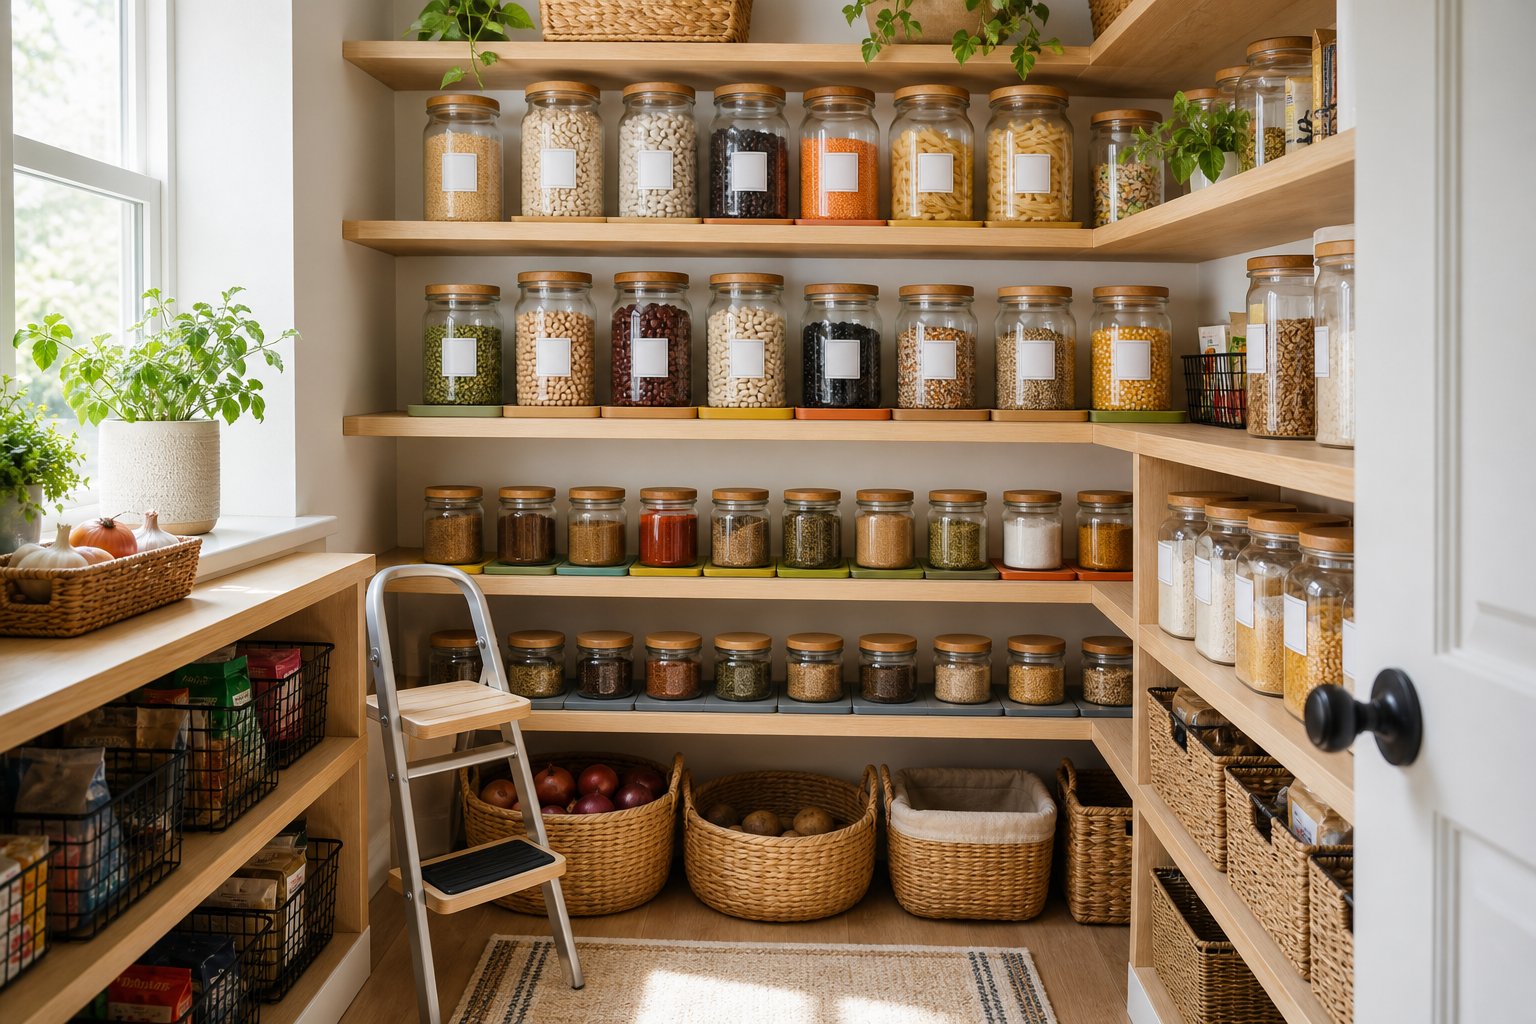
The best way to organize small pantry items is to use clear jars, simple labels, and refill zones that make your ingredients easy to see, reach, and restock. Clear containers help you know what you have at a glance, labels keep every shelf consistent, and refill zones stop extra packages from taking over your space.
With the right setup, even a compact pantry can support faster cooking, smarter grocery shopping, and less food waste. In this guide, you will learn how to audit your pantry, choose the right jars, build refill zones, label everything clearly, and make the most of every inch of storage.
Key Takeaways
- Use clear jars and containers so you can see what you have and avoid overbuying or wasting food
- Label each container and zone so everything has a spot and stays organized
- Set up dedicated refill zones to make restocking easy and keep your system running with minimal effort
Getting Started: Auditing and Decluttering Your Pantry
Before you can turn your small pantry into an organized space with clear jars and refill zones, you need to start fresh. A thorough audit helps you figure out what you actually use, what’s just taking up space, and what deserves a permanent spot in your kitchen routine.
The Importance of a Pantry Audit
Honestly, starting with a full pantry audit always pays off. It shows you your shopping habits and what you really need for storage. Pull everything out, yes, everything. Dump it all on the counter or table.
Suddenly, you’ll spot the duplicates, the forgotten bags, and realize how much space you’re really working with. If you find three open cinnamon containers or a bunch of half-used flour bags, it’s obvious why your pantry feels crowded.
This audit also helps you plan which jars you’ll need. Count up the grains, pastas, baking supplies, and snacks you usually keep on hand. That way, you won’t buy a bunch of containers that don’t fit what you actually use. If you meal prep every week, you’ll notice which ingredients you grab all the time and should keep front and center.
Take a few photos of your empty shelves, too. Measurements matter when you’re shopping for storage, and having a visual reference helps you picture your new setup.
Discarding Expired and Unwanted Items
Check the expiration dates on everything, especially baking powder, spices, and oils. Old stuff just takes up room and isn’t great for your cooking.
Be honest: if you bought something for a one-off recipe months ago and haven’t touched it since, it’s probably just clutter now. That specialty flour or random spice seemed important at the time, but if it’s not part of your regular routine, let it go.
Toss stale crackers, rancid nuts, and rock-hard brown sugar. Keeping only the pantry essentials you use makes it way easier to stay organized. Donate unopened, unexpired food to a local food bank if you can. If you have half-used packages of the same thing, combine them into one container and free up space right away.
Grouping Pantry Essentials for Efficiency
Sort what’s left into categories that match how you cook. We usually go with baking supplies, breakfast stuff, grains and pasta, snacks, oils and vinegars, and canned goods.
Grouping is huge for small pantry organization because it shows you how many jars you’ll need for each section. Maybe you have more baking supplies than snacks. Good to know before you start shopping for containers.
Make separate piles for things you use daily and things you barely touch. Pantry basics for meal prep should be easy to grab, while special-occasion ingredients can go up high or down low. If you bake bread every week, keep flour and yeast handy. If you only bake once in a blue moon, tuck those things away.
Think about how often you use things, not just what category they’re in. Your morning coffee stuff might deserve its own little zone even if it’s just a few items.
Storage Fundamentals: Choosing Jars, Containers, and Bins
The right storage containers make it way easier to keep your small pantry organized. Clear containers and glass jars show you exactly what’s running low, and airtight canisters keep things fresh way longer than the original packaging.
Clear Containers Versus Glass Jars
Both clear plastic containers and glass jars have their perks. Plastic containers are lightweight, won’t shatter, and are perfect for top shelves where you don’t want to risk dropping anything heavy. They’re usually cheaper too, which helps if you’re buying a bunch at once.
Glass jars do a great job keeping strong smells locked in and don’t stain from spices or oils. They’re heavier, so they stay put on shelves and just feel nice to use. We tend to grab glass for things we refill a lot, like flour, sugar, and coffee, since they clean up easily and look pretty sharp.
Honestly, mixing both makes sense. Use plastic bins for bulky stuff like pasta boxes or snack bags, and glass jars for dry goods you scoop out a lot. Match your container choice to how often you use it and where it’ll go in the pantry.
Benefits of Airtight Canisters for Freshness
Airtight containers aren’t just for Instagram. They really do keep pantry staples fresh by blocking out air, moisture, and pests. We’ve noticed that flour, rice, and cereal stay fresh for months longer in airtight canisters versus just rolling up the bags with a clip.
The seal actually matters more than you’d guess. Look for lids with silicone gaskets that really lock in freshness. If it just “pops” closed, it’s probably not airtight. Brown sugar stays soft, crackers don’t go stale, and baking powder keeps its kick when you store them right.
Airtight storage also keeps strong flavors from mixing. Your coffee won’t taste like curry powder, and your baking stuff won’t pick up weird pantry smells. In a small pantry where everything’s close together, this really helps.
Stackable and Modular Storage Solutions
Stackable bins turn wasted vertical space into storage you can actually use. We always recommend square or rectangular bins. They fit together better and make the most of every inch.
Modular systems let you build your storage over time. Start with a few bins, then add more of the same size as you figure out what works. This way, you don’t waste money on containers that don’t fit your space or your habits.
Look for bins with straight sides so they stack neatly. Handles help you grab upper bins without unstacking everything, and clear sides make it easy to see what’s inside. Uniform bin sizes make everything look calmer and make it easy to reorganize when your needs change.
Establishing Easy-to-Use Refill Zones
Refill zones help your small pantry run smoothly by grouping ingredients that need regular restocking in dedicated spots. We organize these by food type and how often you use them, so you can quickly see what’s running low and where new stuff should go.
Creating Zones by Food Types
Start by figuring out the main food categories that fit your cooking style. Most folks need zones for breakfast stuff, weeknight dinner basics, canned goods, and snacks. Put the zones you use most at eye level so they’re easy to grab during meal prep.
Group similar things together inside each zone. Store all your pasta, rice, and grains in one area. Keep canned veggies, soups, and beans on another shelf. This turns pantry organization ideas into a real system.
Common refill zones:
- Breakfast essentials (oats, cereals, coffee)
- Dinner staples (pasta, rice, cooking oils)
- Canned goods (vegetables, beans, soups)
- Snacks and quick bites
Label each zone with simple tags so everyone knows where things belong. When you get home from the store, put items straight into their spots. An organized pantry cuts down on food waste because you can actually see what needs restocking before you shop.
Baking Supply Stations and Snack Bins
The baking zone deserves a little extra attention. We like to keep flour, sugar, baking powder, and other dry baking supplies in clear jars, all within arm’s reach of each other. Stack these on a single shelf for a dedicated baking station.
Keep baking mixes, chocolate chips, and extracts in a bin or basket nearby. This way, you can grab everything you need for cookies or cakes without digging around.
For snacks, go with clear bins or baskets that pull out easily. Put these at a height where kids can grab their own granola bars or crackers. If you have the space, separate sweet and savory snacks. Label each bin so refilling after a grocery run is quick and painless.
Labelling Systems: Making Everything Visible and Accessible
A good labelling system turns your small pantry into a place where everyone can find what they need fast. The right labels, paired with clear jars, keep things organized with barely any effort.
Choosing the Right Labelling Method
The best labelling method really depends on how often you switch up what’s in each jar. If you keep staples like flour, rice, and oats that rarely change, permanent labels look great and last for years. Waterproof vinyl or laminated labels handle moisture and stay readable.
If you rotate contents a lot, go for reusable options. You can wipe them off and relabel without fuss.
Think about where to put the label. Front-facing at eye level works for most pantries. If you have deep shelves or stack jars, put labels on both the front and the lid so you can spot them from different angles. We like bold, clear fonts in black or dark colors on light backgrounds. Easy to read, even when you’re rushing.
Label size matters, too. Use small labels for spice jars and bigger ones for bulk containers.
Using a Label Maker or Chalkboard Labels
Label makers give you clean, uniform labels that make the whole pantry look sharp. Most print on durable adhesive strips that stick to glass, plastic, or metal. The big plus is consistency. Everything matches, and it’s easy to read.
Chalkboard labels are super flexible, which is great if your pantry lineup changes a lot. Write with chalk markers, erase with a damp cloth, and rewrite as needed. They’re perfect for rotating grains or seasonal baking supplies. Plus, the matte black look has a modern farmhouse vibe that’s pretty popular.
Some of us use both. Permanent label maker tags for jars that always hold the same thing, and small chalkboard labels for purchase dates or quick notes. Mixing both gives you a system that’s organized but can adapt as your pantry changes.
Keeping Track with Expiry Dates
Adding expiry dates to labels helps prevent waste and keeps everyone safe from spoiled food. We suggest jotting down the date you put things into jars, not just the original package date. Air exposure can change shelf life.
The simplest way is to write dates right on the label with a permanent marker. Some label makers let you print two lines, so you can add the date below the item name. Chalkboard labels make updating dates easy whenever you refill.
Pop a quick note like “Opened: May 2026” or “Best by: Nov 2026” under the main label. It only takes a few extra seconds per jar but saves you from guessing if something’s still good. We keep a thin dry-erase marker in the pantry for fast date updates on reusable labels.
Maximizing Space in Small Pantries
Small pantries really test your ability to use every bit of space, from floor to ceiling and front to back. Using risers, bins, and door-mounted storage can turn a cramped area into a surprisingly functional space where you can actually see and reach everything.
Using Vertical Space and Shelf Risers
Most small pantries waste a ton of vertical space between shelves. Fixed shelving usually leaves 8 to 12 inches of unused height, especially with short items like spice jars or cans.
Shelf risers fix this by giving you two levels on one shelf. Go for sturdy metal or bamboo risers. They can handle 15 to 20 pounds. Put taller items like cereal boxes and pasta containers in the back, then use the riser to make a front row for smaller jars and tins.
If your pantry has high ceilings, floor-to-ceiling storage makes a huge difference. Add extra shelves every 12 to 14 inches to fit different container heights. Keep your most-used stuff at eye level, stash bulk items or extras up high, and put heavier things like appliances or big pots on the bottom.
A small step stool makes those upper shelves usable for everyday stuff. Keep one nearby so you’re not tempted to leave the top shelf empty.
Utilizing Door Racks and Over-the-Door Organizers
The back of your pantry door usually hides 12 to 24 inches of depth that most people ignore. Hanging an over-the-door organizer instantly adds a bunch of storage pockets. Just hook it over the edge and you're done.
Door racks shine brightest with lightweight stuff that won't wreck your hinges. We toss in spice jars, snack packets, tea bags, and those little condiment bottles. Clear plastic or wire racks make it easy to spot what you need without any digging.
If you want something more permanent, try mounting shallow shelves right to the inside of the door. Keep them under 4 inches deep so the door still closes. Dowel rods or little lips on the shelf edge help stop things from flying off when you open or shut the door.
Before you install anything, measure the space between the door edge and the nearest shelf when the door swings open. You don’t want your new storage crashing into your pantry shelves.
Deep Shelves, Drawer Organizers, and Sliding Bins
Deep shelves can be a nightmare. Stuff just disappears in the back and goes stale before anyone remembers it’s there. We’ve watched so many people buy doubles of things just because they couldn’t see what they already had.
Pull-out bins and sliding drawers save the day here. Just one tug and everything comes forward. We install wire basket drawers or rolling organizers that pull all the way out so you can see everything from above. These work great for canned goods, boxed pasta, and snacks that always seem to tip over.
Drawer organizers break up sliding bins into smaller sections for different categories. We love adjustable dividers. They let you make custom zones that actually fit your jars and containers. This way, things don’t slide around every time you open the drawer.
Pantry bins with handles are a simple alternative if you can’t install anything. Just group similar items in labeled bins and pull the whole bin out when you need something in the back. Renters especially appreciate this, since it doesn’t require any drilling or shelf modifications.
Tools and Accessories to Enhance Organisation
Beyond the basics, like clear jars and labels, there are a few tools that really help you squeeze every inch out of a small pantry. Lazy Susans make corners useful, baskets keep loose items from getting lost, wire shelves double your space, and magnetic racks or tension rods create new storage spots where you’d never expect.
Lazy Susans for Corners and Deep Shelves
Lazy Susans turn tricky corners and deep shelves into usable space. We love putting spinning trays in corners where things usually get lost forever. A quick spin brings oils, vinegars, sauces, and condiments right to your hand.
Deep shelves are way less annoying with a lazy Susan because you don’t have to move stuff in front to get to what’s behind. We use 12-inch turntables for regular shelves and 16-inch ones for bigger pantries. Raised edges are a must. Otherwise bottles just go flying.
Wooden lazy Susans in acacia or bamboo look great in warm-toned pantries, while acrylic ones keep things light and airy. If you need more space, grab a two-tier version. We like to group items by type, like baking extracts on one and hot sauces on another, so it’s easy to find what you need.
Woven, Wire, and Wicker Baskets
Baskets are a lifesaver for organizing small pantry items into portable, labeled groups. Wire baskets let you see what’s inside, while woven and wicker ones hide less attractive packaging. We use them for snacks, baking supplies, breakfast stuff, and tea.
Wire baskets with handles are perfect for refill stations. Just pull out the whole basket when you’re restocking or in the middle of meal prep. Stackable wire baskets with bamboo lids give you storage and a solid spot for more jars.
Woven baskets in natural fibers warm up pantry shelves, keeping protein bars, tea sachets, and little packets together. Wicker baskets are great for things you don’t use often, like specialty flours or backup spices. We label the fronts with chalkboard tags or printed labels so everyone knows what goes where. Hanging baskets under shelves are handy for lightweight things like mushroom packets or bouillon cubes and don’t eat up shelf space.
Open Shelving and Wire Shelves
Wire shelves boost vertical storage in small pantries without blocking light or airflow. We add wire shelf risers to existing shelves, doubling the usable space. This is especially helpful for canned goods and spice jars.
Freestanding wire shelving turns empty walls into pantry space when you don’t have built-ins. We set these up in kitchens, utility rooms, or even big closets to handle overflow. Adjustable shelves let you change things up as your storage needs shift.
Open shelving keeps everything visible, so you’re less likely to buy duplicates or lose track of what you have. We mount floating shelves on empty walls for frequently used jars of pasta, rice, and beans. Wire shelf dividers help split up categories, keeping baking stuff away from snacks. The trick is putting things back where they belong. Otherwise, even the best system falls apart.
Magnetic Spice Racks and Tension Rods
Magnetic spice racks stick to pantry doors, fridge sides, or metal shelves and free up space. We like to put spices in matching magnetic tins with clear tops and labels. Super easy to scan and refill. If you’re short on shelf space, this is a game changer.
Tension rods are another secret weapon. Set them up vertically between shelves to corral cutting boards, baking sheets, or pot lids. Or mount them horizontally near the top of the pantry door to hang lightweight baskets with seasoning packets or tea.
A magnetic knife strip inside the pantry door holds metal measuring spoons and small gadgets. We use several tension rods at different heights to make custom storage slots. Some folks hang spray bottles or tools with loops from horizontal rods. These little upgrades don’t cost much but make a big difference in freeing up shelf space.
Frequently Asked Questions
Clear jars, labels, and refill zones make small pantry organization easier. These quick answers cover the most common questions about choosing, labeling, storing, and refilling pantry items.
Which clear jar sizes work best for spices, baking staples, snacks, and quick-grab pantry items?
Use 120 to 180 mL jars for spices and dried herbs. Choose 1 to 2 litre jars for flour, sugar, rice, oats, and other baking staples.
For snacks, 500 to 750 mL jars work well. Wide-mouth jars are best for crackers, nuts, and quick-grab items because they are easier to reach into.
How do you set up refill zones so restocking stays fast and you do not end up with half-open bags everywhere?
Choose one shelf, bin, or basket for backup pantry items. Keep unopened or partly used bags there until the main jars need refilling.
Label the zone clearly and check it before shopping. This helps prevent duplicates and keeps extra packaging out of your main pantry shelves.
What label style holds up best in a pantry with dust, humidity, and frequent handling?
Waterproof vinyl labels or laminated printed labels hold up best. They resist moisture, dust, and frequent handling better than paper stickers.
For changing dates, use a small removable sticker or wet-erase marker. Place labels in the same spot on every jar so the pantry is easy to scan.
How do you organise jars by category so everyone in the household can find things and put them back properly?
Group jars by how they are used. Keep baking items together, grains and pasta together, snacks together, and cooking staples together.
Use shelf labels for each category. This makes it easier for everyone to return items to the right place.
What is the best way to store and rotate items in jars so older ingredients get used first and food waste stays low?
Write the refill or opened date on each jar. When adding new food, place the older portion on top so it gets used first.
Keep a small “use first” bin near the front for items close to their best-before date. This simple habit helps reduce waste.
How do you clean and refill jars efficiently without making a mess or turning it into a whole weekend project?
For dry goods, wipe clean jars with a dry cloth before refilling. Wash jars only when needed, then let them dry fully before adding food.
Use a wide-mouth funnel to prevent spills. Refill jars after grocery shopping so the pantry stays organized without becoming a big project.
Teilen:
How to Use Square Glass Jars for Pantry Visibility and Faster Cooking
How to Build a Family Freezer Rotation System With Vacuum-Sealed Portions