

Check out our latest collection of compact vacuum sealer for food!
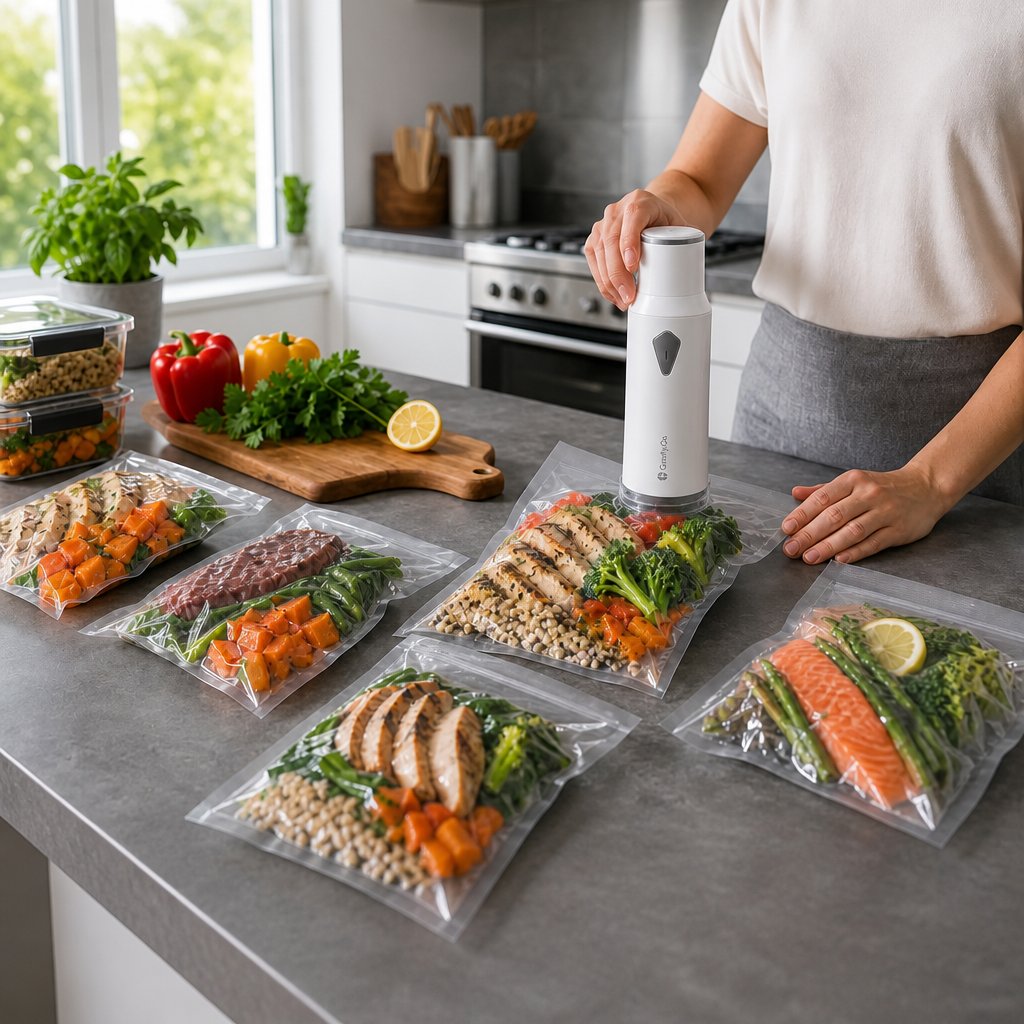
Meal prep should make your week easier, not leave your fridge packed with half-used ingredients and mystery leftovers. A cordless vacuum sealer helps turn weekly food prep into a simple system by keeping portions fresh, organized, and easy to store without taking over your counter space.
With the right workflow, you can batch cook, portion meals, seal ingredients quickly, and store everything in a way that saves time during busy weekdays. A cordless sealer also gives you more flexibility because you can prep near your fridge, counter, pantry, or wherever you have space.
In this guide, you’ll learn how to plan your meals, choose the right foods for vacuum sealing, avoid common storage mistakes, and build a weekly prep routine that keeps food fresher for longer.
Key Takeaways
- Cordless vacuum sealers let you prep and seal food anywhere, with no cord and no hassle
- Batch cooking and sealing right away keeps food fresh, tasty, and nutritious, and slashes food waste
- Good planning and smart storage make meal prep sustainable and save you both time and money
Benefits of Vacuum Sealing for Meal Prep
Vacuum sealing honestly takes meal prep from a constant struggle with spoilage to a system that keeps food fresh three to five times longer. It also makes portioning and storage way simpler.
Maximising Freshness and Shelf Life
Vacuum sealing pulls out up to 99% of the air around your food, which slows down oxidation and bacteria growth. When you vacuum seal things like raw chicken or marinated proteins, they’ll last in the fridge for up to two weeks instead of just a few days.
Freezing gets even better. When you batch cook, you don’t have to stress about freezer burn for years. Soups, stews, casseroles, and proteins all keep their texture and flavor way longer when vacuum sealed.
An airtight seal also holds in nutrients and moisture. Blanched veggies keep their color and crunch, and marinated meats soak up more flavor. Even herbs stay green instead of sad and brown after a couple days in a regular container.
Reducing Food Waste and Saving Money
Throwing out spoiled produce is such a pain. Vacuum sealing helps you buy in bulk, especially when stuff’s on sale, without worrying it’ll go bad. Those big packs of chicken or ground beef? Just divide them up, seal, and stash.
When you can see exactly what’s in your fridge or freezer (clear bags are a must), you’re way less likely to lose stuff in the back. Label each bag with what’s inside and the date, and you’ll actually use what you’ve stored.
It really adds up. When groceries last longer, you make fewer last-minute takeout runs and toss less food. Honestly, a vacuum sealer pays for itself pretty quickly just by saving you from wasted ingredients and emergency dinners.
Portion Control and Convenient Meals
Pre-portioning meals in vacuum bags takes the guesswork out of serving sizes. We seal up single portions of proteins, grains, and full meals so grabbing lunch or dinner is just a matter of pulling out a bag.
Batch cooking works so well here. Make a big pot of chili or curry on Sunday, divide it up, and vacuum seal each serving. Suddenly you’ve got a week’s worth of lunches that reheat perfectly. You can toss the bag straight into simmering water for sous vide-style reheating, or just open and microwave.
Portion control becomes automatic. No more eating double because you made a mountain of pasta. If you’re tracking macros, have family members with different diets, or just want consistency, pre-portioned, vacuum-sealed meals make it so much easier to stay on track all week.
Essential Gear and Set-Up
A cordless vacuum sealer gives you the freedom to prep anywhere, and a handful of good bags and tools really round out your meal prep station. The right setup means less fridge chaos and food that actually makes it to Thursday.
Choosing a Cordless Vacuum Sealer
Pick a model with a rechargeable battery that can handle at least 30-40 seals per session. That’s usually enough for a full week’s prep without having to stop and recharge.
Look for adjustable suction settings. Delicate foods like bread, berries, or soft cheese need a lighter touch compared to raw chicken or steak. Pulse mode is super handy for controlling how much air you pull out.
Weight matters more than you’d expect. A cordless sealer under 600 grams is easy to hold in one hand while you position bags with the other. I like models in the 400-700 gram range, they’re portable but still feel sturdy.
Battery type makes a difference too. Lithium-ion batteries charge faster and last longer than old nickel-metal hydride ones. USB-C charging is a nice bonus, one less cable to keep track of.
Selecting Quality Vacuum Seal Bags
We keep two types on hand: pre-cut bags with built-in seals (great for speed) and continuous rolls you cut to size (perfect for odd-shaped items like baguettes or whole fish).
Thickness is key. Bags between 3-4 mil (about 75-100 microns) work for most fridge and freezer storage. Go thicker (5-6 mil) for sharp bones or high-temp sous vide.
Look for bags that are:
- BPA-free and food-safe
- Compatible with your sealer brand
- Freezer-safe down to -18°C or below
- Microwave and boil-safe if you want to reheat in the bag
- Clear, so you can see what’s inside
Multi-layer bags prevent freezer burn better than single-layer ones. I’ve kept meat fresh for 2-3 years in good bags, compared to just a few months in regular zip-top bags.
Other Must-Have Meal Prep Tools
A digital scale makes portioning proteins and grains way more accurate. We weigh everything from ground meat to cooked rice to keep servings consistent.
Good storage containers (glass with tight lids) are great for ingredients you don’t need to vacuum seal, think chopped veggies, cooked grains, or sauces you’ll use soon.
Sharp knives save time. A chef’s knife does most jobs, while a paring knife handles details like trimming fat or peeling.
Sheet pans let you roast lots of stuff at once. We use them for chicken thighs, root veggies, whatever’s going in that week’s meals, then transfer to vacuum bags once cool.
A food processor speeds up chopping onions, shredding cheese, or making sauces. If you prep a lot, it’s worth the counter space.
Planning and Organising Your Weekly Meals
A good meal prep workflow starts with knowing what you’re actually going to cook and having the right ingredients ready to go. I try to keep the system simple and repeatable so weeknight dinners aren’t a scramble.
Creating a Practical Meal Prep Formula
The best routines I’ve seen stick to a pattern: pick 3-4 main proteins, pair them with 2-3 base carbs like rice or pasta, and rotate through 4-5 favorite veggies. That gives you enough variety without making things complicated.
Start by checking your calendar. How many meals will you really eat at home this week? Most people do better planning for 4-5 dinners, not every single night.
Batch similar cooking methods together. If you’re roasting chicken, toss some veggies in at the same time. Cooking grains? Make extra and seal for another week.
Assign loose themes to nights, maybe Monday is slow cooker night, Wednesday is stir-fry, Friday is leftovers. This makes planning easier and keeps things flexible.
Building an Effective Grocery List
We organize grocery lists by store section, not just jotting things down randomly. Group produce, then proteins, then pantry items. It saves time and helps you remember everything.
Before you shop, check what you already have. You might find vacuum-sealed proteins or veggies that need using up. Build your meals around those first.
Here’s a basic list structure:
- Proteins: chicken breasts, ground beef, salmon
- Produce: broccoli, peppers, spinach, onions
- Grains/bases: rice, pasta, potatoes
- Dairy/eggs: milk, cheese, butter
- Pantry: spices, sauces
Check store sales and adjust your plan. If chicken thighs are cheap, swap them in. We buy in bulk when things are on sale, then portion and vacuum seal for the freezer.
Pantry Staples to Keep on Hand
A stocked pantry keeps you from running out for missing ingredients. Focus on basics that work in lots of recipes, not specialty stuff that just sits there.
Our core pantry staples:
| Category | Items |
|---|---|
| Oils and vinegars | Olive oil, vegetable oil, rice vinegar, balsamic vinegar |
| Grains and pasta | White rice, brown rice, spaghetti, penne |
| Canned goods | Diced tomatoes, beans, coconut milk, broth |
| Flavour bases | Garlic, onions, soy sauce, hot sauce |
| Baking and cooking | Flour, sugar, salt, black pepper, paprika, cumin |
We vacuum seal bulk dry goods like rice and flour to keep them fresh and safe from bugs. It also saves space compared to big bags or boxes.
Spices lose their punch over time, so we buy small amounts and refresh every 6-12 months. The must-haves? Garlic powder, onion powder, Italian seasoning, chili powder, and cumin. Those five cover most recipes.
Step-by-Step Food Prep Workflow With a Cordless Vacuum Sealer
A good workflow means batch cooking, portioning accurately, sealing with clear labels, and storing meals by when you’ll eat them. These steps help us stay organized and keep food from going to waste.
Batch Cooking and Cooling
We cook proteins, grains, and veggies in big batches. Grilling several chicken breasts, roasting a couple sheet pans of veggies, or making a big pot of rice saves time and gives us lots of options for meals.
Cooling matters more than you’d think. Hot food causes condensation in vacuum bags, which can get sucked into the sealer and mess it up. We let food cool to room temp for about 30-45 minutes, then chill it in the fridge for another hour before sealing.
During the cooling time, we prep the next batch of ingredients. It keeps things moving without rushing or risking damage to the sealer.
Portioning and Prepping Meals
Once everything’s cool, we divide meals into single or family portions. Using a kitchen scale keeps portions accurate, especially for proteins and grains.
We arrange food in containers or right into vacuum bags. Laying items flat makes them easier to stack and defrost evenly later. For wet foods like stews or marinades, we use the liquid control setting or freeze the liquid a bit before sealing.
Keeping ingredients separate helps when things reheat at different speeds. Sealing proteins apart from veggies or grains gives us more flexibility when it’s time to eat.
Sealing and Labelling Like a Pro
We use our cordless vacuum sealer to seal bags, starting at the open end and working through our stack of prepped meals. The cordless setup lets us zip around the kitchen instead of searching for a free outlet, which is honestly a relief.
Right after sealing, we grab a permanent marker and jot down the contents and date on each bag. It’s a tiny habit that saves us from playing “guess the leftovers” later, and it keeps us using up older meals first.
For anything headed to the freezer, we scrawl reheating instructions right on the label. No more guessing cook times, and anyone in the house can just grab and heat without bugging the cook.
Safe Storage: Fridge vs. Freezer
Vacuum-sealed meals usually last three to five days in the fridge, or up to three months in the freezer. We keep anything we’ll eat soon in the fridge and freeze the rest.
In the freezer, we stack bags flat so they freeze quickly and don’t hog space. Once they’re solid, we stand them up like files in a drawer. It’s way easier to find what you need this way.
Fridge storage: Cooked proteins, prepped salads (skip the dressing), chopped veggies
Freezer storage: Bulk proteins, soups, sauces, full meals
We never refreeze vacuum-sealed meals once they’ve thawed. Planning what to eat first helps us stick to food safety rules and get the most out of vacuum sealing.
Meal Prep Ideas and Recipes That Work Well With Vacuum Sealing
Vacuum sealing really shines with meals that need to stay fresh longer or when you want to portion things out. We love it for breakfasts like overnight oats, build-ahead grain bowls, and freezer-friendly dinners, especially when the week gets busy.
Make-Ahead Breakfasts and Overnight Oats
Overnight oats are a total win for vacuum sealing. They stay fresh for up to five days in the fridge. We portion oats, chia seeds, milk, and whatever sweetener we’re feeling into individual vacuum-seal bags or containers. If you’re adding berries, nuts, or nut butter, seal those separately so things don’t get soggy.
Egg breakfasts are also easy to seal up. Scrambled eggs, veggie frittatas, and breakfast burritos can be cooked, cooled, and sealed into single servings. When you’re ready, just reheat in the bag or pop them into a microwave-safe dish.
Pancakes and waffles? Definitely make-ahead friendly. Cook a big batch, cool them completely, then stack with parchment between each before sealing. They’ll keep in the freezer for up to three months and won’t get that weird freezer taste.
Grain Bowls and Lunches
Grain bowls are perfect for vacuum sealing since you can prep each part ahead. We cook big batches of grains like quinoa, brown rice, or farro, then seal them up in portions. Grilled chicken, baked tofu, or hard-boiled eggs also seal well and don’t get rubbery.
Roasted veggies keep their texture and flavor when vacuum sealed. We roast sweet potatoes, broccoli, peppers, and Brussels sprouts in bulk, then portion them out. Dressings and sauces go in their own little sealed containers until you’re ready to eat.
Best grain bowl components for sealing:
- Cooked grains (quinoa, rice, farro)
- Lean proteins (chicken breast, turkey, tofu)
- Roasted or steamed veggies
- Legumes (chickpeas, black beans, lentils)
For salads, we seal leafy greens with a paper towel to soak up extra moisture. This trick keeps them fresh way longer than just tossing them in a container.
Dinners and Freezer-Friendly Meals
Soups and stews are some of the easiest things to vacuum seal for the freezer. Let them cool all the way before sealing so the liquid doesn’t get sucked up by the machine. We portion them flat in bags so they thaw faster and store neatly.
Marinated proteins are awesome for this. Seal raw chicken, beef, or pork with your favorite marinade and freeze. The vacuum actually helps the marinade soak in, which is a nice bonus.
Casseroles and baked dishes go straight into vacuum-safe containers, get sealed, and then frozen before baking. When you’re ready, thaw overnight in the fridge and bake. We’ve had good luck with lasagna, enchiladas, and shepherd’s pie this way.
Slow cooker meals are a real time-saver. Toss raw ingredients like chicken thighs, veggies, and spices into a vacuum bag, freeze flat, and when you need it, thaw and dump right into the slow cooker. It’s a lifesaver on busy mornings.
Tips for a Sustainable, Healthy Meal Prep Routine
A solid meal prep routine really comes down to balancing nutrition, variety, and smart storage. Portioning and batch cooking cut down on waste and help you actually stick to your eating goals.
Smart Portioning and Batch Prep
We’ve realized that guessing at portions almost always leads to waste. Using a kitchen scale for proteins, grains, and veggies (at least for the first few preps) makes a big difference. Most folks find out they’ve been making way too much, which just means more leftovers and bigger grocery bills.
Batch cooking works best when we prep versatile basics rather than full meals. Cooking two or three proteins, a couple of grains, and a handful of veggies in one session gives us mix-and-match options all week, without eating the same thing over and over.
Efficient batch prep components:
- Proteins: chicken breast, ground turkey, hard-boiled eggs
- Grains: quinoa, brown rice, farro
- Veggies: broccoli, sweet potatoes, bell peppers, Brussels sprouts
We seal individual portions as soon as they’re cooked. This locks in freshness and makes it easy to grab a meal on the go. Portioning everything before sealing also helps us avoid overeating and keeps things from getting lost in the fridge.
Rotating Recipes to Avoid Burnout
Let’s be real: eating the same thing every day gets old fast. Rotating recipes every two weeks gives us enough variety to stay interested but keeps the shopping list manageable. We keep a running list of 10-12 favorite healthy recipes and just switch them up.
Theme nights help, too. Assigning a theme to each day (like Mediterranean Mondays or Taco Tuesdays) adds variety without turning meal planning into a chore. This way, we can use whatever’s in season or on sale without getting stuck in a rut.
We track what actually gets eaten and what just sits in the fridge. Turns out, “aspirational” meal planning doesn’t always match reality, and that’s okay. We focus on tried-and-true favorites and only add a new recipe every couple of weeks.
Vacuum sealing different components separately lets us mix things up without committing to specific combos ahead of time.
Using Vacuum Sealing for Special Diets
Vacuum sealing is a game changer for anyone with special dietary needs. We’ve seen it help people with diabetes, macro-based diets, or food allergies prep safely portioned meals weeks in advance without sacrificing quality.
For low-carb or keto diets, we seal proteins and high-fat add-ons like avocado sauces separately from fresh veggies. This keeps everything fresh and the macros on point.
Plant-based meal preppers can vacuum seal cooked legumes, marinated tofu, and grain-based proteins. These usually don’t last long in the fridge, but with vacuum sealing, they stay good three to four times longer.
We label every package with the contents, date, and any dietary info (calories, macros, allergens) using a label maker or permanent marker. This gets even more important if you’re prepping for multiple people with different needs.
Vacuum sealing also prevents freezer burn, which is super helpful when you’re spending extra on organic, grass-fed, or allergen-free foods. Your investment lasts months, not weeks.
Frequently Asked Questions
Here are quick answers to common questions about using a cordless vacuum sealer for weekly meal prep.
What's a realistic Sunday meal-prep flow that uses vacuum sealing to cut down weeknight cooking time?
Set aside two to three hours. Cook your proteins, grains, and vegetables first. Let everything cool, then portion meals into bags, seal them, and label each one with the contents and date.
Which foods vacuum seal well for a full week of meals, and which ones should be stored another way?
Cooked proteins, firm vegetables, grains, soups, stews, and marinated meats work well. Delicate berries, lettuce, soft herbs, and soft cheeses are better stored in containers because they can bruise or flatten.
How do you portion proteins, veggies, and snacks for grab-and-go meals without wasting bags?
Use medium bags for full meals and smaller sections for snacks. Lay food flat, avoid overfilling, and seal several small snack portions in one longer bag when possible.
What's the best way to label and organise vacuum-sealed meals so the fridge and freezer don't turn into a mystery box?
Write the food name, date, portion size, and reheating note on each bag. Store meals by category, such as breakfast, lunch, dinner, proteins, and vegetables.
How far ahead can you prep and vacuum seal different ingredients while keeping flavour and texture on point?
Cooked meals usually stay fresh for three to five days in the fridge. Frozen meals can last two to three months with good texture. Always cool food fully before sealing.
What cleaning and maintenance steps keep a cordless vacuum sealer working reliably week after week?
Wipe the sealing area after each use, empty the drip tray if your model has one, and check the gasket regularly. Keep the machine dry before storing it.
Teilen:
Reusable Vacuum Bags vs Disposable Storage Bags: Which Makes More Sense for Weekly Food Prep?
How to Store Marinated Proteins Without Leaks, Odors, or Texture Loss