

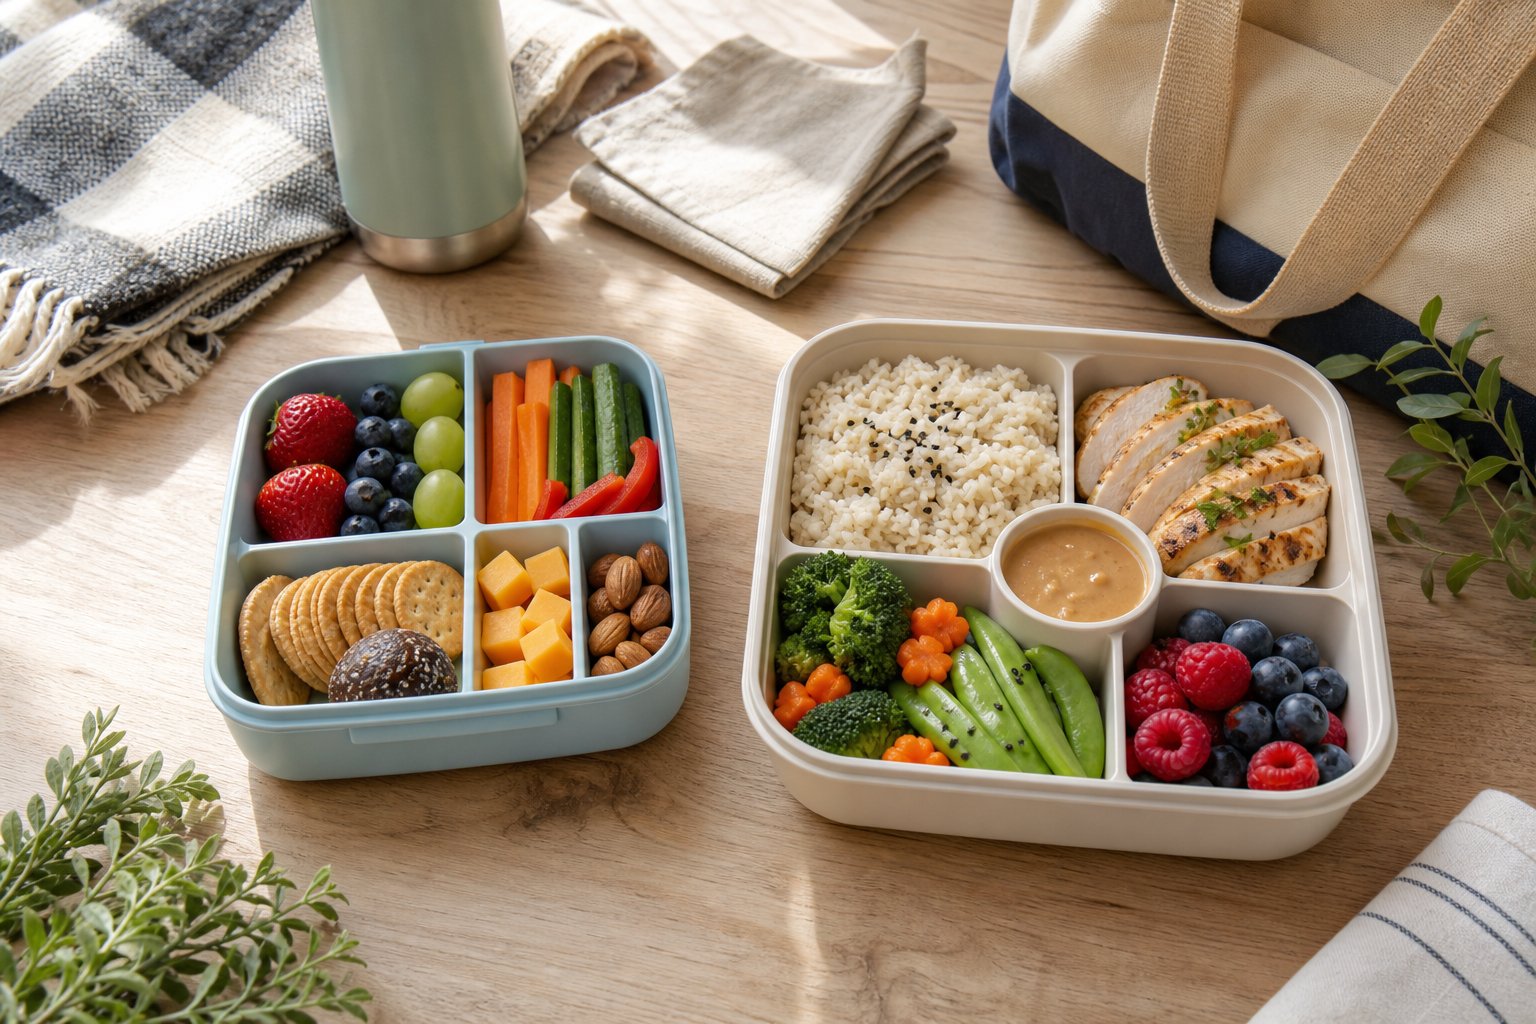
Schauen Sie sich unsere neuesten Snackbox-Kollektionen an!
Am einfachsten packen Sie feuchte und trockene Lebensmittel in eine Snackbox, indem Sie sie in separaten Fächern aufbewahren, Silikonbecher oder kleine, verschlossene Behälter als Trennwände verwenden und überschüssige Feuchtigkeit davon abhalten, Cracker, Brot und andere knusprige Lebensmittel zu erreichen. Ein wenig Planung kann den Unterschied zwischen einem knackigen, ansprechenden Mittagessen und einem, das matschig wird, bevor es Zeit zum Essen ist, ausmachen.
Sie benötigen keine komplizierten Hilfsmittel oder zusätzliche Vorbereitungszeit, um Lebensmittel organisiert zu halten. Mit dem richtigen Behälter, vernünftigen Verpackungsmethoden und der richtigen Temperaturkontrolle können Sie eine Snackbox zusammenstellen, die für Schule, Arbeit, Reisen oder einen Wochenendausflug frisch und genießbar bleibt.
Hier erfahren Sie, wie Sie feuchte und trockene Zutaten ausbalancieren, Kondensation kontrollieren und ein Mittagessen verpacken, das bis zur Mahlzeit gut hält.
Wichtigste Erkenntnisse
- Wählen Sie einen Behälter mit sicheren Fächern, um feuchte und trockene Lebensmittel getrennt zu halten.
- Trocknen Sie die Zutaten vor dem Verpacken und verwenden Sie verschlossene Becher für Saucen, Dips, Joghurt und andere feuchtigkeitsreiche Lebensmittel.
- Halten Sie verderbliche Lebensmittel sicher kalt oder heiß, bis sie verzehrfertig sind.
Beginnen Sie mit dem richtigen Behälter und den richtigen Werkzeugen
Der von Ihnen gewählte Behälter spielt eine wichtige Rolle dabei, nasse und trockene Lebensmittel getrennt zu halten. Ein paar praktische Ergänzungen, wie Silikonbecher und sicher schließende Deckel, können eine noch bessere Trennung ermöglichen.
Wählen Sie geteilte Behälter mit einem sicheren Deckel
Ein geteilter Behälter ist ein praktischer Ausgangspunkt, egal ob Sie eine klassische Bento-Box oder eine Snackbox mit mehreren kleineren Fächern bevorzugen. Eingebaute Trennwände helfen, Obst von Crackern und Saucen von Lebensmitteln fernzuhalten, die knusprig bleiben sollen.
Der Deckel ist genauso wichtig wie die Trennwände. Wählen Sie einen Behälter mit einem Deckel, der sicher schließt und für die Lebensmittel geeignet ist, die Sie verpacken möchten. Wenn Flüssigkeiten beteiligt sind, prüfen Sie, ob der Hersteller den Behälter oder einzelne Fächer als auslaufsicher beschreibt, anstatt davon auszugehen, dass ein fest aussehender Deckel sie zurückhält.
Verwenden Sie Silikonbecher für zusätzliche Trennung
Selbst eine gut gestaltete Brotdose kann von zusätzlicher Trennung profitieren. Wiederverwendbare Silikonbecher können kleine Portionen Dips, Dressings, Obst oder andere feuchte Zutaten in einem größeren Fach aufnehmen.
Dieser Ansatz ist besonders hilfreich, wenn Sie einen Bereich zwischen Lebensmitteln mit unterschiedlichen Texturen aufteilen möchten. Sie können beispielsweise Hummus in einen Silikonbecher geben, während Sie Cracker daneben aufbewahren, wodurch der direkte Kontakt, der die Cracker aufweichen könnte, reduziert wird.
Wiederverwendbare Silikonbecher sind auch leicht zu reinigen und lassen sich zum kompakten Verstauen ineinander stapeln.
Wann separate Behälter stattdessen verpackt werden sollten
Einige Lebensmittel lassen sich besser in eigenen, verschlossenen Behältern verpacken. Suppe, Joghurt, flüssige Dressings und andere flüssige oder halbflüssige Lebensmittel können über gewöhnliche Fachtrennwände hinauslaufen.
Wenn Sie unsicher sind, ob ein Behälter Flüssigkeiten sicher halten kann, testen Sie ihn zu Hause gemäß den Pflegeanweisungen des Herstellers. Verwenden Sie für Lebensmittel, die beim Kippen verschüttet werden könnten, einen Behälter, der speziell für einen sicheren, auslaufsicheren Verschluss entwickelt wurde.
Befolgen Sie die feuchtigkeitskontrollierte Verpackungsmethode
Wie Sie Lebensmittel zubereiten und anordnen, ist fast genauso wichtig wie der Behälter selbst. Die Reduzierung von Oberflächenfeuchtigkeit und Kondensation hilft feuchten und trockenen Lebensmitteln, eine Brotdose zu teilen, ohne die Textur des jeweils anderen zu beeinträchtigen.
Gekochte Speisen vor dem Verpacken richtig abkühlen lassen
Vermeiden Sie es, sehr heiße Speisen direkt in einen für die Kühllagerung vorgesehenen Lunchbehälter zu verschließen. Im Behälter eingeschlossener Dampf kann Kondensation erzeugen und nahegelegene Speisen feucht machen.
Lassen Sie für Reste, die kalt gegessen werden sollen, sehr heiße Speisen nicht mehr dampfen und kühlen Sie sie dann umgehend in einem flachen Behälter, damit sie effizient abkühlen können. Sobald sie gekühlt sind, geben Sie sie nach Bedarf in die Brotdose. Health Canada empfiehlt, Reste umgehend zu kühlen und verderbliche Lebensmittel bei sicheren Temperaturen aufzubewahren.
Produkte trocknen und überschüssige Flüssigkeit abgießen
Frische Produkte können mehr Feuchtigkeit einführen, als erwartet. Waschen Sie Lebensmittel wie Kirschtomaten, Gurkenscheiben, Beeren und Blattgemüse und trocknen Sie sie gründlich, bevor Sie sie verpacken.
Wenn ein gekochtes oder zubereitetes Lebensmittel überschüssige Flüssigkeit enthält, die nicht Teil der Mahlzeit sein soll, gießen Sie diese ab, bevor Sie es neben trockene Zutaten legen. Dieser kleine Schritt kann helfen, die Ansammlung von Feuchtigkeit am Boden des Behälters zu verhindern.
Größere Lebensmittel zuerst und Lücken zuletzt füllen
Beginnen Sie mit größeren Gegenständen, die ihre Form behalten, wie Sandwiches, gekochtem Getreide, Gemüse oder Proteinen. Verwenden Sie dann kleinere Lebensmittel wie Kirschtomaten, Gurkenscheiben, Trockenfrüchte oder Nüsse, um den verbleibenden Platz effizient zu nutzen.
Eine gut organisierte Box kann auch unnötige Bewegungen während des Transports reduzieren. Wenn feuchte und trockene Lebensmittel eine stärkere Trennung benötigen, verwenden Sie eine feste Trennwand, einen Silikonbecher oder einen separat verschlossenen Behälter, anstatt sich auf das Lebensmittel selbst als Barriere zu verlassen.
Saucen, Dressings und Dips unter Verschluss halten
Vermeiden Sie es, Saucen oder Dressings zu Lebensmitteln hinzuzufügen, die Feuchtigkeit aufnehmen können, es sei denn, die Mahlzeit soll sofort gegessen werden. Hummus, Salsa, Salatdressing und ähnliche Zutaten sind in einem kleinen verschlossenen Behälter bis zur Essenszeit normalerweise besser aufgehoben.
Diese Zutaten getrennt zu halten, hilft Brot, Crackern, Gemüse und anderen Lebensmitteln, ihre beabsichtigte Textur zu bewahren. Es ermöglicht auch jeder Person, so viel oder so wenig Dressing oder Dip hinzuzufügen, wie sie es bevorzugt.
Ausgewogene Nass- und Trockenfächer erstellen
Eine praktische Snackbox kann Proteine, frisches Obst oder Gemüse und einen trockenen Snack oder Getreideprodukte kombinieren, auf Wunsch auch Milchprodukte oder eine kleine Süßigkeit. Die genaue Kombination kann je nach Appetit, Ernährungsbedürfnissen und Tageslänge angepasst werden.
Fügen Sie ein sättigendes Protein und ein Hauptgericht hinzu
Protein kann der Anker einer Snackbox oder einer leichten Mahlzeit sein. Hartgekochte Eier, gekochtes Hühnchen, zerflockter Fisch, Käse oder Thunfischsalat können alle funktionieren, wenn sie bei einer sicheren Temperatur gelagert und transportiert werden.
Feuchte Proteine, einschließlich Thunfischsalat oder in Sauce verpackte Lebensmittel, sollten ein eigenes Fach oder einen verschlossenen Behälter haben, damit Flüssigkeit nicht zu Crackern oder Brot wandert.
Nuss- oder Samenbutter kann gegebenenfalls auch als Dip oder Aufstrich dienen. Überprüfen Sie für Schulessen die Allergiepolitik der Schule, bevor Sie Erdnussbutter oder andere Nussprodukte einpacken.
Kombinieren Sie frisches Obst und Gemüse mit trockenen Snacks
Die Trennung zwischen frischen Produkten und knusprigen Lebensmitteln ist besonders wichtig. Babykarotten, Zuckerschoten, Trauben, Heidelbeeren, Apfelscheiben und Kiwi können alle Feuchtigkeit abgeben. Waschen und trocknen Sie sie daher gründlich, bevor Sie sie verpacken.
Legen Sie trockene Snacks wie Cracker, Brezeln, Popcorn, Studentenfutter, Nüsse, Trockenfrüchte oder Müsliriegel in ein separates Fach. Ein Silikonbecher oder eine feste Trennwand zwischen frischen Produkten und trockenen Snacks bietet zusätzlichen Schutz vor Feuchtigkeit.
| Feuchte oder frische Lebensmittel | Trockene Lebensmittel |
|---|---|
| Trauben, Heidelbeeren | Brezeln, Popcorn |
| Apfelscheiben, Kiwi | Studentenfutter, Müsliriegel |
| Babykarotten, Zuckerschoten | Nüsse, Trockenfrüchte |
Milchprodukte und eine kleine Süßigkeit ohne Überpacken hinzufügen
Käsewürfel sind praktisch für Snackboxen, wenn sie richtig gekühlt werden. Joghurt kann ebenfalls gut funktionieren, sollte aber in einem sicher verschlossenen Behälter aufbewahrt und mit ausreichenden Kühlmitteln verpackt werden.
Wenn Sie eine Süßigkeit hinzufügen möchten, können ein kleiner Keks oder ein paar Schokoladenstücke ordentlich in ein trockenes Fach passen.
Vermeiden Sie es, die Box so dicht zu packen, dass feuchte Lebensmittel an trockene Zutaten gedrückt werden. Eine ausreichende Trennung, damit die Fächer wie vorgesehen funktionieren, hilft, die Textur zu erhalten.
Mittagessen kalt, warm und sicher zum Verzehr aufbewahren
Die Feuchtigkeitskontrolle schützt die Lebensmittelqualität, während die Temperaturkontrolle für verderbliche Lebensmittel unerlässlich ist. Health Canada definiert die Temperaturgefahrenzone als 4°C bis 60°C, in der sich Bakterien schnell vermehren können. Verwenden Sie eine isolierte Lunchtasche und Kühlmittel für verderbliche Lebensmittel
Packen Sie verderbliche Kaltwaren in eine isolierte Lunchtasche mit ausreichenden Kühlmitteln. Die USDA empfiehlt mindestens zwei Kühlmittel, wenn verderbliche Lebensmittel in einer Lunchtasche oder -box transportiert werden.
Das Platzieren von Kühlmitteln um die Lebensmittel kann helfen, eine sichere Temperatur aufrechtzuerhalten. Eine gefrorene Wasserflasche oder ein anderes geeignetes gefrorenes Getränk kann beim Auftauen auch als zusätzliches Kühlmittel fungieren.
Halten Sie die Lunchtasche so weit wie möglich geschlossen und packen Sie sie kurz vor dem Verlassen des Hauses.
Heiße Mahlzeiten in einem isolierten Lebensmittelbehälter verpacken
Heiße Speisen wie Suppe, Reis oder Nudeln können in einem isolierten Lebensmittelbehälter transportiert werden, der dazu bestimmt ist, die Wärme zu speichern. Das Vorheizen des Behälters mit heißem Wasser vor dem Hinzufügen der Mahlzeit kann dazu beitragen, die Temperatur effektiver zu halten.
Halten Sie den Behälter geschlossen, bis es Zeit zum Essen ist, damit keine Wärme unnötig entweicht. Verderbliche Lebensmittel sollten entweder sicher heiß oder sicher kalt bleiben, anstatt längere Zeit in der Temperaturgefahrenzone zu verbringen. Health Canada empfiehlt, heiße Speisen bei oder über 60°C zu halten.
Gekochter Reis sollte denselben Prinzipien der Temperaturkontrolle folgen wie andere verderbliche Reste. Halten Sie ihn zum Servieren sicher heiß, oder kühlen und kühlen Sie ihn umgehend, wenn er kalt gegessen oder später aufgewärmt werden soll.
Zeit in der Temperaturgefahrenzone begrenzen
Verderbliche Lebensmittel, die nicht sicher warm oder kalt gehalten werden, sollten nicht länger als zwei Stunden bei Raumtemperatur bleiben. Bei heißen Außenbedingungen kann dieses sichere Zeitfenster kürzer sein. Health Canada rät, verderbliche Lebensmittel bei sommerlichen Outdoor-Aktivitäten auf eine Stunde und bei Raumtemperatur auf zwei Stunden zu beschränken.
Eine isolierte Tasche, ausreichende Kühlquellen und ein geeigneter isolierter Behälter für warme Speisen erleichtern die Aufrechterhaltung sicherer Temperaturen bis zum Mittagessen.
Zuverlässige Snackbox-Kombinationen für geschäftige Tage
Die beste Snackbox-Kombination hängt davon ab, wohin sie geht, wie lange sie gelagert wird und ob eine Kühlung verfügbar ist. In jedem Fall sollten feuchte Zutaten eingeschlossen, trockene Lebensmittel vor Kondensation geschützt und sichere Temperaturen für verderbliche Artikel eingehalten werden.
Knusprige Snackbox für die Schule
Für Schulessen wählen Sie Lebensmittel, die ihre Textur während des Transports gut behalten. Käsewürfel, Brezeln und Cracker können gut funktionieren, wenn der Käse richtig gekühlt und die trockenen Lebensmittel von feuchten Zutaten getrennt werden.
Trauben und Heidelbeeren können frischen Geschmack hinzufügen, ohne einen Dip zu benötigen. Waschen und trocknen Sie sie gründlich, bevor Sie sie verpacken. Wenn Sie Hummus hinzufügen, legen Sie es in einen eigenen versiegelten Becher, anstatt es während des Transports mit Crackern in Berührung kommen zu lassen.
Babykarotten sind eine weitere knusprige Option und können in einem eigenen Fach verpackt werden. Befolgen Sie immer die Richtlinien der Schule zu Lebensmittelallergien, wenn Sie Nüsse, Nussbutter und ähnliche Zutaten auswählen.
Proteinreiches Bento für längere Tage
Für einen längeren Arbeitstag oder Schultag bauen Sie die Box um ein Protein wie hartgekochte Eier, gekochtes Hähnchen oder Käse herum. Halten Sie alle verderblichen Zutaten gekühlt, bis sie verzehrfertig sind.
Eine Bento-Box im Stil mit sicheren Trennwänden kann verschiedene Lebensmittel organisiert halten. Hummus kann in ein versiegeltes Fach oder einen kleinen Becher, während Cracker oder Brezeln in einem trockenen Fach bleiben.
Fügen Sie gut getrocknete Trauben, Heidelbeeren oder ein anderes frisches Obst für Abwechslung hinzu. Bei richtiger Temperaturkontrolle funktioniert dieses Format gut für ein Vormittags-Mittagessen oder einen Nachmittagssnack.
Reste-Lunchbox
Reste können ein einfaches, praktisches Mittagessen sein. Nudeln, Reis oder gekochtes Getreide können als Basis dienen, sollten aber vor dem Verpacken für ein kaltes Mittagessen sicher gekühlt und gekühlt werden.
Gekochtes Hühnchen oder hartgekochte Eier können Proteine hinzufügen. Wenn Sie Sauce oder Dip hinzufügen, packen Sie diese separat ein und fügen Sie sie zum Essen hinzu, um zu verhindern, dass Nudeln, Getreide oder Brot zu weich werden.
Diese Art von Snackbox kann auch dazu beitragen, richtig gelagerte Reste gut zu nutzen und gleichzeitig ein sättigenderes Mittagessen zu kreieren.
Road Trip Snackbox mit reisefreundlichen Lebensmitteln
Beginnen Sie für einen Roadtrip mit trockenen, haltbaren Lebensmitteln, die sich leicht portionieren lassen, wie Studentenfutter, Trockenfrüchte, Brezeln und Cracker.
Wenn Sie verderbliche Lebensmittel wie Käse, Aufschnitt, Joghurt oder geschnittenes Obst und Gemüse hinzufügen, bewahren Sie diese in einer isolierten Kühlbox oder Lunchtasche mit geeigneten Kühlmitteln auf.
Das Trennen von Dips und anderen verschüttungsgefährdeten Lebensmitteln in sicher verschlossene Behälter kann auch das Essen im Auto sauberer und einfacher machen. Kleine Fächer oder wiederverwendbare Becher helfen, jeden Teil des Snackangebots organisiert zu halten.
Häufig gestellte Fragen
Wie hält man feuchte Lebensmittel am besten von trockenen Snacks in einer Lunchbox getrennt?
Verwenden Sie eine geteilte Lunchbox, Silikonbecher oder kleine, verschlossene Behälter, um eine physische Barriere zwischen feuchten und trockenen Lebensmitteln zu schaffen. Saucen, Joghurt und andere flüssige Zutaten sollten in einzeln verschlossenen Behältern aufbewahrt werden, wenn ein Auslaufen möglich ist.
Welche Behälter verhindern, dass Dips, Joghurt und Saucen in Cracker oder Obst eindringen?
Wählen Sie kleine Behälter, die speziell als auslaufsicher oder auslaufsicher konzipiert sind und Deckel haben, die sicher schließen. Überprüfen Sie die Anweisungen des Herstellers, da die Dichtungsleistung je nach Behälterdesign variiert.
Kann ich geschnittenes Gemüse mit Hummus einpacken, ohne dass es andere Snacks matschig macht?
Ja. Waschen und trocknen Sie das Gemüse gründlich und bewahren Sie den Hummus dann in einem verschlossenen Becher oder einem separaten Fach auf. Halten Sie Cracker und andere trockene Snacks physisch von beiden getrennt.
Wie halte ich Sandwiches, Wraps und knusprige Beilagen bis zum Mittagessen frisch?
Halten Sie feuchte Füllungen und Gewürze möglichst vom Brot fern, oder verpacken Sie sie separat und fügen Sie sie vor dem Essen hinzu. Bewahren Sie Chips, Cracker und andere knusprige Beilagen in einem eigenen trockenen Fach oder Behälter auf.
Sind geteilte Snackbehälter auslaufsicher genug für nasse und trockene Lebensmittel?
Das hängt vom Behälter ab. Einige Designs versiegeln einzelne Fächer, während andere nur feste Lebensmittel trennen. Für Flüssigkeiten, Joghurt oder flüssige Dressings verwenden Sie einen separat verschlossenen Becher, es sei denn, der Behälter ist speziell dafür ausgelegt und bewertet, diese zu enthalten.
Welche Lebensmittel sollten separat verpackt werden, um zu verhindern, dass Feuchtigkeit knusprige Snacks ruiniert?
Halten Sie Joghurt, Apfelmus, Hummus, Dips, Dressings, saftiges geschnittenes Obst, feuchte Sandwichfüllungen und andere feuchtigkeitsreiche Lebensmittel von Crackern, Chips, Müsli und Brot fern. Ein versiegelter Becher oder ein spezielles Fach bietet die zuverlässigste Trennung.
Teilen:
Snackbox vs. Brotdose: Was funktioniert besser für Snacks, kleine Mahlzeiten und Tagesausflüge?
Wie man eine Snackbox für Erwachsene für Arbeitstage, Pendeln und geschäftige Nachmittage packt