

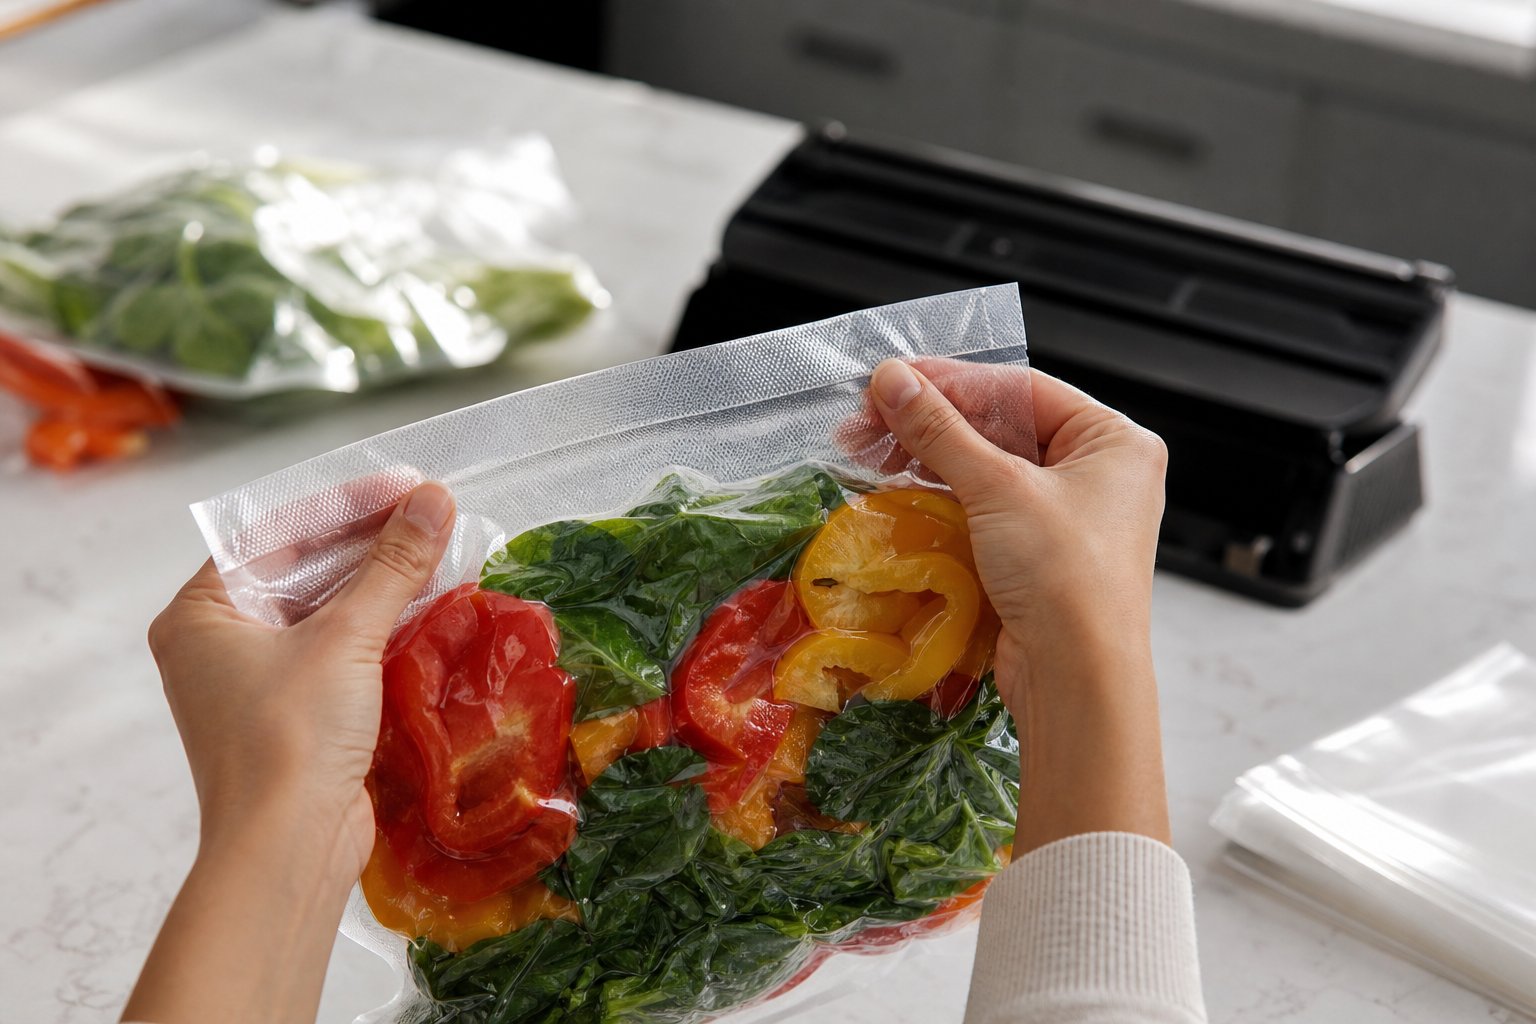
Entdecken Sie unsere neueste Kollektion an kompakten Vakuumiergeräten für Lebensmittel!
Eine undichte Vakuumversiegelung kann frische Lebensmittel unbemerkt in gefrierbrand-geschädigten Abfall verwandeln. Die ersten Anzeichen sind meist ein aufgeblähter Beutel, Inhalt, der sich nicht mehr fest umwickelt anfühlt, oder Feuchtigkeitsansammlungen im Inneren. Um ein Leck zu bestätigen, drücken Sie vorsichtig auf den Beutel und achten Sie auf entweichende Luft, überprüfen Sie die Versiegelungslinie auf Lücken oder legen Sie die versiegelte Kante unter Wasser und achten Sie auf Bläschen.
Dichtungsfehler treten oft innerhalb der ersten 24 Stunden auf, daher kann eine frühzeitige Kontrolle Ihre Essenszubereitung schützen und Lebensmittelverschwendung verhindern. Feuchtigkeit, Krümel, Falten, Einstiche, abgenutzte Dichtungen oder eine verschmutzte Versiegelungsleiste können die Dichtung schwächen.
In diesem Leitfaden erfahren Sie, wie Sie eine fehlerhafte Vakuumversiegelung erkennen, den Beutel testen, Lebensmittel sicher neu versiegeln, häufige Ursachen beheben und zukünftige Undichtigkeiten verhindern können.
Wichtigste Erkenntnisse
- Achten Sie auf Lufteinschlüsse, losen Inhalt und entweichende Luft, um eine fehlgeschlagene Versiegelung zu erkennen
- Oft können Sie Dichtungsfehler beheben, indem Sie die Beutelränder reinigen, abtrocknen und sofort neu versiegeln
- Halten Sie die Dichtungen und die Versiegelungsleiste Ihres Vakuumiergeräts sauber und in gutem Zustand, um zukünftige Versiegelungsprobleme zu vermeiden
Anzeichen dafür, dass Ihr Vakuumierbeutel seine Versiegelung verloren hat
Wenn ein Vakuumierbeutel seine luftdichte Versiegelung verliert, werden Sie einige verräterische physikalische Veränderungen bemerken. Diese frühzeitig zu erkennen, kann Ihnen helfen, Ihre Lebensmittel frisch zu halten und deren Haltbarkeit zu verlängern.
Sichtbare Lufteinschlüsse oder Blasen
Das deutlichste Zeichen sind Lufteinschlüsse im Inneren des Beutels. Als Sie ihn zum ersten Mal versiegelt haben, umschloss der Beutel die Lebensmittel fest, ohne zusätzlichen Platz. Wenn Sie jetzt Schwellungen, lose Stellen oder Blasen sehen, ist Luft eingedrungen.
Überprüfen Sie den versiegelten Rand genau. Manchmal entdeckt man kleine Lücken oder Stellen, an denen der Kunststoff nicht verschmolzen ist. Halten Sie den Beutel gegen das Licht und überprüfen Sie die gesamte Versiegelungslinie auf Falten, Trennungen oder nicht geschmolzene Stellen.
Meiner Erfahrung nach schleicht sich die Luft anfangs langsam ein, dann nimmt das Problem schnell zu. Was als winzige Blase in der Ecke beginnt, kann sich nach ein paar Stunden oder Tagen zu einem großen Puff entwickeln, besonders im Gefrierschrank, wo Temperaturschwankungen Luft durch schwache Stellen ziehen.
Beutel fühlt sich locker oder aufgebläht an
Heben Sie den Beutel auf und drücken Sie ihn vorsichtig zusammen. Ein gut vakuumversiegelter Beutel sollte sich fest und straff um die Lebensmittel anfühlen. Wenn er weich, locker oder matschig ist, ist die Versiegelung wahrscheinlich defekt.
Manchmal bläht sich der Beutel nach außen auf oder hat einfach nicht mehr dieses feste, eingeschweißte Gefühl, das Sie in Erinnerung haben. Diese Aufgeblähtheit bedeutet, dass Luft eingedrungen ist und das Vakuum gebrochen hat.
Wenn Sie Beutel aus dem Gefrierschrank überprüfen, achten Sie darauf, ob der Kunststoff noch an den Lebensmitteln haftet. Eine ordnungsgemäße Vakuumversiegelung sollte den Beutel dazu bringen, gefrorenes Fleisch, Gemüse oder Reste zu umschließen. Jegliche Lockerheit oder Lücke zwischen den Lebensmitteln und dem Beutel ist ein Alarmzeichen.
Feuchtigkeit oder Raureif im Beutel
Wenn ein Beutel im Gefrierschrank seine Versiegelung verliert, dringt Feuchtigkeit ein und es bildet sich Raureif auf den Lebensmitteln oder im Inneren des Beutels. Sie werden weiße, eisige Flecken sehen, die vorher nicht da waren.
Das ist der Beginn des Gefrierbrands. Luftkontakt lässt Eiskristalle auf den Lebensmitteln wachsen, entzieht ihnen Feuchtigkeit und ruiniert Textur und Geschmack. Die Vakuumversiegelung, die dies früher verhindert hat, ist nicht mehr vorhanden.
Im Kühlschrank führt eine fehlgeschlagene Versiegelung zu Kondenswasserbildung im Inneren des Beutels. Wassertröpfchen können am Kunststoff haften bleiben oder sich am Boden sammeln, besonders bei Fleisch oder feuchten Lebensmitteln. Ein frisch vakuumversiegelter Beutel sollte innen trocken bleiben.
Lebensmittel verderben schneller als erwartet
Wenn Ihr vakuumversiegeltes Hähnchen, Gemüse oder Reste viel schneller verderben, als Sie erwarten, ist die Versiegelung wahrscheinlich fehlgeschlagen. Rohes Fleisch in einem Vakuumbeutel sollte im Kühlschrank ein bis zwei Wochen haltbar sein, aber mit einer gebrochenen Versiegelung kann es in nur wenigen Tagen verderben.
Achten Sie beim Öffnen des Beutels auf seltsame Gerüche, schleimiges Fleisch oder Verfärbungen, die zu schnell auftreten. Dies sind Anzeichen dafür, dass Sauerstoff eingedrungen ist und Bakterienwachstum ermöglicht hat.
Ich habe gesehen, wie Leute ganze Chargen ihrer Essenszubereitung verloren haben, weil eine schlechte Versiegelung unbemerkt blieb. Die Aufrechterhaltung dieser Vakuumbarriere ist alles. Sobald sie verschwunden ist, sinkt die Lagerzeit rapide.
So testen Sie die Integrität des Vakuumierbeutels
Wenn Sie Ihre versiegelten Beutel regelmäßig überprüfen, können Sie Undichtigkeiten erkennen, bevor Lebensmittel verderben oder Gefrierbrand entsteht. Ich überprüfe Beutel gerne sofort nach dem Versiegeln und gelegentlich während der Lagerung, mit einem kurzen Blick und dem Unterwasser-Trick.
Tauchmethode für Luftlecks
Der Wassertest ist wahrscheinlich meine Lieblingsmethode, um winzige Lecks zu finden, die man sonst nicht sehen kann. Füllen Sie eine große Schüssel oder das Waschbecken mit zimmerwarmem Wasser, tauchen Sie dann den versiegelten Beutel vorsichtig ein und achten Sie auf Bläschen, die aus der Versiegelung oder an einer beliebigen Stelle des Beutels entweichen.
Drücken Sie den Beutel unter Wasser leicht an, um den Innendruck etwas zu erhöhen. Wenn ein Leck vorhanden ist, sehen Sie eine stetige Bläschenspur, die direkt auf die Stelle zeigt. Markieren Sie sie mit einem wasserfesten Stift, wenn Sie den Beutel erneut versiegeln möchten.
Dieser Test funktioniert am besten mit Beuteln, die noch etwas Luft enthalten, oder mit festen Lebensmitteln. Wenn der Beutel unter starkem Vakuum steht, kann der Außendruck kleine Lecks verdecken, daher überprüfe ich die Versiegelung immer auch visuell.
Überprüfung der Versiegelungslinie
Eine gute luftdichte Versiegelung sieht aus wie ein glatter, durchgehender Streifen über den Beutel, normalerweise 3-8 mm breit, je nach Ihrem Gerät. Halten Sie den Beutel gegen helles Licht und suchen Sie nach Brüchen, dünnen Stellen oder ungewöhnlichen Farben, die bedeuten, dass die Versiegelung nicht richtig funktioniert hat.
Achten Sie auf Falten oder Rillen, die durch die Versiegelung verlaufen. Das sind Schwachstellen, an denen Luft eindringen kann. Die Versiegelung sollte sich gleichmäßig und etwas steif anfühlen, wenn Sie mit dem Finger darüberfahren. Wenn Sie weiche Stellen, klebrige Stellen oder Stellen finden, an denen der Beutel ungleichmäßig geschmolzen ist, könnte Ihre Versiegelungsleiste zu heiß, zu kalt oder einfach nur verschmutzt sein.
Achten Sie besonders auf die Ecken und Kanten. Dort beginnen meiner Erfahrung nach die meisten Lecks.
Überprüfung auf Dichtungsfehler entlang des Randes
Fahren Sie mit den Fingern an beiden Seiten der Versiegelung entlang. Wenn sich die beiden Schichten leicht trennen oder Sie einen Fingernagel hineinstecken können, hält die Versiegelung nicht. Eine gute Versiegelung sollte von einem Ende zum anderen fest haften.
Achten Sie auf Verfärbungen, angebrannte Stellen oder Bereiche, an denen der Beutel zu dünn oder durchgeschmolzen aussieht. Das bedeutet normalerweise, dass Ihr Siegelbalken zu heiß ist oder sich Schmutz auf dem Heizelement befindet. Wischen Sie Ihren Siegelbalken und den Vakuumkanal gelegentlich mit Reinigungsalkohol ab. Das hilft wirklich.
Drücken Sie den Beutel vorsichtig vom Inhalt weg. Wenn Sie ein Zischen hören oder sich der Beutel langsam wieder aufbläht, haben Sie ein Leck. Versiegeln Sie oberhalb der schlechten Stelle neu, lassen Sie dabei mindestens 2-3 cm frischen Beutel übrig, oder verwenden Sie einfach einen neuen Beutel, wenn der alte unbrauchbar ist.
Hauptursachen für Dichtungsfehler
Vakuumierbeutel versagen in der Regel aus nur wenigen Gründen, die immer wieder auftreten. Die Versiegelungsleiste oder das Heizelement funktioniert möglicherweise nicht richtig, Dichtungen werden abgenutzt oder verrutschen, Beutel werden nicht richtig positioniert, oder das Beutelmaterial selbst ist von geringer Qualität oder hat einen Einstich.
Probleme mit der Versiegelungsleiste oder dem Heizelement
Die Versiegelungsleiste übernimmt die Hauptarbeit. Sie heizt sich auf und schmilzt das Beutelmaterial, um die luftdichte Versiegelung herzustellen. Wenn sie nicht richtig funktioniert, sind Ihre Versiegelungen schwach oder halten einfach nicht.
Lebensmittelreste sind oft ein Problem. Selbst ein wenig Fleisch, Sauce oder Gemüse, das am Versiegelungsstreifen klebt, verhindert, dass das Heizelement guten Kontakt bekommt. Das Ergebnis ist eine Versiegelung, die anfangs gut aussieht, aber später versagt.
Nach einer Weile kann der Versiegelungsstreifen selbst verschleißen oder beschädigt werden. Zu viel Hitze zersetzt ihn, und schließlich wird er einfach nicht mehr heiß genug für eine starke Verbindung. Wenn Ihr Beutel zu stark oder zu wenig schmilzt, ist Ihr Heizelement möglicherweise defekt oder für Ihren Beuteltyp falsch eingestellt.
Schmutz im Vakuumkanal kann die Dinge ebenfalls durcheinanderbringen. Lebensmittel oder Feuchtigkeit dort verhindern, dass der Beutel flach an der Versiegelungsleiste anliegt, so dass sich Lücken bilden und Luft wieder eindringt.
Abgenutzte oder falsch ausgerichtete Dichtungen
Dichtungen sorgen für die Luftdichtheit. Diese gummiartigen Teile dichten den Deckel und die Vakuumkammer ab, und sobald sie versagen, ruinieren Luftlecks alles.
Abgenutzte Dichtungen verlieren mit zunehmendem Gebrauch ihre Elastizität und bekommen Risse oder Einrisse. Ich überprüfe sie gerne alle paar Monate, nur einen kurzen Blick, denn selbst winzige Beschädigungen lassen Luft eindringen. Wenn Sie während des Vakuumierzyklus Luftlecks oder schwache Versiegelungen bemerken, sind Dichtungen normalerweise das Erste, was ich überprüfen würde.
Manchmal verrutschen Dichtungen beim Reinigen oder einfach durch den normalen Gebrauch. Das führt zu Lücken, durch die Luft eindringt, sodass sich das Vakuum nie wirklich aufbaut. Der Beutel enthält dann Luft, egal was passiert.
Lebensmittelreste auf den Dichtflächen sind ebenfalls ein Problem. Halten Sie diese Bereiche sauber, genau wie die Versiegelungsleiste.
Falsche Beutelplatzierung
Die Positionierung des Beutels macht einen großen Unterschied. Schon eine kleine Abweichung führt zu schwachen Versiegelungen oder Totalausfällen.
Der Beutel sollte den Vakuumkanal um etwa 5-7,5 cm überlappen. So kann die Luft richtig entweichen und die Versiegelungsleiste hat genug Material zum Arbeiten. Wenn Sie nicht genug Überhang lassen, kann der Beutel den Versiegelungsbereich nicht erreichen. Bei zu viel Überhang knittert der Beutel, wodurch Falten entstehen, die Luft einschließen.
Verknitterte Beutelöffnungen sind ein großes Problem. Wenn das Material nicht glatt und flach über dem Versiegelungsstreifen liegt, bilden sich in den Falten Lufteinschlüsse. Diese Stellen werden zu Schwachstellen, an denen später Luft entweicht.
Überfüllte Beutel verursachen ebenfalls Probleme. Wenn Lebensmittel zu nah an der Öffnung verpackt sind, geraten sie in die Quere oder werden in den Vakuumkanal gesaugt. Ich lasse immer etwas Platz oben, um den Versiegelungsbereich sauber und offen zu halten.
Beutelqualität und Perforationen
Nicht alle Vakuumbeutel sind gleich, und billige Beutel verursachen Versiegelungsfehler, selbst wenn Ihr Gerät perfekt funktioniert.
Gute Beutel verwenden dickes, mehrlagiges Material, das für Heißsiegeln und Vakuumdruck ausgelegt ist. Billigere Beutel sind oft zu dünn, so dass das Heizelement keine feste Verbindung herstellen kann, ohne durchzubrennen. Sie reißen auch leichter ein, besonders bei scharfen Lebensmitteln wie Knochen oder Nudeln.
Selbst bei Qualitätsbeuteln können scharfe Kanten während des Vakuumierens Löcher verursachen, wenn sich Dinge verschieben und an den Seiten drücken. Gefrierbrand um Lebensmittel ist oft der erste Hinweis darauf, dass ein winziger Einstich Luft wieder eindringen ließ.
Die Verwendung des falschen Beutels für Ihr Gerät ist ein weiteres Problem. Strukturierte oder geprägte Beutel funktionieren mit externen Vakuumiergeräten, während glatte Beutel für Kammergeräte sind. Wenn Sie diese verwechseln, erhalten Sie niemals eine gute Versiegelung, egal wie gut Ihr Gerät funktioniert.
Schritt für Schritt: Was tun, wenn ein Beutel seine Versiegelung verliert
Wenn Sie einen Beutel mit einer schlechten Versiegelung finden, warten Sie nicht. Schnelles Handeln hilft, Ihre Lebensmittel vor Gefrierbrand oder Verderb zu bewahren. Normalerweise können Sie einfach denselben Beutel neu versiegeln, einen neuen verwenden oder Ihr Vakuumiergerät auf Probleme überprüfen.
Beutel entfernen und erneut versiegeln
Zuerst legen Sie Ihre Lebensmittel auf eine saubere, trockene Oberfläche oder in einen temporären Behälter. Schauen Sie sich die alte Versiegelung genau an, um Falten, Knicke oder Essensreste zu finden, die die Versiegelung beeinträchtigt haben könnten.
Schneiden Sie die fehlerhafte Versiegelung ab und lassen Sie mindestens 5 cm Beutel über den Lebensmitteln. Das gibt Ihnen genug Platz für eine frische Versiegelung, ohne die Öffnung zu überladen.
Bevor Sie erneut versiegeln, wischen Sie die inneren Ränder des Beutels mit einem sauberen, trockenen Tuch ab, um Feuchtigkeit oder Krümel zu entfernen. Selbst das kleinste Staubkorn kann verhindern, dass das Vakuumiergerät eine solide Versiegelung herstellt.
Richten Sie den Beutel vorsichtig im Versiegelungskanal aus und verwenden Sie dabei alle Führungen, die Ihr Gerät hat. Eine gute Platzierung sorgt für eine gerade und dichte Versiegelung. Drücken Sie den Deckel nach unten und lassen Sie den vollständigen Zyklus durchlaufen, bevor Sie den Beutel entnehmen.
Testen Sie die neue Versiegelung, indem Sie den Beutel vorsichtig zusammendrücken oder ihn in Wasser tauchen, um nach entweichenden Blasen zu suchen.
Beschädigte Beutel ersetzen
Manchmal arbeitet der Beutel selbst einfach nicht mit, egal wie vorsichtig man ist. Überprüfen Sie die gesamte Oberfläche auf Einstiche, Risse oder abgenutzte Stellen, die die Versiegelung ruinieren könnten.
Wenn Sie Schäden entdecken, versuchen Sie nicht, sie zu reparieren. Legen Sie Ihre Lebensmittel stattdessen in einen frischen Beutel. Die Verwendung eines bereits beschädigten Beutels verschwendet nur Ihre Zeit und gefährdet Ihre Lebensmittel.
Bei der Fehlersuche nehmen Sie einen neuen Beutel, versiegeln ihn mit etwas Luft im Inneren und tauchen ihn in Wasser. Wenn Sie Blasen sehen, handelt es sich um einen Herstellungsfehler. Dieser schnelle Test hilft Ihnen herauszufinden, ob es sich um einen Benutzerfehler oder einfach um einen schlechten Beutel handelt.
Scharfe Lebensmittel, wie Knochenstücke oder harte, gefrorene Produkte, können durch den Kunststoff stechen. Ich bevorzuge es, diese doppelt zu verpacken oder sie zuerst in ein Papiertuch einzuwickeln, um Einstiche während des Vakuumierens zu vermeiden.
Bewahren Sie Ihre Vakuumierbeutel an einem kühlen, trockenen Ort und vor direkter Sonneneinstrahlung geschützt auf. Hitze und UV-Strahlen zersetzen den Kunststoff, wodurch die Beutel brüchig werden und eher reißen.
Reinigungsflächen des Gerätes reinigen
Ein Vakuumiergerät, das nicht richtig abdichtet, muss normalerweise gereinigt werden. Lebensmittelreste, Fett oder Feuchtigkeit auf dem Dichtungsstreifen oder der Dichtung können die Verbindung durch Hitze verhindern.
Ziehen Sie den Stecker Ihres Geräts und wischen Sie dann die Dichtungsleiste mit einem mit Reinigungsalkohol befeuchteten Tuch ab. Dadurch werden Öle und Ablagerungen entfernt, die die Dichtung beeinträchtigen können. Überprüfen Sie auch die Schaumstoffdichtungen um die Kammer auf Krümel oder Risse.
Die Wartung des Vakuumiergeräts beinhaltet einen Blick auf die Tropfschale und den Vakuumkanal, um Flüssigkeit zu entdecken. Reinigen Sie diese Stellen nach einigen Anwendungen, besonders wenn Sie feuchte Lebensmittel vakuumieren.
Wenn der Dichtungsstreifen gerissen, abgeflacht oder abgenutzt aussieht, tauschen Sie ihn aus. Die meisten Marken verkaufen Ersatzteile, und Sie können die Arbeit in der Regel in wenigen Minuten mit einfachem Werkzeug erledigen.
Führen Sie nach der Reinigung einen leeren Testzyklus durch, um sicherzustellen, dass das Gerät ein gutes Vakuum erzeugt und die Dichtung fest hält. Besser jetzt überprüfen, als einen weiteren Beutel Lebensmittel zu ruinieren.
Vermeidung zukünftiger Versiegelungsprobleme
Ehrlich gesagt treten die meisten Versiegelungsfehler auf, noch bevor Sie überhaupt den Versiegelungsknopf drücken. Ein paar einfache Gewohnheiten, wie die richtige Beutelpositionierung, die Wahl des richtigen Beutels und die regelmäßige Reinigung Ihres Geräts, können Ihnen eine Menge Frustration und verschwendete Lebensmittel ersparen.
Richtige Techniken zur Beutelpositionierung
Die Beutelpositionierung scheint einfach zu sein, aber sie bereitet vielen Menschen Schwierigkeiten. Der häufigste Fehler? Falten oder Knicke im Bereich der Versiegelung. Diese winzigen Kanäle lassen Luft eindringen und ruinieren die gesamte Versiegelung.
Glätten Sie den Beutel vor dem Versiegeln und stellen Sie sicher, dass das offene Ende vollständig in der Versiegelungskammer liegt. Legen Sie ihn gerade über das Heizelement, ohne Verdrehungen oder Knicke. Lassen Sie 7,5 bis 10 cm Platz zwischen Ihren Lebensmitteln und dem oberen Ende des Beutels, damit das Versiegelungsgerät genügend Platz für seine Arbeit hat.
Wenn Sie Gegenstände mit scharfen Kanten versiegeln, wie Knochen oder Nudeln, halten Sie diese von der Versiegelungslinie fern. Für Flüssigkeiten oder feuchte Lebensmittel frieren Sie diese zuerst ein oder kippen Sie den Beutel, damit keine Feuchtigkeit zur Versiegelung gesaugt wird. Schon eine kleine Menge Flüssigkeit in der Nähe des Heizstreifens kann die Verbindung beeinträchtigen.
Verwendung kompatibler Beutel und Beuteltypen
Nicht jeder Beutel funktioniert mit jedem Vakuumierer, und der falsche Beutel garantiert fast eine fehlgeschlagene Versiegelung. Beutel, die zum Vakuumieren hergestellt wurden, haben strukturierte Kanäle, die während des Vakuumierzyklus das Entweichen von Luft erleichtern.
Generische Beutel oder solche, die nicht für Ihr Gerät hergestellt wurden, könnten zu dick, zu dünn sein oder einfach nicht die für ein gutes Vakuum erforderliche Textur aufweisen. Ich würde bei Beuteln bleiben, die zu Ihrem Vakuumierer passen, sei es Kammerbeutel, Klemmbeutel oder auf Größe zugeschnittene Rollen.
Für wirklich nasse oder ölige Lebensmittel versuchen Sie Beutel mit eingebauten Flüssigkeitsbarrieren oder absorbierenden Streifen. Sie kosten etwas mehr, ersparen Ihnen aber Versiegelungskopfschmerzen. Und nochmals, bewahren Sie Ihre Beutel an einem kühlen, trockenen Ort auf. Hitze und Sonnenlicht zerstören den Kunststoff und die Versiegelung.
Routinemäßige Wartung des Vakuumiergeräts
Eine kleine regelmäßige Reinigung sorgt dafür, dass Ihr Vakuumiergerät jahrelang reibungslos funktioniert. Nach jedem Gebrauch wischen Sie die Versiegelungsleiste und die Dichtung mit einem weichen, mit Reinigungsalkohol befeuchteten Tuch ab. Dadurch werden Essensreste und Öl entfernt, die die Wärmeübertragung blockieren können.
Überprüfen Sie den Vakuumkanal und die Tropfschale auf Schmutz oder Flüssigkeit, die den Luftstrom blockieren oder die Pumpe beschädigen könnten. Die meisten Geräte haben eine herausnehmbare Tropfschale. Leeren und waschen Sie diese ab und zu. Untersuchen Sie die Dichtung auf Risse oder harte Stellen und tauschen Sie sie aus, wenn sie abgenutzt aussieht.
Wenn Ihre Versiegelungen schwach oder ungleichmäßig aussehen, erhöhen Sie die Versiegelungszeit um ein paar Sekunden. Manchmal braucht das Heizelement einfach etwas mehr Zeit, besonders bei dickeren Beuteln oder in kühleren Räumen. Einmal im Monat versiegeln Sie einen leeren Beutel und tauchen ihn in Wasser, um nach Blasen zu suchen. Dies hilft Ihnen, Lecks zu erkennen, bevor sie Ihre Lebensmittel ruinieren.
Zu überprüfende und zu wartende Schlüsselkomponenten
Drei Bereiche sind für die Dichtungszuverlässigkeit wirklich wichtig: die Dichtung und der Dichtungsstreifen, die die eigentliche Verbindung herstellen, der Vakuumkanal und die Pumpe, die die Luft absaugen, und die Oberflächen, die Sie mit Reinigungsalkohol abwischen. Wenn Sie diese Teile im Auge behalten, verhindern Sie die meisten Dichtungsprobleme.
Pflege von Dichtung und Versiegelungsstreifen
Die Dichtung bildet eine luftdichte Kammer um Ihren Beutel, und der Versiegelungsstreifen schmilzt den Kunststoff, um die Versiegelung zu erzeugen. Ich würde beides nach etwa 10 bis 15 Anwendungen überprüfen, oder wenn Sie schwache Versiegelungen bemerken.
Suchen Sie auf der Dichtung nach Rissen oder harten Stellen. Fahren Sie mit dem Finger darüber. Wenn sie sich uneben oder eingekerbt anfühlt, ist das ein Problem. Eine beschädigte Dichtung lässt während des Vakuumierens Luft eindringen, sodass Sie niemals eine solide Versiegelung erhalten.
Überprüfen Sie den Versiegelungsstreifen auf Brandspuren, Essensreste oder ungleichmäßigen Verschleiß. Er sollte über die gesamte Breite gleichmäßig heiß werden. Sie können dies testen, indem Sie einen leeren Beutel versiegeln und die Versiegelungslinie betrachten. Wenn sie nicht über die gesamte Breite klar und stark ist, ist es Zeit für einen neuen Streifen.
Tauschen Sie Dichtungen aus, wenn Sie Beschädigungen feststellen oder wenn versiegelte Beutel innerhalb weniger Stunden aufblähen. Die meisten Versiegelungsstreifen halten bei regelmäßigem Gebrauch 6 bis 12 Monate, aber ölige oder feuchte Lebensmittel können sie schneller verschleißen. Halten Sie ein paar Ersatzteile bereit, damit Sie nicht mitten in der Zubereitung mit einem defekten Versiegelungsgerät festsitzen.
Überprüfung des Vakuumkanals und der Pumpe
Der Vakuumkanal leitet die Luft vom Beutel zur Pumpe, und er verstopft schneller, als man denkt. Krümel, Flüssigkeit und feiner Schmutz sammeln sich hier an.
Überprüfen Sie den Kanal nach jedem Gebrauch und leuchten Sie mit einer Taschenlampe hinein. Wenn Sie Ablagerungen sehen, entfernen Sie diese mit einem Pfeifenreiniger oder einer kleinen Bürste. Verwenden Sie kein Wasser im Kanal; Feuchtigkeit kann das Innere beschädigen.
Hören Sie auf Ihre Pumpe, wenn sie läuft. Eine gute Pumpe summt gleichmäßig und saugt schnell Luft ab. Wenn Sie Schleifgeräusche, seltsame Vibrationen oder langsames Saugen hören, könnte dies auf Pumpenverschleiß oder eine Verstopfung hindeuten.
Wenn Ihr Modell einen Lufteinlassfilter hat, überprüfen Sie ihn. Ein verstopfter Filter lässt die Pumpe übermäßig arbeiten und verkürzt ihre Lebensdauer. Reinigen Sie ihn mit Druckluft oder tauschen Sie ihn gegen einen neuen aus. Wenn Sie täglich Lebensmittel vakuumieren, überprüfen Sie ihn monatlich; bei gelegentlicher Verwendung reicht vierteljährlich.
Reinigungsverfahren mit Reinigungsalkohol
Reinigungsalkohol ist hier Ihr Freund. Er löst Öle, Essensreste und Feuchtigkeit, ohne Fusseln oder Schlieren zu hinterlassen. Ich bevorzuge 70%iges Isopropylalkohol, da es schnell trocknet und Kunststoff nicht angreift.
Befeuchten Sie ein fusselfreies Tuch und wischen Sie den Dichtungsstreifen nach jedem Gebrauch ab. Achten Sie besonders auf die Stellen, an denen der Beutel aufliegt, da sich dort Fett und Krümel ansammeln. Lassen Sie ihn eine halbe Minute trocknen, bevor Sie erneut versiegeln.
Wischen Sie die Dichtung wöchentlich mit einem feuchten, alkoholgetränkten Tuch ab. Wenn etwas kleben geblieben ist, verwenden Sie Ihren Fingernagel oder einen weichen Plastikschaber. Verwenden Sie nichts Scharfes oder Scheuerndes.
Wischen Sie die Öffnung des Vakuumkanals und den Bereich um sie herum ab, um zu verhindern, dass Schmutz ins Innere gelangt. Für die Außenseite und das Bedienfeld sorgt ein schnelles Abwischen mit Alkohol für Sauberkeit und funktionierende Tasten. Die gesamte Routine dauert weniger als zwei Minuten und reduziert Dichtungsfehler erheblich.
Häufig gestellte Fragen
Diese schnellen Antworten können Ihnen helfen, Lecks zu erkennen, gelagerte Lebensmittel zu schützen und zukünftige Versiegelungsprobleme zu vermeiden.
Was sind die einfachsten Anzeichen dafür, dass ein vakuumversiegelter Beutel im Kühl- oder Gefrierschrank undicht geworden ist?
Achten Sie auf einen aufgeblähten Beutel, lockeres Plastik, Lufteinschlüsse, Kondenswasser oder Reif im Inneren. Gefrierbrand und unerwartete Veränderungen der Lebensmittel können ebenfalls darauf hinweisen, dass Luft in den Beutel gelangt ist.
Warum versagt eine Vakuumversiegelung manchmal nach dem Einfrieren, obwohl sie anfangs perfekt aussah?
Kalte Temperaturen können schwache Dichtungen freilegen, wenn sich der Beutel zusammenzieht. Feuchtigkeit in der Nähe der Dichtung, scharfe Lebensmittelkanten, Falten oder kleine Perforationen können ebenfalls nach dem Einfrieren zu Lecks führen.
Wenn ein Beutel seine Versiegelung verliert, sind die Lebensmittel dann noch sicher zu essen, oder sollten sie weggeworfen werden?
Die Sicherheit hängt davon ab, wie lange die Versiegelung unterbrochen war und wie die Lebensmittel gelagert wurden. Werfen Sie Lebensmittel weg, die ungewöhnlich riechen, schleimig sind, verdorben aussehen oder eine unsichere Temperaturgeschichte haben.
Was ist der schnellste Weg, einen Beutel neu zu versiegeln, ohne den ganzen Beutel oder die Lebensmittel darin zu verschwenden?
Schneiden Sie die fehlerhafte Versiegelung ab, trocknen und reinigen Sie den neuen Versiegelungsbereich und versiegeln Sie den Beutel dann erneut. Lassen Sie mindestens 5 bis 8 Zentimeter Platz zwischen den Lebensmitteln und der Versiegelungslinie.
Was sind die häufigsten Versiegelungsfehler, die langsame Lecks verursachen, wie Feuchtigkeit, Krümel oder Falten?
Häufige Ursachen sind Feuchtigkeit, Fett, Krümel, Falten, überfüllte Beutel und Lebensmittel, die zu nah an der Öffnung liegen. Jede dieser Ursachen kann verhindern, dass die Kunststoffschichten gleichmäßig miteinander verbunden werden.
Wie kann man eine Versiegelung testen und zukünftige Lecks beim Vorkochen von Mahlzeiten oder Versiegeln von Flüssigkeiten verhindern?
Überprüfen Sie die Versiegelungslinie, drücken Sie den Beutel vorsichtig und achten Sie auf entweichende Luft. Gefrieren Sie Flüssigkeiten vor dem Versiegeln ein, lassen Sie zusätzlichen Kopfraum, halten Sie die Öffnung trocken und reinigen Sie den Versiegelungsstreifen und die Dichtungen regelmäßig.
Teilen:
Wie man wiederverwendbare Vakuumierbeutel vor dem Lagern vollständig trocknet
So wählen Sie Glasgefäßgrößen für Mehl, Reis, Nudeln, Müsli und Kaffee