

Check out our latest glass jars collection!
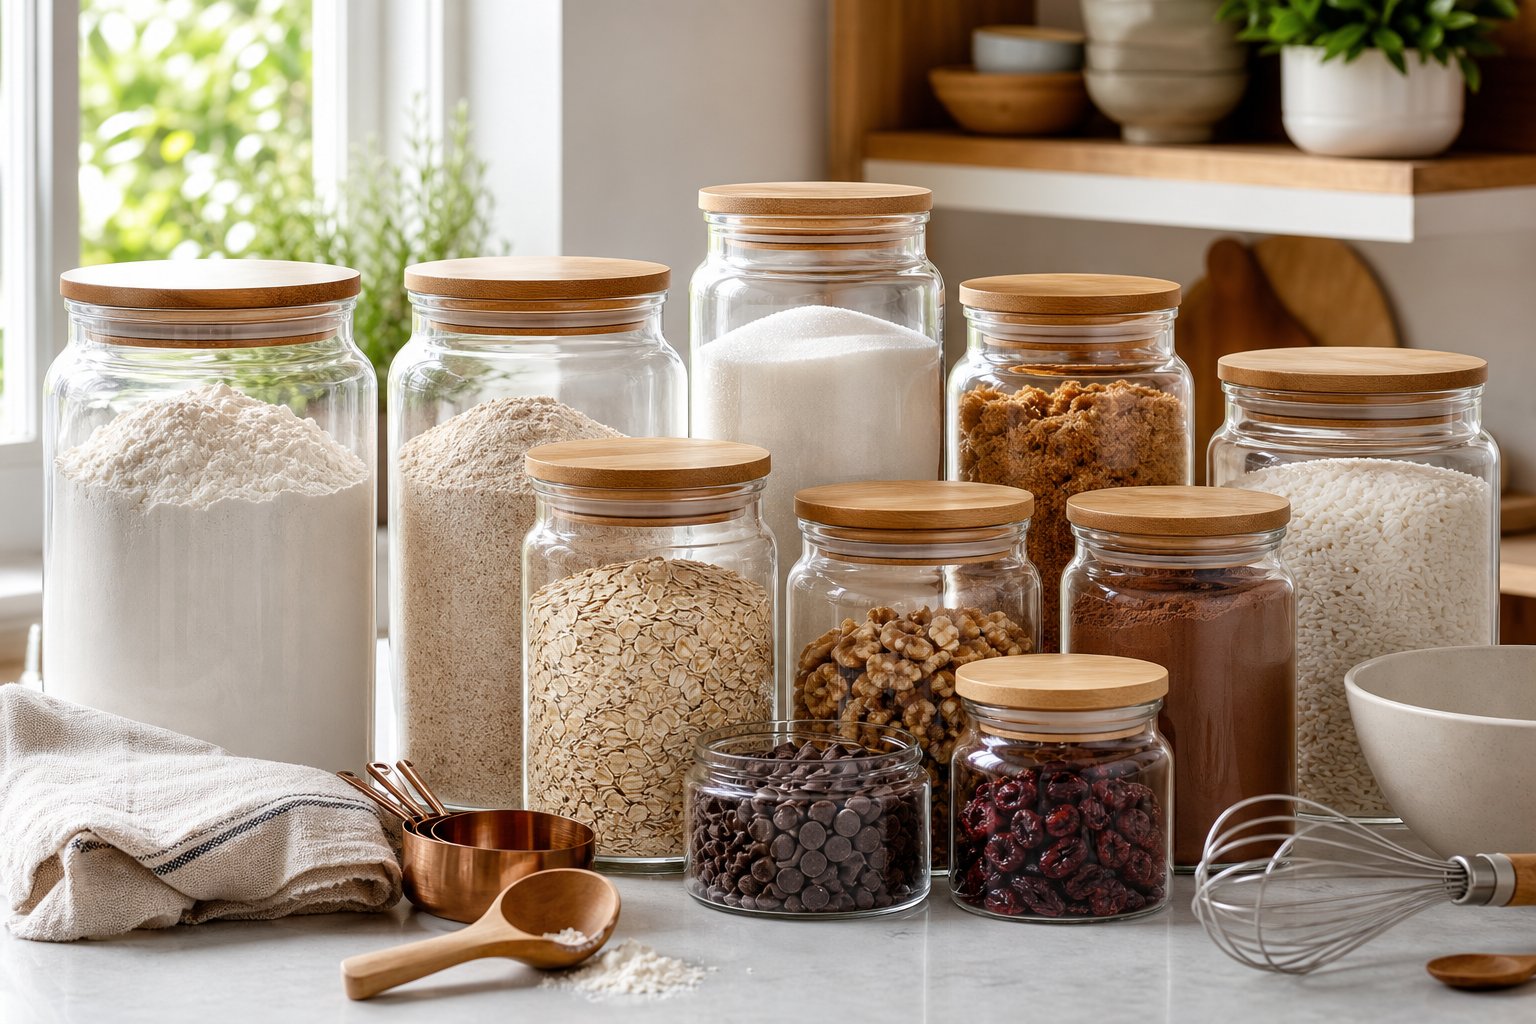
Baking gets easier when you can clearly see what you have and reach it without digging through bags and boxes. The best way to organize baking ingredients in glass jars is to sort ingredients by category, choose jar sizes based on how much you store, and keep everything clearly labeled and within easy reach.
A practical glass jar system can reduce pantry clutter, make ingredients easier to identify, and help protect dry goods when the jars have secure, well-fitting lids. It can also create a cleaner, more cohesive kitchen without sacrificing everyday convenience.
Here is how to create a glass jar system that works for regular baking, from choosing appropriate jar sizes and lids to arranging, labeling, refilling, and rotating your ingredients.
Key Takeaways
- A well-planned glass jar system makes baking ingredients easier to see, access, and use.
- Choosing suitable jar sizes, secure lids, and clear labels helps keep dry ingredients organized and protected.
- Thoughtful placement and regular rotation make everyday baking and grocery planning more efficient.
Build a Practical Glass Jar Baking System
A practical glass jar system starts with three things: knowing what you have, organizing ingredients according to how often you use them, and giving each item a consistent place in your pantry.
Take Stock of Your Baking Supplies
Before buying jars, remove your baking ingredients from the pantry and review what you already have. This makes it easier to spot duplicate packages, nearly empty bags, and ingredients that are past their best-by or use-by dates.
Combine duplicates only when the ingredients are the same and still in good condition. Measure or estimate how much flour, sugar, brown sugar, cocoa powder, baking soda, baking powder, salt, and other staples you usually keep on hand. This will help you choose jars based on your actual storage needs instead of guessing.
Group Ingredients by How Often You Use Them
Once you know what you have, organize ingredients according to how frequently you use them. Everyday staples should receive the most accessible shelf space, while specialty ingredients can be stored farther back or on a higher or lower shelf.
A simple three-tier system can work well:
- Frequent use: flour, sugar, baking soda, baking powder, and salt
- Regular use: cocoa powder, chocolate chips, oats, and brown sugar
- Occasional use: sprinkles, food coloring, extracts, and decorating sugars
This approach keeps frequently used ingredients visible while reducing the chance that specialty items become buried and forgotten.
Create a Dedicated Baking Zone
Choose one cabinet, shelf, or pantry section for baking ingredients whenever space allows. Keeping baking supplies separate from unrelated canned goods, snacks, and pantry staples makes ingredients easier to locate.
If possible, position your baking zone near the area where you usually mix and prepare recipes. Flour, sugar, leaveners, mix-ins, and decorating ingredients can then stay within convenient reach.
Using clear glass jars in coordinated shapes or finishes can create a tidy appearance while also making it easier to see when ingredients are running low. The goal is not simply to create an attractive shelf, but to build a storage system that makes everyday baking easier.
Choose the Right Jar Shapes, Sizes, and Lids
Jar shape, capacity, and lid design all affect how practical your baking storage will be. Choosing the right combination makes ingredients easier to scoop, refill, store, and protect.
Use Wide-Mouth Jars for Scooping Ingredients
Wide-mouth jars are especially useful for ingredients you regularly scoop, including flour, sugar, oats, and brown sugar. A wide opening gives measuring cups and scoops more room and can make the jar easier to clean.
Narrow-neck jars may suit ingredients that are poured rather than scooped, but they can be inconvenient for bulkier baking staples. For ingredients you reach for frequently, prioritize comfortable access over appearance alone.
Match Jar Capacity to Bulk Purchases
Choose jar sizes according to the amount of each ingredient you typically purchase and store. Small containers work well for ingredients used in modest quantities, while frequently purchased staples may require larger jars or a separate container for excess product.
As a general starting point:
- 1 to 2 cups: baking powder, small quantities of cocoa powder, and spices
- 3 to 4 cups: sugar, brown sugar, cornstarch, and similar ingredients
- 6 to 8 cups or more: flour, oats, and other frequently used staples
Because package sizes vary, measure your usual ingredients before choosing jars. Square or straight-sided glass jars can also use shelf space efficiently because they can sit closely together.
Select Lids That Help Protect Dry Goods
A well-fitting lid is important for ingredients that need protection from humidity, odors, and everyday pantry exposure. For staples such as flour, sugar, and oats, choose jars with secure closures designed for food storage.
Clamp-style lids commonly use gaskets to create a close seal, while screw-top jars can also work well when their lids fit securely. Decorative wood lids can be suitable when they include a food-safe sealing ring or insert designed for the jar.
Check seals periodically. If a gasket becomes damaged or a lid no longer closes properly, replace the affected component when possible.
Store Core Baking Ingredients for Freshness and Easy Access
The right jar size and shelf placement can make frequently used baking staples easier to access while helping you monitor how much remains.
Set Up Large Jars for Flours and Oats
Reserve larger jars for ingredients such as flour and oats because they are often purchased in greater quantities and used regularly. The exact jar capacity you need depends on the package size you normally buy, so check the volume before transferring the entire package.
Use clearly labeled containers if you keep several types of flour, such as all-purpose, bread, or cake flour. Similar-looking ingredients can be difficult to distinguish once removed from their original packaging.
If shelf space is limited, straight-sided or square jars can help you use available space efficiently.
Keep Sugars, Leaveners, and Mix-Ins Within Reach
Frequently used ingredients such as brown sugar, baking soda, baking powder, and chocolate chips should be stored where they are easy to reach.
Brown sugar is particularly sensitive to moisture loss, so store it in a securely sealed container. If you use a food-safe brown sugar keeper or terracotta disc, follow its care and usage instructions.
Baking soda and baking powder can be stored in smaller containers if you purchase them in modest quantities. Label them carefully, record relevant package dates, and avoid storing more than you are likely to use within a reasonable period.
Organize Small Ingredients in Compact Containers
Compact jars work well for smaller ingredients such as seeds, dried fruit, baking spices, and decorating ingredients. Short, wide containers can be particularly useful on narrow shelves or in drawers because their contents remain visible and accessible.
Keep strongly scented spices separate from ingredients that may absorb odors. If you store items such as rice or dried beans for use as pie weights, keep them clearly labeled and separate from ingredients intended for regular cooking.
Arrange Jars for Faster Everyday Baking
Once your jars are filled and labeled, thoughtful placement can make the system considerably easier to use. Prioritize visibility, frequency of use, and comfortable access.
Place Everyday Ingredients at Eye Level
Store the ingredients you use most often at eye level whenever possible. Flour, sugar, baking powder, and other regular staples should not be hidden behind specialty ingredients or placed on shelves that are difficult to reach.
Reserve less accessible areas for ingredients used only for occasional recipes, such as specialty flours, decorating sugars, or seasonal baking supplies.
Eye-level shelf space is valuable, so use it for the jars that support your everyday baking routine.
Use Shelf Risers and Vertical Space
Pantry shelves often leave unused vertical space above shorter jars. Shelf risers and tiered organizers can help make smaller containers visible without requiring you to stack glass jars directly on top of one another.
Useful options include:
- Shelf risers for creating a second level for smaller jars
- Tiered stands for keeping labels visible in deeper cabinets
- Wall-mounted storage for suitable lightweight containers when securely installed
Choose organizers that are stable, appropriately sized for your jars, and suitable for the weight they need to support.
Keep Meal Prep Ingredients Easy to Find
If baking or meal preparation is part of your weekly routine, group ingredients you commonly use together. Oats, chia seeds, nuts, baking mixes, and other frequently paired ingredients can be stored in the same section instead of being scattered throughout the pantry.
Grouping ingredients by purpose can reduce unnecessary searching when you are preparing several recipes at once. Clear glass also makes it easier to check quantities at a glance.
Label, Refill, and Rotate Your Baking Jars
A jar system works best when labels remain accurate and ingredients are rotated consistently. Clear naming, careful refilling, and regular inventory checks help turn decorative storage into a practical pantry system.
Add Clear Names and Date Labels
Label every jar with the ingredient name. This is especially important for ingredients such as flour, confectioners' sugar, cornstarch, baking soda, and baking powder, which can look similar once transferred to clear containers.
You may also want to record the purchase, opening, or refill date, depending on how you manage pantry inventory. Useful labeling habits include:
- Write the ingredient name clearly
- Include the variety, such as all-purpose or cake flour
- Add a useful date when freshness tracking is important
- Place labels consistently so they are easy to scan
Reusable labels can make updates easier when jars are cleaned and repurposed.
Refill Jars Without Burying Older Ingredients
Before adding a new package to an existing jar, check what remains inside. Continually covering older ingredients with newer stock can make it difficult to rotate food properly or track how long it has been stored.
When practical, use the older ingredient first. Clean the jar when needed, and make sure it is completely dry before refilling it with dry goods. This is especially important for ingredients that are sensitive to moisture or contain natural oils, including nuts, oats, seeds, and coconut.
Any moisture remaining inside a storage container can contribute to clumping and may create conditions that shorten the usable life of dry ingredients.
Use Visible Inventory to Plan Grocery Shopping
One advantage of clear glass jars is that you can see how much is left without opening every container. Use that visibility when planning your grocery list.
When a frequently used jar is running low, add the ingredient to your shopping list before it is completely empty. This can also help reduce unnecessary duplicate purchases because you can quickly see what is already available.
A regular glance across your baking shelf makes restocking more intentional and keeps pantry inventory easier to manage.
Make Your Baking Storage Functional and Beautiful
A well-organized baking station can improve everyday convenience while giving your pantry or open shelving a more cohesive appearance. The most effective setup balances aesthetics with accessibility and food-storage needs.
Create a Cohesive Look With Coordinated Jars
Using coordinated jars can create a cleaner visual system and make shelves easier to scan. You do not need every container to be identical. Choosing a consistent material, lid finish, or general shape can create a polished look while allowing you to use different capacities.
Wide-mouth jars are especially practical for flour, sugar, oats, and other ingredients that need to be scooped. Smaller jars can hold baking soda, sprinkles, spices, or other ingredients used in smaller quantities.
Larger containers are better suited to bulkier staples such as oats, flour, and chocolate chips. A thoughtful mix of sizes keeps storage practical without making the shelf feel visually inconsistent.
Style Open Shelves Without Sacrificing Convenience
Open shelving can be both attractive and functional when your most frequently used ingredients remain easy to reach. Keep staples such as flour and sugar toward the front, then group related ingredients together.
For example, cocoa powder, chocolate chips, and decorating ingredients can share one area, while flours and leavening ingredients can occupy another.
To keep shelves balanced and practical:
- Group jars of similar heights when it improves visibility
- Place taller containers toward the back when they will not block smaller jars
- Leave enough room to remove jars comfortably
- Move seasonal ingredients forward only when you expect to use them regularly
The result should support the way you actually bake rather than creating a shelf that looks organized but is difficult to use.
Maintain a Clean, Food-Safe Storage Routine
Make sure glass jars are clean and fully dry before adding dry ingredients. Moisture can cause clumping and may compromise the quality of stored food.
Wash jars with warm, soapy water as needed and follow any manufacturer care instructions for lids, gaskets, or other removable parts. Wood lids may require different care from glass or plastic components, so avoid soaking them unless the manufacturer specifically indicates that it is safe.
Store baking ingredients away from excessive heat, moisture, and direct sunlight when appropriate. Periodically check package dates, ingredient condition, and jar seals so your baking shelf remains organized and ready to use.
Frequently Asked Questions
Which baking ingredients are best stored in glass jars?
Common dry baking ingredients such as flour, sugar, oats, cornstarch, cocoa powder, chocolate chips, dried fruit, and shredded coconut can be convenient to store in glass jars. Choose food-safe containers with suitable lids, and follow any specific storage instructions on the original packaging.
What size glass jars should I use for flour, sugar, oats, and chocolate chips?
The best size depends on how much you normally purchase. Larger jars are suitable for flour and oats, while smaller containers often work well for sugar, chocolate chips, and other mix-ins. Measure your usual package before choosing a jar so the contents fit comfortably.
How do I keep flour and other dry ingredients fresh in glass jars?
Use a clean, completely dry jar with a secure, well-fitting lid. Store dry ingredients away from excessive heat, humidity, and direct sunlight, and follow any storage guidance provided on the ingredient's packaging.
Should I use airtight lids for baking ingredients stored in the pantry?
Airtight or well-sealing lids are a good choice for many dry baking ingredients because they help limit exposure to humidity and pantry odors. The appropriate container can vary by ingredient, so check package storage instructions when needed.
What is the easiest way to label glass jars for everyday baking?
A label maker, reusable pantry label, or neatly written removable label can all work well. At minimum, include the ingredient name. You can also add the variety and a purchase, opening, or refill date when useful.
How can I organize baking jars in a small kitchen pantry?
Group jars by category, keep frequently used ingredients at eye level, and use shelf risers or tiered organizers to make better use of vertical space. Straight-sided or square jars can also help reduce unused space between containers.
Partager:
Glass Jars vs Plastic Containers: Which Is Better for Pantry Dry Goods?
Stone Drying Mat vs Microfiber Dish Mat: Which Is Better for Everyday Dish Drying?