

Check out our latest collection of compact vacuum sealer for food!
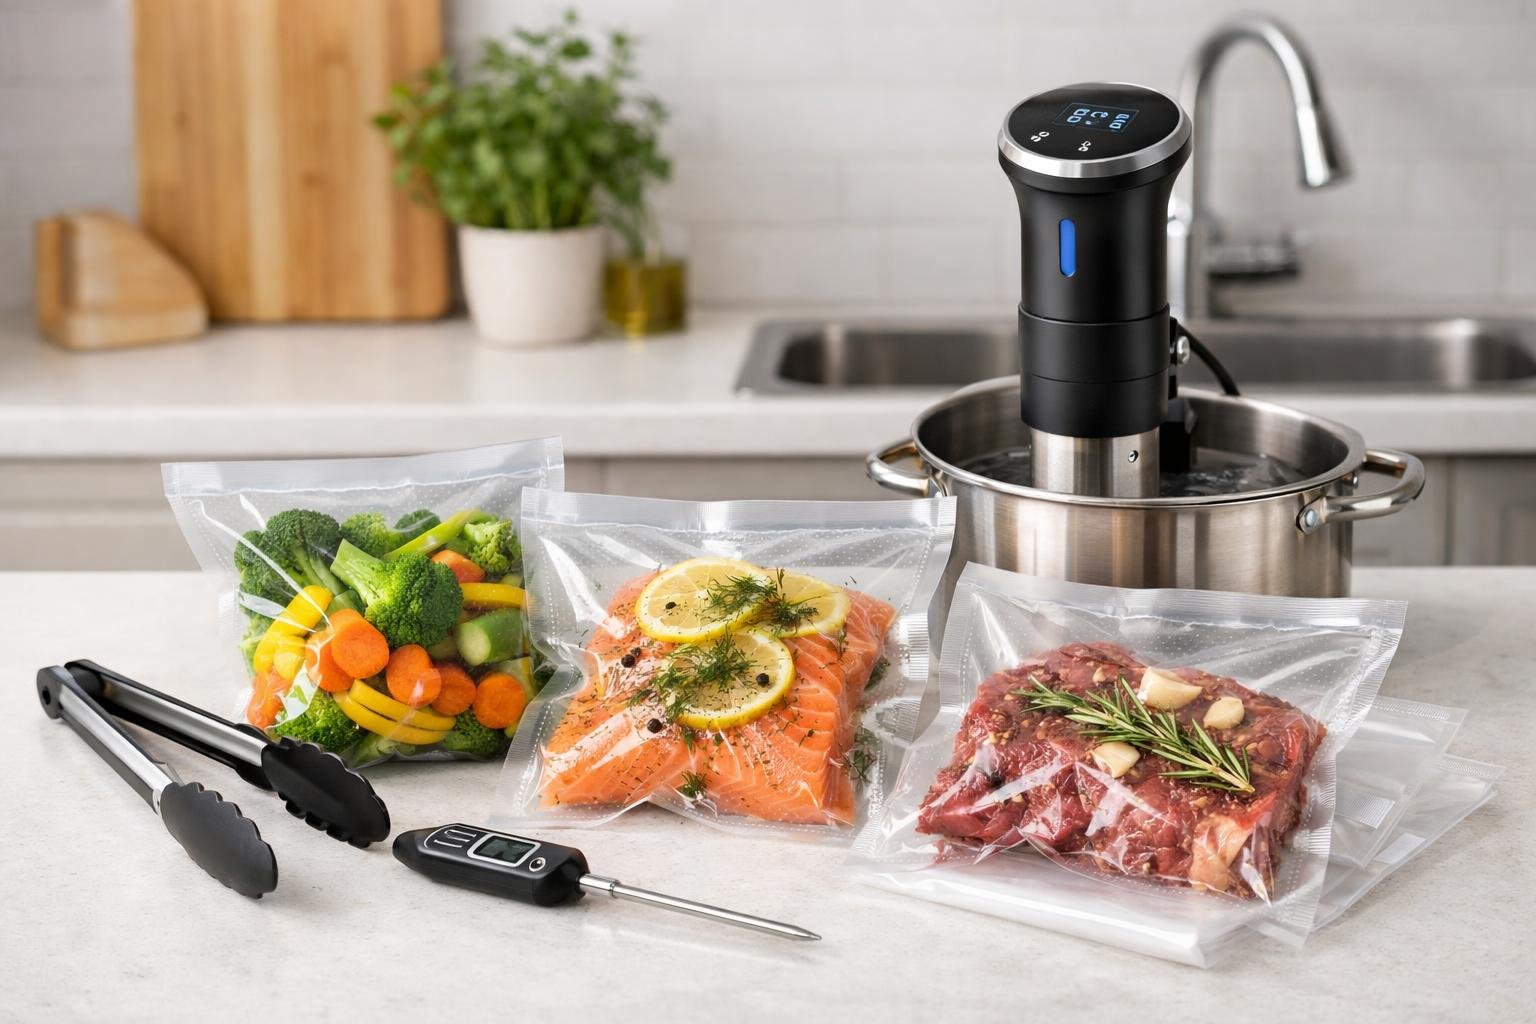
A great sous vide meal starts before the food ever hits the water. The bag you choose affects safety, texture, sealing strength, freshness, and how evenly your food cooks. For home cooks, the best sous vide bags are not just about convenience. They need to handle steady heat, hold a tight seal, keep air out, and fit the portions you cook most often.
The most important sous vide bag features are heat resistance up to 195°F, a reliable seal, food-grade BPA-free materials, and the right size for your meals. These features help prevent leaks, floating bags, uneven cooking, and unwanted food safety issues.
In this guide, you will learn which bag features matter most, how different bag styles compare, and how to choose the best option for safe, consistent sous vide cooking at home.
Key Takeaways
- Heat resistance, sealing quality, BPA-free materials, and sizing are the must-haves for sous vide bags
- Vacuum-sealed and reusable silicone bags deliver the best results and long-term value
- Good air removal and proper temperature ratings prevent cooking fails and keep your food safe
Essential Materials and Safety for Sous Vide Bags
What your sous vide bags are made of really matters for both safety and how your food turns out. Let’s look at what keeps bags safe for long cooking times and which certifications actually mean something when you’re shopping.
Understanding BPA-Free and Food-Grade Materials
BPA-free sounds reassuring, but it’s not the whole story. Some companies just swap BPA for other chemicals that can still end up in your food. Look for bags marked specifically as food-grade. They’ve been tested for direct contact with food.
The safest picks? Food-grade polyethylene and polypropylene. These don’t break down or leach chemicals, even after hours in hot water. Silicone bags are another solid option since they don’t need plasticizers or other weird additives.
Always check packaging for clear info about the material. If it just says “BPA-free” but not “food grade,” that’s not enough for sous vide. “Food safe” or “food grade” means someone actually tested it for this use.
Safety Standards and FDA Regulations
The FDA requires that any material touching your food during cooking doesn’t let through too many chemicals. Good bag makers test their products to meet these standards, but the FDA doesn’t pre-approve every bag.
Look for bags that mention FDA compliance or NSF certification. That’s a sign the company checked their materials against real food safety rules. If a bag’s been third-party tested, even better.
Temperature ratings are a big deal. The best sous vide bags will say their max safe temp, usually somewhere between 170°F and 195°F for polyethylene. Go above that and you risk the bag breaking down or leaching stuff you don’t want.
Are Sous Vide Plastic Bags Safe?
Plastic sous vide bags are safe if they’re made for sous vide and you stay within their temperature limits. Most sous vide recipes run between 130°F and 185°F, which is well below the danger zone for good plastics.
Don’t use regular storage bags or cheap vacuum bags that aren’t rated for cooking. Those might have sketchy additives or be too thin. Stick with bags made from pure, food-grade plastic.
A little common sense goes a long way. Check for holes or weak seals before you cook, keep bags out of direct sunlight, and don’t reuse bags that held raw meat. If you stick with certified bags from brands you trust and follow the temp guidelines, the risk is about as low as it gets.
Comparing Bag Types and Choosing the Right Style
Sous vide bags come in a few main types, and each has its place. Picking the right one depends on how often you cook this way, what you’re making, and how much you care about convenience or sustainability.
Vacuum Sealer Bags: Heavy-Duty and Versatile
Vacuum sealer bags plus a vacuum sealer are the gold standard for serious sous vide fans. These work with compatible vacuum sealing machines to suck out almost all the air, making a tight seal that keeps food submerged and heat even.
You’ll find pre-cut vacuum bags and rolls. Pre-cut bags are ready to go in standard sizes, which is super handy. Rolls let you cut the exact length you need, which is great for odd shapes or small servings.
Thickness matters. Most sous vide vacuum bags are 3 to 4 mil thick, which means they hold up during long, hot cooks. Many food-grade options are BPA-free and built for sous vide use.
These bags also stop freezer burn, so they’re perfect if you like to batch-cook and freeze meals. Yes, the sealer and bags cost more upfront, but if you sous vide often, it pays off.
Zip-Top and Water Displacement Bags
Zip-top bags are a no-fuss way to get started. No special gear needed. You use the water displacement method: lower the bag into the water with the zip above the surface, and let water pressure push out the air before sealing.
Standard freezer-weight zip bags are fine for most cooks under 158°F. For longer or hotter cooks, get heavy-duty freezer bags that are clearly labeled BPA-free and food-safe.
The downside? Sometimes air sneaks back in, making the bag float and mess with your cook. Double-bagging helps if you’re worried about leaks or expensive cuts of meat.
Zip-top bags are perfect for quick meals, marinating, or cooking a few different things at once. Cheap and everywhere, but not as tough as vacuum-sealed bags.
Reusable Silicone and Eco-Friendly Options
Reusable silicone bags are the eco-friendly pick. They handle high temperatures, cut out single-use plastic, and can last for years if you treat them right.
You’ll use the same water displacement trick as with zip bags. The pinch-lock seal works, but it takes a little more effort to get it closed tight.
They’re pricier up front. Expect $15 to $30 per bag. But if you sous vide a couple times a month or more, they pay for themselves in a year.
Cleaning silicone takes a bit of work. Oils and proteins stick, so wash them right after use with hot soapy water, and run them through the dishwasher now and then. The good news: silicone doesn’t hold onto smells or stains.
Pre-Cut, Rolls, and Bag Kits Explained
Sous vide bag kits usually give you a mix of bag types for different situations. You’ll get some pre-cut bags, a short roll, maybe a reusable bag. This is handy if you’re still figuring out your routine.
Pre-cut vacuum bags are our go-to for standard portions. We keep 8x12" and 11x16" sizes around. They fit most proteins and veggies. Consistent sizes make storage easier.
Vacuum seal rolls let you pick your own length. We cut them a couple inches longer than needed to account for sealing both ends. One 11"x16' roll gives you about a dozen bags, depending on what you’re packing.
With rolls, you have to seal one end first, which adds a step, but you won’t be stuck with bags that are too short or too big. They’re also cheaper per bag, usually around 30 to 40% less than pre-cut.
Sealing Techniques and Air Removal
Getting the air out is huge for sous vide. The method you pick affects how your food cooks, what bags you need, and how much you’ll spend.
Vacuum Sealers and Chamber Systems
Vacuum sealers are the most reliable way to get an airtight seal. External sealers suck air out through the open end and heat-seal it shut. Most home cooks use these. They run $50 to $200.
Chamber sealers are the pro-level option. They pull air from a whole chamber, so you can seal liquids and marinades without making a mess. But they’re $300 and up, so only worth it if you’re cooking a ton or meal prepping for an army.
Seal strength matters more than you’d think. Weak seals can fail on long cooks, especially over 24 hours. Look for machines with adjustable seal settings so you can tweak for different bags.
Mid-range external sealers handle almost everything a home cook needs. Just make sure you use bags made for vacuum sealing. They have textured channels to help air escape.
Double Zipper and Air Valve Designs
Reusable silicone bags with double zippers and air valves offer a middle ground between throwaway bags and full-on vacuum sealers. The double zipper gives you a backup if one fails.
Air valves are the trick here. You use a hand pump to suck out air, and the valve keeps it from coming back in. These bags run $15 to $25 each, but they’ll last for years if you’re careful.
The zipper is the weak spot. Cheap ones can pop open under pressure or heat. We always test new bags with water before risking a steak.
You won’t get every bit of air out like with a vacuum sealer. For most cooks, that’s fine, but if you’re doing super delicate fish or need absolute precision, a real vacuum is better.
Water Displacement Method Best Practices
The water displacement method is free and works with any decent freezer bag. Lower the bag into water, let pressure push out the air, then seal it above the waterline.
A couple tips: Keep the seal area dry or it won’t stick. We always wipe the top inch before closing. Lower the bag slowly. Don’t dunk it fast or you’ll trap air.
Quick steps:
- Fill a big pot or container with water
- Put food in the bag, close most of it
- Submerge slowly, keeping the opening above water
- Let water push air out
- Seal once the air’s gone
This method struggles with floaters like chicken breast. You’ll need to weigh those down or use a clamp. For liquids, freeze them a bit first or you’ll have a mess.
Honestly, this is perfect for beginners or travel. No special gear needed.
Hand Pump Kits for Beginners
Hand pump kits work with bags that have air valves. You pump out air by hand, getting a pretty good vacuum without plugging anything in. Most kits are $20 to $40 and come with a pump and a few bags.
You won’t get as tight a vacuum as with an electric sealer, maybe 70% air out versus 95%, but for sous vide, that’s usually enough.
Pumping takes some elbow grease. Expect 20 to 30 pumps per bag, depending on size. If you’re sealing a bunch, your hand might get tired.
We like these for people just starting out. They’re portable, don’t hog counter space, and let you try sous vide before dropping cash on a big machine. Plus, the bags are reusable, so you’re not constantly buying more.
The downside? The pumps are mostly plastic and can break or lose suction over time. Bag valves can wear out after 50 to 60 uses, but that’s still way better than single-use.
Durability, Sizing, and Kitchen Compatibility
How tough your sous vide bags are and whether they fit your food makes all the difference between a smooth cook and a mid-bath disaster. Pick sturdy bags, size them right for your portions, and stay within their heat limits for the best results, every time.
Durability and Heavy-Duty Performance
Heavy-duty bags with multi-layer designs spare you the headache of leaks during long cooks. We stick with bags made from PE/PA materials, usually 3.5 to 4 mil thick, since they stand up to bone fragments and pokey veggie edges.
Embossed channels, those little textured lines, help vacuum sealers suck out more air and create tighter seals. You’ll find these on most commercial-grade bags, and honestly, they just work better than the smooth ones.
The more layers, the better. Seven-layer bags shield your food much more effectively than three-layer ones, especially for marathon cooks. Thicker bags also survive repeated use, which is handy if you’d rather wash and reuse than toss after each meal.
Sizing for Steaks, Veggies, and Batch Cooking
Standard quart-size bags (8 x 12 inches) are perfect for single steaks, chicken breasts, or a pile of veggies. Gallon-size bags (11 x 16 inches) fit large cuts like whole tenderloins or meal-prep batches.
Pre-cut bags are convenient but not always flexible. Rolls let you snip off custom lengths, so you waste less when sealing weirdly shaped foods or tiny portions. This comes in handy when you’re cooking different proteins at once.
Having a few size options around just makes life easier. Three-size variety packs usually cover it: small for herbs or butter, medium for your everyday proteins, and large for family portions. That range gets most home cooks through any recipe without a drawer full of half-used boxes.
Sous Vide Weights, Clamps, and Accessories
Bags like to float during sous vide, which can mess with even cooking. Weights clip onto bag edges and keep everything under the water. They’re tiny but make a difference.
The right container matters too. You want enough depth for water to flow freely around the bags. Weights and clamps help keep bags away from the walls and heating elements so nothing sticks or overheats.
Some reusable bags come with built-in clips or weight pockets, which is nice but not really necessary. Honestly, simple binder clips work just as well for keeping bags in place.
Dishwasher Safe and High-Temperature Limits
Most good sous vide bags handle temps up to 195°F, plenty for almost any home recipe. That covers everything from delicate fish at 130°F to short ribs at 185°F.
Dishwasher-safe bags make cleanup way easier if you’re reusing. We always toss them on the top rack to avoid any heat damage. Turning bags inside-out helps scrub away food and oil that could mess up your next seal.
Just remember: high cooking temps and dishwasher heat aren’t the same thing. Some bags can handle the water bath but not the dishwasher, and vice versa. If you’re reusing, double-check both ratings. BPA-free materials are a must because they keep food safe through repeated heating without any weird chemical leaching.
Preventing Freezer Burn and Ensuring Food Freshness
Sealing technique and the right bag matter a lot for freezer storage. Airtight seals and multi-layer bags keep your food moist and block out ice crystals.
Proper Sealing to Prevent Freezer Burn
Freezer burn is what happens when air gets to your food, drying it out and wrecking the texture. We’ve found vacuum sealing removes about 99% of the air, creating a barrier that zip-top bags just can’t match.
Getting a complete seal is key. Embossed or channeled bags help vacuum sealers suck out air more efficiently, even around bumpy foods like bone-in meats. We always make sure the seal area is dry and clear of crumbs before sealing. Any gunk can leave tiny gaps for air to sneak in.
Temperature plays a role too. Bags rated for freezer use keep their seal at 0°F or below, while cheaper ones can get brittle and crack. For sous vide prep, we seal food before freezing, locking in marinades and seasonings and preventing those nasty ice crystals that ruin texture.
Best Practices for Sous Vide Food Storage
We cool cooked sous vide meals in an ice bath before freezing to keep them out of the temperature danger zone. Label every bag with what’s inside and the date. Vacuum-sealed food only stays at peak quality for 6 to 12 months.
Flat packaging is the way to go. We spread food in a single layer and press out any leftover air before sealing, which helps it freeze and thaw faster. Stacking flat bags saves freezer space and keeps the temperature even.
For raw proteins, we portion them before freezing. That way, you don’t have to thaw a whole bulk pack just to grab a couple servings.
Airtight Technology and Multi-Layer Designs
Commercial-grade bags usually have 3 to 5 layers of polyethylene and nylon, creating a solid barrier against air and moisture. Multi-layer bags don’t puncture as easily, which is important when you’re dealing with sharp bones or edges.
BPA-free is non-negotiable for food safety. We look for bags that say food-grade and are rated for temps up to 195 to 230°F, safe for both freezer and sous vide.
The embossed channels on good bags aren’t just for vacuum sealing. Those little grooves stop the layers from sticking together, which helps the seal hold up through freeze-thaw cycles and keeps the bag from collapsing around odd-shaped foods.
Cost-Effectiveness, Reusability, and Eco-Friendly Choices
Your choice of sous vide bags impacts your budget and the environment. Reusable options cut down on costs and waste, making them a smart pick for frequent cooks.
Reusability and Meal Prep Benefits
Reusable bags really change the game for meal prep. Quality silicone and vacuum sealer bags can handle hundreds of uses and go from -40°F to 425°F without falling apart.
We like to prep a bunch of proteins on Sunday, seal them, and stash them in the fridge or freezer. When it’s time to cook, the same bag goes right into the water bath. Most reusable bags clean up in the dishwasher. Top rack is best.
What matters for reusability:
- Dishwasher-safe material
- Strong seals that don’t wear out
- BPA-free and food-safe
- Works with different sealing methods
Getting air out can be tricky since most silicone bags don’t work with vacuum sealers. Using a straw to suck out air before sealing is a simple workaround.
Cost Savings for Home Cooks
Single-use bags run about $0.20 to $0.50 per cook. Sous vide three times a week and you’re spending $30 to $75 a year just on bags.
Reusable silicone bags cost $10 to $25 each but last for years. A starter set of three pays for itself in 3 to 6 months. Reusable vacuum bags with zippers and valves are similar, usually $15 to $30 for a set.
If you meal prep, the savings add up fast. Cooking five chicken breasts in reusable bags instead of disposables saves $50 to $100 a year per household. Families cooking sous vide four or five times a week see even quicker returns.
Eco-Friendly and Sustainable Bag Options
Silicone bags slash plastic waste compared to disposables. Each reusable bag can keep hundreds of single-use bags out of landfills.
Sustainable picks:
- 100% platinum silicone (super durable and heat-resistant)
- BPA-free PE and PP plastics (for vacuum bags)
- Food-grade materials tested for long heating
Not every recycling center takes silicone, so check before tossing them. Still, their long life makes them way greener than disposables.
Some brands offer biodegradable sous vide bags, but they’re pricier per use than reusables. If you’re focused on sustainability, investing in quality silicone or thick reusable vacuum bags strikes the best balance.
Frequently Asked Questions
Home cooks often ask which bags are safe, which seals hold best, and what to avoid when cooking sous vide. Here are the key answers.
Do I need special bags for sous vide, or will freezer-grade zipper bags hold up safely?
Freezer-grade zipper bags can work for short, lower-temperature cooks, especially under 158°F. For longer cooks, hotter recipes, or better leak protection, use food-grade vacuum sealer bags or reusable silicone sous vide bags.
Which bag materials are best for sous vide if I want to avoid off-flavors and chemical smells?
Choose BPA-free, food-grade polyethylene, polypropylene, or platinum silicone. These materials are safer for heated food contact and are less likely to add unwanted smells or flavors.
What thickness and seam quality should I look for to prevent leaks during long cooks?
Look for bags that are at least 3 mil thick with strong heat-sealed or double-sealed seams. Thicker multi-layer bags are better for long cooks, sharp edges, and freezer storage.
Are reusable silicone sous vide bags actually worth it for meal prep and freezer-to-bath cooking?
Yes, they are worth it if you sous vide often. They cost more upfront, but they reduce waste, last longer, and work well for meal prep and freezer-to-bath cooking.
How can I tell if a bag is truly heat-safe for sous vide temperatures without getting soft or warping?
Check the packaging for a clear temperature rating. For sous vide, choose bags rated for at least 195°F. Avoid bags that only say freezer-safe without a cooking or heat rating.
What should never go into a sous vide bag if I want a clean seal and safe, consistent results?
Avoid sharp bones, shells, loose spices near the seal, excess liquid at the opening, and trapped air pockets. These can cause leaks, weak seals, floating bags, or uneven cooking.
Partager:
What Is The Best Way To Preserve Meat Texture During Long-Term Freezer Storage
How Can Families Keep Bulk Grocery Purchases Fresher For Longer