

Check out our latest home & kitchen collection!
Baking should be a joy, not a scavenger hunt through cluttered cabinets. We've all been there, ready to whip up a batch of cookies, only to spend way too long searching for the right measuring cups or wondering if that baking powder is still good. Honestly, an organized baking space just makes everything easier and less stressful.
The good news? You don’t need a fancy kitchen or expensive organizers to get things under control. Whether you’ve got a big pantry or just a couple of small cabinets, you can make a real difference with a few simple tricks, think grouping similar stuff, using clear containers, and making the most of your vertical space.
Let’s walk through some practical ways to sort, store, and keep track of your baking supplies so you can actually find what you need when you need it.
We’ll look at decluttering, storing specialty equipment, and keeping ingredients fresh. The goal? A system that fits your space and your baking style, so you can skip the chaos and get to the good part, baking.
Key Takeaways
- Start by getting rid of unused tools and expired ingredients—it gives you a clean slate.
- Group similar items and use clear, labeled containers so you can spot things at a glance.
- Use vertical storage to make the most of your cabinets, and keep the essentials close by.
Identifying Your Essential Baking Supplies
Having the right tools makes baking way more fun (and way less stressful). Focus on gear that works for lots of recipes—skip the single-use gadgets that just take up space.
Must-Have Baking Tools for Beginners
If you’re just starting out, you don’t need a massive collection. Grab a few wooden spoons and silicone spatulas for mixing and scraping bowls. A sturdy whisk is a must for eggs and dry ingredients.
Essential mixing tools:
- 2-3 silicone spatulas (and make sure they’re heat-resistant)
- A 10-inch balloon whisk (covers most needs)
- Wooden spoons for thick batters
- Rolling pin for cookies and pastries
Don’t forget a cooling rack to keep your cookies from getting soggy. An oven thermometer is a game-changer—most ovens are off by at least 25 degrees. Cookie scoops help make uniform treats. Parchment paper keeps things from sticking and makes cleanup a breeze.
Selecting Bakeware for Everyday Recipes
You really only need a handful of pans to cover most recipes. Two rimmed baking sheets (the kind that fit your oven) are a solid start. Metal pans conduct heat better than glass or dark nonstick ones.
A 9x13-inch metal pan handles brownies, cakes, and casseroles. Two 8- or 9-inch round cake pans let you do layer cakes. A 9-inch pie dish works for both sweet and savory pies. Personally, I think light-colored aluminum is best—it browns evenly without burning.
Basic bakeware starter set:
- 2 half-sheet pans (13x18 inches)
- 9x13-inch rectangular pan
- 2 round cake pans (8 or 9 inches)
- Standard 12-cup muffin tin
- 9-inch pie dish
A muffin tin opens up cupcakes, muffins, and mini bakes. Don’t bother with specialty pans until you actually need them for a recipe you love.
Understanding Measuring Equipment Basics
Getting measurements right is half the battle in baking. You’ll want both measuring cups and spoons for dry stuff, plus a liquid measuring cup with a spout for wet ingredients. Dry cups should have flat rims so you can level them off.
Measuring spoons usually come in sets from 1/4 teaspoon to 1 tablespoon. Look for narrow ones—they fit into spice jars. Liquid cups should be clear so you can check from the side.
A digital kitchen scale is a real upgrade. Weighing flour instead of scooping takes out the guesswork. You can get a good scale for $15-25, and it’s worth it.
Complete measuring setup:
- Dry measuring cups (1/4, 1/3, 1/2, 1 cup)
- Liquid measuring cups (1-cup and 2-cup or 4-cup)
- Measuring spoons (1/4 tsp through 1 tbsp)
- Digital kitchen scale with tare function
Mixing bowls in a few sizes give you flexibility. Stainless steel ones are light, durable, and nest together. Three is plenty: small (1-2 quarts), medium (3-4 quarts), and large (5-6 quarts). Glass bowls work too, but they’re heavier.
Organizing Tools and Equipment for Maximum Efficiency
How you organize your tools can make or break your baking flow. If you set things up smartly, you’ll grab what you need without digging through chaos.
Drawer, Cabinet, and Pantry Storage Ideas
You can turn basic cabinets into a baking station with a few tweaks. Deep drawers are great for mixing bowls and mixer attachments—just add dividers so things don’t slide around. Shallow drawers are perfect for flat tools like spatulas and spoons; expandable organizers help keep them sorted.
Cabinet doors are easy to overlook, but they’re perfect for hanging measuring cups and spoons on adhesive hooks. That keeps them in sight and saves drawer space.
In the pantry, tiered risers let you see everything, even what’s at the back. Carve out a shelf just for baking stuff and use clear bins to group things together. Pull-out drawers in lower cabinets mean you don’t have to crawl around on the floor to find your baking sheets.
Keep whisks and hand mixers in a canister on the counter if you use them a lot, but don’t let your countertop get crowded—just stick to the essentials.
How to Categorize Baking Tools by Use
It helps to organize tools by how often you use them and what they do. That way, you’re not wasting time searching.
Daily essentials—measuring cups, mixing bowls, spatulas, whisks, and wooden spoons—should live in the drawer or cabinet closest to your main workspace.
Weekly tools like hand mixers, rolling pins, and pastry brushes can go in a bin or drawer that’s still easy to reach, but not prime real estate.
Special occasion tools—piping bags, cake decorating stuff, odd-shaped pans—can go in high cabinets or deeper storage. Label the containers so you don’t forget what’s inside.
Some people group tools by task (measuring/mixing, rolling/cutting, decorating/finishing). Go with whatever matches your style.
Keeping Small Items Visible and Accessible
Small tools love to disappear. Drawer dividers with small compartments are great for cookie cutters, piping tips, and decorating bits. Clear acrylic organizers let you see what’s inside without opening lids.
Magnetic strips on walls or inside cabinet doors hold metal tools like whisks and measuring spoons. It looks pretty cool, too.
Small jars or containers work for things like toothpicks and mini cutters. Label the tops so you can spot what you need when you’re looking down into a drawer. A lazy Susan in a corner cabinet keeps little bottles of extracts and food coloring from getting lost.
For measuring spoons, clip sets together with a carabiner so you’re not hunting for that missing teaspoon. It’s a small thing, but honestly, it saves time.
Storing Bakeware and Specialty Pans
Bakeware comes in all shapes and sizes, and it’s easy for pans to turn into a messy pile. Group similar pans together and store them vertically if you can—it saves space and makes grabbing the right one easier.
Stacking and Arranging Cake and Loaf Pans
Storing cake and loaf pans vertically is a game-changer. Stacking pans flat just scratches nonstick coatings and makes it annoying to dig out the one you want.
Try these options:
- Pan organizers with adjustable dividers for cabinets
- Repurpose office file organizers to hold pans upright
- Install tension rods in cabinets to create custom slots
- DIY dividers with thin boards or pegboard
Keep springform pans with their bases so you don’t lose pieces. If you have to nest cake pans, put a paper towel between them to prevent scratches. Store your go-to pans up front.
Round pans can nest, but separate them with paper plates or pan protectors. Loaf pans fit nicely on their sides in a vertical rack.
Managing Muffin Tins, Bundt, and Specialty Shapes
Muffin tins and specialty pans are always awkward. Store muffin tins vertically in a file organizer or lean them against dividers in a deep drawer.
Bundt pans do best upright or hanging from hooks if you’ve got wall space. Their shapes don’t stack well. Pie dishes can nest, but don’t stack more than three or you’ll risk chips.
For specialty shapes:
- Nest mini muffin tins inside standard ones
- Use adjustable racks for odd shapes
- Keep cookie sheets and baking sheets in their own vertical slot since you’ll use them the most
- Sort specialty pans by how often you use them, not by size
Rarely used pans? Stick them in upper cabinets or toe-kick drawers.
Managing Liners, Mats, and Cooling Equipment
Flat items like parchment paper, silicone mats, and cooling racks can eat up more space than you’d think if you just toss them in a drawer. Go vertical or use dedicated bins to keep them under control.
Finding Space for Parchment Paper and Silicone Mats
Parchment paper rolls fit perfectly in magazine holders mounted inside
Organizing Decorating and Finishing Tools
Decorating tools can take over if you’re not careful. Keep piping stuff separate from spreading tools, and make sure everything’s easy to grab—less digging, more decorating.
Storing Piping Bags, Tips, and Pastry Tools
Piping bags and tips are notorious for getting lost. Clear plastic bins are great for organizing tips by size or type. Small compartment organizers (like for jewelry) keep tips separated and easy to see.
Reusable piping bags should be dry before storage—roll them loosely and pop them in a drawer divider. Disposable bags can stay in their box or in a tall container.
Couplers and other tiny pastry tools need their own compartments too. Storing things vertically helps you see what you’ve got. Drawer organizers with sections work well for keeping piping bags and tips from becoming a tangled mess. If you’ve got a big collection, label the sections.
Keep Spatulas, Offset Spatulas, and Brushes Handy
You’ll reach for spatulas and brushes all the time, so keep them close. If you bake a lot, a utensil crock on the counter is super handy—no more rummaging with sticky hands.
If counter space is tight, use a shallow drawer near your main work area. Drawer dividers help keep offset spatulas, straight spatulas, and brushes separated. The goal is to avoid a jumbled pile.
A hanging organizer on the inside of a pantry or cabinet door works too. Slip spatulas and brushes into pockets to keep them flat and visible.
Space-Saving Tips and Maintenance Tricks
Smart storage and regular check-ins keep your baking supplies ready without taking over your kitchen. Clear containers and a little routine decluttering mean expired ingredients don’t get in the way. There’s no magic fix, but a little effort here and there makes baking a lot more enjoyable.
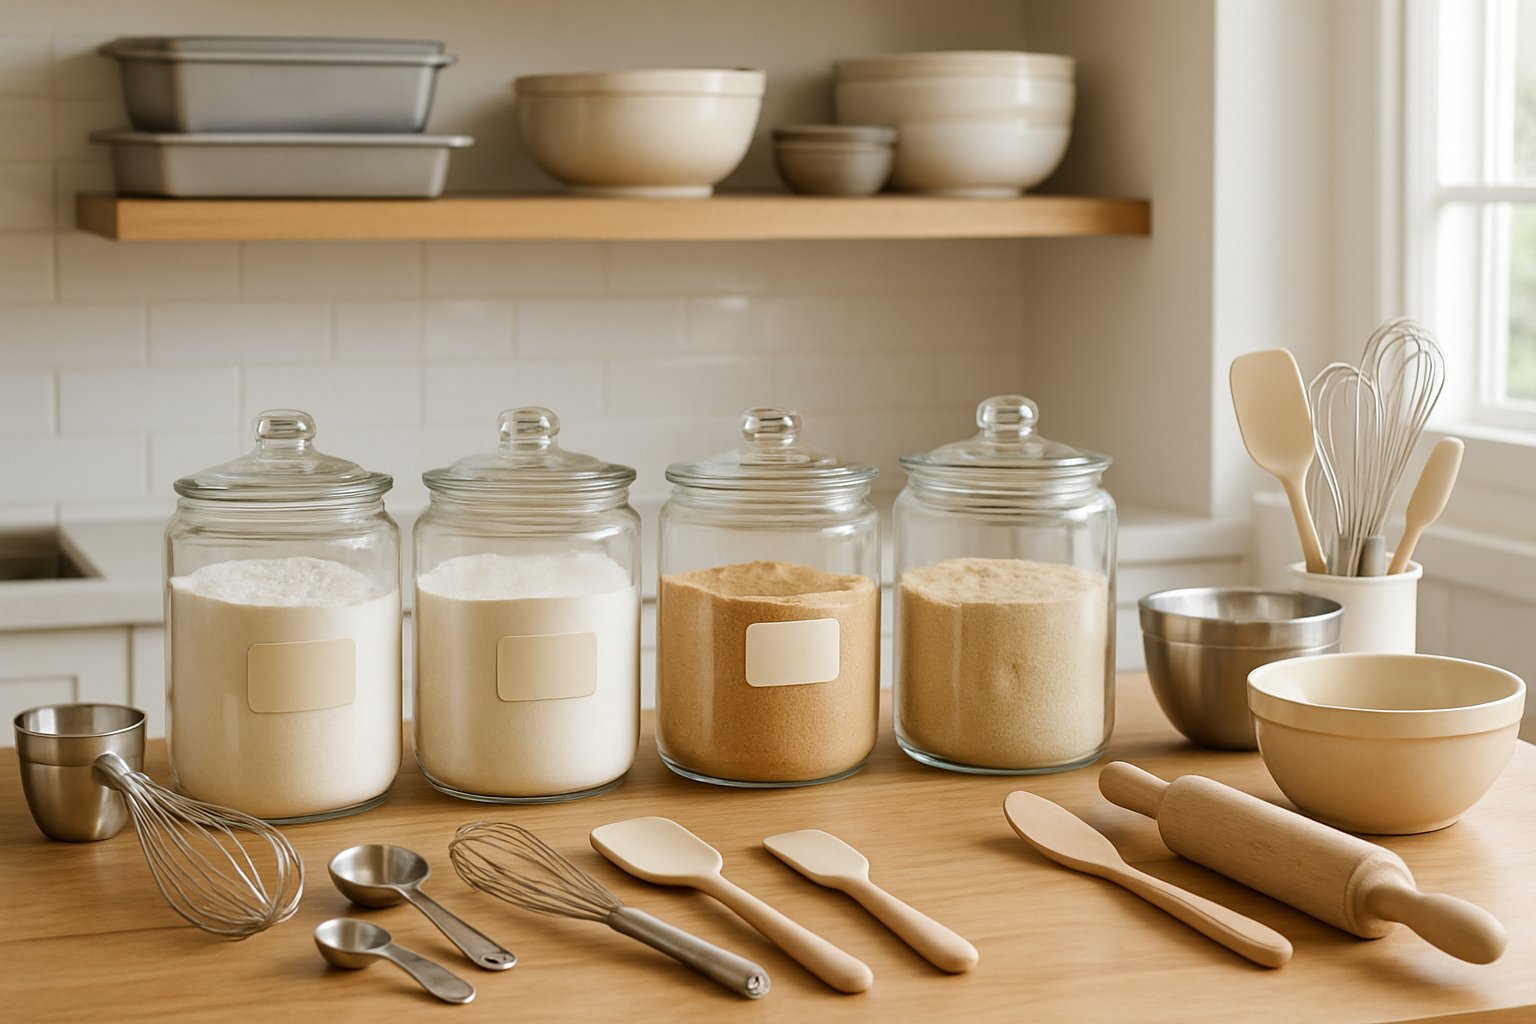
Using Clear Canisters and Labels
Clear canisters can turn a messy pantry into something that actually works. You can see how much flour or sugar is left at a glance—no more opening three containers just to check. Glass or plastic airtight canisters keep dry ingredients safe from moisture and pests, and they stack up pretty nicely in cabinets.
Labels take the guesswork out of baking, especially when you’re in a hurry. We jot down ingredient names and purchase dates right on the container or use removable labels if we’re feeling non-committal. It’s a lifesaver for telling baking soda from baking powder—everyone’s mixed those up at least once, right?
Rectangular containers make better use of shelf space than round ones. They fit together tightly and don’t waste precious inches in those narrow cabinets. For bakeware like muffin tins or cookie sheets, we use vertical dividers or tension rods to create slots. That way, each piece stands on its own and you’re not wrestling a pile just to get one pan.
Decluttering and Rotating Baking Supplies
Monthly checks help us avoid hoarding ingredients or letting things expire. Every few months, we pull everything out and see what we actually use. That novelty bundt pan from years ago? If it’s still untouched, it’s probably time to donate.
We try to use the “first in, first out” system for baking supplies, just like restaurants do. When we buy new flour, the older bag moves to the front so it gets used first. It’s not always perfect, but it does help us avoid tossing out expired stuff.
Duplicates just eat up space. We stick with one good spatula instead of five so-so ones. Same with measuring cups—one solid set does the trick. Broken cookie cutters and warped baking sheets? We get rid of them right away instead of letting them fill up drawers “just in case.”
Frequently Asked Questions
Organizing baking supplies isn’t always straightforward. Some situations just need a little more creativity. Here are some practical answers for common storage headaches.
What are some innovative storage solutions for cramped kitchen spaces?
Vertical space is your friend. We like wall-mounted magnetic strips for metal tools—whisks, measuring spoons, you name it. It keeps them in sight and out of the drawers.
Over-the-door organizers are great for lighter things like cookie cutters, decorating tips, and tiny bottles of extract. They make use of space you’d otherwise ignore, and you don’t have to drill any holes.
Stackable corner shelves help tame those weird cabinet corners where things disappear. Tiered organizers give you a clear view of spices, food coloring, and other little bottles.
Pull-out shelving inside cabinets is a game changer. You can grab flour bags or sugar containers from the back without dragging everything else out.
Can you suggest a system for organizing a variety of baking pans?
Pot lid holders are surprisingly perfect for baking sheets. We just slide the sheets into the dividers, sorting by size for easy grabbing.
For cake pans and pie dishes, adjustable drawer dividers work well. They give each pan its own spot and stop them from getting jammed together.
Pegboards inside cabinet doors let us hang specialty pans—Bundt molds, tart pans, whatever—on hooks. You can space them out however you need.
File organizers, the kind meant for paperwork, are actually great for cooling racks and thin baking sheets. Stand them upright on a shelf or in a cabinet and you’re set.
What are the best containers to keep baking ingredients fresh and easily accessible?
We swear by clear airtight containers for flour, sugar, and the usual dry goods. You can see what’s left without opening anything.
For stuff we scoop all the time, like flour or granulated sugar, we go for wide openings. Narrow containers work better for things we pour, like sprinkles or chocolate chips.
Glass containers with silicone seals do a great job keeping moisture and pests out. They’re heavier than plastic, but they don’t pick up smells or stains.
For brown sugar, we toss in a terra cotta disk or even a marshmallow to keep it soft. Airtight containers alone don’t always cut it.
How should I prioritize items in my pantry for both efficiency and ease of use?
We keep the essentials—measuring cups, mixing bowls, flour, sugar—right at eye level or on the easiest-to-reach shelves. No need to stretch or crouch every time.
Stuff we use weekly, like specialty flours or cake pans, can go a bit higher or lower. They’re not in the way but still easy enough to grab.
Seasonal tools like holiday cookie cutters? Those get stashed in the back or in storage bins elsewhere. No point in letting them hog space year-round.
We like grouping things by task too. All the cookie-baking supplies in one spot, bread-making stuff in another. It makes projects go smoother, honestly.
Are there any clever hacks for storing bulky baking equipment in a small kitchen?
Stand mixers fit well in lower cabinets on rolling shelves. You can pull them out when you need them, and they don’t eat up counter space.
Nested mixing bowls are storage gold—just pop smaller items inside, like measuring cups or bags of chocolate chips.
Hanging racks under cabinets aren’t just for mugs. Add some S-hooks, and you’ve got a place for measuring cups or small sifters.
Food processors and blenders? We keep attachments inside the main bowl or pitcher, wrap the cord around the base, and use a velcro tie. Keeps the whole setup neat and compact.
What's a good method for categorizing and storing small baking tools to avoid clutter?
We like to bag similar stuff together in ziplock bags or small containers, then toss them in drawers. All the piping tips end up in one bag, cookie cutters in another, and decorating tools in their own spot.
Drawer dividers help keep things like thermometers, pastry brushes, and bench scrapers from sliding all over. Without them, you’re just digging around and probably getting annoyed.
Small plastic bins or even those cheap tackle boxes with lots of little compartments are surprisingly great for decorating supplies. Each section gets its own thing—food coloring here, sprinkles there, you get it.
We’ll just scribble labels on the outside with dry erase markers, so it’s easy to update when we inevitably pick up new gadgets or reshuffle everything. Permanent labels? Not for us—they’re too much hassle when you want to change things up.
Share:
Creating a Zero-Waste Kitchen Through Better Storage Habits
How to Label Kitchen Containers for Long-Term Organization