

Check out our latest home & kitchen collection!
A cluttered pantry where you can't tell flour from powdered sugar or expired spices from fresh ones isn't just frustrating, it costs you time and money every week.
Labeling kitchen containers with durable materials, clear information, and a consistent system creates long-term organization that saves time during meal prep and prevents food waste.
Sure, you can slap a piece of tape on a jar, but if you want a system that holds up, you’ll need to pick the right labels and stick with habits that actually last.
We’ve all opened the fridge to find mystery leftovers with no date, or reached for what we think is sugar only to discover it’s salt halfway through a recipe.
The good news? Creating a solid labeling system doesn’t take fancy gadgets or tons of time. With smart choices, like picking waterproof labels, applying them carefully, and keeping things consistent, your kitchen can stay tidy for months or even years without endless relabeling.
Let’s get into it: from picking labels that don’t peel in humidity to setting up a color-coding system that actually makes sense for your space.
Whether you’re in a tiny apartment or wrangling a walk-in pantry, these ideas can help you build a labeling system that genuinely works.
Key Takeaways
- Use waterproof, durable labels with clear info (including expiration dates) to keep your kitchen organized long-term
- Stick to a consistent format and label placement so things feel intuitive
- Check and update labels once in a while; protect them with covers or laminates for extra staying power
Why Labeling Kitchen Containers Matters
Labels totally change how we experience our kitchens. They save time, protect our food, and take the stress out of cooking for everyone under the same roof.
Maximizing Kitchen Organization and Efficiency
Labels cut out the guesswork. Instead of digging through containers, you just grab what you need and get cooking.
When every container has a spot and a label, you know exactly where to find what. Flour in the square bin, second shelf—done. This is a lifesaver on hectic mornings or when a recipe calls for a bunch of ingredients at once.
Clear labels also make it obvious what you have before you shop. No more buying a third bag of rice because you couldn’t remember if you had any left. You avoid clutter and wasted cash.
It’s not just about finding stuff, though. Labels help keep things organized because everyone knows where stuff goes. When containers are clearly marked, it’s easier for anyone—kids, roommates, whoever—to help put groceries away the right way.
Improving Food Safety and Reducing Waste
Food safety hinges on knowing what’s in your containers and how old it is. Labels with dates tell you exactly when you opened that flour or packed up leftovers.
Just jotting down:
- What’s inside
- When you opened or stored it
- When it expires or should be used by
- How much you’ve got
…makes a big difference.
Unlabeled containers are a recipe for disaster. That white powder could be sugar or baking soda, but if you guess wrong, your cookies might taste weird—or worse. Date labels keep you from using spoiled stuff that could make you sick.
When you can see what needs to be used up, you waste less food. Labels help you use older items first, so you’re not tossing out forgotten cans or bags every month.
Supporting Meal Prep and Family Routines
Meal prep’s just easier when everything’s labeled. You can portion out ingredients, slap on a date, and know exactly what’s what when it’s time to cook.
Labels also make it easier for everyone to pitch in. Kids can grab their snacks without asking. Your partner can help cook because they know where things are. It takes some mental load off the person who usually keeps track of everything.
Batch-cooking? Labels show which meal is for which day, and you can even add reheating instructions right on the container. Suddenly, home-cooked meals are actually more convenient than takeout.
With a labeled kitchen, routines just flow better. Coffee’s faster when you know which beans are which. Packing lunches is less of a scramble when snacks are clearly marked and grouped together.
Choosing the Best Containers for Labeling
The right containers make labeling a breeze and help your labels actually last. Think about stackability, how tough the material is, and how well labels stick to different surfaces.
Stackable and Airtight Containers
Stackable containers let you use every inch of pantry or cabinet space. They create neat rows that look great and make everything easy to reach. Plus, their flat sides give you a perfect spot for labels that won’t peel off after a week.
Airtight seals are a must for long-term storage. They keep out moisture, bugs, and air—so your flour stays powdery and your crackers don’t go stale. Look for containers with silicone gaskets or locking lids.
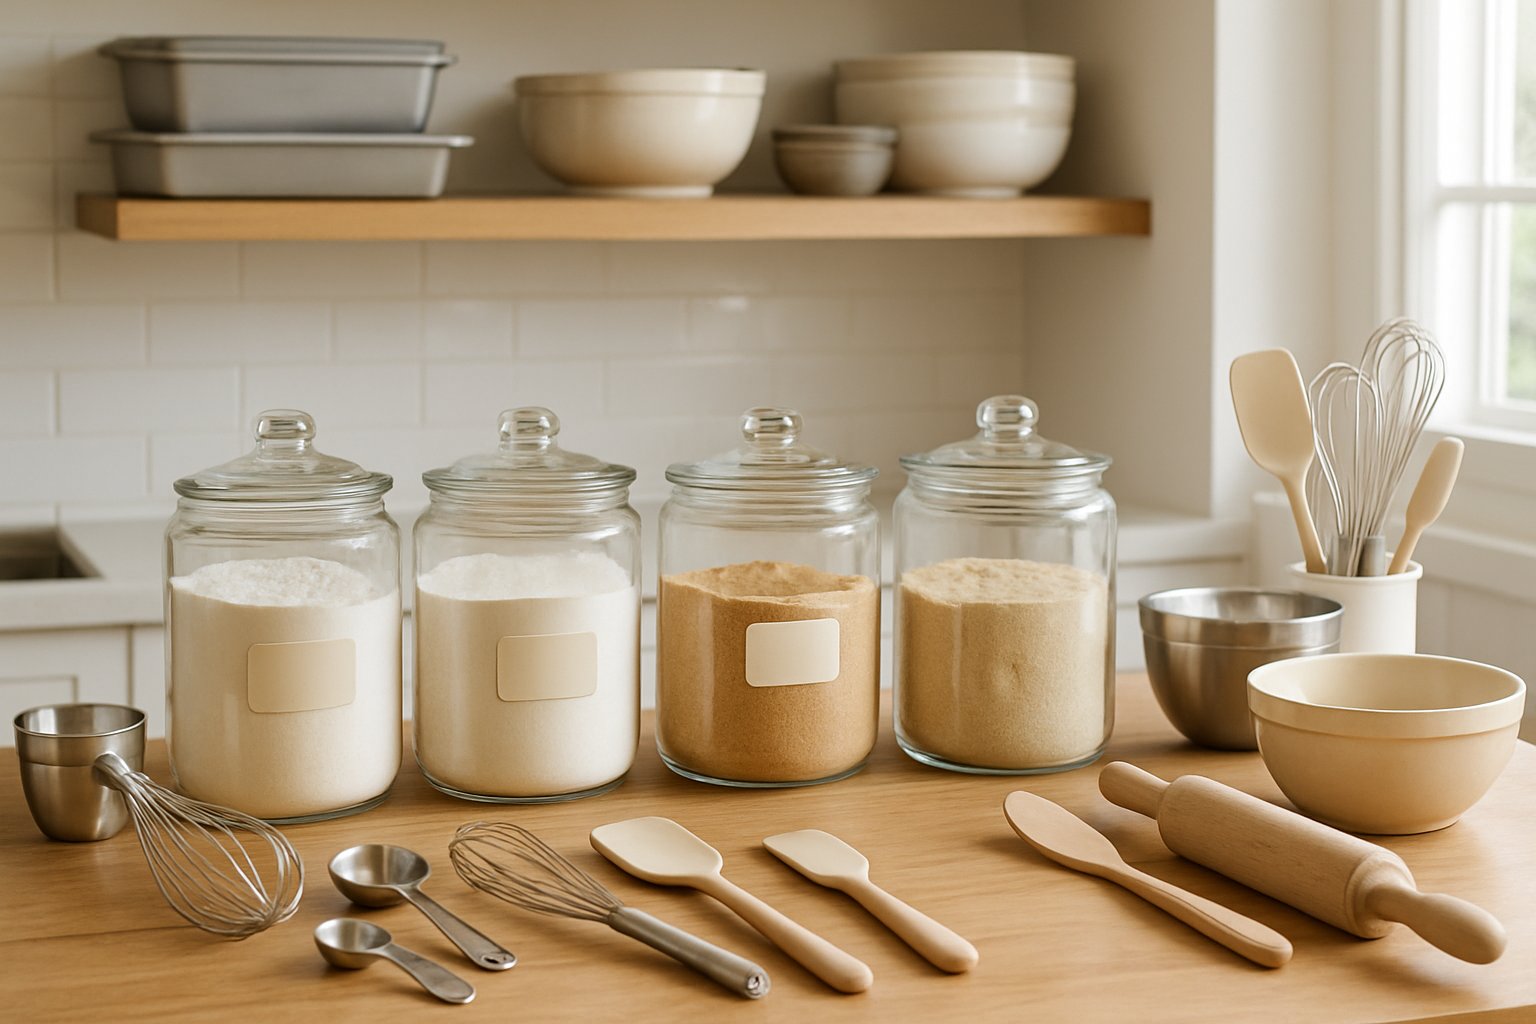
Square or rectangular containers stack better than round ones and make better use of space. Clear containers let you see what’s inside, but labels still matter—especially for stuff like different flours or sugars that all look the same.
Plastic vs. Glass: What to Know
Glass containers have smooth, non-porous surfaces, so labels stick well. They’re dishwasher-safe, won’t hold onto smells, and can last forever. The downside? They’re heavier, so maybe not great for high shelves.
Plastic containers are lighter and won’t shatter, which is nice if you’ve got kids around. BPA-free plastic is the way to go, though some cheaper plastics can get cloudy or stained. Sometimes, labels don’t stick as well to textured plastic.
For labels you want to last, glass is the winner. If you switch up contents a lot, dissolvable labels or painter’s tape work well on plastic.
Matching Containers to Labeling Styles
Not all labels work on all containers. Permanent labels need a clean, smooth spot—glass or good-quality plastic is best. Erasable labels are perfect for containers you reuse for the same thing every week.
Look for containers with flat panels or little spots made for labels. Some even have built-in chalkboard sections or frosted areas so you always know where to stick your label.
Container and Label Pairings:
- Glass jars with smooth sides: Permanent, chalkboard, or erasable labels
- Clear plastic bins: Dissolvable labels or painter’s tape for switching things up
- Opaque containers: Write-on or pre-printed permanent labels since you can’t see inside
- Freezer containers: Only use freezer-safe labels that can handle the cold
Shape matters too. Tall, skinny containers need vertical labels. Wide, shallow ones are better with horizontal labels on the lid.
Selecting the Right Labels for Your Kitchen
The kind of label you pick really affects how long your system lasts. Some labels handle moisture, cold, and daily handling better than others, so it’s worth matching the label to the container and where it lives.
Adhesive Labels: Everyday Versatility
Adhesive labels are the workhorses here. They’ll stick to almost anything—glass, plastic, metal, ceramic—and come in every size and shape you can imagine.
They’re great when you want something to stay put, even through a little moisture or temperature changes. You can buy them pre-printed or blank, and write on them with a marker or use a label maker.
For best results, slap them on a clean, dry surface. Wiping with a little rubbing alcohol helps the label stick better. Most take permanent marker or printed text just fine.
The downside? Sometimes they leave behind sticky gunk. Some brands offer removable versions, but those might not stick as well. If you plan to relabel often, other options might be better.
Chalkboard and Magnetic Options
Chalkboard labels are totally reusable. Write with a chalk marker, wipe it off, and you’re set for the next use.
They look sharp on glass jars and smooth containers—kind of modern, honestly. You can write right on them, no mess or waste.
Magnetic labels are even more flexible. Stick them to metal containers or shelves, then move them around whenever you want. They’re a fun option for spice jars or anything you rotate a lot.
Downsides? Chalkboard labels can scratch, and the writing might smudge if it’s not dry. Magnetic labels only work where there’s metal, so they’re a bit limited.
Waterproof and Laminated Labels for Durability
Waterproof labels stand up to wet, messy kitchens without peeling or smudging. You’ll want these for fridge, freezer, or containers you wash a lot.
Laminated labels are similar—plastic-coated to protect the writing from moisture and grease. You can wipe them down without worrying about smearing the text.
They’re a must for freezer storage, where condensation would destroy paper labels. Also great for anything you use for marinating or storing liquids.
If you’re labeling stuff for the freezer, make sure the labels are really freezer-safe. Not all waterproof labels stick well in super cold temps.
Paper and Removable Labels
Paper labels are cheap and do fine for dry storage. You can print or write on them easily, and they’re simple to apply.
Removable labels use a lighter adhesive, so you can peel them off cleanly. They’re good for containers you repurpose a lot or if you’re still figuring out your system. You can move them around without ruining your containers.
But paper labels and moisture? Not a good mix. Don’t use them in the fridge or anywhere humid—they’ll peel or get mushy.
For pantry staples in a dry spot, paper labels work and save money. Just don’t expect them to survive in the freezer or near the sink.
Methods for Creating Kitchen Labels
There are three main ways to make kitchen labels: label makers for a tidy, uniform look; handwritten labels for flexibility and a personal touch; and printing at home for custom designs. Each has its perks, depending on your style and budget.
Using a Label Maker for Consistency
A label maker gives you a standardized labeling system across your kitchen. The text is clear, easy to read, and you don’t have to worry about messy handwriting.
Most let you pick font size and style, so you can fit labels to anything from tiny spice jars to big flour bins. The adhesive usually holds up to moisture and cold.
The real win? Consistency. Every label matches, so your shelves look organized and it’s easy to scan for what you need.
Label makers can be basic (around $20-30) or fancier models that connect to your phone ($50+). Tape cartridges run $5-15 depending on size and color, so keep that in mind.
Handwritten Labels: Quick and Personal
Handwritten labels are fast, cheap, and you don’t need any gadgets—just a marker and some labels or tape. Perfect for temporary storage or stuff that changes a lot. There’s something nice about a handwritten label; it feels a little more you. You can even add notes like “Mom’s recipe” or doodles if you’re feeling creative.
Just make sure it’s legible—clear block letters, dark ink, and test your marker first so it doesn’t smudge.
Chalkboard labels with chalk markers are great if you want to erase and rewrite as you swap out contents. Super handy for containers you use for different things every week.
Custom Printed Labels at Home
Printed labels from your computer let you get creative. You can play with fonts, colors, borders, even add tiny graphics to match your kitchen vibe.
Free tools like Canva or Word have templates for label sheets. Buy printable label sheets (usually $10-15 for a pack), run them through your printer, and you’re set. Waterproof sheets cost a bit more but survive condensation and splashes.
This is great for making a bunch of matching labels at once—say, all your baking supplies or snacks. You get consistency like a label maker, but with more design freedom.
For anything going in the fridge or freezer, use waterproof or vinyl label sheets. Regular paper labels are fine for the pantry, but they’ll fall apart if things get damp.
Best Practices for Applying and Maintaining Labels
Getting labels to actually stick around and stay readable takes a bit more effort than just slapping them on. A little prep goes a long way—cleaning the surface, picking the right spot, and checking in now and then to keep your system up to date.
Surface Prep and Placement Tips
Start with a clean, dry surface. Wipe down containers using rubbing alcohol or white vinegar—oils and dust make labels peel off way too soon. Let everything air dry for at least five minutes before you even think about sticking a label on.
Temperature matters more than most folks realize. Labels need to go on at room temp, somewhere between 65–75°F. If you grab a container straight from the fridge or dishwasher, the adhesive just won’t bond right.
Where to stick ‘em:
- Front center for containers lined up on shelves
- Top lid if you stack containers in drawers
- Multiple sides for jars you rotate a lot
Put labels where you can actually see them without playing Tetris with your containers. On round jars, aim for eye level on the shelf. Smooth out the label from the center to the edges to push out air bubbles—those little pockets can make moisture sneak in and mess up your label.
Ensuring Labels Last Over Time
Waterproof or vinyl labels just work better in kitchens. Humidity and temperature swings are daily reality, and paper labels fall apart fast near sinks or dishwashers.
To protect labels you handle a lot, slap some clear packing tape over them or just buy pre-laminated ones. It’s a small step that seriously extends their life. If you use the dishwasher, stick labels on spots that avoid the worst of the water jets.
Quick durability rundown:
| Label Type | Best Use | Expected Lifespan |
|---|---|---|
| Vinyl | Fridge, freezer | 2–3 years |
| Chalkboard | Pantry containers | 1–2 years (reusable) |
| Laminated paper | General pantry | 1–2 years |
Try out a new label by putting just one through your kitchen routine for a week. If it peels, smudges, or fades, it’s not the one—switch brands before labeling everything.
Updating and Replacing Labels
Check labels every few months to make sure they're still accurate and readable. Food storage needs change, and old labels just cause confusion.
When it's time to swap out a label, peel off the old one completely. If the sticky stuff won’t budge, soak it with a little cooking oil for ten minutes, then scrub with baking soda paste. A bumpy surface won’t hold new labels flat.
For stuff that needs dates, use a removable date sticker next to the main label. That way, you can swap out expiration dates without redoing the whole thing. Keeping a small label-making kit—markers, blank labels, scissors—in a drawer makes quick fixes easy.
Replace faded or peeling labels right away. One unreadable label can throw off your whole system.
Building a Standardized Labeling System
A standardized labeling setup cuts down on confusion and keeps things humming along. With a little consistency—same formats, same info, maybe some color coding—everything becomes easier to find.
Consistent Labeling for All Kitchen Zones
Stick to the same labeling style across the pantry, fridge, and freezer. Pick a format for names and use it everywhere. If you call it “Brown Rice” in one spot, don’t switch to “Rice - Brown” somewhere else. That consistency speeds things up when you’re hunting for stuff.
Label placement matters too. Put them in the same spot on every container, usually the front or side, so you don’t have to shuffle things around just to read. For shelves, eye level is your friend—no crouching or stretching just to see what’s inside.
Using the same label material in each area keeps things looking tidy and makes it easier to restock supplies. Whether you go for chalkboard, waterproof vinyl, or dissolvable labels, pick one per zone to keep it simple.
Including Dates, Allergy Warnings, and Ingredients
Every label needs a storage date to help rotate stock and cut down on waste. Use a format that makes sense for you—“12/04/25” or “Dec 2025,” whatever’s easiest to read at a glance.
What to include:
- Item name: Be specific—“Almond Flour” beats just “Flour”
- Date stored: When you filled the container
- Expiration date: When to use it by
- Allergy warnings: Make these obvious—nuts, dairy, gluten, etc.
Allergy warnings really need to pop, especially if you share your kitchen. Bold red text, special stickers, or icons all work. It’s critical when you’re moving fast or sharing space with others.
For homemade mixes or meal prep, jot down the main ingredients. Even a quick “Contains: oats, honey, almonds” saves headaches later.
Color Coding and Special Icons
Color coding makes your system almost automatic. Assign colors to food groups—it’s way faster than reading every label.
| Color | Category | Example Items |
|---|---|---|
| Green | Fresh produce & herbs | Spinach, cilantro, lettuce |
| Blue | Dairy & eggs | Milk, cheese, yogurt |
| Red | Proteins & meats | Chicken, beef, fish |
| Yellow | Grains & pasta | Rice, quinoa, noodles |
| Orange | Baking supplies | Flour, sugar, baking powder |
Icons add another quick-glance layer. A snowflake for freezer stuff, a clock for things expiring soon. You can make your own or buy label sheets with common symbols.
For households juggling different diets, icons are a lifesaver. “V” for vegetarian, “GF” for gluten-free, a leaf for organic—you get the idea. These are especially handy on rushed mornings when you just want to grab and go.
Frequently Asked Questions
Labeling kitchen containers brings up all sorts of practical questions—what actually lasts, which tools are worth it, and how to keep things flexible. Here’s what’s worked for us (and what hasn’t).
What's the secret to creating long-lasting labels for kitchen containers without smudging?
Waterproof vinyl labels are hands-down the best for resisting smudges and general kitchen chaos. They shrug off moisture and oils way better than paper.
For writing, oil-based paint markers are fantastic on glass and plastic. Permanent markers made for non-porous surfaces also do the trick.
If you print your labels, laminating them keeps text crisp for ages. Clear packing tape works in a pinch if you want a quick, cheap waterproofing hack.
Can you recommend a label maker that stands the test of time, and spaghetti sauce spills, for kitchen use?
Brother P-touch label makers are a solid bet. Their laminated tape stands up to water, grease, and temperature swings without peeling or fading.
The DYMO LabelManager series is another good choice—strong adhesive, clear text, and they handle regular kitchen use. Both brands offer labels that survive the dishwasher, if that’s a must.
Look for models that use thermal transfer printing. Those labels don’t fade as fast as direct thermal ones, and honestly, the investment pays off when your labels still look fresh after months.
For those of us who change our minds like we change recipes, what are the best removable label options for pantry organization?
Chalkboard labels are super flexible—you can wipe and rewrite as much as you want. They stick well but come off clean when you need a change.
Dry-erase labels work too, especially on glass or plastic. They look a bit more modern, if that’s your thing.
Removable vinyl stickers give you that printed look without the commitment. Just check that they’re actually labeled “removable” if you want zero sticky residue.
Calling all meal-preppers! What labeling system do you swear by to keep track of your ingredients and best-before dates?
We keep it simple: two lines—item name on top, date underneath. That way, you spot what you need and check freshness in one glance.
Writing the storage or expiration date directly on each container makes rotation automatic. We stick to one date format like “12/04/25” to avoid any mix-ups.
Color-coded labels are a game-changer for meal prep. Sort by protein, veggies, or even days of the week—no need to read every label when you’re in a hurry.
Got any tips for creating a pantry label list that's as customizable as my grandma's secret soup?
Start with a spreadsheet listing all your regular pantry items. Digital makes it easy to tweak as your cooking habits change.
Organize your list by storage area and food type. Group baking stuff together, spices in another section, and so on—it speeds up printing and labeling.
Keep a few blank label templates in your file for new finds. That way, you can label something right away without messing with your whole layout.
Are there any freezer-proof labels that can withstand the tundra-like conditions of my deep freeze and still stay on point?
Freezer-grade labels use special adhesives that actually stick at sub-zero temps—regular ones just give up and fall off. Try to find products marked as freezer-safe, or at least rated for -20°F or colder.
In my experience, laminated labels and polypropylene film labels hold up best. They don't crack or peel, even in brutal cold. The lamination also helps keep condensation from sneaking under the label.
It's a good idea to write on freezer labels before you slap them onto containers. Some markers just don't cooperate in the cold. And if you've already got something frozen, let it warm up a bit before labeling—otherwise, nothing sticks right.
Share:
A Beginner’s Guide to Organizing Baking Supplies
How to Organize a Family Kitchen for Stress-Free Cooking