
Check out our latest home & kitchen collection!
A messy baking station can quickly turn your favorite hobby into a wild search for the right pan or tool. Who hasn't torn through cluttered cabinets, oven preheating, muttering about that missing 9-inch round pan or the vanishing act of the measuring cups?
The trick to a smooth baking station? Set up clear zones for your sheets, pans, and tools that match how you actually bake. When everything has a sensible home and you can just reach for what you need—no kitchen Jenga—baking gets back to being that relaxing, creative escape.
You don't need a fancy kitchen remodel or overpriced organizers to make this work. Let’s get into some genuinely practical ways to organize your baking gear—vertical storage to squeeze more out of your cabinets, workflow tweaks to keep your counters clear, and maybe even a sanity saver or two.
Key Takeaways
- Set up your baking station near your oven, with enough counter space and decent lighting for a smoother workflow.
- Use vertical dividers and drawer organizers to keep baking sheets, pans, and tools tidy and easy to grab.
- Group ingredients and tools by function, not just size, to make baking faster and less chaotic.
Choosing the Best Spot for Your Baking Station
Where you set up your baking station really shapes your whole baking experience. It’s all about counter space, where your appliances live, and squeezing the most out of whatever island or table you’ve got.
Assessing Counter Space and Kitchen Layout
Counter space is gold in most kitchens. You’ll want at least 3-4 feet of uninterrupted counter for a baking station that actually works.
Find a spot where you can spread out, not just jam everything together. You’ll want space for bowls, prepping ingredients, and laying out tools—without feeling like you’re playing Tetris.
Think about how people move through your kitchen. Try to avoid spots where folks are always walking by. Flour clouds and snack runs don’t mix.
L-shaped counters tend to work well, giving you a natural split between prep and finished goodies.
Measure before you commit. If your baking station feels cramped, it’s going to be more hassle than help.
The Role of Proximity to Ovens and Appliances
Keep your baking station close to the oven—within about 6-8 feet is ideal. That way, you’re not trekking across the kitchen with hot pans.
Being near the fridge is a bonus. Butter and eggs are baking staples, and you’ll reach for them a lot.
You’ll want the sink nearby for cleaning up, but not so close that you’re splashing water onto your flour.
Stand mixers need a permanent home near an outlet. Hauling a heavy mixer across the kitchen every time you bake? No thanks.
If you can, stash baking tools and small appliances right under the main work area. Less running around, more baking.
Maximizing Kitchen Island and Table Areas
Kitchen islands make awesome baking stations if you’re short on counter space. You can move all around them, and the storage underneath is a big plus.
The usual island height—36 inches—feels just right for rolling dough or kneading. If you don’t have an island, a portable kitchen cart can pinch-hit. Just roll it out when you’re baking and tuck it away after.
A dining table, covered with mats or parchment, works as a temporary baking spot. Just make sure it’s not too low—30-32 inches is comfortable for most folks.
With islands, storage is key. Use those drawers and shelves for sheets, bowls, and ingredients. Open shelving keeps everyday stuff in sight.
If you’re setting up a permanent station on your island, think about adding outlets. Mixers and gadgets need power, and extension cords are a pain.
Essential Baking Tools and Equipment
A good baking station starts with the right tools. Solid measuring tools, reliable appliances, and sturdy bakeware are the backbone of any home bakery.
Must-Have Baking Tools and Utensils
Measuring Tools Accurate measurements make or break a bake. A digital kitchen scale gives you the precision that cups just can’t. Still, you’ll want a solid set of measuring cups and spoons for liquids and small amounts.
Mixing Essentials
Having a few mixing bowls in different sizes saves you from washing the same bowl a million times. Stainless steel or glass are easy to clean. Whisks come in handy for eggs and dry ingredients.
Spatulas and Scrapers Silicone spatulas are great for scraping every last bit from bowls. Grab a couple of sizes. A bench scraper makes dough handling and cleanup so much easier.
Specialty Tools A sturdy rolling pin is a must for cookies and crusts. Pastry brushes help you add egg washes or melted butter exactly where you want. They might seem basic, but they’re surprisingly useful.
Recommended Appliances for Efficient Baking
Stand Mixer vs Hand Mixer A stand mixer is a game-changer if you bake a lot. It powers through doughs and long mixes without breaking a sweat. If space or cash is tight, a good hand mixer gets the job done for most things.
Food Processor Benefits A food processor can whip up pastry dough, chop nuts, or make crumb toppings in no time. Not everyone needs one, but it’s a real time-saver for some recipes.
Power and Capacity Considerations Look for appliances with enough muscle for thick batters. The bowl should fit your usual batch size—a 5-quart stand mixer is a safe bet for most home bakers.
Selecting Durable Baking Sheets, Pans, and Tins
Cookie Sheets and Baking Sheets Heavy-gauge aluminum baking sheets heat evenly and don’t warp. Rimmed cookie sheets are versatile. Lighter colors help prevent burnt bottoms.
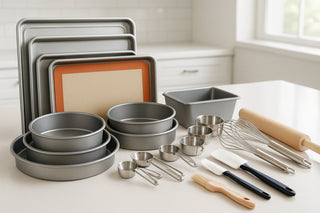
Essential Pan Collection A basic set: round cake pans (8 and 9-inch), a 9x13-inch pan, and a standard muffin tin. You’ll cover most recipes with these.
Quality Indicators Look for pans with straight sides and smooth finishes. Skip the flimsy stuff—it’ll just warp or dent. Solid pans last for years and bake better.
Material Choices Aluminum pans heat evenly and are easy to handle. Non-stick coatings are handy but need gentle care. Carbon steel pans get better with age, building up a natural non-stick layer.
Organizing Baking Sheets, Pans, and Tins
Good storage turns a pile of bakeware into an organized, easy-to-use system. With some clever vertical storage, smarter drawers, and maybe a wall rack or two, you can keep everything in reach.
Vertical Storage Solutions for Bakeware
Storing baking sheets and pans upright changes the game. Use tension rods or adjustable organizers inside cabinets to create vertical slots.
Cookie sheets and pans stand up like books—no more digging through stacks or scratching up the good ones.
DIY Vertical Dividers:
- Wire cooling racks as makeshift dividers
- Cutting boards for temporary slots
- Adjustable bakeware organizers
- File folder holders for lighter pans
Measure your cabinet height before buying anything. Most standard cabinets fit half-sheet pans upright, but double-check.
Even cake pans and pizza stones can go vertical if they’re supported well enough.
Drawer and Cabinet Organization Hacks
Deep drawers are awesome for bakeware if you add the right organizers. Expandable dividers keep muffin tins and cake pans from crashing into each other.
Use small boxes or bins to make custom compartments. That way, mini muffin tins don’t disappear behind bigger stuff.
Cabinet Organization Tips:
- Pull-out shelves make grabbing pans way easier
- Stackable shelf risers double your space
- Keep everyday items at eye level
- Nest sets together, biggest on the bottom
Heavy stuff like cast iron or roasting pans should go in lower cabinets. No one wants to haul heavy pans down from overhead.
Lazy Susans work well in corners, especially for round cake pans or springforms.
Wall-Mounted and Hanging Storage Ideas
Wall storage keeps your go-to bakeware right where you need it and frees up cabinet space. Magnetic strips on walls or inside doors hold metal pans securely.
Install rail systems with S-hooks for hanging lightweight cookie sheets and cooling racks—especially handy in tight spaces.
Wall Storage Options:
- Magnetic strips for metal sheets
- Pegboards you can tweak with different hooks
- Rails and hooks for quick-grab items
- Wall racks for stacking sheets upright
Mount narrow racks on pantry or cabinet doors to use every inch. Great for baking sheets and cutting boards.
Only hang up what you use often. Specialty pans you rarely touch are better off in a cabinet, away from dust.
Storing and Arranging Baking Ingredients
Keeping your baking ingredients fresh and easy to grab makes a huge difference. The right containers, clear labels, and some smart grouping can turn a messy pantry into a baker’s dream.
Airtight Containers and Freshness
Airtight containers keep your staples safe from moisture, bugs, and going stale. Glass jars with tight lids are perfect for flour, sugar, baking powder, and soda.
Clear containers let you see when you’re running low—no more surprise empty bins halfway through a recipe.
Storage Guidelines:
- Flour: containers that hold 5-10 lbs
- Baking powder/soda: small, handy jars
- Different sugars: separate containers
- Label everything with expiration dates
Chocolate chips, nuts, and dried fruit need extra care. Their oils can spoil if they’re exposed to air or light.
Keep chocolate chips in a cool, dry spot, away from sunlight. Nuts last longer in the fridge or freezer, sealed up tight.
Labeling and Accessibility Tricks
Clear labels save time and stop the guesswork. Waterproof ones won’t smudge or peel.
Put the ingredient name and expiration date on every container. It’s a little thing that helps avoid baking with stale stuff.
Labeling Tips:
- Use the same font and size for all labels
- Stick labels at eye level
- Add measurement conversions for your most-used ingredients
- Try color-coding by category
A dedicated spice rack for your baking spices—think vanilla, cinnamon, nutmeg—makes life easier.
Keep your most-used ingredients at eye level or within easy reach. Stash backups or rarely used stuff up high.
Grouping Baking Pantries for Efficiency
Grouping ingredients by how often and how you use them speeds things up and cuts down on prep time.
Set up zones for different baking needs. Bread stuff goes in one spot, cookie supplies in another—less confusion, less mess.
Grouping Strategy:
- Daily Basics: Flour, sugar, baking powder, salt
- Sweet Add-ins: Chips, nuts, dried fruit, extracts
- Specialty Items: Decorating supplies, food coloring, oddball flours
- Backups: Extra containers, stored separately
Heavy stuff like big flour bins should live on lower shelves. Lighter things (baking soda, spices) can go up higher.
Store things that go together—cocoa powder next to chocolate chips, brown sugar with molasses.
Do a quick inventory every month or so. Rotate stock and check dates to keep things fresh and avoid waste.
Smart Storage Solutions for Baking Tools
A truly efficient baking station comes down to how you store your tools. Smart organizers, vertical setups, and keeping things close at hand can turn a cluttered drawer into a baker’s best friend.
Using Drawer Organizers and Bins
Drawer organizers make a world of difference. Adjustable dividers let you set up custom spots for measuring spoons, cookie cutters, and pastry tips.
Clear bins are great for sorting small gadgets. Label each compartment so things don’t get mixed up over time. It’s a simple way to dodge the dreaded junk drawer.
Organizer Categories:
- Measuring tools: Spoons, cups, scales
- Cutting tools: Cookie cutters, bench scrapers
- Specialty stuff: Piping tips, thermometers, timers
Stackable organizers let you use all the vertical space in a drawer. Keep your go-to items on top for quick grabs. Deep drawers work best with tiered setups.
Tackle boxes actually work well for tiny decorating supplies. The little compartments are perfect for sprinkles, edible glitter, and small tools—especially handy if you decorate cakes and need lots of options at your fingertips.
Optimizing Vertical and Open Shelving
Vertical storage lets you multiply your kitchen space without actually taking up more room. Wall-mounted racks keep lightweight utensils—whisks, spatulas, measuring cups—right where you need them.
Stick magnetic strips inside cabinet doors to corral metal tools. I’ve found this trick especially handy for measuring spoons and those small knives that always seem to get lost in drawers.
A lazy susan in the corner cabinet spins oils, extracts, and food coloring into view. Try grouping similar items together so you’re not hunting for vanilla in the middle of a bake.
Vertical storage ideas:
- Pegboards with adjustable hooks
- Over-the-door organizers on pantry doors
- Wall spice racks for extracts
- Stackable shelf risers to double up storage
Open shelving puts your most-used tools on display and within arm’s reach. I’d group things by function rather than size—it just feels more natural when you’re in the zone.
Rolling carts are a lifesaver when you want storage that follows you. Load one up with bowls, measuring cups, and whatever else you need to shuttle between prep and baking.
Keeping Utensils Within Arm's Reach
Put your go-to tools right where you need them and you’ll save yourself a lot of back-and-forth. Countertop canisters can hold wooden spoons, whisks, and spatulas near your main work area.
Wall-mounted rails give you custom storage zones. Add hooks and little containers for measuring cups, pot holders, whatever you grab most.
Key placement spots:
- By the mixer: Measuring tools, bowls
- Near the oven: Pot holders, cooling racks, timers
- At your prep spot: Cutting tools, pastry brushes
A rolling cart loaded with essentials glides between storage and baking zones. If you get one with tiers, you can sort tools by how often you use them.
Tiered organizers on the counter show off your tools and save space. I like these for cookie cutters—sort by shape or season for quick grabs.
Magnetic strips under cabinets keep metal utensils handy without hogging drawer space. Everything’s visible and ready to go when you’re mid-recipe.
Workflow and Safety Considerations
Smart workflow and a few safety tweaks can turn your baking area from chaos central into a smooth operation. Ergonomics matter—a lot. Keep protective gear nearby for those “hot pan!” moments, and don’t underestimate the power of good lighting.
Accessibility and Ergonomics
Put your most-used stuff between shoulder and waist height. That’s where it’s easiest to grab things without stretching or stooping. Stand mixers, measuring cups, mixing bowls—they all belong here.
Heavy stuff like flour containers? Store them low with pull-out shelves. No more wrestling flour bags overhead just to make a batch of cookies.
Counter height is sneaky important. Standard is 36 inches, but if you’re always bent over or reaching, try a rolling cart at your ideal height.
Store baking sheets and pans vertically with dividers. No more pan avalanches when you just want the bottom one.
Keep a crock of spoons, whisks, and spatulas right by your main workspace. Saves steps, keeps things flowing.
Keeping Hot Pads and Oven Mitts Handy
Oven mitts should live in more than one spot. I stash a pair near the oven, another by the stove, and one at my main prep area.
Hooks on cabinet sides or magnetic clips keep mitts visible. If you jam them in a drawer, you’ll be fumbling with hot pans.
Choose mitts with long cuffs to guard your arms from oven racks and steam. Silicone grips are a must for slippery pans.
Keep a trivet or cooling rack right next to the oven. You’ll always have a safe spot to drop hot pans—no frantic searching.
Toss worn mitts as soon as you spot thin spots or holes. Burns sneak up on you when you least expect it.
Lighting and Clean-Up Tips
Under-cabinet lighting brightens your workspace without weird shadows. LED strips work well and show you the real color of your bakes.
Add task lighting over your main mixing area. You want to see what you’re doing—especially with tricky doughs or delicate batters.
Keep a small handheld vacuum handy for flour spills. Sweeping just pushes the mess around.
Put a compost bin or trash can within arm’s reach of your prep area. That way you’re not tracking flour across the kitchen.
Wipe up spills fast. Flour and sugar mixed with water can turn your floor into a skating rink.
Personalizing and Maintaining Your Baking Space
A good baking station flexes for everything from quick muffins to marathon cake projects. The trick is building systems that shift with your needs and don’t fall apart when you’re busy.
Flexibility for Special Baking Projects
Holiday baking hits different than your average Tuesday. Your setup should expand when you need it.
Create overflow zones for big projects. Claim a nearby counter or island for extra space. Keep a rolling cart tucked away for those times you need more room for cooling racks or prepping ingredients.
Use modular containers that stack or nest. They’re great for bulk ingredients during busy seasons. Glass jars with tight lids work well for extra flour, sugar, or spices.
Install adjustable shelves if you can. Being able to move shelves means you can fit tall mixer attachments or specialty pans that only come out once in a while.
Have a "project bin" for the oddball tools you only use occasionally. Keeps your main space clear.
Quick Organization Routines After Baking
Cleanup is easiest when it’s a no-brainer. We’ve all left floury cups “just for now” and regretted it later.
One-touch rule: Put each thing back in one motion. No juggling or rearranging towers of stuff.
Clean as you go, but save the last round for when you’re done. Wipe counters, wash measuring tools, and stash ingredients before you leave the kitchen.
Weekly five-minute reset: Check containers, wipe jars, reorganize anything that wandered. Small messes are easier to fix than big ones.
Keep cleaning supplies close—a little bin with soap, a sponge, and a cloth makes it less of a hassle.
Frequently Asked Questions
Storing baking sheets and pans vertically, adding padding between them, and using smart cabinet dividers or pull-outs saves space and keeps everything in good shape.
What's the best way to store baking sheets to maximize space?
Vertical storage is the way to go. Adjustable dividers in cabinets or a pull-out rack system work best.
You’ll probably get about 50% more storage this way, and your sheets won’t warp from stacking.
File organizers do the job if you’re on a budget. I’ve seen plenty of bakers turn magazine holders into vertical slots for cookie sheets and racks.
Can you give me some creative DIY ideas for organizing my baking pans?
Tension rods make quick, adjustable dividers in deep drawers or cabinets. Set them to your pan widths and you’ve got instant slots.
Office organizers are great for bakeware. File sorters hold muffin tins and cake pans vertically; drawer organizers keep the small stuff in order.
Foam drawer liner, cut to fit, pads stacked pans and keeps nonstick coatings safe.
Pool noodles (yep) cut lengthwise can protect cabinet edges and separate pans. Cheap, colorful, and weirdly effective.
How do you keep your baking tools accessible but uncluttered?
Organize by how often you use things. Everyday items at eye level, seasonal stuff up high. No more digging for cookie sheets behind the bundt pan.
Magnetic strips on cabinet doors hold metal measuring spoons and small tools. It’s quick, visible, and frees up drawers.
Lazy Susans in corner cabinets keep small tools in reach. One spin and you’ve got what you need—no more cabinet avalanches.
Clear containers let you see what’s inside. I label everything, especially ingredients like baking powder and vanilla.
I've got a narrow cabinet—any tips for fitting in cookie sheets without a mess?
Narrow cabinets are made for vertical storage. Slim pull-out racks bring sheets right to you.
Measure the width, then find adjustable dividers that fit. Standard cookie sheets are about 16-18 inches wide, so keep that in mind.
Over-the-door organizers work on pantry doors for lighter stuff like cooling racks and baking mats.
If there’s a gap between your fridge and counter, store sheets vertically there. Most kitchens have at least one forgotten sliver of space.
Is there a secret to fitting all different sizes of baking pans in one cabinet, or is it a game of Tetris?
Honestly, it’s pretty much Tetris—but with a bit of plotting. We tend to group pans by size, and I like using adjustable organizers because, let’s face it, the collection always changes.
I usually start with the biggest pans I reach for all the time, then work everything else around them. Cookie sheets and half-sheet pans seem to set the rules for how the rest gets arranged.
Nesting sets are a lifesaver for space. I’ll stack round cake pans together with a little padding between them (to keep the scratches down), and square pans get their own spot.
Shelf risers help a ton, too. I usually stash muffin tins underneath and pop taller things like loaf pans up on top. It’s not perfect, but hey, it works.