

Check out our latest collection of compact vacuum sealer for food!
A crowded fridge can slow down your entire week. When chopped vegetables, cooked proteins, leftovers, and pantry staples are hard to see or hard to grab, meal prep quickly turns into extra work. Vacuum storage helps make weekly ingredient access easier by keeping prepped food compact, visible, and fresher for longer.
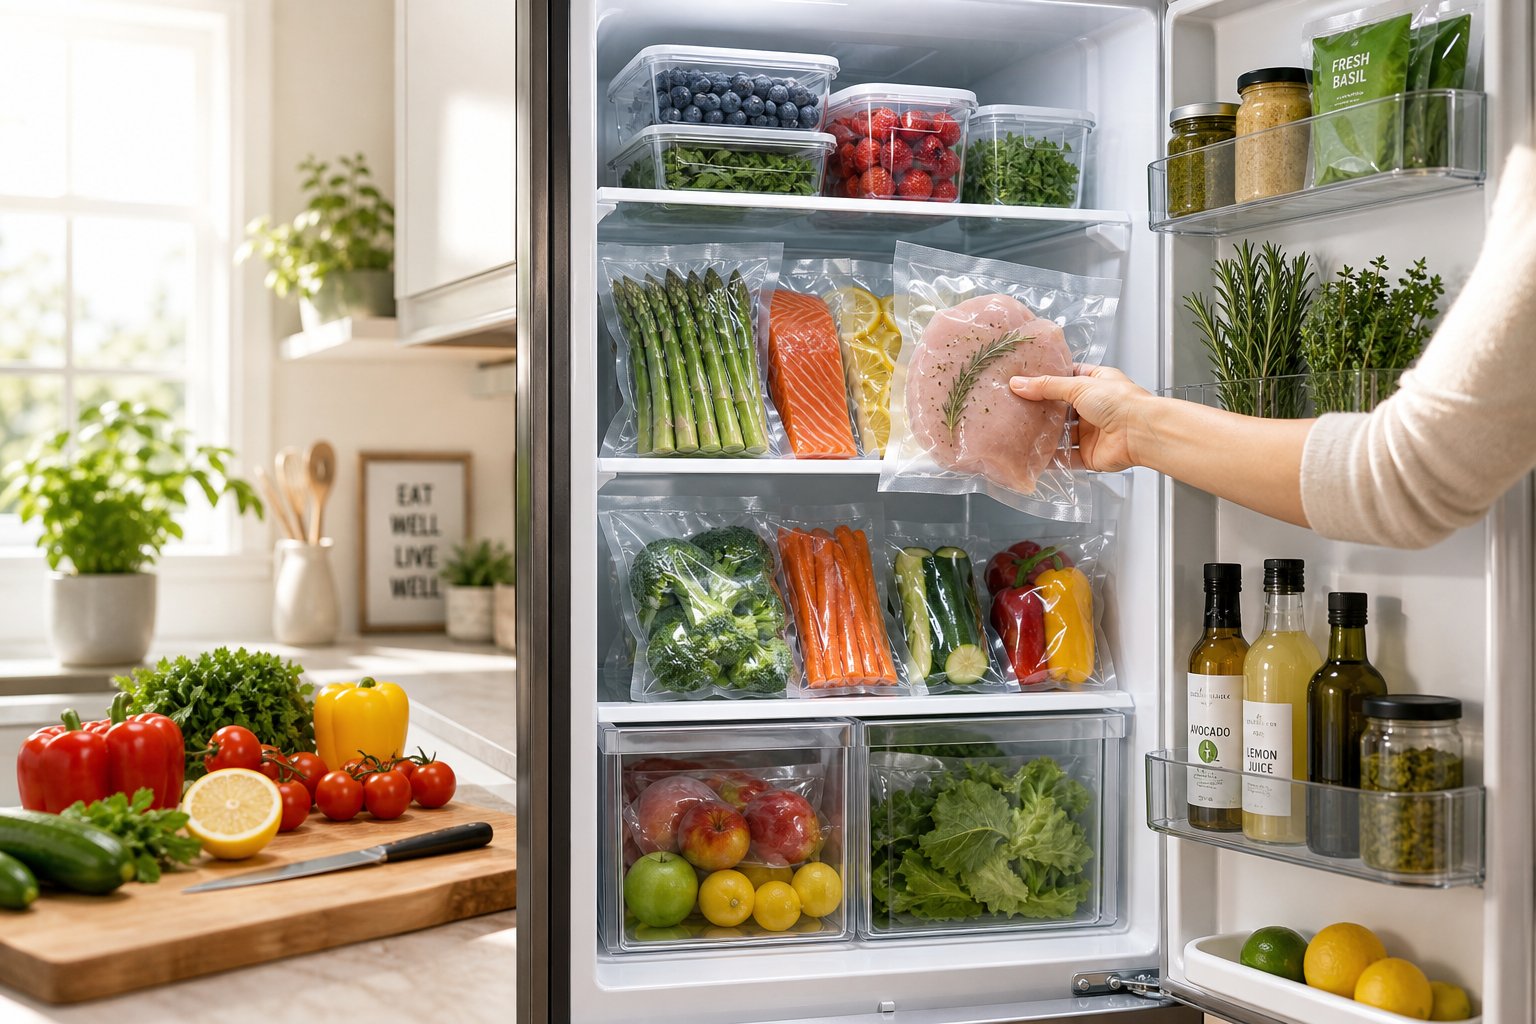
By removing excess air, vacuum-sealed bags take up less space than bulky packaging or half-empty containers. Proteins, grains, herbs, and chopped produce can be portioned, labeled, stacked, and organized by meal, so you can find what you need without digging through clutter.
This guide explains how vacuum storage supports weekly meal prep, which foods work best, how to seal ingredients correctly, and how to organize your fridge and freezer for faster, fresher cooking.
Key Takeaways
- Vacuum sealing cuts down on fridge clutter by removing air and letting you stack food efficiently
- Pre-portioned, vacuum-sealed ingredients last longer and are easier to grab for meals
- Good labeling and organization of sealed bags helps prevent waste and keeps your meal prep routine smooth
How Vacuum Storage Solves Common Fridge Clutter
Vacuum storage turns messy fridges into organized spaces by compressing items into compact, stackable packs that save room while keeping everything visible and fresh.
Keeping Ingredients Organized and Visible
We've all opened the fridge and found mystery containers hidden in the back. Vacuum seal bags change the game. These clear bags show you exactly what's inside, so you don't end up with forgotten veggies turning into science experiments.
The flat, even shape of vacuum bags makes stacking a breeze. Stand them up like files or lay them flat, either way, you get a visual inventory that actually works.
When you vacuum seal your meal prep, you can sort by recipe or meal type. A whole week's stir-fry veggies fit in one bag, while marinated proteins wait in another. The airtight seal keeps odors from mixing too, so your berries won't end up tasting like last night's garlic chicken.
Labeling is easy. Write right on the bag or use a sticky label that actually stays put. Date everything, and you'll always know which ingredients to use first.
Reducing Overfilling With Compact Storage Solutions
Vacuum storage pulls out up to 80% of the air, so your food shrinks down and takes up way less space. That big bag of greens that usually hogs the crisper? Now it's a slim packet.
The real win comes when you store lots of things at once. Three portions of prepped veggies in vacuum bags fit where just one loose container used to. You're not just saving a little space, you're multiplying how much you can fit in your fridge.
Vacuum bags mold to whatever space you have, slipping into narrow gaps or alongside tall bottles where containers just can't go. This flexibility finally puts those awkward corners to use.
Bulk buys get easier too. When you pick up family-size packs of meat or cheese, just portion them out into meal-sized vacuum bags. Each serving stays fresh on its own and the whole lot takes up a fraction of the original space.
Maximizing Fridge and Freezer Space
Vacuum bags really shine in the freezer. They stack flat and don't let freezer burn ruin your food. You can fit twice as much in the same space compared to clunky containers or regular freezer bags full of air.
Airtight seals keep food fresh three to five times longer than traditional storage. Meat that would only last three days in the fridge stretches to two weeks when vacuum sealed. In the freezer, sealed food keeps its quality for two or three years, no more ice crystals or weird flavors after a few months.
We like to organize the freezer into zones: proteins on one shelf, veggies on another, prepared meals in their own spot. The slim vacuum bags make this system doable because you can see and grab everything easily.
When freezer space gets tight, just move things between the fridge and freezer depending on when you'll eat them. Vacuum bags handle both environments and keep food fresh, so you don't need different containers.
Getting Started With the Right Vacuum Sealing Gear
The best vacuum sealer setup depends on how much you prep, your fridge size, and whether you want something portable or more heavy-duty. Let's go through the main types of sealers, what to look for in bags, and which features actually help keep your fridge organized.
Types of Vacuum Sealers for Home Use
Countertop vacuum sealers do the heavy lifting for regular meal prep. They sit on your counter and handle big sealing sessions without overheating. Most have built-in bag cutters and roll storage, which makes portioning chicken or chopping veggies much faster.
Handheld vacuum sealers are good if you don't have much counter space or just seal things now and then. They're cordless and small, but you need special bags or containers with valve ports. They're handy for resealing snacks or small portions, but not strong enough for big prep jobs.
Chamber vacuum sealers are more of a pro tool. They handle liquids without making a mess by removing air from the whole chamber, not just the bag. They're pricey and take up a lot of space, so unless you're sealing soups or doing sous vide often, they're probably too much.
Choosing a Vacuum Sealer for Meal Prep
For weekly prep, a countertop model with a moist food setting is a solid bet. Fresh veggies and marinated meats release moisture, and a standard vacuum cycle can suck liquids into the machine and mess up the seal.
Built-in roll storage and a cutter bar save you time since you don't have to hunt for scissors mid-prep. Just pull out the length you need, cut, seal one end, fill, and seal the other, no interruptions.
A double seal feature adds a second line for extra leak protection, which is handy if your fridge gets crowded. Some models also have accessory ports for jar attachments or lids, so you can seal more than just bags.
Skip the fancy preset modes or confusing controls. You just need a strong, reliable seal, adjustable vacuum strength, and a design you can use one-handed if needed.
Selecting the Best Vacuum Bags and Accessories
Pre-cut vacuum sealer bags come in standard sizes and make things easy when you're sealing the same portions over and over. They're great for proteins, cheese, and veggies that fit the bag size. Some have zippers so you can open and reseal by hand before vacuum sealing again.
Vacuum bag rolls let you make custom sizes, cutting down on waste for small items like herbs. They're also a must for big cuts of meat or bulky foods that won't fit standard bags. We keep both rolls and pre-cuts around, rolls are cheaper per foot but take a little extra effort.
Look for bags that are multi-ply, BPA-free, and safe for freezer or microwave. Durable vacuum sealer bags should handle freezing, thawing, and reheating without tearing. Thin bags might work once but often split when defrosting or reheating.
Reusable vacuum bags and containers with valve lids work well for dry goods like flour, coffee, or crackers. They're handy for pantry storage since you don't have to keep replacing bags, and they stack nicely in cabinets.
Batch Cooking and Portioning for Effortless Access
Batch cooking plus vacuum-sealed portions let you prep a week's worth of meals in one go, then just grab what you need from the freezer, no more digging through crowded containers or thawing giant batches.
Batch Cooking for the Week Ahead
Try planning four to six main recipes that each make four to six servings. That covers dinners without cramming your freezer or taking up your whole weekend. Make a shopping list by recipe, then plan out your cooking so you can roast veggies while soup simmers.
Let cooked food cool down to room temp before sealing. Hot food causes condensation in the bag, which weakens the seal and leads to freezer burn. Once cooled, portion proteins into 4 to 6 oz servings, and liquids into 1 to 2 cup amounts.
Vacuum sealing locks in flavor and texture way longer than regular freezer bags. Meals last for two or three months instead of just a few weeks, so you can batch cook less often without worrying about food going bad.
Simple Portion Control With Vacuum Bags
Vacuum bags make portioning easy, just measure, seal, and label. Use quart bags for single servings and gallon bags for family meals or multiple portions separated by parchment.
Lay portions flat before sealing. Shoot for about half an inch thick so they freeze quickly and stack well. Leave at least half an inch at the top for a clean seal.
For liquids like soup or sauce, freeze them in silicone cups for half an hour or so before transferring to bags. That way, liquid doesn't get sucked into the machine. Label every bag with what's inside and the date (YYYY-MM-DD), so you can use older meals first.
Storing Meal-Sized Portions Efficiently
After sealing, freeze bags flat on a baking sheet. Once they're solid, stand them up or stack them vertically in labeled bins. This makes the most of your freezer space and lets you see every meal at a glance.
Group similar meals together: proteins on one shelf, soups in a bin, grains in another. Consistent bag sizes and clear labels make it quick to find what you want.
Don't overfill the freezer, leave some space for air to move so things freeze and thaw evenly. When you pull out a meal, you only take what you need, leaving the rest untouched.
Sealing Techniques for Maximum Freshness and Convenience
Good sealing techniques keep food fresh and make weekly meal access easier. Getting the seal right, dealing with moisture, protecting delicate foods, and organizing your bags all make a difference in whether vacuum storage actually helps or just adds hassle.
Creating an Airtight Seal Every Time
A solid seal keeps food fresh and saves space. Place the open end of the bag flat in the sealer, no wrinkles or folds, or the seal won't hold.
Wipe the inside of the bag opening with a paper towel before sealing, especially if you're dealing with meat or oily foods. Leave about two inches of empty space at the top so the machine has room to work.
Hold the bag up to the light after sealing, look for gaps or thin spots. A good seal looks even and solid. If you spot a problem, just cut off the bad part and seal again.
For bags you'll grab from often, double-sealing (running it through twice) adds extra protection against tears when you're moving things around in a packed fridge.
Dealing With Liquids and Saucy Dishes
Vacuum sealing liquids takes a little extra care, since liquid can get sucked into the machine and mess up the seal. The best trick is to freeze liquids flat in the bag first, then seal once they're solid.
For soups, sauces, or marinated meats, lay the unsealed bag flat in the freezer for a couple hours. Once frozen, the sealer can pull out the air without sucking up any liquid. This also makes flat, stackable packs that save space.
If you need to seal liquids right away, use the pulse function to control suction. Watch the liquid level and stop before it reaches the top. Most machines have a moist or gentle setting to help with this.
Or, try the water displacement method: seal most of the bag, leave a small gap, and submerge it in water up to the unsealed edge. The water pushes out the air, then you seal the rest before lifting it out.
Pre-Freezing and Blanching for Delicate Foods
Soft foods like berries, cooked pasta, and baked goods usually get squished under normal vacuum pressure. We spread them out on a baking sheet and pop them in the freezer for an hour or two. That quick chill firms them up just enough so the vacuum sealer won't smash them.
We always blanch vegetables before vacuum sealing, otherwise, enzymes can zap their color and flavor during storage. We dunk cut veggies in boiling water for a couple of minutes, then toss them in ice water right after. That short heat shock bumps their fridge life from just a few days to nearly a week and a half once they're sealed up.
After blanching, we dry the veggies thoroughly with clean towels. Any leftover moisture can mess with the seal and even encourage bacteria, which nobody wants, even in a vacuum. Spending five minutes on this step really does help food last longer.
Fresh herbs and leafy greens are a bit trickier. We use the gentle or delicate setting on the vacuum sealer to avoid crushing them. They bruise so easily that we sometimes leave a little air in the bag rather than risk turning them to mush.
Labeling and Rotating for Smooth Meal Planning
Clear labels turn vacuum-sealed bags from a storage hack into a meal planning lifesaver. We grab a permanent marker and jot down what's inside and when we sealed it, right on the bag.
Adding portions helps too. A label like "Chicken breast, 8 oz, 6/24/26" means no more guessing games or opening bags to check. For batch-cooked stuff, we scribble reheating notes if it's not obvious.
We stand the bags up vertically in bins so we can flip through them like files. This way, nothing gets lost at the back of the fridge. We keep separate bins for proteins, veggies, and ready-to-eat meals.
Whenever we add new bags, we move the older ones to the front. It's first-in, first-out, otherwise, even vacuum-sealed food can go bad. A quick weekly glance keeps things moving and helps avoid waste.
Meal Prep Ideas Perfect for Vacuum Sealing
Vacuum sealing really shines when you match the right foods to the method. We've figured out which proteins, veggies, grains, and full meals actually seal well and hold up for the week. That keeps meal prep simple and the fridge from overflowing.
Proteins, Veggies, and Grains That Store Well
Proteins like raw chicken breasts (portion them into 4-6 ounce servings), ground beef or turkey (half-pound portions), and marinated steak strips all seal up easily. We flatten them before sealing to save freezer space and make thawing faster.
Cooked proteins are even better for grab-and-go. Grilled chicken thighs, seasoned ground meat, and hard-boiled eggs keep fresh for up to a week in the fridge when sealed.
Vegetables need a slightly different approach. Bell peppers, carrots, and snap peas can go in raw, chopped to size. Broccoli and cauliflower need a quick 2-3 minute blanch before sealing so they keep their color and crunch.
Grains and starches are meal prep gold. Cooked rice, quinoa, and pasta last 5-7 days in the fridge, and sweet potato cubes or roasted squash hold up for two weeks. We usually portion grains in 1-cup servings, they flatten and stack easily.
Vacuum-Sealed Meals for Grab-and-Go Convenience
Having full meals ready to heat and eat is a game changer on busy nights. For breakfast, we seal up egg muffin cups with veggies, overnight oats in single servings, and breakfast burritos that reheat fast.
Lunches work well as grain bowls with the parts sealed separately, cooked chicken, roasted veggies, and quinoa in their own bags. That way, nothing gets soggy.
For dinner, these meals seal and store especially well:
- Soup and stew portions in flat bags that stand up in the freezer
- Marinated proteins prepped and ready to cook
- Stir-fry kits with cut veggies and sauce
- Pasta parts stored separately to keep noodles from turning to mush
Vacuum sealing helps with portion control and saves fridge space. One week's worth of lunches takes up way less room than a bunch of bulky containers, and everything stays fresher.
Family-Friendly and Special Diet Options
Families get a lot out of kid-sized portions in small bags. Chicken nuggets, meatballs, and mini quesadillas seal up nicely and let kids grab their own snacks. We toss in veggie sticks and hummus for balance.
Special diet meal prep works great with vacuum sealing. Keto? Portion out cauliflower rice and protein. Vegetarians can seal bean-based meals and tofu. Paleo folks like pre-portioned sweet potatoes and proteins.
If you're juggling different diets at home, labeling is huge. We mark bags with what's inside, the date, and any dietary tags (GF for gluten-free, V for vegetarian, etc). Color-coded markers make it even easier to spot what you need.
Batch cooking plus vacuum sealing means making a big meal, then dividing it into family or single servings. A good Sunday prep session can fill the fridge with 10-14 sealed meals for the week, no need to cook every day.
Tips to Reduce Waste and Keep Food Fresh for Longer
Good vacuum sealing and smart storage habits can keep food fresh for weeks and cut down on waste. It's all about knowing how to store each type of food, avoiding common sealing mistakes, and managing fridge and freezer temps.
Smart Storage to Minimize Spoilage
Portioning food before sealing makes a huge difference in cutting waste. If you seal a giant pack of ground beef, you have to thaw and use it all at once. We split it into 1-pound bags that fit our meals.
Best foods to portion:
- Ground meats (1 lb per bag)
- Chicken breasts (2-3 pieces per bag)
- Fish fillets (single servings)
- Cheese blocks (enough for a week)
- Fresh herbs (just what you'll use)
We always pre-freeze liquids and soft foods before sealing. Soups, sauces, and berries go in the freezer for a couple of hours so the vacuum doesn't suck up liquid or crush tender foods.
Every bag gets a label with what's inside and when we sealed it. We organize the freezer by proteins, veggies, and meals, so nothing gets lost and turns into a freezer mystery.
Blanching veggies before sealing halts enzymes that would otherwise turn them mushy and dull. Boil broccoli for 3 minutes, carrots for 5, then chill in ice water before sealing. This step keeps veggies good for up to 18 months in the freezer.
Avoiding Common Mistakes With Vacuum Bags
Too much suction will crush delicate foods and ruin storage. Bread, chips, and pastries need the pulse setting. We tap the button for a second, check the shape, then go again if needed.
Leave at least three inches of empty space at the top of the bag. That gap ensures a solid seal and keeps food bits away from the heating strip. Overfilled bags often fail and can waste pricey cuts of meat.
Don't vacuum seal fresh mushrooms, garlic, or soft cheeses, they can grow harmful bacteria in low oxygen. Mushrooms do best in paper bags, and garlic likes mesh containers with airflow.
If we're sealing something with bones or sharp edges, we double-bag it. One layer isn't always enough for long-term storage, especially for ribs or chicken pieces. The extra bag costs less than losing a nice roast to freezer burn.
Managing Food Freshness in the Fridge and Freezer
Temperature matters more than you'd think for vacuum-sealed food. We keep the fridge at 35-38°F and the freezer at 0°F or below. Appliance thermometers are more reliable than the built-in ones, so we check monthly.
Vacuum-sealed raw meat lasts 1-2 weeks in the fridge (compared to just a few days in regular packaging). Cooked leftovers stay fresh for two weeks instead of five days. In the freezer, sealed meats keep their quality for 2-3 years, way longer than the six months you get with regular freezer bags.
We always store vacuum-sealed bags flat if we can. They stack better, thaw faster, and make the most of freezer space. Flat packs of ground meat thaw in half an hour under cold water, while big blocks take hours.
First-in-first-out rotation keeps things moving. We put new bags behind the old ones and do a quick freezer check each month to pull anything over six months old to the front.
Try not to leave the freezer door open too long. Warm air sneaks in, causes condensation, and can shorten the life of even vacuum-sealed food. We grab everything we need in one go to keep things cold.
Frequently Asked Questions
Vacuum sealing comes with practical questions, especially when you use it for weekly meal prep. Here are simple answers to help you store food with less waste and less clutter.
What foods benefit most from vacuum sealing when you are meal prepping for the week?
Proteins, hard cheeses, cooked grains, chopped vegetables, and ready-to-heat meals benefit most. Vacuum sealing helps reduce air exposure, which can slow freshness loss and make ingredients easier to portion.
How do vacuum-sealed bags compare to rigid containers for saving space in the fridge and freezer?
Vacuum-sealed bags usually save more space because they flatten around the food. They can be stacked, filed upright, or grouped in bins, while rigid containers keep the same shape even when half full.
What are the most common downsides of vacuum sealing, and how do you avoid them in everyday use?
Moisture, overfilled bags, and crushed delicate foods are the main issues. Pat food dry, leave enough space for sealing, cool cooked foods first, and use a gentle setting for soft items.
What is the best way to vacuum seal soups, sauces, or marinades without making a mess?
Freeze liquids first, then vacuum seal them once solid. This keeps liquid out of the machine and creates flat packs that are easier to store.
Can you get a reliable seal without a vacuum sealer, and when is that method worth using?
You can use valve bags with a manual pump or the water displacement method for occasional storage. These methods help reduce air, but a vacuum sealer gives stronger, more consistent results for weekly prep.
How should you portion and label vacuum-sealed ingredients so they stay easy to grab during busy weeknights?
Seal food in single-meal or two-serving portions. Label each bag with the food name, date, and serving size, then group similar items in bins so you can grab what you need quickly.
Share:
Why Vacuum Bags Work Well for Flat, Stackable Storage in Small Kitchens
What Should First-Time Buyers Include in a Simple Vacuum Storage Setup?