

Check out our latest compact vacuum sealer for food collection!
One minute food is perfectly cooked, and the next it is dry, tough, or still not safe to eat. Getting doneness right is one of the biggest differences between a frustrating meal and one that feels easy, delicious, and worth repeating.
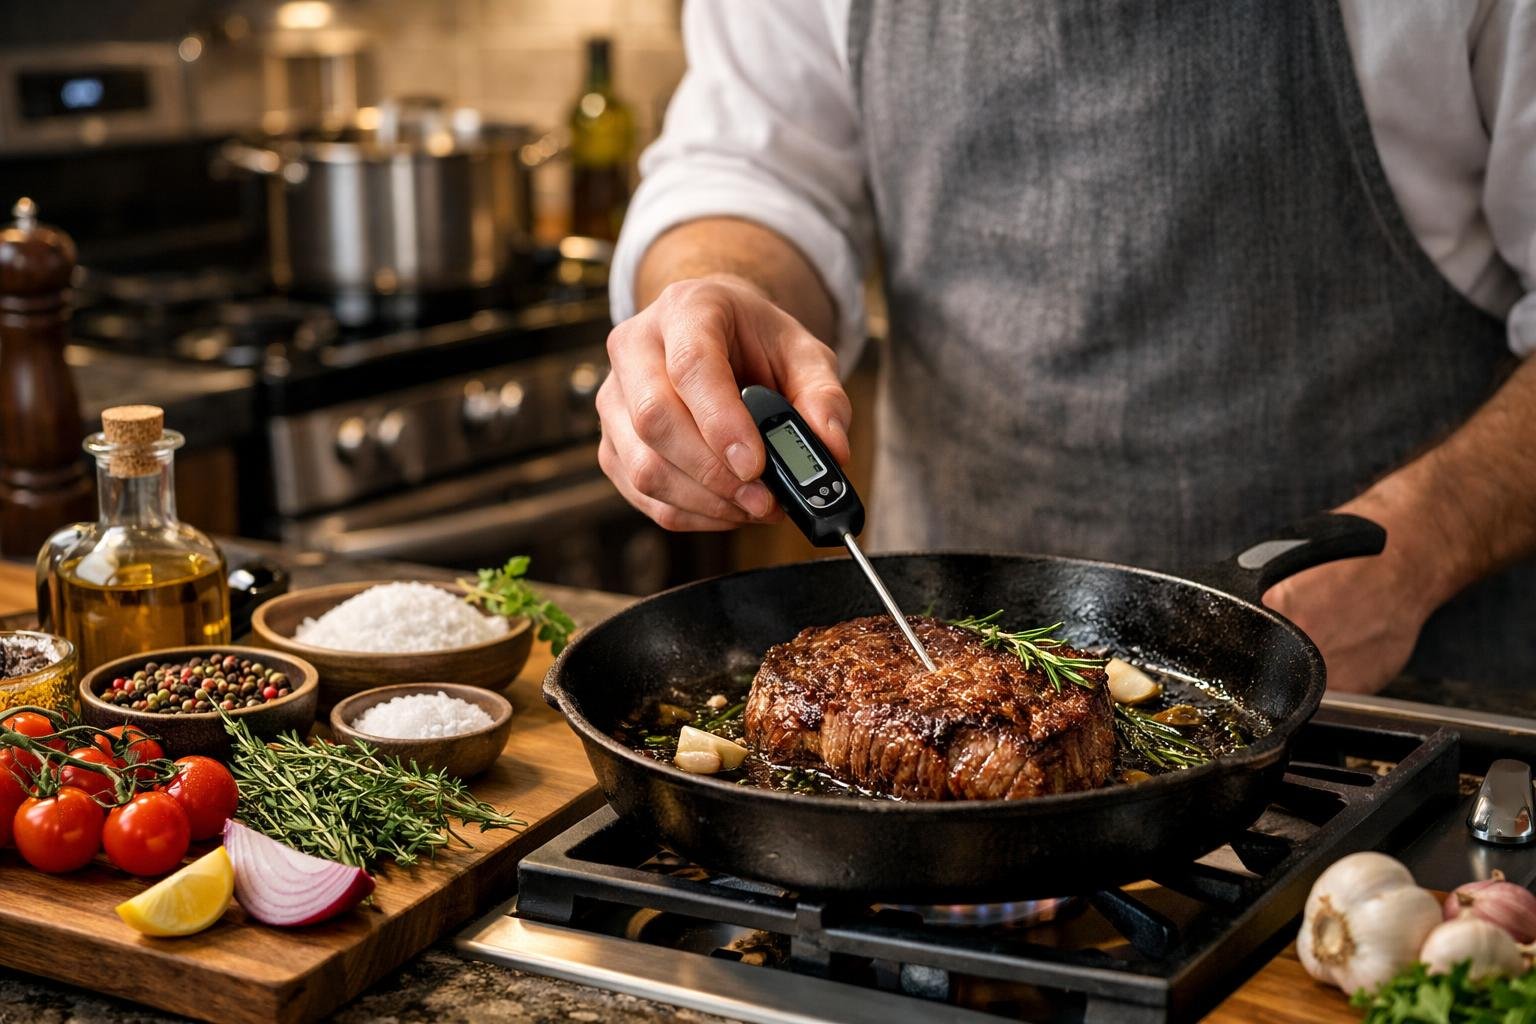
The key to avoiding overcooking or undercooking comes down to using a food thermometer, paying attention to cooking times, and understanding how different foods respond to heat.
Cooking food properly is not about luck. It comes down to a few smart habits, the right tools, and knowing what signs to watch for as food cooks.
In this guide, you will learn how to use temperature, timing, prep, and visual cues to cook proteins, vegetables, and more with better consistency and confidence.
Key Takeaways
- Use a food thermometer to check internal temperatures and make sure food hits safe levels without drying out
- Cut ingredients to uniform sizes and prep everything before cooking so heat distributes evenly
- Watch cooking progress with timers and visual cues; let meat rest after cooking for juicier results
Understanding Overcooking and Undercooking
Getting food to the right level of doneness means knowing what happens when we cook it too long or not long enough. Both overcooking and undercooking create specific problems that affect how our food tastes, feels, and even how safe it is to eat.
What Is Overcooking?
Overcooking happens when food sits on the heat too long or cooks at temperatures that are too high. Proteins in meat get tough and stringy, moisture disappears, and that juicy chicken breast is gone. Now it is dry and disappointing.
We've all seen it: veggies that looked bright and fresh a few minutes ago now just look limp and lifeless. Overcooking doesn't just wreck texture. It also zaps nutrients, especially water-soluble vitamins like C and B that break down with too much heat.
Flavour takes a hit, too. Instead of that perfect golden brown, you get burnt, bitter notes that take over the dish. Fish falls apart, pasta goes gummy, and rice clumps together in a way nobody wants.
What Is Undercooking?
Undercooking means food doesn't reach the minimum safe internal temp or hasn't cooked long enough to get the right texture. You know the signs: meat that's raw in the middle, veggies still hard when they should be tender, or baked goods that are doughy instead of fluffy.
This isn't just about taste or texture. Undercooked food can carry nasty bacteria like salmonella, E. coli, and listeria. Poultry needs to hit 74°C (165°F) inside to be safe; ground beef should hit 71°C (160°F).
Even if safety isn't the issue, undercooking can mess with digestion and flavour. Raw starches in potatoes or grains are tough on the stomach. And to get those deep, complex flavours, you need enough cooking time for things like the Maillard reaction to happen.
Dangers And Downsides Of Improper Doneness
Food safety is the big worry when things aren't cooked right. Undercooked meat, seafood, and eggs can cause food poisoning that ranges from mild discomfort to a pretty terrible week.
Common foodborne illness symptoms include:
- Nausea and vomiting
- Diarrhoea and stomach cramps
- Fever and chills
- Dehydration
Improper doneness also wastes food and money. That overcooked roast or undercooked cake? That's time, effort, and ingredients down the drain. Plus, you miss out on the nutrition your food should have.
Overcooking destroys heat-sensitive nutrients and can create some not-so-great compounds. Undercooking means proteins and starches don’t break down enough, making them tougher for your body to handle. The real trick is finding that sweet spot where food is safe, nutritious, and actually tastes good.
Mastering Cooking Temperatures for Perfect Doneness
Getting food to the right temperature is what separates a passable meal from one you want to brag about. You have to know the target temps for different foods, which numbers matter, and how to spot when something’s both safe and delicious.
The Importance Of Internal Temperature
Internal temperature tells you what's really going on inside your food, not just what it looks like on the outside. A chicken breast can look perfectly browned and still be raw in the middle. Cooking times are a rough guide, but things like starting temp, thickness, and even your pan can throw them off.
A meat thermometer takes the guesswork out. It measures the heat at the thickest part, where it takes longest to cook. This helps you dodge both undercooked dangers and the dry, bland results of overcooking.
Stick the thermometer in the thickest part, steering clear of bones and fat, since those mess with the reading. And honestly, checking a few spots is smart because cold pockets can hide.
Cooking Temperatures For Different Foods
Different proteins and dishes need specific internal temps for proper doneness. Here are the ones that come up all the time:
Poultry: 74°C (165°F) for all cuts
Ground Meats: 71°C (160°F) for beef, pork, lamb
Whole Cuts of Beef/Pork: 63°C (145°F) minimum, with a 3-minute rest
Fish: 63°C (145°F) or until flesh is opaque
Eggs: 71°C (160°F) for dishes with eggs
Cooking temps also depend on what you like. A medium-rare steak is spot-on at 54-57°C (130-135°F), but if you want medium, aim for 60-63°C (140-145°F). These numbers matter. They're the difference between juicy and tough.
Safe And Tasty Doneness Levels
Balancing safety with flavour means knowing the minimum safe temps and then adjusting based on what you like. Always hit the safety minimums, but you can tweak within that range for texture and taste.
For beef, you get some wiggle room. Whole cuts just need the surface bacteria killed by searing, so rare or medium-rare is fine. Ground beef needs to go to 71°C since grinding spreads bacteria around.
Poultry is strict. 74°C is non-negotiable, but you can pull it at 71°C and let it rest, since carryover heat will finish the job. Pork isn’t what it used to be: 63°C is safe and gives you a little pink and a lot more tenderness.
Visual cues like colour and texture help, but a thermometer is the only way to know for sure.
Essential Cooking Tools for Precision
Good tools take the guesswork out and help you get consistent results. Accurate temperature checks and timing are the two things that really stop overcooking and undercooking in their tracks.
Choosing The Right Food Thermometer
A meat thermometer is your best friend for checking doneness without hacking into food and losing all the juices. Keep both an instant-read and a probe thermometer around if you can.
Instant-read thermometers are quick, 2 to 10 seconds tops. They're perfect for checking several pieces of chicken or different spots on a roast. Digital ones with thin probes are the easiest to use and don’t leave big holes.
Probe thermometers stay in the food while it cooks, which is great for big roasts or whole birds. You can monitor the temp without opening the oven door a dozen times. Look for models with heatproof cables and clear displays.
Remember, poultry has to hit 74°C (165°F) inside; medium-rare beef is 54-57°C (130-135°F). You just can't eyeball these.
How To Use Timers Effectively
Multiple timers save you from that classic multitasking disaster where everything burns. Use your phone for the main dish, a kitchen timer for sides or prep.
Set timers for a little less than the recipe says, then check for doneness. For example, if the recipe says 25 minutes, set your timer for 22 and check early. That gives you a buffer before things go south.
Timers help with resting, too. Meat keeps cooking as it rests, so timing this right can mean the difference between juicy and dry. Ten minutes for steaks, 20 for big roasts, and carryover heat does the rest.
Oven And Probe Thermometer Tips
Ovens lie. Most run 10-25°C hotter or colder than the display says. Stick an oven thermometer on the centre rack to see the real temp and adjust as needed.
Keep the oven thermometer away from the walls and heating elements. Check it after a 20-minute preheat to get an honest reading.
For probe thermometers, put the probe in the thickest part of the meat, not touching bone or fat. You want it right in the centre, where it cooks slowest.
Smart Cooking Techniques Every Home Chef Needs
Mastering different cooking methods helps control heat and timing, so you don't end up with burnt outsides and raw insides or dried-out everything. Each method has its strengths for different foods and results.
Even Cooking With Sautéing, Baking, And Roasting
Sautéing needs medium heat and frequent stirring to keep things cooking evenly. Make sure the pan's hot and your ingredients are cut to similar sizes. Don’t crowd the pan. Let moisture escape so things brown instead of steam.
Baking uses gentle, even heat all around. Always preheat your oven and put racks in the centre unless the recipe says otherwise. Use an oven thermometer, since most ovens aren’t as accurate as we’d like.
Roasting cranks up the heat for caramelisation and browning. Arrange food in a single layer with a little space between pieces. Flip halfway through for even colour and to make sure the inside cooks through.
Benefits Of Steaming And Boiling
Steaming keeps nutrients in and prevents overcooking. The gentle heat keeps veggies and fish moist. Layer your steamer basket by cooking time, adding quick-cooking stuff later. You pretty much can't burn food this way because the temp never goes above boiling.
Boiling works for pasta, grains, and tough veggies. Use enough water so things move around and cook evenly. Start testing doneness a bit before the timer says. That way you catch food at its best. Salting the water gives you flavour from the inside out.
Getting Grilling Just Right
Grilling is all about direct and indirect heat zones. Sear proteins over high heat, then move them to indirect heat to finish. This keeps the outside from burning while the inside cooks through.
Preheating the grill for 10-15 minutes is key for good sear marks. Try not to constantly move or flip food. Let it sit for caramelisation. Closing the lid turns your grill into an oven, which helps thicker cuts cook more evenly.
Food Prep Strategies That Make a Difference
Proper prep is what decides if your ingredients cook evenly or end up half-burnt and half-raw. Cut veggies to similar sizes, thaw proteins the right way, and get your workspace organized. It makes a world of difference when the heat is on.
Prepping Ingredients For Success
Honestly, having everything ready before we start cooking makes all the difference, otherwise, chaos. This approach, called mise en place, is just about washing, peeling, chopping, and measuring before the heat’s even on.
Sharp knives matter more than people think. Dull blades crush ingredients, mess up textures, and somehow make everything harder. We try to keep our knives sharp and grab the right cutting board for the job, even if it means pausing to hunt one down.
We like to toss prepped ingredients into little bowls or containers, lining them up in the order we’ll use them. It’s not just for show. It actually helps avoid overcooking while you’re elbow-deep searching for the next thing. Sometimes we jot down notes in a cooking journal, but honestly, we forget half the time.
Patting dry proteins and vegetables with paper towels before cooking matters. Extra moisture turns browning into steaming, and no one’s looking for soggy, pale food.
Why Uniform Sizes Matter
Cutting stuff to the same size sounds nitpicky, but it’s the secret to getting everything cooked just right. If carrots are all over the place, the skinny bits turn to mush and the big ones stay tough.
We try to keep each ingredient type consistent. Chicken breast pieces should be about the same thickness. Either pound them flat or slice big ones in half. Veggies for the same pan should stay close in size.
| Ingredient Type | Recommended Size | Why It Matters |
|---|---|---|
| Root vegetables | 2.5 cm cubes | Even roasting without burning |
| Chicken pieces | 4 cm chunks | Uniform cooking time |
| Onions for sautéing | 0.5 cm dice | Prevents raw or burnt bits |
Different cooking methods need different sizes. Stir-fry veggies get chopped smaller because high heat cooks them in seconds. Soup veggies can be chunky because they’ve got all the time in the world to soften up.
Thawing And Marinating Done Right
Frozen proteins need real thawing for even cooking. We usually move meat to the fridge a day ahead, so the outside doesn’t overcook while the inside stays icy.
If we’re in a hurry, cold water thawing works. Seal the protein in a bag, dunk it in cold water, and swap the water every half hour or so. It’s quicker and still safe.
Never marinate at room temp. We always marinate in the fridge. Acidic marinades, think lemon or vinegar, don’t need long. 2-4 hours is plenty. Oil-based ones can go longer without turning the meat mushy.
Letting marinated proteins sit out for 20-30 minutes before cooking helps them cook evenly. Cold centers mean overcooked outsides, and nobody wants that.
Foolproof Tips to Prevent Kitchen Slip-Ups
Managing the space and timing in your kitchen is half the battle. When ingredients get the space and attention they need, it’s easier to keep things on track.
The Dangers Of Overcrowding The Pan
If you cram too much in the pan, you’re steaming, not searing. Overlapping food traps moisture, drops the temperature, and suddenly everything’s grey and sad instead of golden and crisp.
We try to leave about a centimeter between pieces. That way, hot air can circulate and moisture evaporates fast. Especially with proteins, spacing makes the difference between a nice crust and rubbery regret.
Cooking In Batches Like A Pro
Cooking in batches sounds tedious, but it saves dinner. We split big piles into smaller rounds that actually fit, even if it means a few extra minutes.
Between batches, we heat the pan up again and wipe out any burned bits. Letting the pan recover for half a minute keeps things cooking evenly.
Finished batches go on a wire rack or a warm plate, not stacked, so they don’t get soggy. For veggies, we might keep the oven at 95°C to hold them. Proteins can rest while we finish the rest. Timing usually works out.
Avoiding Common Cooking Mistakes
Most cooking mistakes come from rushing or skipping prep. We see people tossing cold ingredients straight from the fridge into hot pans, which tanks the temperature and leads to uneven results. Bringing proteins to room temp for 15 minutes helps.
Key mistakes to dodge:
- Forgetting to preheat pans before adding oil or food
- Flipping or stirring constantly instead of letting food get some color
- Using a pan that’s too small for the amount of food
- Ignoring what you see and feel, and just following the clock
Recipes are guidelines, not gospel. A thick chicken breast needs more time than a thin cutlet, no matter what the recipe says. We trust the thermometer or the touch test way more than the timer.
Sharpening Your Senses and Timing
Learning to read how food looks, sounds, and smells turns cooking from guessing into something you can actually count on. We try to jot down what worked, when we remember, so next time’s easier.
Recognising Visual Cues for Optimal Doneness
Watching food change tells us a lot. Chicken’s done when the skin’s golden and juices run clear, not pink. Beef goes from red to brown, and gets firmer as it cooks. Fish turns from see-through to opaque and flakes apart with a fork.
Veggies give their own hints. Greens wilt and darken, roots get tender and browned at the edges. When we batch-cook, we compare pieces to see which need more time.
Baked goods show off with color: pale dough turns golden, surfaces go from wet and shiny to dry and a little firm as they finish.
Tuning in to Sounds and Smells
The sizzle tells a story. A strong sizzle means moisture’s leaving and things are browning. If it’s quiet, the pan’s not hot enough. When it softens to a gentle bubble, food’s probably close to done.
Aromas are big clues. Garlic smells sweet when it’s just right, but turns harsh if it burns. Onions get that caramelized scent as they cook, and roasting veggies smell nutty when they’re perfect.
With bread and pastries, the warm, yeasty smell means the inside’s set. Burning smells? That’s your last warning. We try to trust our nose as much as our eyes.
Jotting Down Your Learnings for Next Time
A cooking journal is handy for remembering what worked and what flopped. We note down times, heat levels, and how things looked when they were perfect or not.
We track pan types, temperatures, and quantities for recipes we want to repeat. When batch-cooking, it helps to know which round came out best. Simple notes like “chicken breast, 6 min per side, med-high, golden with clear juices” are gold.
We write down mistakes too, like “overcooked at 8 min” or “still raw inside,” so we don’t keep making the same errors. These notes turn into our own personal recipe guides.
Getting the Hottest Results: Heat and Rest
Getting a handle on temperature and knowing how heat keeps working after you pull food off the stove is a game-changer. Carryover cooking and letting things rest make the difference between juicy and dry, or just plain undercooked.
Dialling In Temperature Control
Oven and stovetop settings are more of a suggestion than a rule. Most home ovens are off by 25°F or more, so 375°F on the dial doesn’t always mean that inside.
We use an oven thermometer to check what’s really going on, placing it on the center rack. Stovetop burners are fickle too. Medium on one burner isn’t always the same on another.
A digital probe thermometer is our best friend for checking inside temps. We poke it into the thickest part of the meat, steering clear of bones and big fat pockets. Chicken’s safe at 165°F, pork at 145°F, and ground meats at 160°F.
Room-temperature ingredients help everything cook evenly. We try to pull meat from the fridge about 30 minutes before cooking.
What Is Carryover Cooking?
Food keeps cooking after it’s off the heat. The outside stays hot and sends warmth inward, raising the internal temp by 5-10°F for small cuts, up to 15°F for big roasts.
A steak pulled at 130°F will climb to 135-140°F as it rests, so we take it off a little early. Dense roasts and whole birds have more carryover than thin chops or fish.
If we ignore carryover, we end up with dry, overcooked food even if we watched the thermometer like a hawk.
The Secret To Resting Meat
Resting lets muscle fibers relax and soak up juices that cooking squeezed toward the center. We rest steaks and chops for 5-10 minutes, big roasts for 15-30, depending on size.
Cutting right away? All those juices just pour out onto the board, and the meat’s drier than it should be.
We tent with foil, but not too tight. Otherwise, steam ruins any crispy bits. The meat stays plenty warm, and the texture’s way better for it.
Frequently Asked Questions
Cooking well gets easier when you rely on a few consistent habits. Use a thermometer, pay attention to texture and color, and give yourself enough space and time to cook without rushing.
What's the secret to timing our meals to perfection in the kitchen?
Prep ingredients before cooking, set timers a little early, and check doneness before the full cook time is up. A food thermometer helps you confirm when proteins are ready.
How do we keep our veggies vibrant and perfectly crisp every time?
Cut them to similar sizes and cook them quickly with methods like steaming or sautéing. Avoid overcrowding the pan so they stay bright and lightly crisp instead of turning soft.
What are some foolproof methods for ensuring meat is cooked just right?
Check the thickest part with a thermometer and let the meat rest after cooking. This helps you hit the right internal temperature and keep juices in the meat.
Can we dish out some tips for managing multiple dishes without breaking a sweat?
Read recipes first, work backward from serving time, and prep ingredients in advance. Use separate timers so you can track each dish without guessing.
What are our top tricks for keeping seafood succulent and never rubbery?
Cook seafood just until it turns opaque or flakes easily. Pull shrimp and fish off the heat as soon as they are done, since they continue cooking briefly after removal.
How do we become masters of measuring doneness without fancy gadgets?
Look for color, texture, and simple visual cues. Fish should flake, baked goods should come out clean with a toothpick, and vegetables should feel tender without turning mushy.
Share:
Which Cooking Techniques Help Retain Maximum Flavor
What Is The Best Way To Handle Ingredients Before Cooking