

Check out our latest home & kitchen collection!
We've all done it, bought fresh herbs or some fancy spice, convinced we'll use it, and then months later, it turns up wilted or expired, buried behind a stack of cans. Turns out, where we stash our ingredients really changes how often we use them.
If ingredients are right in front of us and easy to grab, we use them more. Hide them away, and they basically vanish from our mental shopping list.
Storage placement isn't just about looking tidy, it shapes how we cook, how much food we toss, and even what we spend at the store.
When we can actually see and reach our stuff, we're way more likely to cook with it. Sometimes, the difference between a pantry that's a goldmine and one that's a wasteland of expired goods comes down to where things live.
Let's dig into some real-world strategies for turning your kitchen into a space where ingredients don't disappear. We'll look at layouts, tricks for making stuff visible, and a few systems that help you actually use what you buy.
Key Takeaways
- Ingredients you can see and reach get used way more often
- Good storage plus a system like FIFO (First In, First Out) keeps things fresh and cuts down on waste
- Keeping daily-use items at eye level makes cooking smoother and helps avoid forgotten food
Why Storage Placement Directly Impacts Ingredient Usage
Where we put our food changes how much we use it, what gets forgotten, and, honestly, how much ends up in the trash.
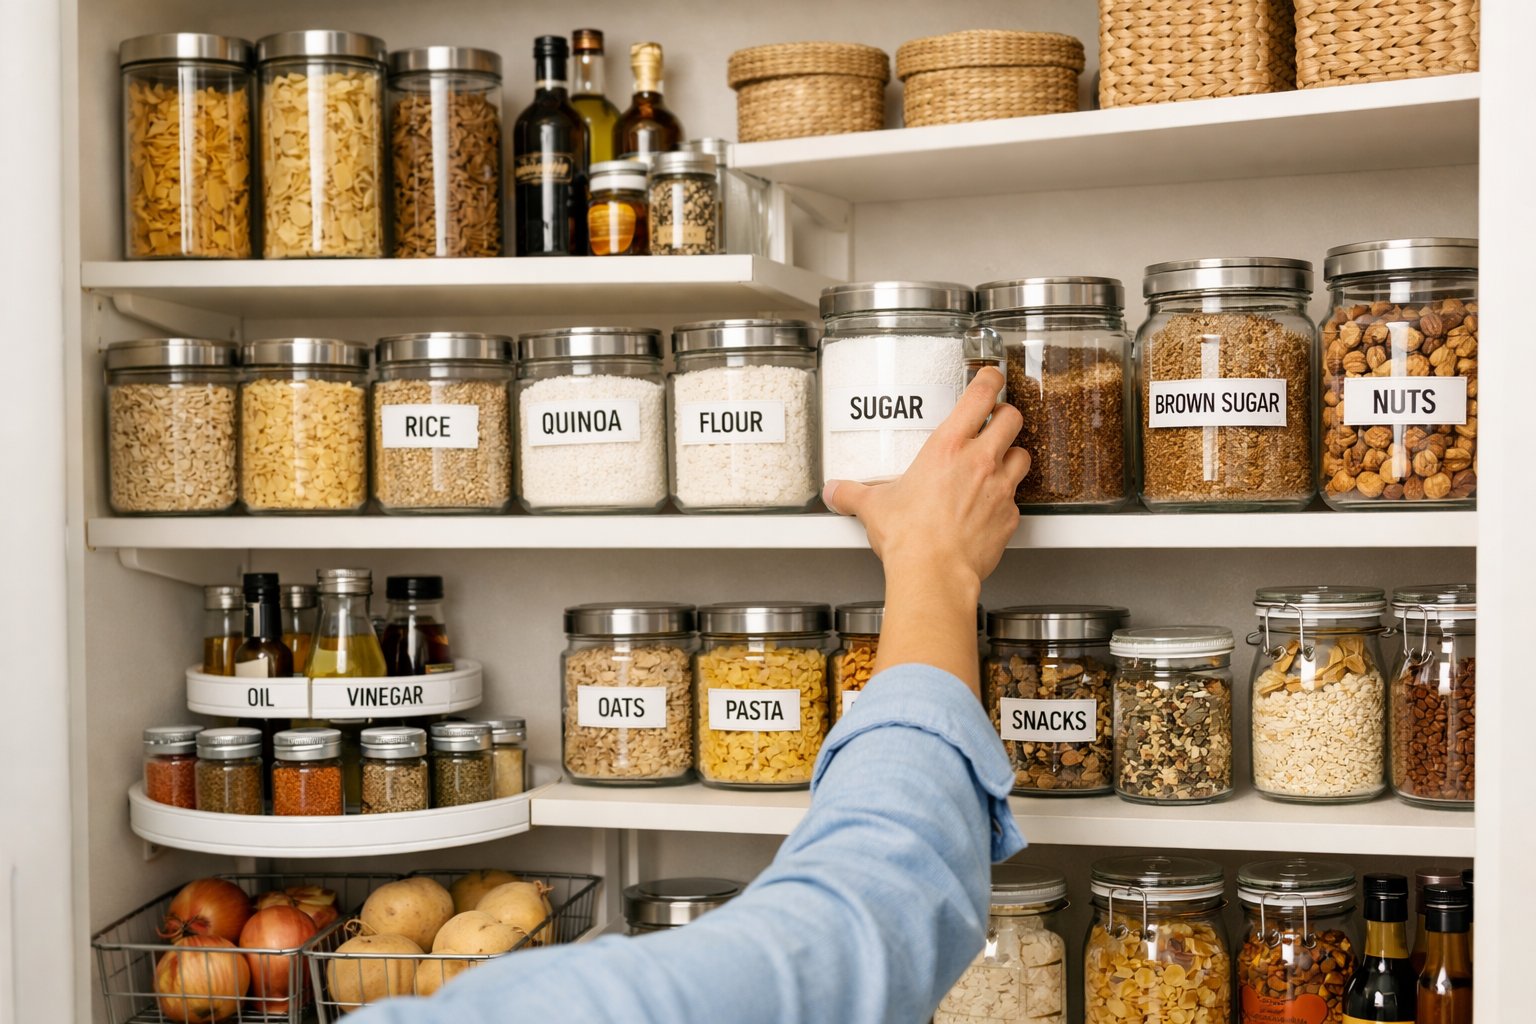
Visibility and Accessibility
If something's at eye level or smack in the middle of the fridge, we're way more likely to use it—sometimes three times as often as whatever's buried in the back. It's not just about being lazy; our brains just don't register what we can't see.
We've all tossed out sad, slimy herbs that got lost in the fridge. If it's out of sight, it's out of mind. And if you have to move a mountain of jars to get to the quinoa, you'll probably just make rice instead. High shelves or low drawers? Forget about it—unless you're really motivated, those ingredients might as well not exist.
Professional chefs get this. They keep their go-tos close and push specialty stuff further away. At home, it pays to be just as picky about where things go. Take a look at what you use most and shuffle things around until it actually makes sense.
Behavioral Patterns in Home and Professional Kitchens
We always reach for whatever's right in front. The stuff at the back? It lingers, sometimes forever, until it quietly expires. It's just how people work.
There's this "rule of three"—we usually grab one of the first three things we see. That's why rotating older stuff to the front matters. In restaurants, they stick to FIFO like it's gospel. At home, though, groceries tend to land wherever there's space, which leads to duplicates and forgotten bags of flour.
Fridge zones matter, too. Produce in the crisper drawer lasts but often gets ignored, while whatever's at eye level disappears fast. It's a balancing act: keep things fresh, but don't hide them so well you forget they exist.
Impact on Meal Prep and Cooking Efficiency
Where we keep things shapes how fast we cook and what we actually make. If all your baking stuff is together, you're more likely to bake. If your oils are next to the stove, you'll use them. It's not about limiting choices, just making the things you want to make a little easier.
Bad placement slows everything down. If you stash cutting boards in a weird spot or keep oils across the kitchen, you'll waste time (and probably get frustrated). Over time, those little hassles add up and make cooking feel like a chore.
When we keep prepped ingredients front and center, we're reminded to use them before they spoil. That alone can cut down on waste and help us actually eat what we planned.
Organizing for Optimal Use: Practical Storage Layouts
The way we organize our storage has a huge effect on how easy it is to grab stuff, use it before it goes bad, and just keep cooking from turning into a headache. A little strategy goes a long way.
Strategic Placement for High-Frequency Items
The stuff we use every day—olive oil, salt, pepper, your favorite spices—should be at eye level, right where you prep food. No reaching, no bending, no hunting. Oils by the stove, baking stuff near your mixer. It sounds obvious, but it makes a difference.
Where to put what:
- Top shelves: Rarely used or backup items
- Eye to waist level: Daily essentials and things you open all the time
- Lower shelves: Heavy stuff, big appliances, bulk buys
- Deep storage: Out-of-season or overflow stock
Heavier things go where you don't have to lift them overhead. Lighter, often-used items should be right in your line of sight. Makes life easier and saves your back.
Zoning Kitchen Storage Areas
Dividing storage into zones by type or use keeps chaos at bay. Most people end up with baking supplies in one spot, canned goods in another, grains together, snacks somewhere else, and so on.
Stick to FIFO by putting new stuff behind the old. That way, you grab the oldest first and don't end up with mystery cans from 2019.
Sample zone setup:
| Zone Type | Items | Location |
|---|---|---|
| Active cooking | Oils, spices, go-to sauces | Near stove, eye level |
| Baking station | Flour, sugar, baking soda, extracts | Lower cabinets, near counter |
| Dry goods | Pasta, rice, beans | Deep pantry shelves |
| Snacks & quick items | Nuts, crackers, dried fruit | Middle shelves, easy grab |
| Backup stock | Bulk, duplicates | Top or out-of-the-way shelves |
Putting things back in the right spot takes a little discipline, but after a while, it just becomes habit.
Labelling and Inventory Tracking
Labels save time and sanity. Mark containers with what's inside and when you bought or opened it. No more guessing if the flour's still good.
If you move stuff to different containers, slap on the expiration date from the original package. A label maker is nice, but honestly, masking tape and a marker work just as well.
Inventory tracking doesn’t have to be fancy. Keep a note on your phone or a magnet pad on the fridge. Jot down when you open something or if you’re running low. It beats realizing you’re out of sugar halfway through making cookies.
Color-coding helps, too. Maybe red for stuff that needs to be used ASAP, green for new. You can spot what needs attention without reading every single label.
Storage Conditions That Affect Usage and Longevity
Temperature, humidity, and airflow all play into how long food stays fresh and how likely we are to use it. The right storage keeps things edible and at the front of your mind.
Temperature Control in Different Storage Zones
Kitchens have hot and cold spots. The fridge should stay between 35°F and 38°F for things like dairy, meat, and produce. Freezers at 0°F or below keep food safe for months.
Pantries near ovens or sunny windows get warm—bad news for oils, grains, and canned goods. Oils go rancid above 70°F, and grains attract pests in heat. Cooler, stable spots keep food fresher and more appealing, so we actually use it. Spices and snacks last longer and get eaten more when they're not stored in hot corners.
Dry Storage Versus Refrigeration
Deciding between dry storage and the fridge depends on what you're storing. Flour, pasta, rice, canned goods, and beans do best in cool, dry pantries. Humidity ruins them.
Dairy, fresh produce, eggs, and open condiments need the fridge. Cold slows down spoilage, so you get more time to use them. But even in the fridge, if you hide things in drawers or the back, you might forget they exist. Clear containers in obvious spots help a ton.
Humidity and Airflow Considerations
Too much humidity means moldy bread, clumpy salt, and rusty cans. Too little dries out cheese and greens, or makes baked goods go stale.
Airflow matters, but drafts can dry things out, so it's a balance. Use mesh bags for veggies in the fridge—enough air to keep things crisp, but not so much they shrivel. Pantry shelves need some ventilation, but grains and cereals should be in airtight containers to block out moisture. If you can keep things in the sweet spot, you'll eat more of what you buy and toss less.
Preventing Ingredient Loss: Food Safety and Spoilage Risks
Bad storage isn't just annoying—it can actually make food unsafe, let pests in, or break seals that keep things fresh.
Cross-Contamination and Safe Handling
Think about what touches what. Raw meat above ready-to-eat food is a recipe for trouble. Always keep raw proteins down low and sealed tight.
Temperature matters more than we realize. Stuff that needs to stay cold shouldn't be near the oven or in a warm pantry corner. And never store cleaning stuff with food—just don't.
If you stash your most-used items somewhere awkward, you end up moving a bunch of things around and risk contaminating other food. A sensible setup lets you grab what you need without playing Tetris.
Role of Airtight and Sealed Containers
Airtight containers are your best friend for keeping food fresh. Air brings in moisture and bacteria, and makes things go stale. Move open bags of flour, grains, or sugar into sealed containers right away.
Not all containers seal well. Rubber gaskets or silicone seals beat snap-on lids every time. You can test them by dunking an empty container in water—no bubbles means it's airtight.
Glass or sturdy plastic with a real seal keeps food better than flimsy packaging. Just remember to label with the date, because sealed doesn't mean immortal.
Pest Control in Storage Areas
Pests love forgotten food in open packages. The best way to keep them out is to use good containers and check your storage regularly.
Look over your shelves every week for droppings, chewed corners, or holes. The stuff in the back or way up high is easy to ignore, which is exactly where pests like to hide.
Physical barriers work better than sprays or traps. Use easy-to-clean shelf liners, leave space between items so you can spot problems, and keep things off the floor. Cooler storage areas are less inviting for pests, too.
Maximizing Shelf Life: Freezing and Secondary Packaging Tips
Freezing at the right time and using extra layers of packaging can stretch shelf life by weeks or months without killing flavor or nutrition. Sometimes, just a little extra care goes a long way.
When and How to Freeze Ingredients
Freeze ingredients before they start showing signs of decline. Fruits go into the freezer best when they're ripe but still a bit firm. For vegetables, a quick blanch helps keep their color and texture intact.
Preparation matters. Portion ingredients into meal-sized amounts before freezing—trust me, it makes life easier later. Push out as much air as you can from storage bags to dodge freezer burn. Flattening the bags helps too.
Best practices for freezing:
- Label everything with contents and date
- Freeze items flat for easier stacking
- Use moisture-proof containers or freezer bags
- Let cooked foods cool to room temp before freezing
- Don't overload the freezer; it slows down freezing
Chop fresh herbs and freeze them in ice cube trays with water or oil to keep them vibrant. Bread products keep their quality when wrapped tight—you can even toast slices straight from the freezer.
Benefits of Secondary Packaging Solutions
Secondary packaging adds an extra protective layer around your main storage container. It’s a simple step, but it helps block moisture, air, and temperature changes that mess with food quality.
We often use this when storing cheese—pop it in an airtight container after opening the original wrap, or toss store packaging inside a freezer bag. This double layer really cuts down on freezer burn and keeps odors from mingling.
Secondary packaging advantages:
- Extends freezer storage by 2-3 months over original packaging
- Shields against punctures and tears
- Stops moisture loss in refrigerated foods
- Blocks light for sensitive ingredients
Airtight containers are great for pantry staples that come in flimsy bags. Vacuum-sealed bags? Those are gold for freezing meats and meals long-term.
Implementing FIFO and Other Usage Systems
Rotation systems help avoid that classic scenario: forgotten ingredients expiring in the back while fresh stuff gets used up first. FIFO and a few quick fixes keep things running smoother and cut down on waste.
First-In, First-Out Explained
FIFO means the first thing you store is the first thing you use. Place new groceries behind what’s already there, so you naturally reach for the oldest stuff first.
Set up shelves with clear front-to-back access. When restocking pasta, canned goods, or spices, push older packages forward and put new ones behind. For the fridge, it’s even more important—dairy, produce, and proteins have shorter lives.
Simple FIFO setup:
- Mark dates on products that don’t have them
- Put older items at eye level or within easy reach
- Store new purchases toward the back or on less convenient shelves
- Check dates weekly when planning meals
It only works if everyone gets the system. For bulk items in containers, jot the purchase or open date right on the container. That way, you don’t accidentally bury old stuff under new.
Corrective Actions for Inventory Mistakes
Find expired or buried items? Time for a quick reset. Start by checking the whole area to spot everything that’s expired or lost in the shuffle.
Toss expired products, then reorganize using proper FIFO. If certain things always expire, maybe you’re buying too much or not planning enough meals around them. Tall shelves that hide things? Add risers or a lazy Susan so you can actually see what you have.
Quick fixes:
- Install pull-out drawers in deep cabinets
- Use clear bins to group items by expiration window
- Create a “use first” zone at the front of shelves
- Set phone reminders to check specific perishables
Keep an eye on what keeps expiring. That info helps tweak your shopping list or decide where to store things. If you barely use something, buy a smaller package or put it somewhere you’ll actually notice it.
Frequently Asked Questions
Storage placement isn’t just about where things fit—it’s about how temperature, organization, and access affect freshness and waste. Here are some of the most common questions people run into.
What are the top strategies for organizing pantry items to maximize ingredient freshness?
Store pantry goods in airtight containers to keep out moisture, air, and pests. Clear containers make it easy to see what’s inside and how much is left without opening everything up.
Group similar items together. Baking stuff in one spot, grains in another, canned goods in their own section. This setup saves time and keeps you from leaving things open while you hunt around.
Put newer items behind older ones, and keep your everyday essentials at eye level. Stuff you use less often can go higher or lower.
Can you spill the beans on how temperature variations impact the shelf life of common kitchen staples?
Temperature swings mean condensation inside containers, and that moisture can ruin dry goods. Flour, sugar, and spices break down faster if temps go over 70°F.
Oils go rancid quicker in warm spots. Keep them in a cool, dark pantry away from the stove—somewhere between 50-70°F is best.
Chocolate and nuts don’t like heat either. Chocolate can get that weird white bloom, and nuts’ oils go off if it’s too warm.
How does the 'first in, first out' method prevent the tragedy of expired spices and sauces?
FIFO makes sure you use the old stuff before the new. Put recent purchases behind what’s already there so nothing gets lost in the back.
Label everything with the purchase or open date. Spices lose their punch after a year or two, and opened sauces last 3-6 months in the fridge.
Rotating stock saves money and cuts waste. When you can see dates and grab the oldest items first, you’re way less likely to toss forgotten ingredients.
Fridge real estate: which ingredients deserve a front-row seat for optimal use-by dates?
Dairy goes on upper shelves where temps stay steady. Keep milk, yogurt, and cheese away from the door—it’s too warm out there.
Leafy greens and herbs need to be front and center in the crisper. They spoil fast, so seeing them helps you use them up before they wilt.
Condiments and sauces can handle door storage since they’re full of preservatives. Middle shelves are best for leftovers and prepped ingredients you’ll eat in the next few days.
Got the chills for chilled goods: How important is freezer organization in preventing freezer-burned disappointments?
Freezer organization really matters if you want to keep food tasting good. Wrap things tight with freezer paper or use vacuum-sealed bags to keep air out—freezer burn is the enemy.
Set up zones: raw meats on the bottom, prepared meals in the middle, frozen veggies or fruits on top or in the door bins.
Label everything with what it is and when you froze it. Most frozen foods taste best within 3-6 months, though well-wrapped meats can last a year. Without labels, you’ll end up guessing what’s in those mystery containers—and probably wasting more than you’d like.
Could you dish out some tips on maintaining the perfect temperature in your food storage zones to keep your meals tasting Michelin-starred?
Set your refrigerator between 35-38°F, and keep the freezer at 0°F or lower. I usually grab an appliance thermometer to double-check, since those built-in displays can be off.
Don’t cram your fridge or freezer full—air needs room to move. I aim for about 75% full in the fridge, and I try not to let packages block the freezer vents.
For pantry items, keep them away from heat sources like ovens, dishwashers, or sunny spots. I shoot for 50-70°F in the pantry, using a fan or cracking a window if things get stuffy. A quick temp check every so often helps catch any issues before stuff goes bad.
Share:
What Makes Some Pantry Items Go Stale Before Their Expiry
Why Clear Storage Improves Food Usage in the Kitchen