

Check out our latest home & kitchen collection!
A functional cooking station turns meal prep from a scavenger hunt into something way more enjoyable. If you’re always searching for a knife, cramming into a tiny bit of counter, or reaching across the kitchen for basic stuff, even simple meals start to feel like a chore.
The trick is to set up clear work zones and store your tools where you actually use them, following a flow from prep to cooking to plating.
We've all had that moment, mid-recipe, the cutting board is lost under a pile of mail, your favorite knife is in the dishwasher, and there’s zero counter space left.
A well-organized cooking station keeps what you need within reach and gives every task its own spot. No need to buy fancy gadgets or rip out your cabinets.
Let’s go through how to assess your space, pick a layout that fits, and set up zones that match how you actually cook. We’ll talk about which tools are worth it, how to keep ingredients handy, and some workflow habits that make pro kitchens tick.
Key Takeaways
- Organize your kitchen around the work triangle—sink, stove, fridge—to cut down on pointless steps
- Divide your space into prep, cooking, and cleaning zones, and stash the right tools in each
- Invest in a few quality multipurpose tools instead of filling drawers with gadgets you’ll barely use
Evaluating Your Kitchen Space
Before you start shuffling tools or buying organizers, it helps to get a real sense of your space. How your kitchen is shaped, where you move, and even where the light hits—it all matters for a cooking station that actually works.
Measuring Dimensions and Assessing Storage
First up, grab a tape measure. Note the length and width of counters, the space from counter to cabinets above, and how deep your storage goes.
Check where your outlets are. That decides where you can plug in appliances without running cords everywhere. Watch for radiators, weird corners, or anything else that gets in the way.
Count your cabinets and drawers near your main prep spot. Small kitchens might only have a couple within arm’s reach of the stove, while bigger ones give you more wiggle room. Measure the inside of shelves too—if your mixer won’t fit, that shelf isn’t much use.
A quick sketch with these numbers helps. It doesn’t have to be pretty, just enough to see where a cooking station fits without blocking people or making things awkward.
Understanding Traffic Flow and Accessibility
Traffic flow can make or break your setup. Map out how you (and anyone else) move around while cooking.
Stand at the sink, walk to the stove, then to the fridge. That’s your classic work triangle, and ideally, each side is 4–9 feet. If you’re always circling back or bumping into open doors, something’s off.
Watch where people go for snacks or drinks. Don’t put your main cooking zone right in that path—or you’ll have interruptions all night. Try moving your station just out of the main walkway so you’re not in the way.
Cabinet doors and drawers matter too. If a lower cabinet blocks the dishwasher when open, or you can’t open two drawers at once, that’s a headache. Leave at least 36 inches for walkways, and 42 if more than one person cooks at a time.
Maximizing Natural Light for Cooking
Good light makes cooking easier and honestly, just nicer. Figure out which windows bring in direct sun during the times you usually cook—late afternoon and early evening for most folks.
If you can, put your main prep spot near a window. It’s easier on your eyes when chopping or checking if something’s cooked. Morning light is great for breakfast, and west-facing windows help at dinner.
No windows? Or just not enough light? Get some decent under-cabinet LEDs and aim them at your counters. You can’t change where the sun is, but you can put your main work area where the light’s best.
Choosing an Optimal Kitchen Layout
The way you arrange your cooking station really shapes how easy it is to move from task to task. The right layout makes a bigger difference than you’d think.
Exploring Popular Kitchen Layouts
The galley kitchen has two counters facing each other with a walkway down the middle. It’s tight but efficient—great for solo cooks in narrow spaces because everything is right there.
L-shaped kitchens use two walls to create a natural work zone and feel a bit more open. There’s usually space for a little table, and more than one person can cook without getting in each other’s way.
U-shaped kitchens wrap around three walls, so you get tons of counter and storage. But if the counters are too close, it can feel cramped—aim for at least 8 feet between opposite sides.
Island layouts stick a freestanding counter in the middle. They’re awesome for prep, extra storage, or even casual meals, but you’ll need at least 42 inches of space all around so you’re not squeezing by.
Implementing the Kitchen Work Triangle
The work triangle links your fridge, sink, and stove—the three spots you hit most. Each side should be 4–9 feet, and the total triangle no more than 26 feet, or you’ll be running laps.
Put the fridge where you can grab stuff without crossing the cooking zone. The sink usually goes under a window, which is nice for light and for rinsing stuff as you prep.
Stove goes at the last point. Don’t put it right next to the fridge (that’s not great for the fridge), and don’t put it too far from the sink unless you love carrying heavy pots.
Adapting for Different Cooking Styles
Bakers need a long stretch of counter—at least 36 inches—for rolling dough and spreading out ingredients. Keep your mixer and measuring cups close to the oven, not the stovetop.
If you’re into stir-frying or quick meals, cluster your go-to stuff within three feet of the stove. Oils, spices, utensils—keep them right there so you can move fast.
Cooking big, multi-course meals? You’ll want separate zones for prepping raw stuff, cooking, and plating. Spread out your triangle a bit, and if you can, add a second prep sink so you’re not washing veggies where you just rinsed raw chicken.
Zoning Your Cooking Station Effectively
Breaking your cooking station into zones keeps you from running in circles. We’ll focus on three: prep, cooking, and cleanup.
Defining the Prep Zone
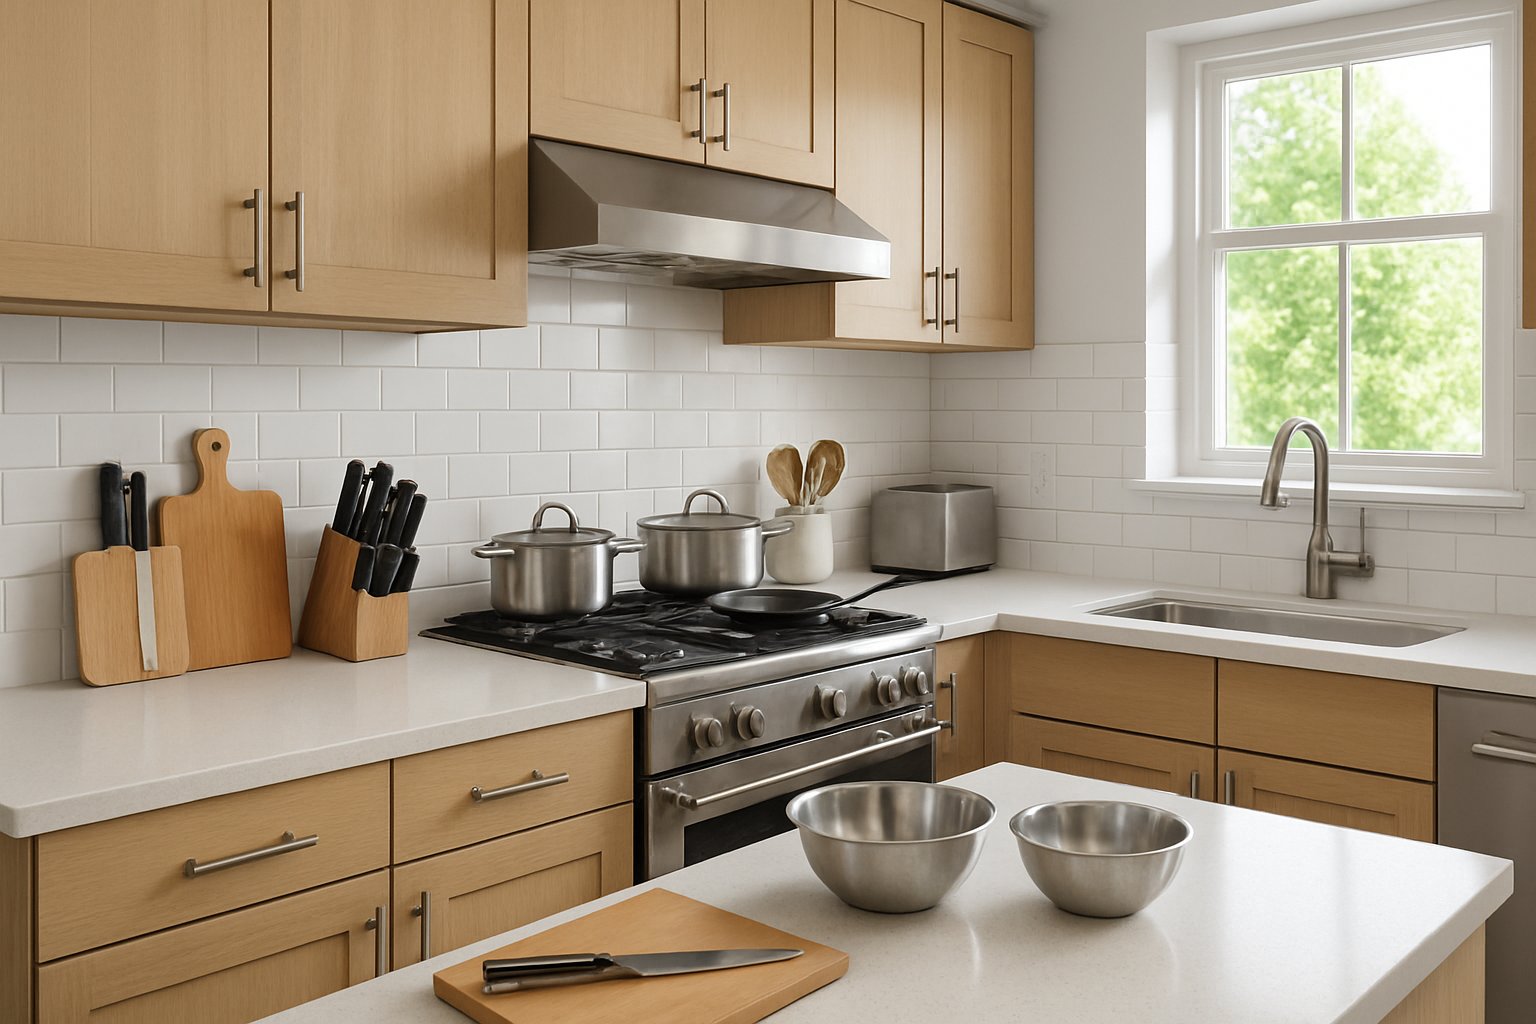
Prep happens between the fridge and stove—close to both so you’re not making extra trips. You’ll want at least 36 inches of counter here. Keep your cutting boards, knives, bowls, and measuring stuff in drawers or cabinets right by this area.
Have a separate cutting board for raw meat, but keep it with the others for convenience. Being near the sink helps for rinsing and quick cleanups. Store everyday items like oil, salt, and pepper here, not across the kitchen. If you’re short on space, hang a magnetic knife strip or use a crock for utensils.
Designing a Functional Cooking Zone
The cooking zone is all about the stove and oven. Pots, pans, and cooking utensils should be in drawers or cabinets next to the range.
Hang spatulas, tongs, and spoons on a rack or keep them in a jar by the stove. Store oven mitts in the nearest drawer so you’re not leaving the stove to find them.
Keep oils, spices, and your most-used sauces here too. Mount a spice rack near the stove or dedicate a drawer to spices. Heavy pots go in lower cabinets nearby, lighter pans can go up top if you have to.
Organizing Cleaning and Plating Areas
The cleaning zone centers on the sink and dishwasher. Dish soap, sponges, and scrubbers belong right under the sink or in a caddy close by.
Plating needs about 24–30 inches of counter near the cooking zone but not right on top of the burners. Store plates, serving bowls, and utensils above or beside this spot so you can plate up fast. Keep a trash bin between the prep area and sink so you’re not walking across the kitchen with scraps.
Hang dishtowels on hooks near the sink so they actually dry. Use a nearby drawer for food storage containers, and stash plastic wrap and foil close for leftovers.
Essential Tools and Equipment for Cooking Success
The difference between a fun cooking experience and a frustrating one often comes down to the tools you have at hand. Quality, multipurpose gear beats a drawer full of one-off gadgets any day.
Must-Have Knives and Cutting Boards
A good chef’s knife (8-inch) is honestly a game-changer. It’ll handle almost everything—from dicing onions to breaking down a chicken. Pair it with a paring knife for the little stuff, and you’re set.
Keep your knives sharp—it’s safer and just feels better. Get them professionally sharpened twice a year, and use a honing steel every week or so.
You’ll want at least two cutting boards: one for raw meat, one for everything else. Wood or bamboo boards are gentle on your knives; plastic ones are easy to toss in the dishwasher. Bigger is better—a 12x18-inch board gives you space to work.
Cookware and Appliances You Can't Live Without
A cast-iron skillet is worth every inch of space—use it on the stove, in the oven, for steaks, cornbread, even pizza. Add a 3-quart saucepan for grains and sauces, and an 8-quart stockpot for soups and pasta, and you’ve got the basics covered.
Stainless steel pans work on any cooktop and don’t react with acidic foods. A nonstick pan is great for eggs, but stick to low heat so it lasts.
For appliances, a blender is handy for smoothies or soups, and a food processor can chop veggies or mix dough in seconds. You don’t need both right away—pick what fits your style. If space is tight, an immersion blender does a lot for less money and storage.
Smart Storage for Tools and Ingredients
Keep tools near where you use them. Spatulas and spoons live in a crock by the stove. Knives go in a block or on a magnetic strip—never loose in a drawer.
Use clear, labeled containers for pantry staples like rice and flour. They stay fresh and you’ll know when you’re running low. A Lazy Susan works wonders for oils and condiments in deep cabinets.
Drawer dividers keep utensils from tangling. Put your most-used items in the easiest spots and stash the specialty stuff up high or down low—out of the way but not forgotten.
Selecting Measuring Cups and Other Prep Essentials
Accurate measuring cups really do matter, especially for baking. A small difference can throw off a cake or bread. We keep two sets: nested dry measuring cups for things like flour and sugar, and liquid measuring cups with spouts for water and oil. Glass liquid measures are handy since you can see the markings and toss them in the microwave if you need to melt butter.
Metal measuring spoons just last longer than plastic ones. They don’t stain or keep weird smells. A set from 1/8 teaspoon up to a tablespoon covers pretty much everything you’ll run into.
Mixing bowls in a few sizes—small for eggs, big for tossing salads—make life easier. Stainless steel bowls nest to save space, don’t break if you drop them, and double as makeshift double boilers. We always keep a microplane grater for zest and garlic, tongs for flipping, and a decent peeler. These tools get used all the time and just make things smoother.
Organizing and Storing Ingredients
Good storage keeps food fresh, saves money, and honestly, it just makes cooking less annoying. If everything has a spot, you don’t waste time digging or rebuying stuff you already have.
Pantry Organization for Freshness
Clear, airtight containers for dry goods—flour, rice, pasta, cereal—are a game-changer. They keep moisture and bugs out, and you can actually see what’s inside. Stick a label on with the name and when you bought it.
Use the FIFO method: put new stuff behind the old so you use up the oldest first. It’s simple but saves you from finding ancient pasta in the back. Group similar things together: baking stuff in one area, cans in another, snacks somewhere else.
Keep the things you use most at eye level. The rest can go up high or down low. If you’re short on space, risers or tiered shelves help you see what you have without stacking everything in a pile.
Maximizing Refrigerator Space
Raw meats should go on the bottom shelf in sealed containers. That way, if anything leaks, it won’t drip onto your other food. Middle shelves are good for dairy, eggs, and leftovers. The door is the warmest, so keep condiments and drinks there.
Give one drawer to produce and another to deli meats and cheese. Lining the produce drawer with paper towels soaks up moisture and keeps veggies fresh longer. Clear bins help keep small things—like cheese, yogurt, or sauce jars—from disappearing into the abyss.
Label leftovers with masking tape and the date. Try to eat them in 3-4 days. Stack containers to save space instead of spreading them out.
Preventing Cross-Contamination
Always keep raw proteins away from ready-to-eat foods. We use color-coded cutting boards: one for raw meat, one for veggies, another for cooked stuff. It’s a visual reminder that helps when things get hectic.
Keep raw meat, poultry, and seafood in sealed containers or zip bags on the bottom shelf. Never put them above other foods. Wash your hands, tools, and surfaces with hot soapy water after handling raw proteins.
If you can, use different prep areas for raw and cooked foods. If not, prep veggies first, clean up, then do the meat last.
Workflow and Meal Prep Efficiency
A little planning up front makes cooking way less stressful. Organizing ingredients before you start and keeping your area in shape turns even complicated recipes into something you can handle.
Applying Mise en Place Principles
Mise en place—having everything ready before you start—really does save your sanity. There’s nothing worse than burning garlic while you frantically dig for the next ingredient.
Read the recipe all the way through. Gather everything, wash your veggies, and do the chopping and measuring ahead of time. Portion proteins into small bowls or containers. Cooks in restaurants do this because it lets them focus on cooking, not hunting for stuff.
You don’t need fancy prep bowls—ramekins, coffee mugs, whatever’s handy. Group things that go in together. It cuts down on dishes, too.
This habit also means you’ll notice if you’re missing something before the pan gets hot. Better to run out for an onion now than halfway through cooking.
Setting Up for Streamlined Meal Prep
If you can, set up a meal prep zone. Counter space near the fridge for raw stuff, next to the stove for easy transfer—makes a difference.
Keep these within arm’s reach:
- Sharp knives and a cutting board
- Measuring cups and spoons
- Bowls in a few sizes
- Sheet pans for roasting
- Storage containers for finished food
When prepping a bunch of meals, do it assembly-line style. Wash all the veggies, then chop, then cook in batches. It saves you from bouncing all over the kitchen.
A compost or trash bowl on the counter is a must. You’ll make fewer trips to the trash and keep your space tidier.
Maintaining an Efficient Cooking Station
A kitchen only stays organized if you keep up with it. Clean as you go, or you’ll have a disaster to deal with after dinner.
Fill the sink with hot soapy water before you start. Toss in used tools as you go—no more crusty bowls to scrub later.
Put ingredients back as soon as you’re done. Spices in the rack, oil by the stove, produce in the fridge. It keeps counters clear and you’ll always know where things are.
Wipe down surfaces between tasks. Takes a few seconds, but it keeps everything safer and more usable. Sharpen knives regularly and do a quick check on appliances before you need them—nothing worse than a dead mixer when you’re halfway through dough.
Frequently Asked Questions
Setting up a cooking station brings up plenty of real-world questions about space and workflow. Here’s what we’ve figured out about making your kitchen smarter through a little planning and some creative tweaks.
What are the must-have elements for a well-organized prep station in a home kitchen?
You need counter space, storage within reach, and decent lighting. Aim for at least 36 inches of clear counter for chopping and assembling.
Key pieces: a good cutting board, knife storage, a small scrap container, and a tray or sheet pan for oil, salt, pepper—whatever you grab often. Keep a mixing bowl nearby, and store measuring tools in the drawer right below.
Lighting matters more than you think. If you’re squinting to mince garlic, add an under-cabinet light or a cheap LED strip. It’s worth it.
Can you suggest creative ideas for incorporating a prep station into a small kitchen space?
A cutting board that fits over the sink is a lifesaver. It gives you more space without hogging the counter.
Rolling carts work wonders in tiny kitchens. Pick one at counter height and use the top for prep, with tools and ingredients stashed below.
Wall-mounted magnetic knife strips and rails free up drawers and keep tools handy. We’ve seen people use the inside of cabinet doors for little shelves or hooks—great for measuring spoons or peelers.
A fold-down shelf on the wall is another smart move. It stays out of the way but flips down for real workspace when you need it.
What's the best way to maximize storage around my kitchen prep area?
Store things based on how you actually use them, not just by category. If you make smoothies every morning, keep the blender, protein powder, and frozen fruit together.
Use the cabinets right above and below your main prep spot for your most-used stuff. Organizers call this a “point of use” system—everything’s a step away.
Drawer dividers and clear bins stop avalanche disasters when you open a cabinet. Lazy Susans for oils and vinegars mean nothing gets lost in the back.
Make the most of vertical space with tiered shelf inserts or stackable bins. Don’t waste that gap between shelves.
How do I design a kitchen with zoning that optimizes meal prep and cooking flow?
Group tasks together. We set up a prep zone with boards and knives, a cooking area by the stove with oils and spices, and a cleanup zone near the sink.
The less you zigzag, the better. Ideally, you prep in one spot, move a few steps to cook, and clean up without trekking across the kitchen.
Think about how things move: raw ingredients at the prep station, then to heat, then plated near where you serve.
Keep daily-use items between hip and eye level. Stuff you use less can go up high or down low.
What are some clever tips for setting up a multi-functional cooking station?
Make stations you can swap out depending on the meal or season. A morning coffee setup can become an oatmeal bar—just swap the beans for oats and set out toppings.
Trays make stations portable. Load up a sheet pan with oil, salt, pepper, garlic, and you can move your essentials wherever you’re working.
Label containers so everyone knows where things go. Especially handy for lunch-packing stations—kids can grab what they need without help.
A tension rod inside a deep cabinet is great for hanging spray bottles or small tools. We’ve also stuck command hooks inside cabinet doors for potholders, measuring cups, and towels.
How does the 'kitchen work triangle' concept apply to modern kitchen layouts?
The kitchen work triangle connects the sink, stove, and refrigerator in a triangular pattern. It’s all about cutting down the distance between the three spots you use most when cooking.
But let’s be honest—modern kitchens don’t always stick to this triangle thing. These days, we talk more about work zones than strict shapes, especially since most of us use more gadgets and our routines are, well, a bit messier.
Still, the main idea sticks: don’t waste steps. Most folks keep their main path clear and set up prep space between the fridge and stove.
If you’ve got an open-concept or a galley kitchen, the triangle might morph into a straight line or an L-shape. That’s totally fine, as long as you’re not trekking across the room for every ingredient.
These days, we also factor in stuff like extra sinks, wall ovens, or a coffee station. The real goal? Make cooking feel easy and natural—not like a workout.
Share:
The Best Way to Store Cooked Meals to Maintain Flavor and Texture
The Role of Airtight Containers in Maintaining Food Quality