

Check out our latest home & kitchen collection!
Your kitchen layout shapes whether cooking feels easy or like a daily struggle. When you set up appliances, storage, and work surfaces to match your real cooking habits, you create smoother paths between the fridge, sink, and stove, and keep your go-to items close at hand.
The gap between a smart layout and a clumsy one is obvious, in the extra steps you take, the time lost hunting for tools, and that constant lack of counter space.
Most of us know what it’s like to use a kitchen that just doesn’t flow. You’re carting hot pots across the room because the stove’s nowhere near the sink.
You keep opening the same cabinet over and over, and your prep space is buried under gadgets you barely use. These aren’t just little annoyances, they’re fixable design issues.
Here’s the thing: making your kitchen work for daily cooking doesn’t have to mean a full remodel or hiring a designer.
If you pay attention to your own cooking habits and tweak your setup around them, you’ll find the kitchen starts to work with you, not against you. Even small, thoughtful changes can totally transform how the space feels.
Key Takeaways
- Arrange your kitchen around the work triangle—fridge, sink, stove—to cut down on wasted steps
- Set up clear zones for storage, prep, cooking, and cleaning, and keep the tools for each zone right there
- Adapt your layout to your own cooking style and household routines, not just what design trends say
Understanding Kitchen Layout Fundamentals
A good kitchen layout boils down to three things: how you move between work zones, the actual size and shape of your workspace, and how people get around the room. Nail these basics, and cooking gets a lot less frustrating.
The Importance of Kitchen Workflow
The work triangle is still the backbone of kitchen design. You want the sink, stove, and fridge at three points, with each leg somewhere between 4 and 9 feet. Ideally, the total distance around the triangle lands between 13 and 26 feet.
This keeps you from running laps just to make dinner. Think about it: you grab veggies from the fridge, rinse them at the sink, then head to the stove—over and over, every meal.
But it’s not just the triangle. Zoning matters too. You’ll want a prep area near the sink with room for chopping, a cooking zone by the stove with pots, pans, and oils close by, and a cleanup zone with the dishwasher within 36 inches of the sink.
Key Measurements and Floor Plans
Standard counters sit at 36 inches high, and there’s usually 15 to 18 inches of space between the countertop and the bottom of the wall cabinets. Single-cook kitchens need at least 42 inches for the aisles; if more than one person’s cooking, bump that up to 48 inches.
Don’t overlook landing spots. You’ll want 15 inches of clear counter on the fridge handle side and at least 12 inches next to the stove. For the sink, aim for 24 inches on one side and 18 on the other.
Essential Clearances:
- Dishwasher to counter edge: at least 21 inches
- Oven door open: 48 inches of clear space
- Island to perimeter cabinets: 42–48 inches
You can sketch out your own floor plan on graph paper—1/4 inch per foot works well. Mark in windows, doors, and where the plumbing and outlets are.
Traffic Flow and Entry Points
Traffic flow can make or break a kitchen. If too many people cross through the main work zones, everyone ends up in each other’s way.
If your kitchen’s a pass-through from the garage to the living room, you’ve got to keep the triangle out of that main path. Try to line up the work areas along one wall or in an L-shape so cooking stays out of the traffic lane.
Corners can be trouble spots that collect clutter or block movement. Lazy Susans or pull-out organizers help, but honestly, it’s better to stash the fridge or pantry in the corner and keep the main work areas open.
If you’ve got multiple doors, make the aisles wider—at least 48 inches—so you’re not colliding with someone hauling groceries while you’re emptying the dishwasher.
Choosing the Best Kitchen Layout Types
The four main kitchen layouts—single-wall, galley, L-shaped, and U-shaped—each have their own strengths. Your pick depends on your space, how many cooks you’ve got, and whether you care more about storage or open room to move.
Single-Wall Kitchen
A single-wall kitchen lines up all your stuff—appliances, cabinets, counters—along one wall. It’s a go-to for studios or small homes, or when the kitchen’s part of a bigger living area.
The upside? Everything’s right there. No turning around, no hunting. Plus, you free up floor space for a table or extra seating.
The downside is obvious: not much counter or storage space. People often add carts or open shelves to help. If you cook a lot or have tons of gadgets, this setup can get cramped fast.
Best for: tiny spaces, folks who don’t cook much, or homes where the kitchen isn’t the star.
Galley Kitchen for Tight Spaces
A galley kitchen puts everything on two parallel walls, forming a corridor. It keeps the work triangle close, so you’re not wasting steps.
Galleys shine in narrow rooms. Both walls get used for storage and counters, and they’re super efficient for solo cooks or couples.
The catch? If the galley connects two rooms, people passing through can mess with your flow. And if the aisle’s too tight, working side by side gets tricky.
To make it work, leave at least 36 inches between walls. Lighter colors or open shelves help keep things feeling airy.
Best for: narrow rooms, apartments, or anyone who wants efficiency and doesn’t care about hosting big groups.
L-Shaped Kitchen for Flexibility
An l-shaped kitchen runs along two walls that meet at a right angle. Usually, the sink’s on one wall and the stove or fridge on the other. This setup creates a natural triangle and leaves the middle of the room open.
L-shaped layouts are flexible—they work in small or medium kitchens. The open side is perfect for a table, island, or just more breathing room. Corners can be awkward, but lazy Susans or pull-outs help.
This layout’s great in open homes where you want the kitchen to blend into the living space. The corner gives a bit of separation without closing things off, and you can add bar seating along one counter.
Best for: open floor plans, medium kitchens, or anyone who wants a kitchen that’s good for both cooking and hanging out.
U-Shaped Kitchen for Maximum Efficiency
A u-shaped kitchen wraps counters and cabinets around three walls. If you want max storage and workspace, this is it.
You get separate zones for prep, cooking, and cleanup. Everything’s within reach, and there’s space for more than one cook. It’s ideal if you love to cook or need room for lots of gear.
But it does eat up floor space. You’ll need at least 8 feet between the far walls, or it can feel tight. Too many cabinets can also make it feel boxed in.
To keep things open, try a window on one wall, fewer upper cabinets, or lighter materials.
Best for: big kitchens, frequent cooks, or anyone who’d rather have storage than open space.
Optimizing Work Zones for Seamless Cooking
A smooth kitchen workflow depends on setting up three main zones—prep, cooking, and cleanup—in a way that makes sense for how you actually cook. The classic triangle’s a good start, but it helps to think about what you do most and where you do it.
Work Triangle Essentials
The work triangle links your fridge, stove, and sink. You want each leg between 4 and 9 feet, and the total distance for all three to be 13 to 26 feet.
For most people, 4 to 9 feet between each spot feels about right. The fridge and sink should be close enough for easy ingredient grabs and rinsing. The path from stove to sink needs to be short but not so tight you’re bumping into things.
Ideal Triangle Measurements:
- Refrigerator to sink: 4-7 feet
- Sink to stove: 4-6 feet
- Stove to refrigerator: 4-9 feet
- Total perimeter: 13-26 feet
Try to keep the triangle clear—nothing ruins your rhythm like someone cutting through while you’re cooking.
Prep Zone Placement
The prep zone works best near the fridge and usually includes the main sink. That’s where you’ll be grabbing, rinsing, and chopping ingredients.
You need at least 36 inches of counter space near the fridge, and another 36 inches by the sink for chopping and mixing. If you’re short on space, a pull-out cutting board or a butcher block insert helps.
Keep knives, boards, bowls, and measuring cups right here. Magnetic strips for knives are handy and free up drawer space. Put the trash and compost nearby since you’ll use them most while prepping.
Good lighting here is key—nobody wants to chop veggies in a shadow.
Cooking Zone Organization
Set up your cooking zone around the stove, with 15 to 18 inches of heat-safe counter on both sides. You’ll use these spots constantly for resting utensils, lids, or hot pans.
Store pots, pans, utensils, oils, and your go-to spices within a step of the stove. Drawer dividers keep things sorted, and deep drawers below the cooktop are great for big pots. If you like the look, hang pots overhead, but only if you’ve got the ceiling height.
Make sure the vent hood covers the edges of the cooktop to catch smoke and steam. Keep trivets and hot pads close for pulling things out of the oven.
Keep this area out of main traffic paths—hot pans and kids or pets don’t mix.
Cleanup Zone Strategies
The cleanup zone centers around the sink and dishwasher, which should be within 36 inches of each other. Set the dishwasher so its door doesn’t block your way while you’re still cooking.
You’ll want 24 inches of counter on one side of the sink for dirty dishes and 18 inches on the other for clean ones. Place the dishwasher where it’s easiest to unload straight into nearby cabinets.
Stash soap, brushes, and cleaning supplies under the sink with pull-out trays so you’re not digging around. Everyday dishes and glasses should be close to the dishwasher—it’s just easier that way.
If your kitchen’s big, a second smaller sink in the prep area lets another cook work without waiting for the main sink.
Maximizing Storage and Organization
Smart storage turns a kitchen from cluttered to calm. When everything has a spot, you get more usable space and less mess.
Smart Storage Solutions
Pair your storage with what you actually use. Airtight containers for dry goods take up way less room than original packaging, especially for bulk stuff. Stackable bins make the most of tall cabinets.
Dividers and pull-out shelves keep things from turning into a jumble. Add dividers near the sink for cutting boards, by the oven for sheet pans, and in the pantry for serving dishes. Adjustable shelves let you fit your actual cookware, not just what the cabinets came with.
Under the sink, tension rods hold spray bottles and free up space below. Drawer organizers keep utensils and gadgets sorted so you’re not digging while something’s burning. Ideally, you can grab any tool in one move, without shifting three other things first.
Vertical Storage and Open Shelving
Most kitchens waste wall space. Floating shelves put oils, spices, and dishes within arm’s reach and open up small spaces where upper cabinets would feel bulky.
Open shelves mean you’ve got to keep things a bit neater, but matching canisters or baskets help. Hooks on walls or inside cabinet doors hold mugs, measuring cups, or utensils.
Tall, skinny storage makes use of weird corners or narrow gaps. Slim rolling carts slide into tight spots and pull out when you need more prep space.
Pantry and Specialty Zones
Grouping items by purpose instead of just filling any available space makes the kitchen flow so much better. A prep zone puts cutting boards, knives, and mixing bowls right by the main work surface. Cleaning supplies stay close to the sink, where we actually use them.
Pantries are way easier to manage when we sort by category and use clear containers—seeing what’s left at a glance means fewer surprise shortages. Rotating stock by sliding new items behind older ones helps keep ingredients from expiring. Wire baskets or bins keep similar things—like baking stuff or snacks—corralled and easy to grab.
A “use it up” bowl on the counter for soon-to-expire ingredients is a game changer. It helps us actually use what we have before buying more, and it’s a simple way to cut food waste.
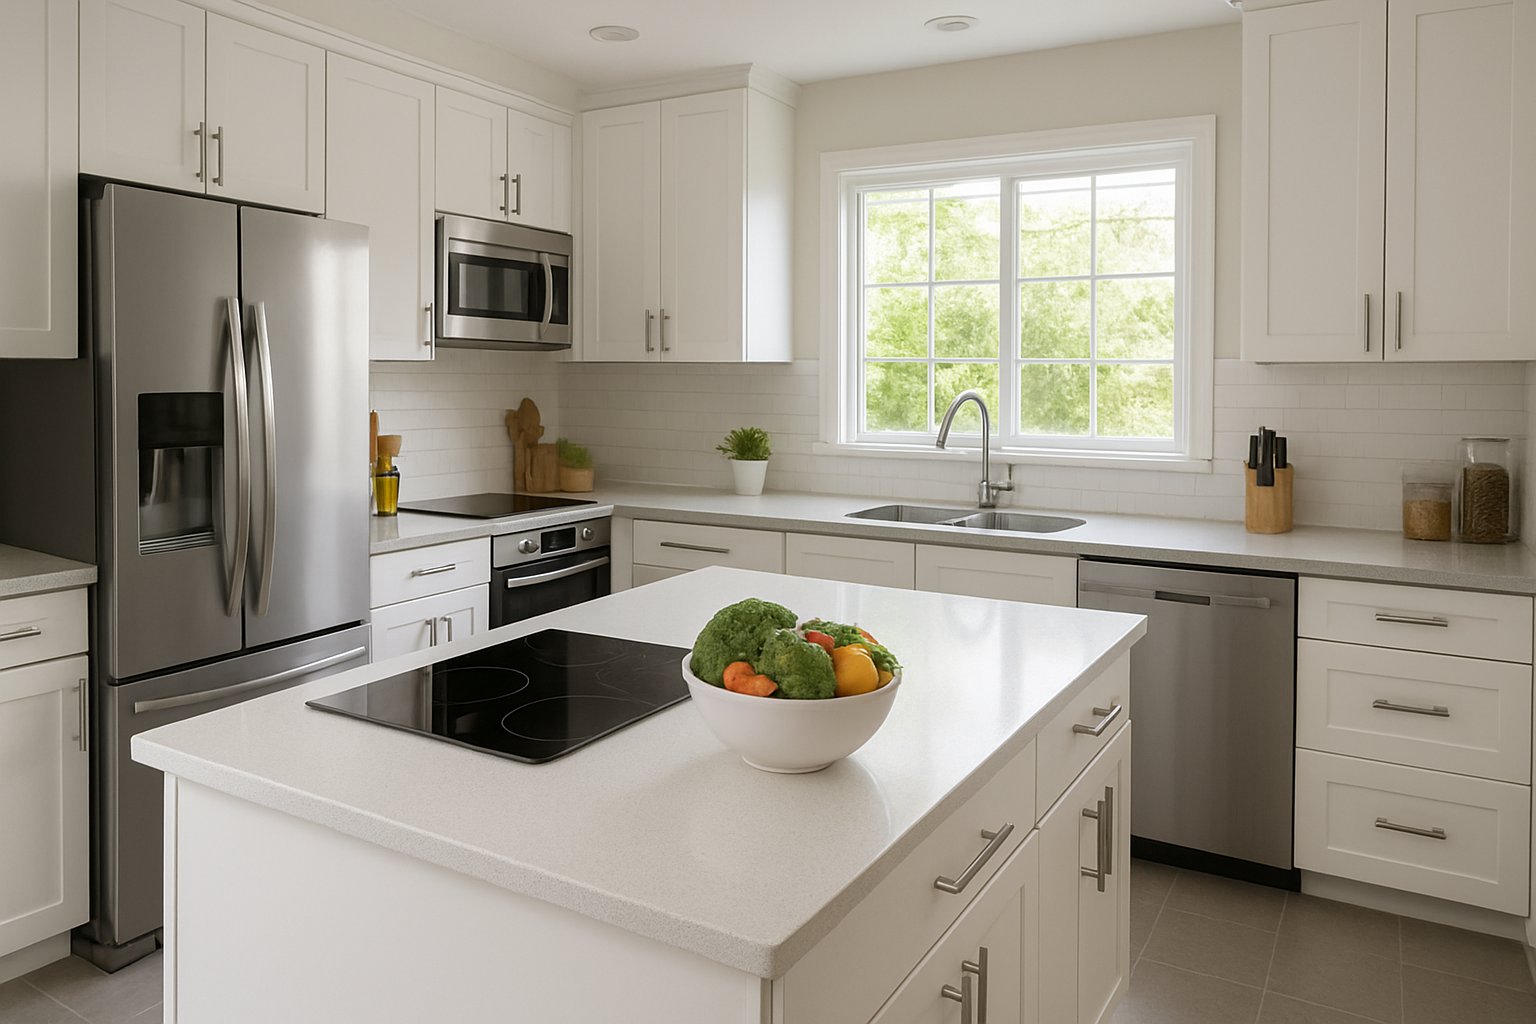
Kitchen Islands and Peninsulas: The Multi-Tasking Heroes
Kitchen islands and peninsula layouts totally change how we cook by giving us more counter space, storage, and seating right where we need them. Suddenly, cooking isn’t just a solo chore—it’s a team effort, and everything’s within reach.
Benefits of a Kitchen Island
A kitchen island becomes the heart of the kitchen. Instead of trekking across the room, we just pivot from sink to stove to prep area. It’s a real time-saver.
The storage underneath is where the island truly shines. Base cabinets and drawers finally give pots, pans, small appliances, and pantry items a proper home. We can dedicate one side to cooking tools, the other to baking gear—no more hunting for the right spatula.
Ideally, we leave about 47 inches of clearance around the island. That way, two people can pass by without bumping elbows, and cabinet doors open all the way. In open floor plans, the island marks the cooking zone without closing off the space.
The surface is perfect for meal prep, especially with more than one cook. Someone can chop veggies while another rolls out dough—everyone gets their own corner.
Peninsula Layout Advantages
If there’s no room for a freestanding island, a peninsula attached to existing counters or walls works wonders. Starting at 71 inches long by 27.5 inches deep, it fits tighter spaces but still brings in valuable counter space.
A peninsula naturally separates the kitchen from the living or dining area—no need for walls or doors. We keep the open feel but still have defined zones.
Common Peninsula Types:
- Extension peninsula – Simply continues the counter style and finish
- Connected peninsula – Attaches to a wall, column, or structural post
Peninsulas are especially handy when doorways or windows break up wall runs. Instead of wasting that space, we link cabinetry to whatever’s there, creating more storage and work area. Sometimes we even add a cooktop to the peninsula, so we can face guests while cooking—not just stare at a wall.
Since it’s attached, we only need clearance on three sides, which is a huge plus in small kitchens.
Island Seating and Storage Tips
When adding seating to an island, figure about 24 inches of counter width per person. That gives everyone enough elbow room for a plate and drink. Standard counter height (36 inches) works with 24-inch stools; bar height (42 inches) calls for 30-inch stools.
Storage Optimization Strategies:
- Go for drawers instead of cabinets so you can actually reach things in the back
- Pull-out trash and recycling bins keep messes hidden
- Corner drawers make use of weird angles that usually get wasted
- Open shelves on one side work for cookbooks or a few decorative pieces
For seating, an overhang of at least 12 inches works, but 15 inches is way more comfortable for adults. We can get that by extending the countertop or setting the cabinets back from the edge. If we’re putting in appliances like dishwashers or wine fridges, it’s best to keep them away from seating so folks aren’t always getting bumped.
Deep drawers for big pots and mixing bowls use the island’s footprint better than standard cabinets. You can see everything at a glance—no more digging in the dark.
Enhancing Functionality With Light, Tech, and Appliances
Lighting and smart tech can make or break how easy it is to cook and prep meals. When these work together, the kitchen just feels more responsive to our daily routines.
Maximizing Natural Light
Natural light makes prepping food less of a squint-fest and keeps us from relying on overhead lights during the day. It’s best to put work surfaces near windows, especially the main prep counter where we spend the most time.
South-facing windows give steady light, but in hot climates, they might heat things up a bit. Skylights above islands or sinks bring sunlight into spots where outside walls can’t help. Light-colored or reflective surfaces near windows can bounce daylight deeper into the kitchen.
For window treatments, sheer curtains or adjustable blinds let us tame the glare without blocking all the light. If we’re short on windows, glass-paneled doors to nearby rooms help share the light. Keeping tall appliances or clutter away from windows makes sure we get every bit of daylight we can.
Accent Lighting for Work and Ambiance
Task lighting matters most where we actually do stuff—chopping, measuring, plating. Under-cabinet LED strips should sit near the front edge to light up counters without glare. We need focused fixtures over the stove, sink, and prep areas—at least 450 lumens per square meter is a good target.
Pendant lights above islands double as both work lights and a nice visual feature. Hanging them 30–36 inches above the counter keeps heads safe and the space well-lit. Dimmers let us tweak the brightness for different times and moods.
Smart lighting that connects to our phones or voice assistants is handy when our hands are covered in flour. The Amazon Echo Dot or Google Nest Hub works with compatible bulbs—just ask for more light. Cooler light (4000–5000K) wakes us up in the morning; warmer tones (2700–3000K) make evenings feel cozy.
Technology Integration and Smart Appliances
Smart appliances handle the boring stuff so we can focus on cooking. A smart fridge tracks inventory and lets us know when we’re running low or something’s about to expire. The Samsung RF29DB9900QD even has a touchscreen for shopping lists and recipes—no need to grab your phone with sticky hands.
Connected ovens let us preheat or adjust temps from another room. The Breville Smart Oven Air Fryer Pro sends notifications when food’s done, so nothing overcooks while we’re multitasking. Smart dishwashers like the Kenmore 24" built-in model can start cycles from our phones and ping us when dishes are clean.
Voice assistants help with conversions, timers, and recipe lookups without needing to stop and wash up. Smart coffee makers brew on schedule, and programmable slow cookers start dinner while we’re out.
All these gadgets can link up through Alexa or Google Home, making the kitchen feel like it knows what we need. It’s best to pick appliances that actually fix our pain points, not just add more tech for the sake of it.
Outdoor Kitchen Considerations
Outdoor kitchens let us cook outside and keep the house cooler in summer. We need weather-resistant materials and appliances—think stainless steel grills, fridges, and cabinets that can handle rain and temperature swings.
Lighting’s huge for outdoor kitchens, especially for evening hangouts. Overhead task lighting above the grill and prep zones, plus softer lights around seating, keep things safe and inviting. Motion-sensor lights on paths help prevent spills or falls.
Shelters like roofs or pergolas protect gear from rain and sun. Covering the main cooking area keeps us comfortable and helps appliances last longer. Electrical outlets with GFCI protection are a must for blenders or fridges. If we’re adding a built-in grill, a pro should handle the gas lines—no shortcuts there.
Outdoor storage needs to be sealed against weather and critters. A small sink with hot water makes cleanup easier and means fewer trips inside. Counter space on both sides of the grill gives us room to prep and rest dishes.
Personalized Touches and Special Features
A kitchen really comes alive when we add features that fit our habits and routines. Personal touches make the space work for us, not just look good on paper.
Coffee Station Creation
A dedicated coffee station streamlines the morning rush and keeps the rest of the counter clear. We can claim a small corner near a water source and an outlet for the coffee maker, grinder, mugs, and supplies.
The best setups have a little counter space, a pull-out drawer for filters and pods, and upper cabinets for mugs within reach. It’s smart to keep this area away from the main cooking zone—nobody likes a morning traffic jam. A tray or mat under the coffee maker catches spills and keeps things tidy.
For households with several coffee drinkers, maybe install a water line for plumbed machines or add a mini fridge for milk and creamers. Organizers for beans, tea bags, and sweeteners keep everything handy but not messy.
Add-Ons for Busy Households
Busy families need features that save time. A pot filler above the stove means no more hauling heavy pots from the sink. Pull-out cutting boards near the sink or cooktop add instant prep space without hogging the counter.
Charging stations in drawers or cabinets keep devices powered without cords everywhere. A message center—maybe a chalkboard wall or bulletin board—keeps grocery lists and schedules in sight. Built-in tablet holders let us follow recipes hands-free.
Deep drawers with dividers beat lower cabinets for storing pots and gadgets we use all the time. Under-cabinet lighting lights up workspaces without extra fixtures.
Tips for a Successful Kitchen Remodel
A remodel needs a clear plan and a realistic budget before we start tearing things out. Listing must-haves versus nice-to-haves helps us allocate funds where they matter most. Most designers say 15–20% of the home’s value is a good ballpark for a major kitchen redo.
We should expect 6–12 weeks without a full kitchen, so a temporary setup with a microwave, hot plate, and mini fridge is a lifesaver. Hiring licensed contractors and getting permits protects our investment and keeps everything up to code.
Choosing materials comes early, since custom cabinets and countertops can take 8–10 weeks. Ordering appliances before demo day ensures they fit and arrive on time.
Frequently Asked Questions
Kitchen layout questions come up all the time—storage, prep, color, space-saving tricks that actually work in real kitchens.
What are the essential elements to consider for efficient kitchen storage and organization when planning my layout?
Vertical space is our friend. Tall cabinets that reach the ceiling pack in storage without taking up extra floor space, and pull-out drawers are way easier than digging through cabinets for pots and pantry items.
Organizing by activity zone makes a big difference: prep stuff by the cutting board, cooking tools by the stove, cleaning gear near the sink. It saves steps and sanity.
Heavy things go on lower shelves for safety and ease. Everyday dishes and glasses should live between hip and eye level, while seasonal stuff can go up high. Deep drawers are better than cabinets for heavy cookware—no more crouching and digging.
Corner solutions matter in L-shaped and U-shaped kitchens. Lazy Susans or pull-out corner units keep things from getting lost in the abyss.
Can you dish out some tips on optimizing a kitchen layout for those of us who are meal prep maestros?
Meal preppers need serious counter space—at least 36 inches of uninterrupted counter near the fridge is ideal for unpacking groceries and laying out containers.
Fridge placement is crucial. It should be close enough to the prep area so we’re not zigzagging across the kitchen. A fridge near the entry also makes unloading groceries easier.
Storage for containers deserves its own spot. Dedicating a cabinet or drawer near the prep area streamlines packing.
A second or prep sink is a luxury, but if not possible, at least make sure the main sink has enough counter space for a drying rack and bowls.
What's the recipe for selecting the perfect kitchen layout that marries functionality with style?
Start with the classic work triangle: sink, stove, and fridge forming a triangle with each side between 4 and 9 feet. This keeps movement efficient without turning cooking into a marathon.
L-shaped layouts work in most homes, giving us decent workflow and leaving space for dining. Two adjoining walls of workspace, and it doesn’t feel boxed in.
Islands add workspace and storage, but we need at least 42 inches of clearance all around for easy movement. If the kitchen’s under 120 square feet, it’s better to skip the island.
Style comes from materials and finishes—not the layout itself. We go for durable, easy-to-clean surfaces like quartz countertops, then layer in style with cabinet hardware, backsplash tile, and lighting.
In the kitchen design world, what's got everyone buzzing about the 60-30-10 color rule, and how can I serve that up in my layout?
The 60-30-10 rule splits color into three portions: 60% dominant color, 30% secondary color, and 10% accent color. It’s a way to balance things out without making the space feel chaotic.
Usually, we use that 60% for the big stuff—cabinets and walls, mostly. White, cream, or gray cabinets tend to win here since they’re easy to live with and don’t get old fast.
The 30% chunk? That’s for things like countertops, flooring, or maybe a kitchen island if you want it to stand out. Butcher block counters, a moody blue island, or patterned tile all work if you’re after a little personality but don’t want to regret it later.
And then there’s the 10%—this is where you get to have a little fun. Think cabinet hardware, bar stools, a bright toaster, or art that grabs attention. It’s a safe space for bold color, and if you get bored, you can swap it out without much fuss.
Could you whisk together some advice on how to apply the 3x4 kitchen rule to keep my cooking space both savory and spacious?
Honestly, the 3x4 rule doesn’t really pop up in most pro kitchen design guides. What we actually use: the 42-inch clearance rule for walkways and the 48-inch rule for work aisles if you’ve got more than one chef in the kitchen.
For single-cook kitchens, 42 inches between the island and counters usually does the trick. It keeps things from feeling cramped, even when you’re pulling open the oven or loading the dishwasher.
If you’ve got a busy kitchen with multiple cooks, aim for at least 48 inches. That extra space means you’re not bumping elbows or dodging hot pans—always a good thing.
Share:
A Guide to Safe Food Storage Temperatures in the Home
The Benefits of Glass Storage Jars for a Cleaner, Safer Kitchen