

Check out our latest compact vacuum sealer for food collection!
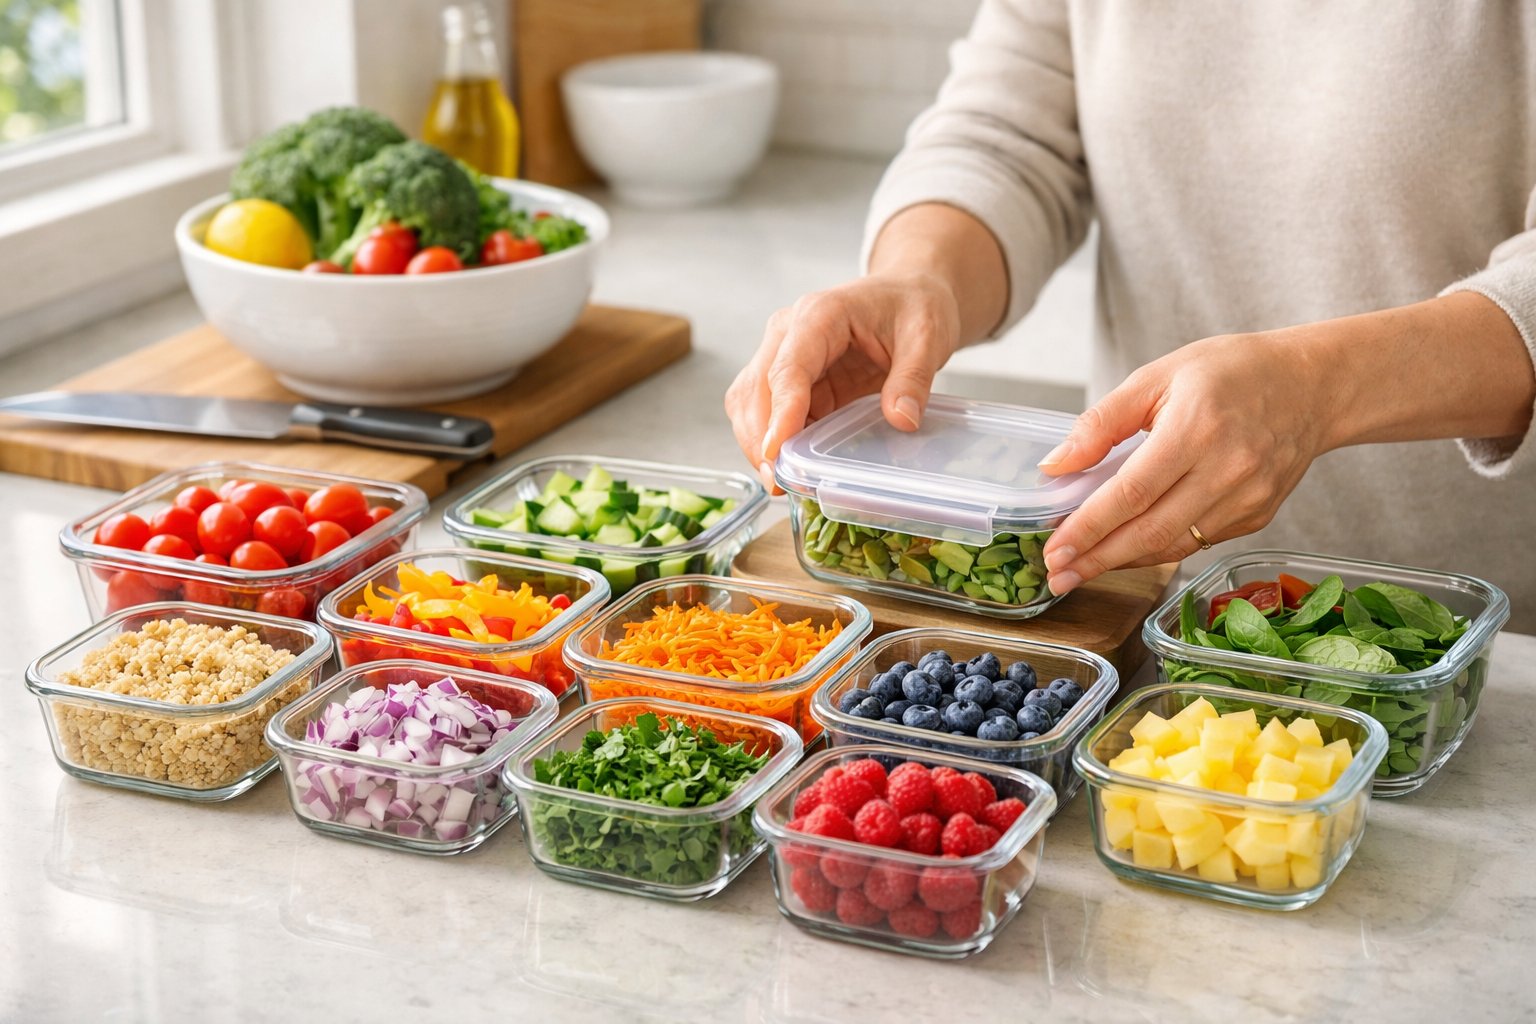
Portioning ingredients the right way can mean the difference between a week of tasty meals and a fridge full of wilted greens.
Most of us have opened containers only to find soggy lettuce or sad, mushy produce by Wednesday. But honestly, with a few smart moves, you can keep your prepped ingredients fresh and ready to go for days, sometimes even a whole week.
The real trick to keeping portioned ingredients fresh is using airtight containers and keeping moisture-sensitive stuff away from anything wet until you’re actually cooking.
Sure, lots of us try to meal prep, but the real magic comes from knowing which ingredients need immediate attention, which can wait, and how to store each one so nothing gets wasted. If you prep proteins separately from veggies and stash sauces on the side, your meals stay crisp and tasty, no more soggy mess.
Let’s dig into how to portion everything from hearty grains to delicate herbs so your meal prep doesn’t flop halfway through the week. Less waste, fewer grocery runs, and honestly, it feels good to open the fridge and see fresh ingredients ready for action.
Key Takeaways
- Portion and store your ingredients properly and they’ll stay fresh for five days or more.
- Keep wet and dry items separate and use airtight containers to stop spoilage and keep things tasty.
- Plan what to prep first and know how to store it, this saves time and cuts down on waste.
Why Portioning Ingredients Matters for Weekly Freshness
Smart portioning turns meal prep into a system that keeps ingredients fresh and reduces waste. When we divide things up at the start, we protect their quality and make eating well way easier.
Meal Prep Benefits for Busy Lifestyles
Prepping ingredients ahead of time gives us a head start during hectic weeks. Instead of staring at a full head of broccoli and wondering what to do, we’ve got pre-measured amounts ready to toss in the pan. That alone shaves precious minutes off weeknight dinners.
We can wash and chop veggies, portion proteins, and split up grains into meal-sized containers in one go. Each part stays fresh because we only open what we need. The rest is sealed tight and untouched.
This keeps us from opening bags or containers over and over, which just makes food go bad faster. When a busy Tuesday hits, we’re not scrambling or eyeing the takeout menu.
Reducing Food Waste Through Smart Portioning
Pre-portioned ingredients seriously cut down on what ends up in the trash. Buy a big bag of spinach? Divide it up right away and each portion will stay fresher, instead of the whole bag wilting at once.
We also stop guessing how much we’ll use. That giant batch of diced peppers? Split it into what you’ll actually need for each recipe, and nothing sits forgotten until it spoils.
It helps to plan for the most delicate things—like herbs or berries—early in the week, and save heartier veggies for later. That way, we use everything at its peak and waste less money (and food).
Healthy Eating and Portion Control Made Simple
Breaking ingredients into portions takes the guesswork out of eating well. We know exactly how much protein, veggies, and grains go into each meal, because we measured it all up front. No more skimping on the greens or accidentally doubling the rice.
With everything portioned, we can see if our meals are balanced or if we’re leaning too hard on one food group. It’s easier to adjust during prep, instead of making last-minute decisions when we’re hungry.
This method makes it simple to stick to health goals without getting bogged down in measuring every night. Get the work done once, and coast on those benefits all week.
Smart Meal Planning: Laying the Groundwork for Freshness
Keeping ingredients fresh all week really starts with a sensible plan, picking recipes that don’t wilt or go bland, and mixing things up without stuffing your fridge to the brim.
How to Build a Weekly Meal Prep Plan
First, take a real look at your schedule. How many meals are you actually eating at home? No sense prepping five lunches if you’ve already got meetings or plans.
Once you know how many meals you need, block off a couple hours—Sunday is classic, but pick any day that works—to prep most of your food. That routine makes meal planning less of a chore.
Planning checklist:
- Count meals you’ll eat at home
- Check what’s in your fridge and pantry already
- Pick 3–4 main proteins or bases
- Add veggies and grains that go with them
- Write a shopping list by store section
Also, think about your energy levels. Save the fastest, easiest meals for your busiest days, and leave anything with fancy finishing touches for when you actually have time.
Choosing Recipes That Maintain Freshness
Not every recipe survives four days in the fridge. Some get soggy, others lose all their flavor. Focus on meals that can handle a few days in an airtight container.
Grain bowls, sheet pan proteins, and soups usually stay good for 4–5 days. Salads need a little more care—keep dressings separate and don’t mix delicate greens with heavy toppings until you’re ready to eat.
Go-to picks for freshness:
- Roasted chicken thighs (they’re more forgiving than breasts)
- Slow-cooked meats like pulled pork or beef stew
- Hearty grains (farro, quinoa, brown rice)
- Root veggies and cruciferous options
- Bean dishes—they often get better after a day or two
Skip recipes with lots of fresh herbs as garnish or anything that relies on being crispy. Add those right before eating.
Balancing Variety: Mix and Match Meal Prep Ideas
Nobody wants to eat the same exact meal five days in a row. The smarter move is to prep base ingredients that work across different meals.
Try prepping 2–3 proteins in simple, versatile ways. Grilled chicken can go in salads, bowls, wraps, or pasta. A batch of seasoned ground turkey? That’s tacos one night, a rice bowl the next, maybe stuffed peppers after that.
Mix up veggies, too. Roast some, leave others raw for snacking, and maybe shred or spiralize another batch. You get texture variety without doubling your workload.
| Component Type | Prep Method | Usage Ideas |
|---|---|---|
| Proteins | Grilled, roasted, slow-cooked | Bowls, wraps, salads, standalone |
| Grains | Batch cooked | Base for bowls, side dishes, fried rice |
| Vegetables | Mixed preparations | Snacks, sides, main dish components |
| Sauces | Small containers | Flavor variation across similar bases |
This approach keeps things interesting and helps every ingredient stay fresh, since you’re not opening and closing the same container all week.
Selecting and Prepping Fresh Ingredients Like a Pro
The difference between ingredients that last and those that wilt by midweek? Picking sturdy produce and proteins, cooking things in batches, and handling everything with the right washing and chopping tricks.
How to Pick Long-Lasting Produce and Proteins
When buying veggies, go for firm and heavy. Bell peppers should be glossy and tight-skinned, no soft spots. Carrots should snap, not bend. Onions and garlic need to feel solid and dry.
For leafy greens, skip anything with brown edges or slime. Kale and romaine last longer than delicate spring mix. The sturdier the leaf, the better.
For proteins, fresh chicken should be pink, not gray, and shouldn’t smell weird. Try to buy meat with several days left before its sell-by date. With ground meat, we usually cook it right away—browned meat lasts longer in the fridge.
Whole veggies outlast pre-cut ones every time. A whole head of broccoli will make it through the week; pre-cut florets, not so much.
Batch Cooking Strategies for Flavor and Freshness
We cook grains and proteins in big batches because they often taste better after a day or two. Make a heap of quinoa, rice, or farro on Sunday, and you’ve got meal bases through Thursday. Cool them completely before refrigerating.
For proteins, browning ground meat with onions and garlic gives you a versatile base for tacos, pasta, or bowls. Portion it into small containers so you only open what you need.
Marinating proteins before storing them is a win-win. Acids and salt help preserve and add flavor. Cube chicken or beef, toss it in a bag with marinade, and let it sit for a couple days.
Beans and legumes are great, too. Cook a big pot and store them in their liquid to keep them moist and tasty all week.
Proper Washing, Drying, and Chopping Techniques
Water can ruin your meal prep if you’re not careful. Veggies need to be completely dry before storage or they will get slimy. Spin leafy greens a few times, then pat dry with towels. Any leftover moisture just breeds bacteria.
Keep chopped pieces uniform so they cook evenly. Diced onions should be roughly the same size. Slice carrots into coins of similar thickness—makes a difference when you’re in a hurry.
For storage, line containers with paper towels to absorb extra moisture. Swap out the towels after a couple days if they get soggy.
Hardy veggies like peppers, onions, and celery can be chopped days ahead. High-water veggies like cucumbers and tomatoes? Wait until the day you need them. Potatoes can sit in cold water for a day to keep them from turning gray.
Mastering Storage: Containers, Arrangement, and Labeling
The right storage setup keeps food fresh, saves time, and makes dinner assembly a breeze. Good containers, smart fridge organization, and clear labeling make all the difference.
Picking the Right Airtight Containers
Airtight containers are a must for keeping ingredients fresh. Look for ones that seal well and don’t let in air.
Glass containers are perfect for wet stuff—marinated proteins, grains, sauces. They don’t absorb smells and you can reheat right in them. For freezing, stick with plastic containers or heavy-duty freezer bags, since glass can crack unless it’s made for the freezer.
When storing cut veggies or fruit, use containers big enough to fit a paper towel at the bottom. It’ll soak up moisture and keep things crisp.
For dry stuff like quinoa, oats, or nuts, plastic containers with snap lids do the trick. Don’t use a giant container for a tiny amount—too much air speeds up spoilage.
Smart Fridge and Pantry Storage Systems
Fridges have temperature zones. The door is warmest, so skip storing perishable stuff there.
The middle and bottom shelves stay coldest—this is where your proteins, prepped veggies, and ready meals should go. The top shelf is a bit warmer, so keep whole fruits or less perishable things there.
Don’t cram the fridge too full. If air can’t circulate, you’ll get warm spots where food spoils faster. Running out of room? Time to freeze a few portions.
In the pantry, keep grains together, cans in another spot, and snacks where you can see them. Using shelf risers or lazy susans helps you spot what you’ve got and avoids forgotten food hiding in the back.
Labeling and Organizing for Maximum Shelf Life
Labels show us two things we can't skip: what's inside and when we portioned it. We jot the contents and date on every container—sometimes with masking tape and a Sharpie, sometimes with a label maker if we're feeling fancy or prepping a lot.
"First in, first out" sounds basic, but it works. Every time we add new containers to the fridge, we shuffle older ones to the front, so nothing gets lost in the back and goes bad.
For proteins, we aim to eat them within three to five days. Veggies, if we've stored them right, last about a week. Cooked grains and legumes hang in there for four or five days. Knowing these windows helps us plan meals and avoid the guilt of tossing forgotten food.
Clear containers let us see what's inside, but labels still matter for dates. We like to group containers by meal type—breakfasts in one spot, lunch stuff in another—so mornings aren't a scramble.
Portioning Like a Chef: Techniques for Keeping Meals Fresh
Keeping meals fresh all week isn't just about what we store—it's about how we store it. Layering, separating, and keeping wet stuff away from dry can turn meal prep from a soggy letdown into something you actually look forward to eating.
Layering and Separating Ingredients to Prevent Sogginess
Tossing everything into one container rarely ends well. We've learned that the hard way. The trick is knowing which foods release moisture and which soak it up.
Start with the sturdiest ingredients on the bottom. For grain bowls, that means quinoa or rice first, then roasted veggies, then proteins. Keep raw veggies like cucumbers and tomatoes separate until you're ready to eat.
Glass containers with dividers are a game changer. We stash crunchy toppings—nuts, croutons, tortilla strips—in little containers or zip bags. Sometimes, we even slide a paper towel between layers to soak up extra moisture and keep things crisp.
Overnight oats? Wet stuff (milk, yogurt) goes in first, oats in the middle, and we save crunchy toppings or fruit for a separate container. Otherwise, by day three, it's all just mush.
Storing Dressings and Sauces Separately
Nothing ruins a lunch faster than a pre-dressed salad that's turned into a wilted swamp. We always keep dressing separate, whether in little 2-ounce containers, silicone cups, or just old baby food jars.
Same goes for wet condiments—salsa, hummus, tahini, marinades. Each gets its own container. This way, we can add as much or as little as we want, and everything stays fresh until the last minute.
With mason jar salads, we put the dressing at the bottom, then sturdy veggies (carrots, peppers, chickpeas), then proteins and grains, with greens on top. When it's time to eat, just shake it up and pour it out.
Meal Prep Salads: How to Keep Greens Crisp
Keeping salad greens from turning slimy is always a challenge. We wash and dry greens with a salad spinner, then wrap them in paper towels before storing. The towels soak up extra moisture all week.
Kale, romaine, and cabbage hold up way better than delicate mixes or arugula. We sometimes massage kale with a bit of olive oil—it keeps longer and tastes better, honestly.
If possible, we tear lettuce by hand instead of using a metal knife. It browns less and stays crispier. A folded paper towel on top of the greens inside the container helps catch condensation.
For the freshest salads, we keep greens and toppings separate in big containers, then build individual salads each morning. It takes a couple extra minutes, but the crunch is worth it.
Food Safety and Freshness Essentials
Keeping food safe and fresh means paying attention to temperature, avoiding cross-contamination, and knowing which storage method works for each ingredient.
Temperature Control and Refrigeration Tips
We keep our fridges at 40°F (4°C) or below to slow bacteria. It's not negotiable—anything higher, and food spoils fast.
Before we store cooked food, we let it cool to room temp within two hours. Any longer, and bacteria get a head start. For big batches, we use shallow containers or ice baths to cool things down faster.
We put raw meats on the bottom shelf to keep juices from dripping onto other food. Produce goes in crisper drawers for better humidity. Dairy and eggs stay in the main fridge compartment, not the door, since the door's temperature swings every time it opens.
Labeling containers with prep dates is a habit worth sticking to. Cooked proteins are good for 3-4 days, grains for 4-6, and most cooked veggies for 3-5.
Preventing Cross-Contamination During Prep
We always use different cutting boards for raw meat and produce—color-coded ones make it easy.
Hand washing between ingredients is a must. We clean knives and utensils before switching foods. When portioning, we handle ready-to-eat stuff first, then move to anything raw that needs cooking.
Containers should be clean and bone dry before filling. Moisture invites bacteria and mold. We always keep raw and cooked foods separate, and airtight containers help keep flavors (and smells) where they belong.
Freezing vs Refrigerating: What Works Best
Refrigeration's great for stuff we'll eat within 3-5 days. Freezing stretches shelf life to months—perfect for proteins, cooked grains, soups, and lots of veggies.
| Food Type | Refrigerate (Days) | Freeze (Months) |
|---|---|---|
| Raw chicken | 1-2 | 9-12 |
| Cooked chicken | 3-4 | 3-4 |
| Cooked rice | 4-6 | 6-12 |
| Fresh veggies | 3-7 | 8-12 |
| Soups/stews | 3-4 | 4-6 |
Some foods just don't freeze well—lettuce, cucumbers, and watery veggies get mushy. Dairy sauces can separate. We keep those in small batches in the fridge instead.
For freezing, we use airtight containers or vacuum bags to dodge freezer burn. We portion things into single-use sizes so we only thaw what we need. Always thaw frozen food in the fridge overnight, never on the counter.
Creative and Delicious Meal Prep Recipes That Stay Fresh
Having the right recipes makes meal prep way easier. Chickpea salad and egg muffins hold up all week, and grain bowls with the right dressings stay tasty for days.
Signature Dishes: From Chickpea Salad to Egg Muffins
Chickpea salad is a go-to for us. We mix chickpeas with cucumber, cherry tomatoes, and red onion, and keep cheese and dressing separate. Chickpeas actually get better as they soak up flavors, lasting up to five days.
Egg muffins are breakfast lifesavers. We whisk eggs with chopped veggies, pour into muffin tins, bake at 350°F for 20 minutes, and store them in airtight containers. They reheat in 30 seconds and stay good for a week.
Bean salad is another solid option. Black beans, kidney beans, white beans, bell peppers, and corn—vinaigrette goes on just before eating, so beans stay firm and veggies crisp for 4-5 days.
Turkey meatballs are easy to portion—4-5 per container keeps them from getting soggy. They reheat evenly and taste fresh even on day six.
Grains and Greens: Quinoa Salad and Sautéed Kale
Quinoa salad works because quinoa doesn't turn to mush. We cook a big batch, let it cool, and portion it out with roasted veggies. Any herbs or citrus dressing waits until serving.
For sautéed kale, after cooking with garlic and olive oil, we let it cool and press out extra moisture with paper towels. Then we portion it into 1-cup servings for grain bowls or sides.
Quinoa and greens are flexible. We prep both at the start of the week and mix them up with different proteins and toppings so meals never get boring.
Flavor Boosters: Using Balsamic Vinaigrette and More
Balsamic vinaigrette makes everything better. We keep it in 2-ounce containers—just right for two salads. The vinegar helps it last up to two weeks.
We usually prep a few dressings at once:
- Classic balsamic (3:1 oil to vinegar)
- Lemon herb with fresh parsley
- Sesame ginger for Asian bowls
- Creamy tahini for grain bowls
Dressings stay separate from the rest until serving. Even sturdy veggies like Brussels sprouts or sweet potatoes hold up better when you add dressing at the last minute. This simple step keeps meal preps fresher for a couple extra days.
Frequently Asked Questions
Keeping prepped food fresh takes a few tricks, from managing moisture in veggies to keeping dairy cold and safe.
What's the secret to keeping chopped veggies crisp and ready-to-go all week?
It's all about moisture control. We wrap chopped veggies in paper towels before storing in airtight containers—the towels soak up extra water but keep enough humidity so things don't dry out.
Leafy greens and herbs get paper towels on the top and bottom of their container. Hard veggies like carrots, celery, and peppers actually stay crispest submerged in cold water (just change the water every couple days). This keeps them crunchy all week.
We make sure veggies are bone dry before storing, unless we're using the water trick. Any leftover moisture from washing can make stuff spoil faster than you'd think.
Can you give us the lowdown on storing herbs so they're still kicking by day seven?
Soft herbs like cilantro, parsley, and basil do best when we trim the stems and stand them in a jar with an inch of water, like a bouquet. We cover the jar loosely with a plastic bag and keep it in the fridge—except for basil, which prefers room temp and no direct sun.
Hardy herbs (rosemary, thyme, sage) last longer wrapped in a damp paper towel in a sealed bag or container. We check mid-week and swap out the towel if it's dried out.
Got any clever hacks for portioning and preserving protein without losing its oomph?
We portion raw proteins right after buying and stash what we won't use in three days in the freezer, squeezing out as much air as possible.
Cooked proteins need to cool completely before we store them, so condensation doesn't build up. Chicken, beef, and fish last three to four days in airtight containers.
Marinating proteins in something acidic (like lemon or vinegar) adds flavor and helps them last a little longer. We portion everything out so we only open what we need at mealtime.
Help us out! What's the best way to keep our dairy delights from turning sour before the week's out?
We keep dairy in the coldest part of the fridge, not the door. The back of the main compartment is best for milk, yogurt, and cheese.
Hard cheeses last longer if we wrap them in parchment, then loosely in plastic or foil—lets them breathe but keeps them from drying out. We never reuse wrapping because it can carry bacteria.
For yogurt or cottage cheese, we use small containers and always use clean spoons—double-dipping speeds up spoilage.
Is there a proper technique to allocate grains and legumes for the week without them turning into a science project?
Cooked grains and legumes last four to six days if we store them in airtight containers. We let them cool and use shallow containers so they chill faster.
We portion rice, quinoa, and lentils into single servings so we don't keep exposing the whole batch to warm air. A tiny drizzle of oil after cooking helps keep them from clumping.
For longer storage, we freeze portions flat in freezer bags—they thaw quickly and save space. Frozen grains and legumes keep for up to three months without losing quality.
Could you spill the beans on crafting a fridge layout that keeps ingredients perky and easily accessible?
Honestly, we just sort our fridge by food type and whatever needs to be used soonest. Stuff we’ll reach for in the next day or two sits up front, right at eye level. That way, things don’t disappear into the void at the back and go bad before we even remember buying them.
Top shelves? Those are for leftovers and anything ready-to-eat, since the temp up there doesn’t really fluctuate much. Raw proteins hang out down below, tucked in sealed containers—nobody wants chicken juice dripping on their salad greens.
We’re big fans of clear, stackable containers. You can spot what’s inside without digging through a pile of mystery Tupperware. If we’re not feeling lazy, we’ll slap a quick label on with the contents and the date. It’s not fancy, but it saves us from sniff-testing things midweek. Drawers are where the veggies and herbs live, since the humidity controls in those compartments actually make a difference—at least, that’s what we’ve found.
Share:
Why Storage Systems Should Match Cooking Frequency
A Practical Guide to Extending the Life of Bulk-Bought Groceries