

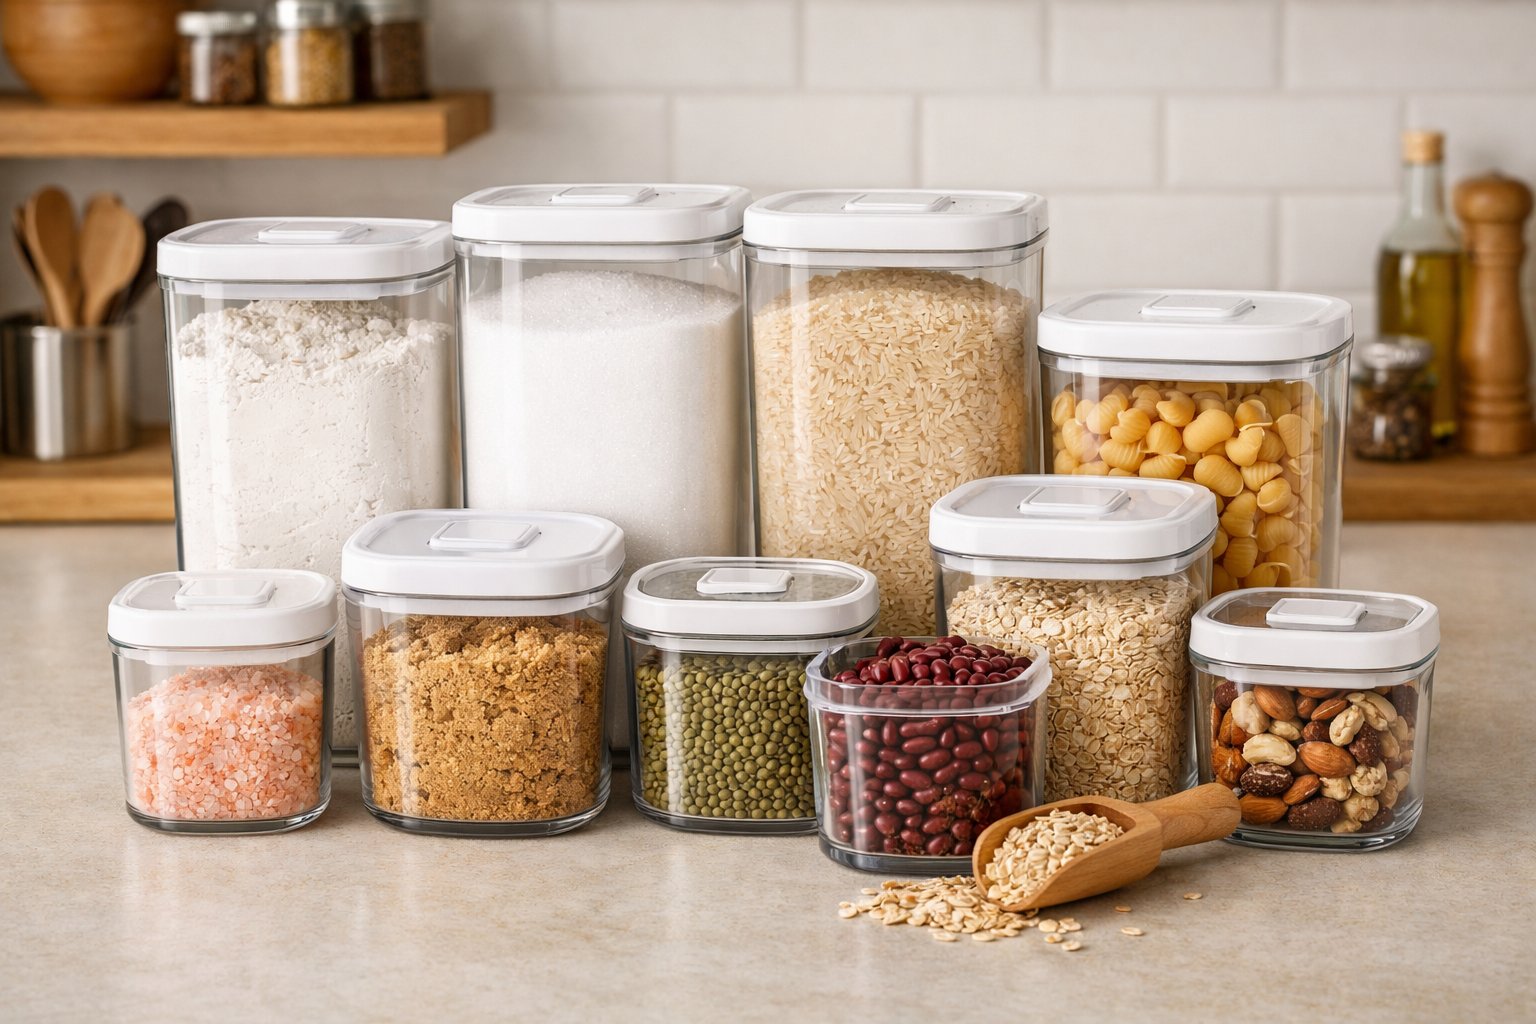
Check out our latest compact vacuum sealer for food collection!
Moisture’s the biggest enemy of dry ingredients in your kitchen. Flour, sugar, pasta, spices, none of them stand a chance if humidity sneaks in.
Even a little bit can cause mold, clumping, or spoilage that just wastes your food and money. But honestly? You don’t need fancy gadgets or complicated setups to keep things dry.
Keeping dry ingredients safe really just comes down to blocking out moisture, airtight containers, a few smart tricks, and paying attention to storage conditions.
We’ve all had that moment: open a bag of flour, find it clumpy, or discover your pantry staples smell off. Water got in. It’s frustrating, but totally avoidable.
Let’s get into the strategies that actually work. We’ll cover the best containers, what temperature and humidity do to storage, and a few no-nonsense ways to keep your dry goods fresh without making it a big project.
Key Takeaways
- Use airtight glass or quality plastic containers to keep out moisture and keep ingredients fresh
- Toss in silica gel packs or oxygen absorbers for extra protection against humidity and spoilage
- Store dry goods somewhere cool, dark, and stable; rotate stock and check for damage regularly
Why Moisture Is the Top Enemy of Dry Ingredients
Moisture turns perfectly good dry ingredients into clumped, moldy, or spoiled messes. If you know what causes moisture buildup and can spot the early signs, you’ll save yourself some headaches.
How Moisture Leads to Spoilage and Clumping
When water touches dry ingredients, it creates the perfect place for bacteria, mold, and yeast to multiply. They need moisture to survive, so even a little bit can turn flour, sugar, or spices into a breeding ground. Water activity—the technical term—determines how at-risk your food is.
Most bacteria show up when water activity is above 0.90, but some molds get going at just 0.70. That’s why even a small amount of moisture can be bad news.
Moisture also changes how ingredients feel and behave. Flour gets clumpy, sugar hardens, and powders like baking soda lose their smoothness. Water acts like glue, sticking particles together. Salt, for example, pulls in moisture right out of the air (that’s why the shaker gets caked up in summer).
Common Triggers for Moisture Buildup
Temperature swings are a big culprit. When warm air hits something cold, condensation forms—water droplets show up on containers or right on your food.
Moving stuff from the fridge to the pantry? That’s a classic way to get condensation. Even just opening a cold container in a warm kitchen can do it.
Humidity in your kitchen matters, too. If it’s above 60%, your dry goods are at risk. Kitchens near sinks, dishwashers, or stoves are usually more humid.
Bad container seals let damp air in, little by little. Old lids, cracked gaskets, or loose tops all make things worse.
Recognizing Signs of Moisture Damage
You’ll usually spot the problem before you taste it:
- Hard clumps that won’t break up
- Mold spots (green, black, white—you name it)
- Darker color or weird patches
- Caked-on stuff around the container edges
Texture is another giveaway. Flour feels heavy or sticky, not light. Sugar turns into a brick. Baking powder gets lumpy instead of powdery.
And then there’s the smell. Fresh dry goods barely smell at all, or just faintly like themselves. If something smells musty, sour, or just off, it’s probably spoiled. Trust your nose and toss anything that seems wrong, even if it looks okay.
Rice or pasta that feels slippery or has dark spots? That’s moisture damage. Spices that clump or lose their scent? Same story. If you see these signs, it’s time to rethink your storage setup.
Choosing Airtight Containers for Ultimate Freshness
The right container can mean the difference between flour that lasts for months and flour that clumps up or attracts bugs in a few weeks. Look for containers that really keep out moisture and air, but are still easy to use day-to-day.
Features of Airtight Storage Containers
A good airtight seal usually needs a silicone gasket or rubber ring around the rim. When you close the lid, that gasket compresses and blocks air and moisture. Lids that lock down with clips, clamps, or twists are much better than plain push-on lids. Four-point locking systems? Even better—they press evenly all around.
Stackable containers save space, but make sure stacking doesn’t mess up the seal on the ones underneath. Clear containers or those with windows make it easy to check what’s inside without opening them. Wide openings are nice for scooping, but the lid still needs to seal tight.
Pick sizes that fit your needs. Too much empty space inside can let moisture build up, even if the lid is tight.
Best Container Materials: Glass, Plastic, and Metal
Glass jars with rubber seals are classic. They don’t absorb smells or leach anything weird, and you can see what’s inside. Mason jars are great for small amounts; bigger clamp-top glass jars work for bulk stuff. Plus, glass goes in the dishwasher—easy.
BPA-free plastic is lighter and won’t shatter if you drop it. Good, thick plastic with a real gasket works just as well as glass. Just avoid thin, cheap plastic that cracks or warps.
Metal—especially stainless steel—blocks light and is super durable. It’s good for things like whole grain flour that don’t like light. But you can’t see inside, and you’ll want to make sure the metal doesn’t react with acidic foods.
How to Test for a Proper Seal
You can test your containers before trusting them with expensive ingredients. Try the water test: fill the container halfway with water, seal it, and flip it upside down over the sink for half a minute. If it leaks, the seal’s no good.
Or try the paper test: put a thin piece of paper between the rim and lid, close it, and try to pull the paper out. If it tears, the seal is solid. If it slips out, not so much.
For vacuum-seal types, press down on the lid and listen for air or feel if it gives. A good seal should have some resistance and make a little pop when you open it. If the lid lifts off with no effort, it’s probably not airtight.
Boosting Moisture Protection with Desiccants
Desiccants are little moisture magnets that help keep your dry goods safe. They work with airtight containers and cool storage to keep clumping, mold, and spoilage at bay.
How Desiccant Packets Absorb Excess Moisture
Desiccants work by adsorption—water molecules stick to the surface of the desiccant, rather than soaking in. When you put a packet in a sealed container, it starts pulling moisture from the air right away. This drops the humidity inside so bacteria and mold can’t grow.
Desiccants keep working until they’re full (saturated). Some have color-changing dots to show when they’re spent.
Safe Types: Silica Gel, Calcium Chloride, and Food-Grade Options
Silica gel packets are the most common. They’re non-toxic, made from silicon dioxide, and can grab up to 40% of their weight in moisture. They’re stable, don’t react with food, and work at room temp.
Calcium chloride soaks up even more moisture—up to 300% of its weight. It’s great for super-humid places, but it turns into liquid when full, so you need to keep it away from your food.
Food-safe desiccants are made to FDA standards. These include:
- Food-grade silica gel (usually clear or white)
- Clay-based desiccants
- Special molecular sieves for food
Always check that packets are labeled food-safe before tossing them in with anything you’ll eat.
Sizing and Placement for Best Results
How much desiccant you need depends on your container size and how humid your space is. A general rule: 1 gram of silica gel for every 100 cubic inches of container space. In really humid conditions, use more.
For a 5-pound flour container, 2-3 packets of 5-10 grams each usually do the trick. Bulk bins (like 25 pounds of rice) might need 4-6 packets spread out. Put packets on top of the food (since moisture rises), and for really big containers, add a few at different levels.
Try not to let packets touch the food directly. Tape them to the lid or use a small mesh pouch on top.
How to Use and Refresh Desiccants
Make sure your containers are bone-dry before adding ingredients and desiccants. Any leftover dampness cuts down on how well they work. Drop in fresh packets, add your dry goods, and seal up tight.
Check monthly by feeling the packets—fresh silica gel feels hard and crunchy, but when it’s used up, it’s soft or clumpy. Color-changing types are even easier: they’ll shift from blue or orange to pink or green when they’re done.
You can revive many silica gel packets by baking them on a sheet at 200–250°F for a couple of hours, until the color comes back. Let them cool in a sealed jar before reusing. Calcium chloride can’t be recharged, so just replace those.
Stash spare packets in a sealed jar—they’ll be ready when you need them.
Leveraging Oxygen Absorbers for Longer Shelf Life
Oxygen absorbers are another tool for keeping dry ingredients fresh. They pull oxygen out of sealed containers, which helps prevent spoilage and keeps food tasting like it should.
The Role of Oxygen Absorbers in Dry Ingredient Storage
Oxygen absorbers contain iron powder and salt that react with oxygen to create a nitrogen-rich environment inside your container. This removes almost all the oxygen, stopping oxidation, rancidity, and the growth of bacteria and mold.
Used right, oxygen absorbers can extend shelf life from months to years—or even longer. They work best with foods that are already dry (less than 10% moisture), creating a place where spoilage just can’t get a foothold.
You’ll notice flour stays fresher, rice keeps its texture, and dried herbs hold onto their flavor and color when you store them with oxygen absorbers in a good airtight container.
When to Use Oxygen Absorbers vs. Desiccants
We reach for oxygen absorbers when we want to get rid of oxygen, and we use desiccants to control moisture. They each have their job, and sometimes they tag-team, but knowing when to use which makes all the difference.
Use oxygen absorbers with:
- Rice, beans, and lentils
- Flour and whole grains
- Pasta
- Freeze-dried foods
- Powdered milk
- Brittle-dry dehydrated produce
Skip oxygen absorbers for:
- Sugar (it’ll turn into a rock)
- Salt (clumps and doesn’t need it)
- Baking powder or baking soda (can off-gas)
- Sticky dried fruits like raisins or dates (too much moisture—botulism risk)
- Brown sugar or anything with molasses
Desiccants are better when you need to keep things dry but still want some air in there. Sometimes, both come in handy, but only if your food is bone-dry to begin with.
Guidelines for Safe and Effective Usage
We only open oxygen absorbers when we’re ready to seal things up. They start working as soon as they hit the air, so we move fast—no more than 20 minutes out.
The “snap test” is our go-to for checking dryness. If your food snaps or crumbles, you’re good. If it’s bendy or sticky, it’s not ready.
We stash unused absorbers in vacuum-sealed jars or containers with as little air as possible. Sometimes the packets feel warm or get a bit damp inside after opening—no worries, that’s just the iron doing its thing.
Pick the right absorber size for your container. Using extras doesn’t help and just creates heat and moisture you don’t want.
Vacuum Sealing & Smart Bag Choices
Vacuum sealing pulls air out and keeps dry goods safe from moisture, oxygen, and pests. Choosing good bags and labeling them right means you’re not just sealing food—you’re setting up a system that keeps things fresh and easy to rotate.
How Vacuum Sealing Blocks Moisture and Air
Vacuum sealers suck the air out of special bags, then seal them tight. With the air gone, moisture can’t sneak in and ruin your flour, sugar, grains, or spices.
You have to keep the sealing strip dry—any water and the seal might fail. If your food’s a little damp, try pre-freezing or put a paper towel inside to soak up the extra moisture.
A good seal hugs the food with no air bubbles. Use bags a bit longer than you think you need so you can see the seal and keep the area clean and dry. Double-sealing helps if you’re in a humid place or planning for long-term storage.
The Benefits of Mylar Bags and Vacuum-Sealed Bags
Mylar bags are basically the gold standard for blocking moisture and light. They’re tough, block out everything, and work with most vacuum sealers or a heat sealer.
Regular vacuum bags are fine for most dry foods if your pantry isn’t too humid. They’re see-through, which is handy, and usually cheaper. Go for thicker bags if you’re storing sharp-edged stuff like rice or beans—they won’t puncture as easily.
Material Comparison:
| Bag Type | Moisture Barrier | Light Protection | Best For |
|---|---|---|---|
| Mylar bags | Excellent | Complete blackout | Long-term storage, light-sensitive stuff |
| Vacuum-sealed bags | Very good | Transparent | Everyday use, easy ID |
| Foil-laminate bags | Excellent | Very good | Bulk storage, super humid places |
Labeling for Easy Rotation and Freshness
Good labels turn your sealed bags into a system, not just a pile of mystery food. Write the ingredient, packaging date, and expiration date before sealing. Otherwise, you’ll forget what’s what.
Permanent markers or printed labels work best—they don’t rub off. Stick them on the front where you can see them. Jot down the purchase date, too, so you know how long something’s been around.
If you’re breaking up bulk buys, add the original lot or package date. It’s handy if you ever need to look up a recall or notice a quality issue. Some vacuum sealers have label dispensers, but tape or even masking tape does the trick just as well.
Storage Conditions: Keep It Cool, Dark, and Stable
Where you store things matters—a lot. Aim for 50°F to 70°F, keep it dark, and avoid temperature swings that cause condensation.
Ideal Temperature and Humidity for Pantry Goods
The sweet spot for pantry storage is 50°F to 70°F. That slows down spoilage and keeps bugs away. Go much above 100°F and things start to go downhill fast, especially if you’re storing a lot at once.
Humidity is just as important. You want the air dry—moisture brings mold and makes things clump. Even sealed containers can get condensation if the room’s too humid.
Key guidelines:
- Ideal temp: 50°F to 70°F
- Max safe temp: Under 100°F
- Humidity: Low and steady
- Storage time: 4 months to 1 year for most dried foods
Cooler temps mean better flavor and nutrition. Pantries away from the oven, dishwasher, and fridge usually do best.
Avoiding Temperature Fluctuations
Temperature swings are the enemy. When warm air hits cooler containers, water forms inside—exactly what you don’t want.
Look for sources of temperature change. Pantries on outside walls get more swings than those in the middle of the house. Avoid spots near appliances that heat up and cool down all day.
Season changes are the worst for condensation—one day it’s hot, the next it’s cold, and suddenly your flour’s clumping or your beans are stale.
A cheap thermometer helps you spot problem areas. If the temp changes by more than 10°F in a day, it’s time to move your food somewhere more stable.
Best Pantry Locations for Longevity
Interior pantries or cabinets away from outside walls are your best bet. They stay steady and aren’t hit by sun or weather changes.
Keep things dark—sunlight heats containers and breaks down nutrients. If your pantry’s not naturally dim, adding doors or a curtain makes a difference.
Best spots:
- Away from ovens, stoves, dishwashers
- Not on outside walls or near windows
- Inside cabinets or dedicated pantry rooms
- No sunlight
- Far from sinks or water
Corner cabinets and walk-in pantries on inside walls are great for big stashes of flour, rice, beans, and the like. Don’t put dry goods under sinks or near water—even if it seems dry, the humidity’s higher than you want, and pests love it.
Solutions for Large and Long-Term Storage
If you’re storing huge amounts or prepping for the long haul, you need to step up your game. Bigger moisture absorbers, heavy-duty containers, and regular checks are musts.
Best Practices for Bulk Ingredients
For more than a few pounds, we use food-grade plastic bins with gasket seals. For really big amounts, metal drums with clamp lids work best.
Paper bags are a problem. Most bulk flour, sugar, and grains come in multi-wall paper—zero moisture protection. Move them to sealed containers within a day or risk losing the whole batch to humidity.
If you keep things in the original packaging, double up: put the sealed bag inside a bigger bin with desiccant packs in between. That way, if the inside bag fails, you’ve got a backup.
Don’t store anything directly on the floor. Put bins on pallets or shelves at least 4 inches up. This keeps moisture from wicking up and lets air circulate.
Organizing and Monitoring Stock
Rotate your stock. Old stuff comes to the front, new stuff goes in the back. Label everything with dates so you don’t find surprises months later.
Hang simple temp and humidity meters around the storage area. Check them weekly and write down the readings. You want 60-70°F and humidity under 60%.
Don’t trust sensors alone. Open random containers every month—look for clumps, weird smells, or moisture. If you find a problem, pull that batch right away.
A basic spreadsheet helps track what you use and what’s sitting too long. That way you don’t overbuy and waste space.
Maintaining Moisture Control Over Time
Swap out industrial desiccant packs every 2-3 months in humid areas, or whenever their color indicator says so. Buy in bulk and keep extras handy so you’re never caught off guard.
Seals wear out. Gaskets flatten and lids loosen over time, especially with temperature changes. Check all seals every few months and replace any that look worn. A tiny leak now can mean ruined food next season.
If you have climate control, keep it steady year-round. Don’t let temps swing with the seasons—condensation is a sneaky problem. Running a dehumidifier in summer helps, but make sure you’ve got enough power for it.
Twice a year, pull everything out and give the storage area a deep clean. Check for leaks, pests, or blocked vents that might trap moisture.
Frequently Asked Questions
Brown sugar bricks, buggy flour, and clumpy spices—moisture is usually the culprit. Here’s how we handle the most common headaches.
What's the deal with brown sugar turning into a brick – and how can I keep it scoop-ready?
Brown sugar hardens because the molasses in it dries out. That’s when it turns into one big clump.
To keep it soft, use an airtight container with a terra cotta disk. Soak the disk in water for 15 minutes, pat it dry, and toss it in. It’ll release just enough moisture to keep things scoopable.
No terra cotta? Try a slice of bread or a couple marshmallows. They’ll do the trick, but swap the bread every few weeks to avoid mold.
Seeing weevils waltzing in your flour? What are pro-tips to keep the creepy-crawlies out?
Weevils usually hitch a ride in your grains as eggs, and they love warm, humid places.
Move all flour, grains, and pasta into airtight glass or sturdy plastic containers right after you buy them. That traps any bugs inside and keeps new ones out.
Bay leaves work as a natural bug repellent. Drop a few in each container or tape them to your shelves.
Freezing flour for 48 hours after you bring it home kills any eggs. After that, store it as usual.
In the battle of container materials, who wins the crown for keeping dry goods the freshest – glass or plastic?
Glass is best for keeping moisture and odors out. It doesn’t stain, seals tight, and lasts forever. Plus, you can see what’s inside without opening it.
High-quality plastic with silicone gaskets works for most dry goods, but make sure it’s food-safe and BPA-free. Lower grade plastics let a little air and moisture sneak in over time.
Glass is the go-to for long-term storage or anything acidic. It’s heavy, though, so for big batches, plastic is easier to haul around—just plan to replace plastic containers every few years as seals wear out.
Can you spill the beans on the secret to keeping those pricey dehydrated truffles truffle-y and not spongy?
Dehydrated truffles are weirdly needy. They soak up humidity like a sponge, which ruins their texture and dulls all that earthy aroma we pay for. So, you’ve gotta keep them away from air and moisture, no excuses.
Honestly, I stash mine in small glass jars and toss in an oxygen absorber packet. Those little packets suck out leftover oxygen, which helps keep the flavor sharp and keeps moisture at bay.
Find a cool, dark spot for the jar—somewhere around 50-60°F is pretty ideal. If you’re not planning to use them soon, vacuum-seal the truffles and stick them in the freezer. They’ll last ages that way, and you won’t lose quality.
Refrigerators? Nope. Unless you’ve vacuum-sealed them, the humidity in there will destroy your truffles so fast it’s not even funny.
Got any nifty tricks for ensuring that gourmet dried mango stash doesn't turn into mango leather?
Dried mango should feel a little bendy and tacky, not like some sad sheet of fruit jerky. The trick is protecting them from too much air, but not suffocating them either.
I usually keep dried mango in a container that’s just big enough—too much empty space dries them out, but you don’t want them squished. If you’re worried about sticking, a bit of parchment paper between layers works wonders. Oh, and those food-safe humidity packs? The ones that keep things around 55-60% humidity? Total lifesavers.
Glass jars beat plastic bags for keeping the texture right, at least in my experience. I’ll check the mango every month or so. If it starts to feel too dry, I’ll toss in a tiny piece of fresh apple peel for a day—just enough to bring back some moisture—then pull it out. Works like a charm, but don’t forget to remove the apple or you’ll end up with a science experiment.
Spice rack looking like a clump fest? How do we keep our spice game on point and moisture-free?
Ground spices love to clump up when they soak up moisture from the air—especially in kitchens where steam is a regular guest. Salt, garlic powder, and onion powder? Yeah, those are the usual suspects.
Try tossing 5-10 grains of uncooked white rice into each spice jar. Rice grabs that extra moisture and keeps things loose, and honestly, you’ll never notice it’s there.
Keep your spices far from the stove, dishwasher, or sink. Those spots pump out steam and heat, which just begs for clumping and saps the flavor faster than you’d think.
If you can, switch spices into small glass jars with tight lids instead of leaving them in flimsy packaging. Whole spices are even better—they shrug off moisture way better than pre-ground stuff. Just grind what you need, when you need it.
Share:
A Practical Guide to Extending the Life of Bulk-Bought Groceries
When Freezer Storage Makes More Sense Than Refrigeration