

Check out our latest home & kitchen collection!
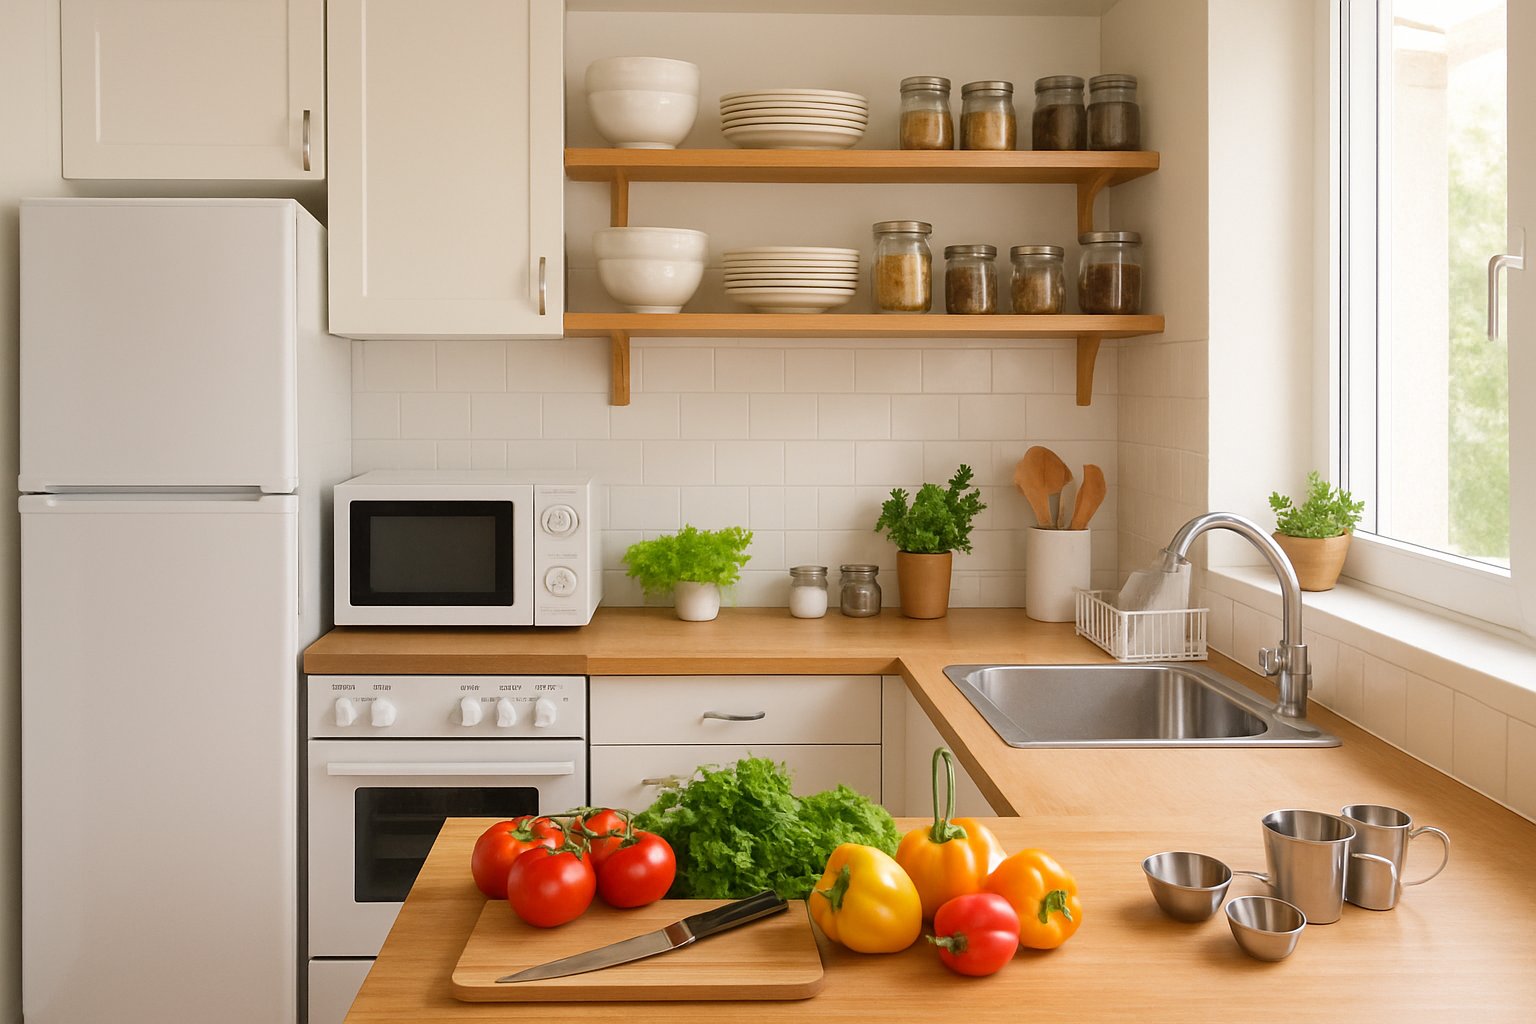
Small kitchens can be a real headache for daily meal prep, but you don't have to give up on home-cooked meals or resign yourself to endless takeout.
Getting your small kitchen ready for meal prep is all about planning your workspace, finding clever storage, and choosing tools that really earn their keep.
The difference between a cramped, frustrating cooking session and a smooth routine often comes down to how you organize things and use your space.
Honestly, successful meal prep in a tiny kitchen isn't about square footage, it's about working with what you've got. With a few smart storage tricks, a little workflow planning, and the right tools, you can turn even the smallest cooking area into a meal prep hub.
Whether you're stuck with a studio kitchenette or a narrow galley, the right setup makes cooking feel doable, not overwhelming.
The strategies below are practical and come from real-life small kitchen struggles. From going vertical with storage to carving out a dedicated prep spot, these ideas help you cook without constantly battling clutter or running out of space.
Key Takeaways
- Use vertical storage and multi-purpose tools to stretch your kitchen space
- Set up zones for prep, cooking, and storage to make your workflow smoother
- Plan meals around shared ingredients and batch-cook basics to cut down daily mess and effort
Assessing Your Small Kitchen for Meal Prep
Before you start organizing, take a good look at your kitchen and figure out where you'll actually do meal prep. Measuring and understanding your space helps you choose equipment and plan your workflow better.
Identifying the Best Meal Prep Zone
Find the best spot in your kitchen for chopping, mixing, and portioning. Ideally, this is between your fridge and stove, so you can grab ingredients and move to the cooking area without zig-zagging all over.
Look for at least 18-24 inches of uninterrupted counter space. If that's a pipe dream, try an over-the-sink cutting board or a rolling cart you can stash away later.
Keep in mind how people move through your kitchen. If it's also a hallway, avoid prepping in the main walkway. That corner near the sink? It's often a winner, since you're already washing and prepping veggies there.
Test a few spots by actually prepping a meal—notice where you naturally reach for things. Sometimes your body figures out the best setup before you do.
Measuring and Mapping Out Key Areas
Grab a tape measure and jot down your usable counter space, cabinet depths, and wall heights. These numbers matter when you're buying storage stuff that needs to fit.
Measure from your countertop to the bottom of your upper cabinets—usually about 18 inches. That tells you what appliances or organizers can stay out all the time. Check cabinet widths and depths so stackable containers and organizers don't end up useless.
Take a quick sketch or snap phone pics and note the measurements right on them. Don't skip vertical space—walls, cabinet backs, weird corners. Sometimes those awkward spots are gold.
If you're eyeing a rolling cart or extra storage furniture, measure doorways and the intended spot too. Leave a couple inches of wiggle room for easy moving.
Working with Limited Counter Space
Let's be honest—most small kitchens give you maybe 2-3 feet of real counter space once you subtract all the appliances. Time to get creative.
A folding cutting board over an open drawer can give you a bonus foot of workspace. Over-the-sink boards with built-in colanders are genius—prep, rinse, and then stash them flat.
Clear the counters before you start prepping. Move the coffee maker, toaster, whatever, to a shelf or cart. It takes a minute, but you get so much more space to work.
Try the "one thing at a time" rule: chop your veggies, store them, clean up, then move to the next thing. It keeps your tiny counter from getting buried in chaos.
Organizing Your Kitchen for Meal Prep Efficiency
Good kitchen organization can turn daily meal prep from a struggle into a flow. Declutter, group your essentials, and set up logical zones for each task—suddenly, even the smallest kitchen can feel manageable.
Decluttering and Grouping Essentials
First step: get rid of stuff you never use. Be honest—if that bread maker's just collecting dust, it's time to let it go.
Group your go-to tools by function, not just by where they fit. Keep all your cutting gear—knives, boards, peelers—together. Measuring cups, spoons, and mixing bowls go in their own spot. That way, you're not rifling through drawers when dinner's on the line.
Stackable containers are your secret weapon. Go for square or rectangular ones—they fit shelves better than round. Pick a few standard sizes that nest when empty. Label them with tape or washable marker so you know what's inside and when you put it there.
Add simple organizers: drawer dividers, under-shelf baskets, racks on cabinet doors. Magnetic knife strips and wall hooks free up drawers for stuff that can't hang.
Creating Dedicated Meal Prep Stations
You need a steady spot where your meal prep happens. Doesn't have to be huge—even a 24-inch rolling cart with a butcher block top works.
Keep this station near the fridge so you’re not running laps for ingredients. If you’re using a cart, lock the wheels before you start chopping. The top should have your MVPs: cutting boards, knives, measuring cups—right within reach.
Store your containers on the middle shelf, along with spices and oils you use all the time. Bottom shelf? That’s for backups or small appliances. Add hooks for hanging measuring cups, tongs, or a dish towel.
Stock this station with your daily staples in clear containers—olive oil, salt, pepper, garlic powder, whatever you reach for most. No more searching around the kitchen mid-prep.
Designing Zones for Cleaning, Chopping, and Cooking
Break your kitchen into three main zones: cleaning by the sink, chopping on the counter, and cooking at the stove. Keeping tasks in their own area cuts down on backtracking and speeds things up.
The cleaning zone is your sink area—wash produce, rinse containers, start food prep. Keep colanders, veggie brushes, and boards for raw proteins here. A dish rack or over-the-sink cutting board helps you use vertical space.
Your chopping zone needs at least 18 inches of clear counter. Put cutting boards, knives, mixing bowls, and containers within reach. If you’re short on space, use corner shelves or risers to create extra room. Keep a small bowl for scraps so you’re not running to the trash every two minutes.
The cooking zone is all about the stove and oven. Store pots, pans, utensils, and potholders in cabinets or drawers right next to the stove. Hang a magnetic strip or utensil holder above for spatulas and tongs. A small tray for oils and seasonings nearby saves you from constant searching.
Maximizing Storage and Counter Space
Tiny counters and limited storage can kill your meal prep vibe before you even start. But with some strategy, you can turn cramped spaces into efficient work zones.
Vertical Storage Solutions and Wall-Mounted Racks
When you run out of floor and counter space, look up. Wall-mounted racks keep your tools handy and clear up your prep area. Magnetic strips hold knives on the wall—no more chunky knife blocks hogging space.
Pegboards turn blank walls into custom storage. Hang measuring cups, whisks, ladles—whatever you need often—on hooks you can move around. Magnetic spice jars stick to the board or metal strips, so you see what you have at a glance.
Hanging pot racks on the wall or ceiling free up cabinets for less-used stuff. Open shelves work for dishes and glasses you use every day. Just keep these areas tidy—otherwise, your kitchen will feel even smaller.
Optimizing Cabinets with Shelf Risers and Drawer Dividers
Most cabinets waste the space between shelves. Shelf risers let you double up—plates and bowls below, cereal boxes or mugs above.
Drawer dividers keep utensils and gadgets from turning into a tangled mess. Adjustable ones let you make space for spatulas, tongs, whisks—whatever you use most. No more digging for the one thing you need.
Pull-out organizers make those awkward corner cabinets actually usable. Lazy Susans bring stuff from the back to the front. Stand baking sheets and cutting boards upright with vertical dividers instead of stacking them and losing the bottom one forever.
Using Stackable and Clear Containers
Pouring dry goods into stackable containers gets rid of wasted space from weird packaging. Square or rectangular containers fit together neatly and use every inch.
Clear containers show you what's inside and how much is left—no more opening every lid or shuffling boxes. Label the contents and date for easy rotation.
Best foods for container storage:
- Rice, pasta, grains
- Flour, sugar, baking stuff
- Nuts, seeds, dried fruit
- Snacks, cereal
Stick with a few uniform sizes so you can stack and move things around without the whole pile collapsing.
Making the Most of Awkward Spaces
That skinny gap between the fridge and wall? Slide in a rolling cart—perfect for cans, oils, or cleaning supplies that otherwise have nowhere to go.
Over-the-door organizers hang on cabinet doors for bonus storage, no tools required. Use them for spices, wraps, or snacks—whatever fits.
Selecting Meal Prep Tools and Appliances
The right tools make meal prep quicker and less annoying, especially when space is tight. You want items that multitask, fit your space, and don't hog the counter.
Essential Utensils and Cutting Boards
A sharp chef's knife is a must. Find one that feels good in your hand and breezes through veggies, meat, and herbs. Pair it with a sturdy cutting board that actually fits your counter—medium ones (about 12x18 inches) are usually just right.
Have at least two boards to avoid mixing raw meat and produce. Plastic boards are dishwasher-friendly; wood is kinder to your knives. Silicone spatulas won't scratch your pans, and a solid set of measuring cups and spoons keeps recipes on track.
Don't skip a veggie peeler, kitchen shears, and a box grater. They barely take up space but save you a ton of time when prepping.
Compact and Multi-Functional Appliances
Small kitchens need appliances that do more than one job. An Instant Pot? Total game-changer—it pressure cooks, slow cooks, steams, makes rice, and more, all in one spot. You can cook beans, soup, even a whole chicken without hogging all your space.
A mini food processor speeds up chopping and shredding, and it tucks away in a cabinet. If you have to choose between a big or mini one, the mini usually wins for saving space.
A slow cooker is still handy for hands-off meals, but if you have an Instant Pot, you might not need both. If you love stews and braises, a dedicated slow cooker (like the GreenPan) heats up fast and stays cool on the outside.
If you have an oven, a couple of heavy-duty baking sheets let you do sheet pan dinners and batch roasting. They stack flat and store upright, saving precious cabinet room.
Choosing Mixing Bowls, Colanders, and Containers
Mixing bowls in a few different sizes let us prep several things at once. Nesting stainless steel or glass bowls save space and don’t pick up smells. I’d say three sizes are plenty—small for dressings, medium for marinating, and a big one for tossing salads.
A colander with a sturdy base and small holes drains pasta and rinses veggies without making a mess. Collapsible silicone models fold up, so they’re perfect if your cabinets are already packed.
Meal prep containers are worth some thought since they’ll hold most of our food all week. Here’s what I look for:
- Leakproof lids that actually stay on (Rubbermaid Brilliance is a solid pick)
- Clear sides so you know what’s inside without guessing
- Stackable shapes to squeeze into any fridge
- Microwave and dishwasher-safe materials
Glass lasts longer and doesn’t stain, but plastic is lighter for lunches on the go. I keep enough containers for 4–6 meals, plus a few extras for chopped veggies or cooked grains. You’ll be glad you have spares.
Meal Planning and Prep Strategies
Good meal planning keeps kitchen chaos in check, especially when space is tight. Let’s dig into weekly menus, batch cooking, and some leftover tricks that actually work in a small kitchen.
Planning Weekly Menus for Limited Space
I usually pick recipes that share ingredients across meals. If I’m buying chicken, bell peppers, and rice, I’ll use them in a bunch of dishes so I’m not stuffing the fridge with one-off items. With three proteins and five veggies, you can stretch those combos for a whole week.
One-pot meals are a lifesaver. Sheet pan dinners roast everything together so you can use the counter for something else. Soups, stir-fries, and pastas need fewer pots and make cleanup less of a headache.
I organize my shopping list by store aisle and buy just what I need for each meal. That way, I don’t overfill the fridge with stuff that’ll just go bad. Planning portions helps use up ingredients before they spoil.
Sample weekly menu:
- Monday: Sheet pan chicken with roasted veggies
- Tuesday: Chicken fried rice (with leftovers)
- Wednesday: One-pot pasta with marinara
- Thursday: Stir-fry with whatever veggies are left
- Friday: Bean and veggie soup
Batch Cooking Techniques
I like to cook grains, proteins, and basics in one go. A pot of rice or quinoa lasts 4–5 days and works in bowls, as a side, or in fried rice. Roast a few chicken breasts or a whole bird, then shred for meals all week.
Chop veggies all at once—bell peppers, carrots, onions, celery—and stash them in clear containers for a few days. Makes it so much faster to throw together stir-fries or omelets without dragging out the cutting board every day.
Big batches of sauce go straight into ice cube trays. Each cube is about one serving, so you only thaw what you’re going to use. Marinara, pesto, even curry bases—these transform plain grains or proteins and don’t hog fridge space.
Making the Most of Leftovers
Leftovers aren’t just for eating the same meal twice. Monday’s roasted chicken? That’s Tuesday’s chicken salad, Wednesday’s quesadillas, Thursday’s soup. Mixing things up keeps meals interesting and makes your cooking go further.
Leftover grains work as breakfast bowls, salad bases, or fried rice. Pair them with different proteins and sauces, and you won’t even notice it’s the same rice from two days ago.
I store leftovers in clear, stackable containers and slap on a label with the date. The “first-in, first-out” trick helps use up older stuff first—just move new containers behind the old ones. It’s not fancy, but it keeps the fridge from turning into a science experiment.
Smart Food Storage Tips for Small Kitchens
Staying organized with the right containers makes a small kitchen feel bigger. When you can see what you have and keep it fresh, meal prep gets way less stressful.
Labeling and Storing Ingredients
Labeling saves so much time, especially when you’re in a rush. I use masking tape and a Sharpie—nothing fancy—to write what’s in the container and when I opened it. No more mystery jars or accidental double-buys.
Pour flour, rice, and pasta into clear, airtight containers. It keeps them fresh and you’ll know when you’re running low at a glance. Stack them to use every inch of cabinet space.
Group baking stuff together, keep breakfast items in one spot, and snacks in another. When everything has a home, you spend less time hunting and more time actually cooking.
Organizing Pantry and Fridge Zones
Set up zones in your pantry and fridge based on how you cook. Breakfast at eye level, lunch stuff in the middle, dinner ingredients lower down. The fridge door is best for condiments and small jars; main shelves hold the big stuff.
Stackable containers help make use of vertical fridge space and stop things from getting lost in the back. Always put new items behind older ones.
In the pantry, use bins or baskets for similar things—cans in one, grains in another, oils and vinegars together. This way, you’re not digging through every shelf for a single can of tomatoes.
Utilizing Meal Prep Containers for Freshness
Quality meal prep containers that stack and match make a difference. Glass ones with snap lids are my favorite—they seal tight and you can see what’s inside. Rectangular shapes fit together better than rounds.
Keep prepped ingredients in small portions so it’s easy to grab what you need. Chop veggies on Sunday, portion them, and stack in the fridge. They stay fresher this way than just tossing them loose in a drawer.
Label leftovers right away with what they are and the date. You’re way more likely to eat that soup if you don’t have to guess what’s in the container. Keep all leftovers in one fridge zone so nothing gets lost and wasted.
Maintaining A Clean and Efficient Meal Prep Area
A tidy workspace makes meal prep faster and safer. A good cleanup routine keeps dishes and clutter from piling up and taking over your kitchen.
Establishing a Clean-As-You-Go Routine
Honestly, cleaning as you go is the only way I keep my sanity during meal prep. Wipe down the counter after chopping, wash cutting boards while the meat is marinating, and toss used tools in the dishwasher as you finish with them.
Keep a damp cloth nearby for quick wipes. I use a bowl next to the cutting board for scraps, so I’m not running to the trash every five minutes.
Fill the sink with soapy water before you start. That way, bowls and spoons can soak as you go, and you’re not stuck scrubbing dried-on messes later. Wash things during breaks—like when something’s simmering—so you don’t end up with a mountain of dishes.
Streamlining Post-Prep Cleanup
Start on cleanup while your last dish cooks. Tackle big stuff first—cutting boards, pots, mixing bowls—since they take up the most space. Spray down the stove and counters, let it sit, and load the dishwasher or hand wash what’s left.
Make cleanup easier by using one side of the sink for washing and the other for rinsing. Let things air dry on a rack or towel—no need to dry every spoon by hand.
Wait until containers are totally cool and the kitchen’s clean before putting them away. It stops condensation and gives you a nice “done for the day” feeling. Sweep or vacuum last to pick up any stray crumbs.
Frequently Asked Questions
A small kitchen doesn’t have to kill your meal prep routine. With a little creativity and the right setup, you can make it work—promise.
What are the top design hacks for maximizing space in a small kitchen?
Thinking vertically is the fastest way to double your storage. Floating shelves above the counter hold oils, spices, and go-to ingredients without eating up work space.
Magnetic strips on the backsplash get knives and spice tins off the counter. I like a 16-inch strip for knives and a few metal spice jars.
Over-the-door organizers turn forgotten space into storage for pantry goods or tools. Look for ones with adjustable tiers for different containers.
Inside cabinet doors is prime real estate, too. Add narrow shelves or wire racks for spices and measuring cups—no need to give up shelf space.
Can you share budget-friendly tips for organizing a small kitchen without cabinets?
Rolling carts are a lifesaver if you don’t have cabinets. They give you extra prep space and tuck away when you’re done. The lower shelves are great for tools or extra ingredients.
Pegboards on the wall cost next to nothing and hold pots, pans, or utensils. Move the hooks whenever you want—no need to drill new holes.
Stackable wire shelves fit in corners or against walls and create instant pantry space. Way cheaper than custom cabinets and perfect for dry goods or small appliances.
Under-counter tension rods hold cleaning supplies or dish towels. It’s a cheap and easy fix that keeps things handy.
What's the best way to create a meal prep zone in a tiny kitchen design?
Set up your main prep spot close to the sink—it makes washing veggies and cleaning up way easier.
Keep cutting boards, bowls, and utensils handy with a shelf or a rolling cart. Salt, pepper, and olive oil should be right there too.
A packing area near the fridge is key. Use a tray or basket for containers, labels, and markers so you’re always ready to portion and store.
Dedicate a section of counter just for chopping. A cutting board holder or magnetic strip nearby lets you store boards vertically and frees up space.
How can I arrange my small kitchen appliances for optimal meal prep efficiency?
Only keep what you use every day on the counter—usually just a coffee maker and maybe a toaster. Everything else goes in cabinets when you’re not using it.
Pick appliances that do more than one thing. An Instant Pot, for example, replaces a bunch of gadgets that would otherwise crowd your counter.
Store heavier appliances like stand mixers in lower cabinets, and lighter ones like blenders up top. Giving each tool a home you can actually reach means you won’t dread pulling them out.
Put the most-used appliances in the easiest-to-reach cabinets. I keep my food processor in a lower cabinet with a pull-out shelf—it just slides out when I need it.
Any clever small kitchen hacks for keeping ingredients fresh and accessible?
Clear containers are a must—you can see what’s inside without opening everything. Glass is best since it’s microwave-safe and doesn’t hold onto smells.
Label everything with what’s inside and when you prepped it. Waterproof markers or a label maker work great. Saves so much time on busy mornings.
Try organizing by meal type and prep date. Breakfast stuff on one shelf, lunches on another, and older items up front so you use them first.
Collapsible silicone containers shrink down to a quarter of their size when empty, so you can fit way more in your storage drawer than with regular ones.
What's the ideal small kitchen layout to streamline my daily cooking routine?
The best layouts carve out clear zones for each task, instead of lumping everything together. That way, you’re not always shuffling things around or bumping into yourself.
Set up a prep spot near the sink. Keep a packing area close to storage, and claim a counter just for chopping. This triangle setup cuts down on steps and keeps things flowing—especially when you’re in a hurry or juggling a few dishes at once.
Pull-out drawer organizers in lower cabinets make it way easier to grab things from the back—no more digging through a pile of pots just to find the right lid.
Shelf risers are a game changer, too. You get a double-decker cabinet instantly. Wire risers work for dishes; solid ones are better for cans and pantry stuff.
Share:
How to Build a Kid-Friendly Snack Storage System
A Guide to Organizing Kitchen Shelves for Easy Access