

Check out our latest home & kitchen collection!
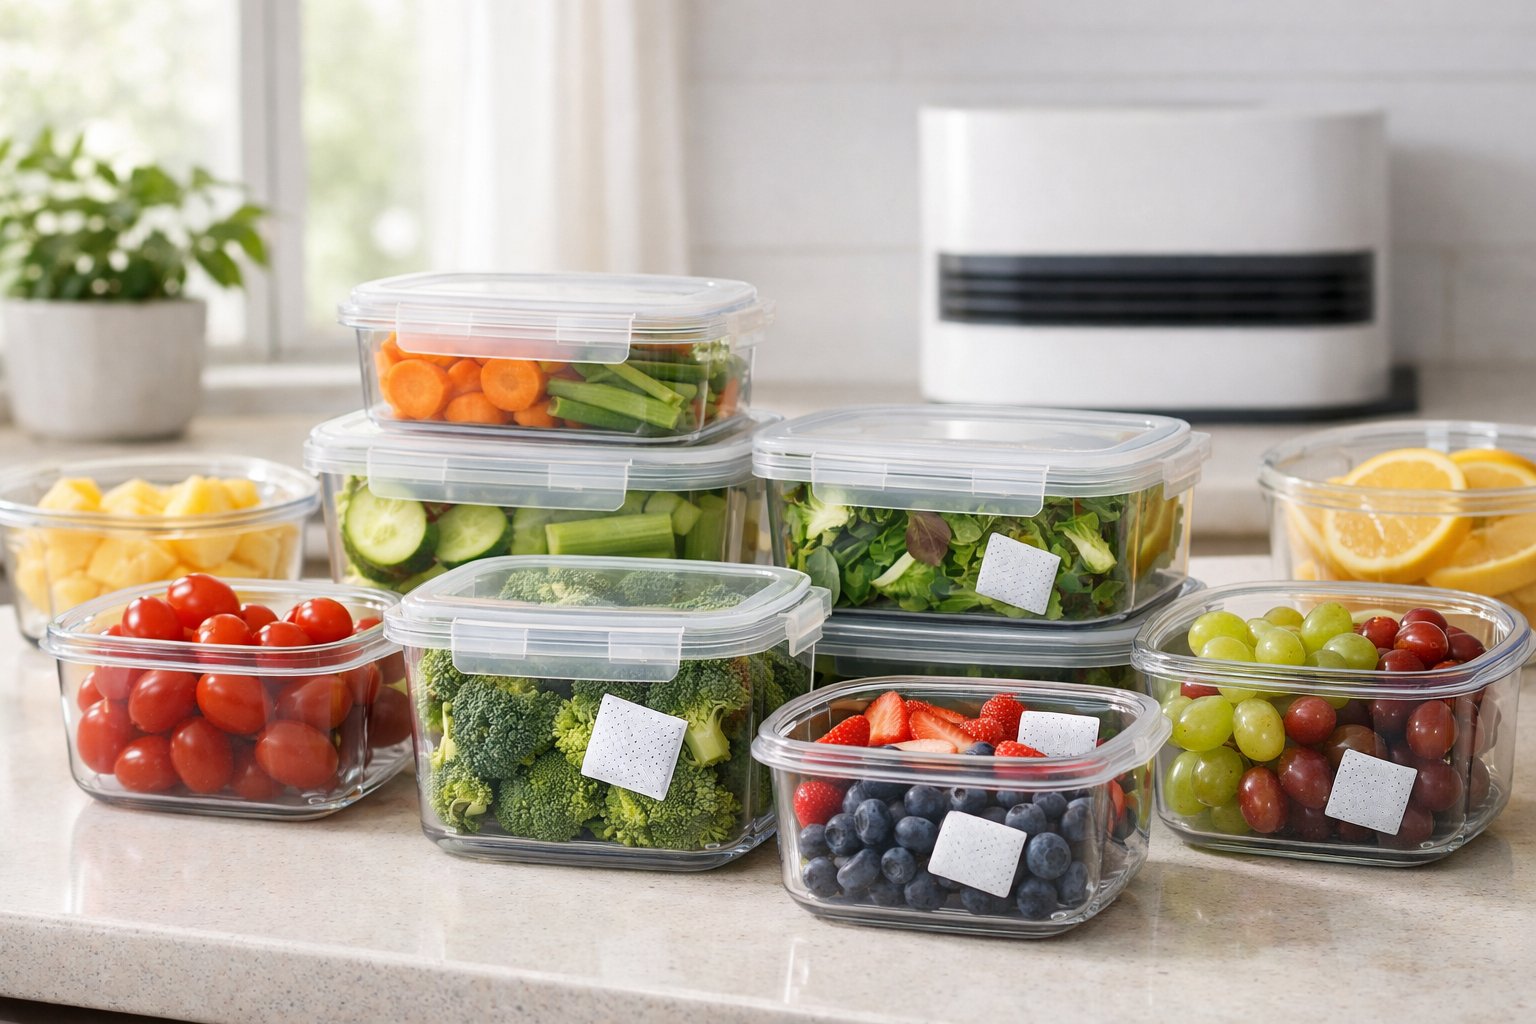
We've all hit that moment, digging into the pantry or fridge, only to find something stale, moldy, or weirdly soft when it was supposed to be crispy. The three elements that make or break your food’s shelf life? Air, light, and moisture.
Get those right, and you might double (or more) how long stuff stays fresh. Knowing how these factors play off each other turns food storage from random luck into a system that actually works and honestly, it saves a lot of money and frustration.
Most people obsess over temperature, but air, light, and moisture quietly wreak havoc on foods, even when you keep things cold. Oxygen kicks off oxidation, which turns oils rancid and apples brown.
Light breaks down vitamins and triggers chemical changes, messing with taste and safety. Moisture? That’s an open invitation for mold, or sometimes it just sucks the life out of foods and leaves them dry and sad.
You don’t need fancy gadgets or complicated hacks to get these under control. There are practical ways to cut down air exposure with smart containers, shield foods from light, and dial in humidity for different products. You’ll be able to set up storage that actually keeps food fresh, not just wish it would.
Key Takeaways
- Air, light, and moisture are the big three that speed up food spoilage—even more than temperature sometimes
- Picking the right containers and storage spots can seriously extend shelf life
- Different foods need different storage approaches, so matching method to product keeps things from going to waste
Why Air, Light, and Moisture Matter Most
Air, light, and moisture each have their own ways of ruining food. Air brings oxidation and staleness, light breaks down nutrients and flavors, and moisture fuels mold and bacteria. It’s a team effort—unfortunately.
How Air Impacts Food Freshness
Expose food to air, and oxygen immediately starts breaking down fats, vitamins, and pigments. Oils turn rancid, fruits and veggies brown, and nuts get that stale, old taste.
Oxygen also helps bacteria and molds multiply. Most spoilage bugs need oxygen to thrive, so foods last way longer when vacuum-sealed.
Common signs of air-related spoilage:
- Rancid or weird smells in oils and fatty foods
- Brown spots on cut fruits and veggies
- Crackers, chips, and baked goods going stale
- White "fat bloom" on chocolate
Minimize air by using airtight containers, vacuum sealers, or oxygen absorbers. Even just squeezing the air out of a zip bag before sealing helps.
The Trouble With Light Exposure
Light speeds up chemical reactions in food. Sunlight and even regular kitchen lighting break down vitamins like riboflavin (B2), A, and C. You can lose nutrition even if the food still looks okay.
Fats and oils are especially sensitive—light causes photooxidation, creating rancid flavors even faster than air alone.
Light also fades colors. Green veggies turn olive-brown, spices lose their vibrancy, and sometimes the taste follows the look.
Foods that hate light:
- Oils and fats
- Milk and dairy
- Fresh herbs and greens
- Whole grain flours
Opaque containers, dark glass, and keeping things out of direct light (like in a pantry) are the way to go.
Moisture's Big Role in Spoilage
Water activity decides if bacteria, yeast, or mold can grow. Bacteria need water activity above 0.91, yeasts above 0.88, and molds can hang on down to 0.65. Keep moisture in check, and you control spoilage.
But moisture messes with texture too. Crackers and cereals soak up humidity and go limp. Fresh foods lose water and shrivel up.
Moisture content and water activity aren’t always the same thing. Two foods might have the same water content but behave totally differently. That’s why food scientists measure both.
Refrigeration slows water movement, humidity-controlled containers help, and desiccants (like silica gel) suck up extra moisture. For dry goods, keeping them at their “monolayer moisture content”—where water molecules just coat the surface—keeps them at their best.
Air Control Techniques for Peak Freshness
Cutting down oxygen is the single best way to slow down food spoilage. The right container and a good seal can make a huge difference for everything from coffee beans to veggies.
Airtight Containers: Types and Materials
Glass containers are tough to beat for keeping air out. They don’t absorb smells and are perfect for dry goods. Sure, they’re heavy, but for pantry staples, I’ll take the tradeoff.
Plastic containers with solid silicone seals are lighter and great for stacking in the fridge. Just make sure they’re BPA-free and have thick walls with locking lids.
Stainless steel containers block light and seal air out. These are awesome for coffee since they tackle both oxygen and light at once. Plus, the opaque metal keeps photodegradation at bay.
The Power of Vacuum Sealing
Vacuum sealing pulls out almost all the air, massively slowing oxidation and bacteria. Meats last three to five times longer, and nuts and seeds stay fresh for months.
Vacuum sealing is a lifesaver for meal prep and bulk buys. Portion out chicken or beef into vacuum bags and freeze—no more freezer burn. Coffee beans keep their aroma way longer, though it’s best to seal them in smaller amounts, since opening and resealing lets air back in.
Vacuum sealers aren’t cheap, but the money you save on wasted food makes up for it. The pricier, commercial ones seal better and last longer.
Proper Sealing and Organization Tips
I always test container seals by closing the lid and lifting the container by it—if it holds, the seal’s good. Replace silicone seals if they’re cracked or deformed.
Label everything with contents and date. Dry-erase markers on glass work great. Store airtight containers in cool, dark spots away from heat.
In the fridge, put newer stuff behind older, so you don’t forget what needs using first. Group similar items in matching containers—it saves space and makes things easier to find.
Fighting Off the Fade: Light Protection in Food Storage
Light breaks down chemical bonds in food, ruining vitamins, fading colors, and creating off-flavors. UV rays are only a small part of sunlight, but they’re powerful enough to speed up spoilage, especially in fats and proteins.
Best Storage Spots: Pantries, Cabinets, and Drawers
Foods last longer in spots that block light. Pantries with solid doors work best, especially for oils, spices, and flour.
Great storage spots:
- Cabinets away from windows
- Deep drawers that close fully
- Basement shelves with little light
- Pantries without glass doors
Heat and light often combine to spoil food faster. Lower drawers and corner cabinets usually beat upper cabinets near ceiling lights. In my experience, foods in these darker spots keep their color, flavor, and nutrition longer.
The backs of cabinets protect better than the fronts. Rotating items from back to front during checks helps keep things from lingering too long.
Opaque vs Clear Containers: What Works Best?
Opaque containers block all light, making them the best pick for foods that spoil from photooxidation. Dark glass, metal tins, and solid plastics stop the light reactions that wreck herbs and grains.
Clear containers are fine if you keep them in a dark cabinet. They’re handy for seeing what’s inside, which helps avoid forgotten food. But on open shelves or counters, they offer no light protection.
Container performance by material:
| Material | UV Protection | Best For |
|---|---|---|
| Dark glass | Excellent | Oils, dried herbs |
| Metal tins | Complete | Spices, tea, coffee |
| Opaque plastic | Very good | Flour, sugar, grains |
| Clear glass | None | Dark storage only |
| Tinted plastic | Moderate | Snacks, pasta |
Amber and cobalt glass hit a nice middle ground—blocking UV but still letting you see inside. They’re great for olive oil and other foods prone to going rancid.
Minimizing Light in Refrigeration
Fridge lights seem harmless, but every door opening adds up. Over time, it degrades food quality.
Wrap cheese, butter, and deli meats in foil or parchment to block light from LED bulbs. Milk stays fresher in the back of the fridge, away from door light.
Produce drawers with solid fronts protect better than wire baskets. Keep leafy greens and other sensitive veggies in these drawers, not on open shelves. Opaque bags for cut veggies help too.
Mastering Moisture: Humidity and Food Longevity
Moisture control is key to keeping food fresh. Relative humidity directly affects water activity, which in turn decides how fast food spoils. The right storage—humidity-controlled containers, desiccants, or just smart placement—makes a big difference.
Humidity Levels and Food Types
Each food has its own humidity sweet spot. Veggies like high humidity (90-95%), baked goods need it low (30-50%), and fruits generally prefer around 85-90%. Berries are pickier—they like the lower end to avoid mold.
Dry goods like crackers, cereals, and pasta want low humidity (20-40%) to stay crisp. Too much moisture, and they turn limp fast. Cheese does best at 65-70%—enough to keep it from drying out, but not so much it molds.
Water activity tells us how much moisture is available for microbes. Most bacteria need above 0.90. Managing humidity around food helps keep this under control.
Humidity-Controlled Containers & Drawers
The crisper drawer isn’t just for show—it’s got vents to adjust humidity. Close the vents for 90-95% humidity (good for leafy greens), open them for 60-70% (better for fruits that give off ethylene).
Airtight containers keep humidity steady and block outside moisture. That’s why crackers stay crisp and brown sugar doesn’t turn rock-hard. For long-term storage, containers with rubber or silicone seals work best.
Special humidity-controlled containers go a step further, with vents or one-way valves to release extra moisture but keep outside air out. These are awesome for coffee beans, nuts, and dried fruit.
Desiccants and Moisture Absorbers
Silica gel packets are classic moisture-fighters. These tiny sachets can soak up about 40% of their weight in water vapor, shielding spices, dried herbs, and supplements from humidity. If you want to reuse them, just toss them in a low-temperature oven until the indicator crystals flip color.
Calcium chloride is more aggressive, drawing in up to three times its weight in water. It's handy for pantries in muggy climates or damp basements packed with bulk goods. Unlike silica gel, calcium chloride turns to liquid as it works, so you need a little collection tray.
Food-grade desiccants come in all sizes. A 1-gram packet fits a spice jar, while 10-50 gram packets are better for big containers of flour or sugar. Swap desiccants out when they’re saturated—sometimes that’s in a few weeks, sometimes months, depending on how damp things get.
Monitoring and Adjusting Storage Humidity
A digital hygrometer gives you a real number for relative humidity in your storage spots. These gadgets cost anywhere from $10 to $30 and take the guesswork out of moisture control. Stick one in your pantry, fridge drawers, or anywhere else you worry about climate, and check how things change over time.
Humidity sensors with alerts will ping you when levels wander outside the sweet spot. It actually matters—a cold room holds less moisture than a warm one, even if the relative humidity is the same. In winter, heated homes often drop to 20-30% humidity, so you might need to add moisture for foods that don’t like it too dry.
If your hygrometer shows pantry humidity above 60%, try adding a dehumidifier or just run a small fan to get air moving. Too dry? Set out an open bowl of water to gently boost humidity. The main thing is to check weekly and act before you see stale crackers or limp cereal.
Container Know-How: Choosing the Right Storage Gear
The material and design of your storage containers really matter for keeping food safe from air, light, and moisture. Glass blocks odors and stains, plastic is light and flexible, and stainless steel is tough as nails with zero risk of shattering.
Comparing Glass, Plastic, and Stainless Steel
Glass containers are great at stopping odors and don’t leach chemicals. Borosilicate glass won’t crack with quick temperature changes, so you can go from freezer to oven. The downside? Heavy and breakable.
Plastic containers (made from polypropylene or BPA-free stuff) are light and won’t shatter if you drop them. But they can pick up smells and stains, especially from acidic sauces. Look for food-grade plastics with recycling codes 2, 4, or 5.
Stainless steel containers last forever and don’t hold onto flavors or smells. They’re perfect for dry goods and travel. The catch is you can’t see what’s inside without opening them, and they can’t go in the microwave.
| Material | Best For | Limitations |
|---|---|---|
| Glass | Leftovers, meal prep, acidic foods | Heavy, breakable |
| Plastic | Bulk storage, on-the-go meals | Can stain, absorbs odors |
| Stainless Steel | Dry goods, travel, lunch boxes | Opaque, no microwave use |
When and How to Use Vacuum Seal Bags
Vacuum sealing zaps almost all the air out of storage bags, which really slows down spoilage from oxygen and moisture. It’s a game-changer for the freezer—freezer burn shows up after 2-3 years (instead of 6-12 months with regular bags).
For day-to-day, vacuum seal raw meats, whole cheese blocks, or bulk nuts and coffee beans. Pop the food in a special bag, stick the open end in the vacuum sealer, and let the machine suck out the air before heat-sealing it shut.
Skip vacuum sealing soft breads—they’ll get squished. Mushrooms and soft cheeses are tricky too unless you freeze them first. With liquids like soups, freeze them flat in the bag before vacuum sealing, so you don’t end up with a messy machine.
Spotlight: Silicone Seals and Leak-Proof Lids
Airtight containers are only as good as their seal. Silicone gaskets press against the rim when you close the lid, flexing to fill little gaps and holding up to temperature swings.
Top-notch leak-proof lids use four-sided locks to clamp down evenly. If you want to check a seal, fill the container with water, close it, and flip it upside down over the sink—simple but effective.
Inspect silicone seals every so often for cracks or warping. Most brands sell replacements, so you don't have to toss the whole container. Wash seals with warm soapy water, not harsh cleaners. If you treat them right, they’ll usually last a couple of years.
Smart Storage Hacks and Tools
Tech and a few old-school tricks help us keep tabs on food and conditions in the kitchen. Digital gadgets track humidity, apps remind us what needs eating, and reference charts save us from storage guesswork.
Humidity Sensors and Food Freshness Apps
Humidity sensors are tiny devices you can drop in the fridge, pantry, or a container to keep an eye on moisture. They connect to your phone and send alerts if things get too damp or too dry—usually you want 30-50% humidity in most pantries, with special ranges for different fridge zones.
The USDA’s FoodKeeper app covers over 650 foods, giving you timelines for fridge, freezer, or pantry storage. You can search any ingredient and get advice on shelf life and even some cooking tips.
Apps like NoWaste and Fridgely let you snap photos of receipts, scan barcodes, and set up custom reminders. They’ll ping you before anything expires, which honestly helps cut down on waste.
Food Storage Charts for Every Ingredient
A food storage chart tells you exactly where to stash each food and how long it’ll last. Print one for your pantry door or save a digital copy on your phone for quick grocery unpacking.
| Food Category | Location | Shelf Life |
|---|---|---|
| Fresh herbs | Refrigerator in water | 1-2 weeks |
| Root vegetables | Cool, dark pantry | 2-3 months |
| Leafy greens | Crisper drawer, wrapped | 5-7 days |
| Hard cheeses | Refrigerator, wrapped | 3-4 weeks |
| Flour | Sealed container, pantry | 6-8 months |
These charts help dodge mistakes like putting tomatoes in the fridge (kills the flavor) or storing onions with potatoes (both go bad faster). Following these guides keeps food fresher and cuts down on waste.
Organizational Tricks to Reduce Food Waste
Try the "first in, first out" method—put new groceries behind older ones. Use bins with labels or just slap some masking tape with dates on containers.
Clear containers let you see what’s inside without cracking them open, which keeps air and moisture out. Square, stackable containers make better use of space and help avoid the “forgotten leftovers” problem.
Set up an “eat me first” bin in front of the fridge for stuff that’s about to expire. Separate ethylene-producing fruits (apples, bananas) from veggies that are sensitive to it (lettuce, broccoli) using different drawers. Meal prep containers for single servings make leftovers easier to grab and help you actually eat what you’ve got.
Beyond the Basics: Advanced Techniques for Every Food Type
Storing food isn’t just about tossing it in the pantry—each type needs its own approach for air, light, and moisture. Water activity is a big deal for keeping foods safe and tasty.
Dry Storage: Grains, Nuts, and More
We aim for specific water activity levels for dry goods. Most grains keep best at water activities between 0.2 and 0.4—the “monolayer” point where water forms a single layer on the food’s surface.
For grains and legumes, keep moisture below 13%. Use airtight containers with oxygen absorbers to prevent rancidity and bugs. Store these in dark, cool places; light and heat speed up oil spoilage.
Nuts and seeds are trickier because of their fat content. They need even lower water activity (below 0.3) to avoid going rancid. Refrigerate or freeze them in vacuum-sealed bags to stretch shelf life from weeks to months. Roasted nuts don’t last as long as raw ones—roasting damages their cell structure.
Dried herbs and spices lose their punch when volatile oils evaporate. Keep them in amber or opaque glass, away from heat. Whole spices hang onto flavor about five times longer than ground.
Sun and Air Drying Methods
Traditional air and sun drying drop water activity so microbes can’t survive. Most bacteria need water activity above 0.91, while molds can survive down to about 0.65.
Sun drying works best where it’s hotter than 85°F and under 60% humidity. Spread produce out in single layers on racks, cover with cheesecloth, and bring them in at night to keep them from reabsorbing moisture. Tomatoes, peppers, and stone fruits are good candidates. Usually takes 3-5 days.
Air drying is great for herbs and leafy greens. Bundle stems and hang them upside down in a dark, breezy spot. Darkness helps preserve color and oils, and airflow keeps mold at bay.
Food dehydrators give you more control, with steady temps between 95-165°F depending on the food. They work faster and do a better job keeping color and nutrients than just air or sun.
Moisture Control for Fresh Produce
Fresh produce is all about balance—enough moisture to keep things crisp, but not so much that you get soggy messes. Leafy vegetables like high humidity (90-95%) but need to breathe.
Use perforated bags or containers with adjustable vents. Line crisper drawers with paper towels to soak up extra moisture—swap them every couple of days when they get damp.
For stuff like lettuce and spinach, store unwashed in slightly open containers. Washing strips off protective coatings and adds water that speeds up decay. With herbs, trim the stems, pop them in a jar with a bit of water, and loosely cover with a plastic bag.
Root veggies want different treatment. Potatoes, onions, and garlic like it dry, dark, and airy. Don’t put potatoes in the fridge—cold turns their starches into sugar and messes up flavor and texture.
Frequently Asked Questions
Storing food well means juggling temperature, moisture, and knowing which foods need chilling. Here are some of the most common questions about keeping pantry staples fresh.
What are some shelf-stable food examples that don't require refrigeration?
Dried beans, rice, pasta, and whole grains can hang out in the pantry for months or even years if kept dry and cool. Canned veggies, fruits, meats, and soups are also good at room temp until opened.
Nut butters, honey, and most oils don’t need the fridge before opening. Dried fruits, nuts, and seeds stay fresh in sealed containers away from heat and dampness.
Flour, sugar, and baking basics do fine in the pantry if you keep bugs and humidity out. Hard cheeses with wax coatings and some cured meats can last outside the fridge, but watch for spoilage.
At what temperature should canned foods be stored for optimal safety?
Keep canned foods between 50°F and 70°F for best results. Higher temps (above 75°F) speed up nutrient loss and can eventually mess with the can's seal.
Freezing won’t make canned food unsafe, but the liquid inside can swell and damage the can. Avoid storing cans in garages, attics, or near heat sources.
A cool, dry basement or an inside pantry is ideal. The steadier the temp, the longer your canned goods will last.
How can improper storage conditions, like humidity, impact the quality of my pantry staples?
High humidity makes dried foods soak up water, leading to clumpy powders and soggy crackers. That extra moisture can let mold spores and bacteria get a foothold.
Pasta and rice can turn sticky or smell off if they get too humid. Flour and baking mixes might harden into lumps that are tough to use.
Cans can rust in damp spots, eventually breaking their seal. Even sealed packages can fail if humidity stays above 60%—moisture can sneak in over time.
Sugar turns rock-hard, and salt clumps up, even with anti-caking agents. Letting humidity run wild just wrecks food quality and makes things harder to use.
Could you shed some light on the USDA's guidelines for food storage to ensure longevity and safety?
The USDA suggests keeping shelf-stable foods in cool, dry spots, away from sunlight or heat. They’re big on the “first in, first out” rule—use up older stuff before you crack open the new. Makes sense, right?
It’s important to keep storage areas clean and watch out for pests. The USDA says you should check expiration dates and look for any quality changes, but honestly, a lot of shelf-stable foods are fine well past those dates if you’ve stored them right.
For dried goods, they recommend airtight containers—metal, glass, or food-grade plastic all work. What matters most is keeping the temperature steady, not just cold.
Even though a lot of foods can technically last forever if you store them properly, their taste and texture will eventually go downhill. So, sometimes you’ve gotta weigh safety against whether you’ll actually want to eat that old stuff.
What's the ideal humidity level in my pantry to keep my foodstuffs in top-notch condition?
If you’re storing dried goods like grains or beans long-term, shoot for humidity between 10% and 15%. For everyday pantry use, just keep it under 50%—that’s usually enough to dodge most moisture issues.
Once humidity creeps above 60%, mold can start popping up and your dried foods will soak up water from the air. In damp basements or humid climates, a small dehumidifier or tossing a few silica gel packets in containers can help a lot.
Foods have their own quirks, but for pantry basics, lower humidity is almost always better. I like to use a cheap hygrometer to keep tabs on things—better to catch a problem early than discover a bag of ruined rice.
Why is it crucial to protect food from air and light exposure, and what are some practical steps to combat these spoilage agents?
Oxygen in the air makes fats go rancid, leading to odd flavors and wiping out fat-soluble vitamins like A, D, and E. Light speeds up this process and breaks down nutrients—especially in foods with oils or anything processed.
Honestly, airtight containers with sturdy lids are a lifesaver. Glass jars with rubber seals, plastic tubs with good locking snaps, or even those resealable bags with tough zippers—they all help keep air out.
Opaque containers do the best job blocking light. Tinted glass offers some help, but we usually stash clear containers in dark cabinets or pantries, far from windows or harsh lighting.
If we pick up foods in see-through packaging, tossing them into opaque bins or wrapping them in foil does the trick. Oxygen absorber packets? They're surprisingly effective. Pop them into sealed containers with flour, nuts, or dried fruit, and you'll notice they last a lot longer.
As soon as we open something from the store, we move it into our own airtight containers. It's a small habit, but it really cuts down on how much air and light the food sees between uses.
Share:
Why Clear Storage Improves Food Usage in the Kitchen
When to Transfer Food Out of Original Packaging