

Check out our latest home & kitchen collection!
Kitchens seem to collect clutter faster than any other room, and honestly, containers sometimes make it worse. You know the drill: mismatched lids, stacks that won’t stay put, random stuff shoved to the back of cabinets. It’s a daily headache.
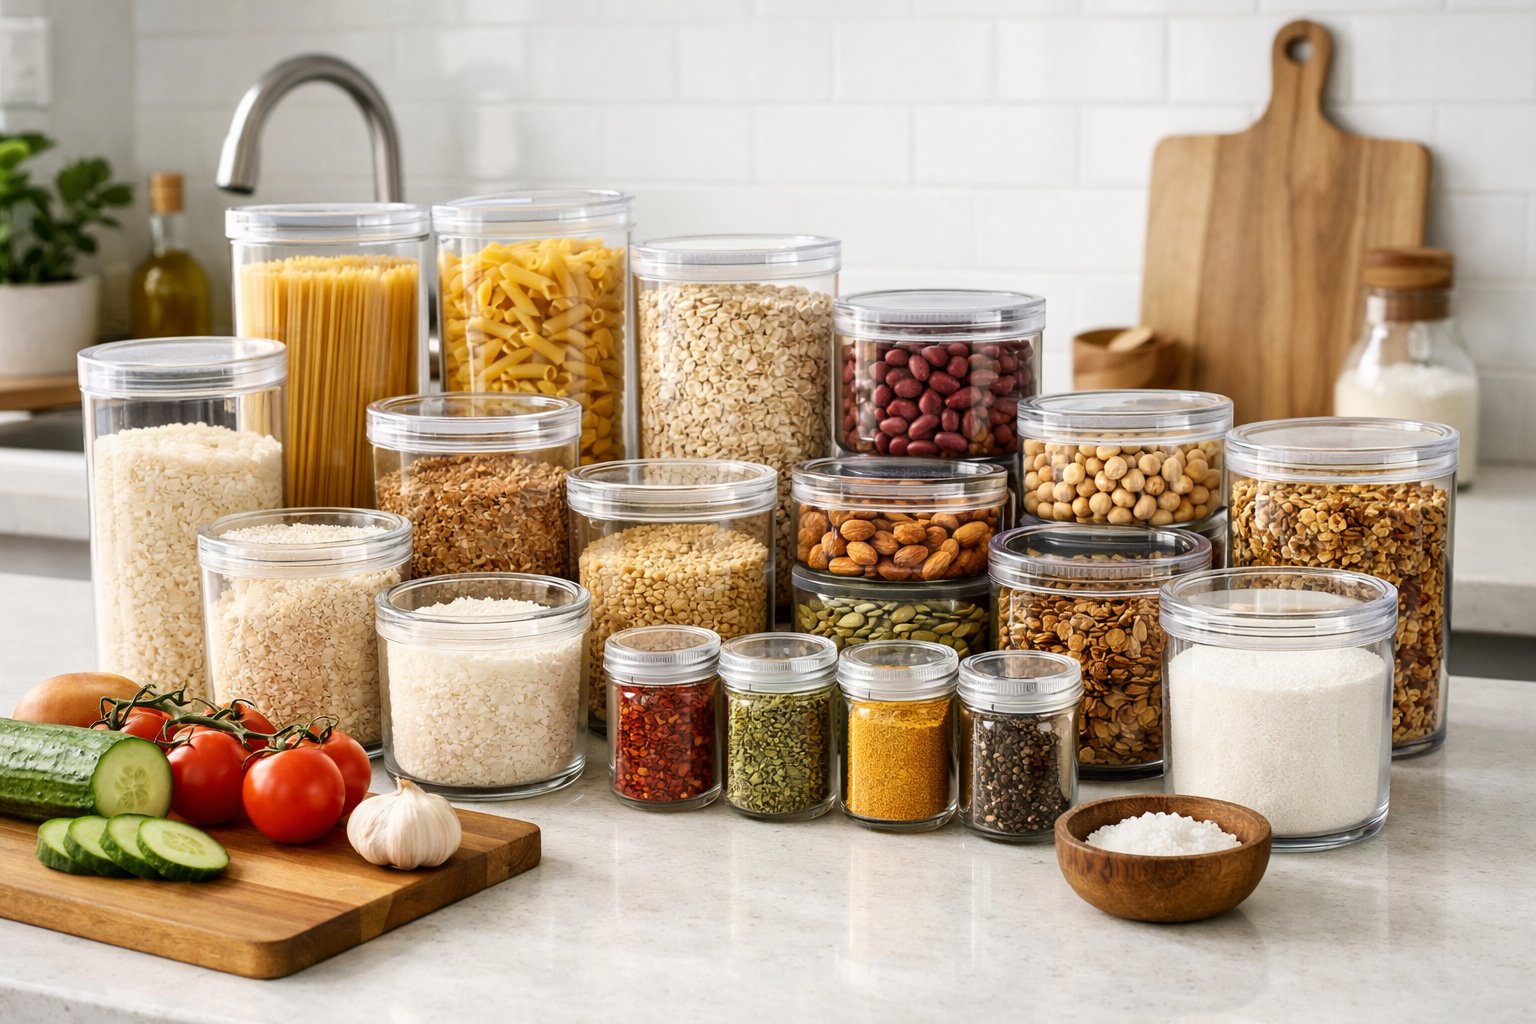
But containers, when chosen and arranged with a bit of intention, can actually anchor kitchen organization, defining spaces, keeping food fresh, and creating systems that genuinely work.
If you’ve ever opened a cabinet and been greeted by an avalanche of plastic, you’re not alone. The real issue isn’t always having too many containers, it’s having the wrong ones, or no system at all. Different kitchen zones need different containers, and knowing which is which can really make life easier, especially when you’re scrambling to cook.
A solid container strategy can totally change how your kitchen runs. Clear containers let you see what’s inside without any guesswork. Stackable ones make the most of those tiny cabinets. The right size means you’re not wasting space, and your food stays fresh longer. When containers fit their job and spot, suddenly the kitchen’s less of a maze.
Key Takeaways
- Pick containers based on what you’re storing and where, so you avoid clutter and keep food fresh longer
- Set up a system for both containers and lids—no more daily lid-hunting or wasted time
- Match materials and sizes to the task, and you’ll find storage actually helps your meal prep instead of fighting it
Why Containers Are Essential for Kitchen Organization
Containers really do bring order to chaos. They manage clutter, help food last, and just make daily cooking feel less like an obstacle course.
Reducing Clutter and Enhancing Efficiency
Most of us have faced the dreaded cabinet avalanche—half-open bags, random lids, and food packages everywhere. Containers can fix this, giving you uniform, stackable storage that actually uses your vertical space and clears up the counters.
Transferring stuff like flour, pasta, or cereal into their own containers means you ditch bulky packaging that hogs space. Square and rectangular containers fit together neatly, so you’re not losing precious inches to awkward gaps.
Clear containers let you see what you have—no more digging through piles or shuffling things around just to find the oats. It’s way easier to spot when you’re running low, too.
If you stack containers, you’ll use all that vertical space in cabinets and pantries that usually just sits empty. Labels help, too. You glance, you know what’s inside, and you can keep things organized with almost no effort.
Preventing Food Waste Through Effective Storage
A lot of food goes to waste just because it gets forgotten in the back somewhere. When you can’t see what’s there, it’s easy for stuff to expire before you even remember buying it.
Airtight containers make a difference here—they keep out moisture, air, and pests, so dry goods like flour or nuts last much longer than if you left them in their original bags.
With transparent containers, you can spot when you’re running low and avoid those last-minute grocery runs or accidental double-buys. Plus, it’s easier to use the FIFO method—first in, first out—since you can actually see what’s oldest.
Right-sizing your containers helps, too. Leftovers stay fresher in smaller, filled containers than in big, half-empty ones. Less air, less spoilage, and you’re more likely to actually eat what you save.
Supporting Meal Prep and Cooking Routines
If you’re into meal prep, containers are your best friend. They turn a weekly scramble into a repeatable system. Having dedicated containers for ingredients and finished meals just makes everything smoother.
Portion-controlled containers let you prep lunches or dinners for the week—just grab and go in the morning. It’s a lifesaver on busy days.
Keeping prepped ingredients in their own containers during cooking keeps things organized and cuts down on cross-contamination. It’s the kind of setup chefs use—everything in its place.
Microwave- and freezer-safe containers go even further. Prep meals ahead, freeze them flat to save space, and reheat right in the same dish. That flexibility means you’re less likely to order takeout when you’re tired.
Types of Kitchen Storage Containers and Their Uses
Not all containers are created equal. Plastic, glass, and stackable or modular designs each fit different needs.
Plastic Containers: Lightweight and Versatile
Pretty much everyone has a stash of plastic containers. They’re cheap, light, and come in every size and shape. Great for leftovers or packing lunches.
The best part? They bounce instead of shattering when you drop them, which is a big deal if you’ve got kids or just tend to be clumsy. BPA-free plastic is the standard now, so you don’t have to worry about weird chemicals.
Plastic works well for room temp and fridge storage. Toss them in bags, stack them in the pantry—they’re easy. But they do have downsides. Plastic absorbs smells and stains easily (tomato sauce, anyone?). Not all are microwave-safe, so check the label. Over time, they can warp or crack, especially if you use the dishwasher a lot.
For dry goods, plastic containers with airtight seals do the job and cost way less than glass.
Glass Containers: Durable and Odor-Resistant
Glass is like the gold standard for food storage. It doesn’t stain or hold onto smells, so your next meal won’t taste like last week’s curry.
Glass jars and canisters are great for organizing the pantry—flour, rice, coffee, you name it. You see what’s inside, no guessing.
Airtight glass containers are oven, microwave, and dishwasher safe (just don’t forget to take off the lids before baking). They’re perfect for meal prep. You can prep, store, reheat, and serve in the same dish. Glass keeps heat and cold well, so it works for everything from soup to salad.
Downsides? They’re heavy. If you’re packing lunch, you’ll notice. And, yeah, glass breaks, but tempered glass is tougher than you’d think.
If you’re cutting back on plastic or want something that lasts, glass is worth the investment.
Stackable and Modular Storage Options
Space is always tight, right? Stackable containers help by letting you build up, not out.
Modular sets take it up a notch—uniform sizes that nest together and look tidy on shelves or in the fridge.
Airtight stackables keep things fresh and organized. Square or rectangular shapes are just more efficient than round ones—no wasted corners, no weird gaps.
A lot of stackable sets have lids that fit multiple sizes, which is a small miracle if you’re tired of hunting for the right top. It also makes replacing lost lids a lot easier.
You can get stackables in both plastic and glass. Plastic’s lighter and good for high shelves; glass is great for lower spots you use often. Some even come with dividers for smaller items like spice packets or snacks.
The real win? You turn that chaotic cabinet into a system where everything’s got a home—and nothing gets lost in the back.
Choosing the Right Containers for Your Kitchen
Picking containers comes down to material, space, and whether you want to see what’s inside. Each choice affects how organized things stay and how fresh your food is.
Container Materials: Pros and Cons
After trying out a ton of containers, I can say: material really matters. Plastic is lightweight and cheap—great for daily use. Go for BPA-free and recycling codes 1, 2, 4, or 5. They’re dishwasher-safe and won’t shatter, which is why families love them.
But plastic does pick up smells and stains, especially from things like tomato sauce. It also warps if you microwave it too much.
Glass doesn’t have those issues. It’s non-porous, so it won’t hold onto odors or flavors. You can move it from freezer to oven (just remember to take off the lid). Borosilicate glass handles temperature changes better than the regular kind. Downsides? It’s heavier, breaks if dropped, and costs more upfront.
Stainless steel lasts basically forever and keeps food hot or cold longer. Food-grade stainless (304 or 316) won’t react with acidic foods. It’s easy to clean and resists scratches. You can’t see inside, though, and you can’t microwave it.
Size, Shape, and Space Considerations
You’ll want a range of sizes. Small (1-2 cups) for snacks and spices, medium (3-6 cups) for leftovers and meal prep, large (8+ cups) for bulk pantry stuff.
Rectangular containers stack and fit better in fridges and pantries—they use up corners and line up neatly. Round containers are better for liquids or things you stir a lot.
Measure your shelves before you buy. Tall, narrow containers fit deep shelves but might tip over. Short and wide are stable but need more depth. Stackables let you use vertical space without making a mess.
Clear vs. Opaque Storage
Clear containers are a game-changer. You see what’s inside instantly, which means less food waste. Glass and transparent plastic make it easy to check inventory, especially when you’re rushing or making a grocery list.
Clear kitchen containers work best for pantry staples like flour, rice, or pasta. You spot when you’re low without opening every lid. They’re also handy for meal prep—you can see your portions at a glance.
Opaque containers, like stainless steel, are better for foods that lose quality in light, such as oils or some spices. They also give shelves a cleaner, more uniform look if you’re into that. But you’ll need to label everything, or you’ll end up with mystery meals.
Practical Storage Solutions for Different Kitchen Zones
Every kitchen zone needs its own approach. Here are some ideas for pantries, cabinets, drawers, and the fridge to make cooking less of a hassle.
Smart Pantry Organization
Start with clear containers for dry goods—rice, pasta, flour, cereal. You’ll see what you have and keep things fresh longer.
Try a FIFO (First In, First Out) setup: put newer stuff behind older, so nothing gets forgotten.
Go vertical whenever you can:
- Stackable systems for cans
- Tiered organizers for more levels
- Door racks for spices and small stuff
- Pull-out drawers for deep shelves
Label everything—contents and dates. It saves you from digging around and helps keep things tidy.
Group similar items. Baking stuff in one spot, snacks in another, breakfast items together. Zoning like this speeds up meal prep since you know where everything lives.
Maximizing Cabinet and Drawer Space
Wire baskets and drawer dividers really help tame the chaos. They give everything from storage containers to gadgets a proper home.
Add multi-tier organizers to cabinets to double or triple your space. Adjustable shelves let you fit different container heights and reach stuff more easily.
For drawers, try:
| Storage Tool | Best Used For |
|---|---|
| Expandable dividers | Utensils, small tools |
| Deep drawer inserts | Pots, pans |
| Narrow organizers | Spices |
Keep lids and containers separate—store lids upright in a rack or organizer instead of piling them up. Match up container sizes so they stack neatly.
Corner cabinets work better with lazy susans or pull-out carousels. Otherwise, those spaces just swallow stuff you’ll never see again.
Fridge and Freezer Storage Strategies
Set up zones in your fridge for different foods. We keep dairy together, stash produce in the bins, and always put leftovers at eye level so they don’t disappear into the abyss.
Clear, airtight containers beat original packaging once something’s open. They stack, use up vertical space, and you can see what’s inside at a glance. I’ll always grab square or rectangular containers over round ones—round just wastes space.
Drinks and ready-to-eat stuff go on the top shelf. Middle shelves are for dairy and eggs. The bottom shelf is coldest, so it’s where we keep raw meat and fish. The door? That’s for condiments and anything that doesn’t mind a little temperature swing.
The freezer needs the same kind of thinking. We group stuff in clear bins or bags, slap on labels with dates, and keep a running list of what’s inside. Flattening things like ground meat or soups before freezing saves a ton of space compared to leaving everything in its original packaging.
Organizing Containers and Lids: Tips and Tools
Keeping containers and lids in order takes a little planning and the right tools. Once you’ve got a system, cabinets go from chaos to something you can actually use without swearing.
Managing Lids with Organizers and Dividers
Lids are always the first to go rogue. A solid lid organizer gives each one a spot, standing upright so you can see them all. I like using file holders mounted inside cabinet doors for flat lids, or even a mail sorter in a drawer to separate by size.
Drawer dividers help too—no more lids sliding around and mixing up. Tension rods, spaced a couple inches apart, make quick compartments for different lid sizes. Sometimes I’ll even flip a book bin on its side for a vertical divider that keeps lids in line.
Wall-mounted file holders on cabinet doors? Surprisingly effective. They keep lids in sight and don’t eat up shelf space. In drawers, box shelves corral lids by type and stop the usual toppling mess.
Arranging Containers by Function and Use
It’s way easier to stay organized if you group containers by how you actually use them. Keep lunch containers separate from the fancy serving stuff. Grab-and-go water bottles fit perfectly in a magazine holder turned on its side—no more rolling around.
A lazy susan is a lifesaver for smaller containers you use all the time. Just spin it and grab what you need—no digging necessary. I keep lids close to their containers but not always snapped on, so I’m not wrestling with mismatched stacks when I’m in a hurry.
Undershelf baskets add bonus storage inside cabinets. I use them for sorted lids, with containers below. Clear or frosted bins let you spot what’s inside right away, which helps keep the system going.
Nesting, Stacking, and Categorizing
Nesting containers inside each other frees up a ton of space. I always keep lids separate in their own organizer instead of stacking them with the containers—makes both easier to grab. Three-tier corner shelves help sort by size or type, and nothing gets lost in the back.
Stack containers by size and label the sections by what fits where. Lightweight acrylic trays can become pullout shelves in deep cabinets, so nothing gets stuck in the dark. A little adhesive liner makes those trays glide, too.
If your containers are all one brand or material, store them together—interchangeable lids mean fewer to keep track of. Sets with graduated sizes? Store them as a set so you can grab the right one for any meal or snack.
Creative and Advanced Container Organization Ideas
If you’re ready to level up, try rotation systems, vertical storage, or clever labeling. These tweaks squeeze more out of your kitchen and tackle the usual clutter spots.
Rotating Pantry Systems and Lazy Susans
A lazy susan turns dead corner space into something you’ll actually use. I like installing them in those awkward cabinets where stuff just gets shoved to the back.
Give it a spin and everything’s in reach—no more awkward stretching or digging. Circular models fit pantry corners, and kidney-shaped ones work for those cabinets with weird doors.
Pantry carousels do the same but with more levels, perfect for stacking spice jars or little condiment containers. Just make sure you measure your cabinet before buying—the wrong size is a pain.
Two-tier rotating systems are great for deep cabinets. Keep your go-to items like coffee and sugar on top, and the backups below.
Using Vertical and Door-Mounted Storage
Door-mounted racks use space most of us ignore. Over-the-door options hold lightweight containers, foil, or wraps—no drilling required.
Vertical storage options:
- Adjustable door shelves for different container heights
- Clip-on spice racks for cabinet doors
- Wire baskets for separating lids
- Magnetic strips for metal containers or utensils
Cabinet doors can usually handle 5-10 pounds, but I wouldn’t risk heavy glass jars. Inside cabinets, vertical dividers turn wasted height into storage. Stand up baking sheets, cutting boards, and lids—they’re way easier to grab this way. Tension rods work as quick, no-commitment dividers.
Wall-mounted containers near the stove keep the stuff you use most right at hand. Clear acrylic pockets hold towels, bags, or even the smaller plastic containers.
Labeling and Categorization Hacks
Labels save you from playing “guess the leftovers.” I use a label maker for the stuff that stays put, and dry-erase markers for containers that rotate through different foods.
Handy categorization ideas:
- Color-coded labels by category (blue = baking, green = grains, red = snacks)
- Dates for when you stored or need to toss something
- Quantity markers for meal-prep ingredients
- FIFO tags so you always use the oldest stuff first
Chalkboard labels are flexible—just wipe and rewrite when you switch contents. Group by how often you use things, not just the type. Breakfast stuff all together, even if it’s a mix, makes mornings smoother.
Transparent containers mean you don’t always need a label, but I still jot down dates to keep track of freshness without opening every single one.
Frequently Asked Questions
Container headaches never really go away—mismatched lids, cracked glass, wobbly stacks, you name it. Here’s how we handle the usual messes.
What are the best ways to maximize space when organizing food storage containers?
Try storing containers with their lids snapped on. It takes up a bit more room, but it ends the endless hunt for matches and keeps stray lids from multiplying.
Nest containers by size and shape—keep squares with squares, rounds with rounds. Uniform stacks don’t tip over as easily.
If you like lids and containers separate, use vertical dividers or tension rods to keep lids upright and visible. Stackable, uniform containers take up less space than a random assortment.
Can you suggest some tips for decluttering a cupboard full of mismatched plastic containers?
Start by matching everything. If a container or lid doesn’t have a mate, toss or recycle it. We’ve all kept extras “just in case,” but let’s be honest, that day never comes.
Only keep what you actually use. If you’ve got a dozen tiny containers and only use three, donate the rest. Most of us get by with 5-7 containers in each size.
Ditch anything stained, warped, or smelly. Old plastic just doesn’t last. Investing in a matching set with lids that fit all the containers can save you from future headaches.
How do you keep glass storage containers from chipping when stored in cabinets?
Lay down shelf liners or silicone mats to cushion glass containers. They absorb bumps and stop chips from forming.
Never stack glass more than three high—too much weight leads to cracks, especially at the edges.
Keep glass away from the cabinet edge, out of the way of daily bumps. If you can, give them their own shelf, spaced out so nothing gets knocked around.
In what ways can meal preppers efficiently use storage containers for portion control?
Go for containers in standard sizes—2-cup or 4-cup makes portioning automatic.
Divided containers keep proteins, carbs, and veggies separate for grab-and-go lunches. No need to measure every time.
Label with serving info using permanent marker or tape. Marking “1 serving = 150g protein” or “2 cups” right on the container keeps things consistent. Stack same-size portions together so you can pack a week’s worth of meals in one go.
What are some creative ideas for labeling containers to keep ingredients and leftovers identifiable?
Painter’s tape and a Sharpie make for easy, removable labels—no sticky residue and perfect for leftovers that change all the time.
Dry erase markers write straight on glass or some plastics. I just jot down the date and contents, then wipe it off when it’s time for something new.
For pantry staples, a label maker is worth it—labels hold up to cleaning and look tidy. Chalkboard labels let you update with a chalk marker whenever you swap what’s inside. Color code with tape or stickers if you want—assign a color to baking, grains, snacks, whatever makes sense for your kitchen.
Could you recommend strategies for storing various sized containers without wasting kitchen real estate?
Try dedicating one deep drawer or a single cabinet section just for containers. Scattering them around only leads to frustration, right? Keeping everything in one spot makes it way easier to find what you need and avoids wasting precious space.
For those tiny containers—like sauce cups or baby food portions—grab a few small bins or drawer organizers. Otherwise, they’ll disappear into the abyss of your cabinets. Grouping them together keeps things sane.
Stack similar shapes and sizes, with the biggest ones on the bottom. Honestly, square and rectangular containers just fit better and stack more neatly than round ones, especially in corners. I like to keep the ones I reach for most at eye level or somewhere easy to grab. The big mixing bowls and those oddly-shaped specialty pieces? Those can go up high or somewhere out of the way until you actually need them.
Share:
Why Kitchen Organization Fails Without Clear Storage Zones
When Kitchen Storage Starts Working Against You