

Check out our latest golf collection!
Better putting starts with better speed control. A putting mat can help you build that skill indoors by giving you a consistent surface for repeatable strokes, clear feedback, and focused distance drills.
Distance control is not only about making short putts. It is about learning how far the ball rolls with different stroke lengths, so longer putts finish close instead of leaving stressful comeback putts.
With the right mat length, simple drills, and a steady practice routine, indoor putting can sharpen your touch without needing a trip to the course. This guide explains how putting mats support distance control, how to set up your space, and which drills make home practice more effective.
Key Takeaways
- Putting mats deliver consistent feedback, so you can build real distance control and a reliable stroke tempo through repetition.
- To get the most out of indoor practice, you’ll want the right mat, targeted drills, and a routine that hits specific distance ranges.
- If you’re just going through the motions or ignoring speed variation, you can fix that with focused training and the right gear.
How Putting Mats Foster Distance Control Skills
Putting mats help you build distance control by letting you repeat strokes, feel the feedback, and dial in your stroke tempo in a consistent environment. The main thing is figuring out how your indoor reps can help you on real greens, and using your mat to develop feel instead of just aiming at the cup.
Translating Indoor Reps to On-Course Performance
Practicing indoors lays the groundwork for better distance control outside, even though your mat won’t match the course perfectly. The big skill you’re after is stroke tempo and knowing how your backstroke length affects ball speed.
When you hit putts on your mat regularly, you train your hands and arms to connect a certain stroke length with a certain distance. That muscle memory comes with you to the course, and your mechanics stay the same, no matter what’s under your feet.
Most mats run a bit faster or slower than real greens, which usually sit between 9 and 13 on the stimpmeter. I’d focus more on relative distances than exact ones. Try hitting a ball twice as far with a longer stroke, or see if you can get three balls to stop in a tight zone.
Your indoor work pays off when you can keep the same tempo and face control on all kinds of surfaces. The stroke you groove at home will hold up, even if the green speed out there is a little different.
Muscle Memory and Consistency With Daily Use
If you hit putts on your mat every day, you start to build that pendulum-like stroke that just feels automatic. Most average golfers struggle with distance control because, let’s be real, they don’t practice enough to get that reliable touch.
I’ve noticed that just ten focused minutes a day on the mat does more for your feel than a once-a-week session at the course. Your brain and muscles need regular reps to learn those subtle changes in stroke length and pace.
Practicing at home takes out all the variables. Same putter, same ball, same surface every time. That consistency helps you really understand how your backstroke sends the ball whatever distance you’re after.
Why daily mat practice works:
- You build a repeatable tempo and rhythm
- You start trusting your stroke path
- Your hands remember what different distances feel like
- You get instant feedback, no driving or tee times needed
Simulating Realistic Green Speed and Roll
Good putting mats try to copy real green speeds, though most land somewhere between 9 and 11 on the stimp scale. Knowing how your mat compares to your local course helps you set the right expectations and tweak your practice.
If you can, test your mat’s speed. Roll a few putts from a fixed spot and see how far they go compared to what you’d expect outside. Some mats let you adjust the speed or surface texture, which is handy if you want to mix things up.
Roll quality is just as important as speed. The better mats give you a true roll, with no weird bouncing or grain to mess you up, which helps you trust your stroke. Cheap mats with uneven weaves can throw off your distance control by giving you bad feedback.
I’d focus on grouping drills, not just making putts. Put three balls at 6, 10, and 15 feet, and try to get each group to stop within a two-foot window. That’ll build your feel for speed, even if your mat isn’t a perfect match for your course’s stimpmeter.
Setting Up an Effective Indoor Practice Space
You don’t need a giant house or a basement that looks like a bowling alley to set up a solid practice area. What really matters is matching your equipment to your space, arranging things so you can focus, and handling the little details that make your sessions actually useful.
Choosing the Right Indoor Putting Mat
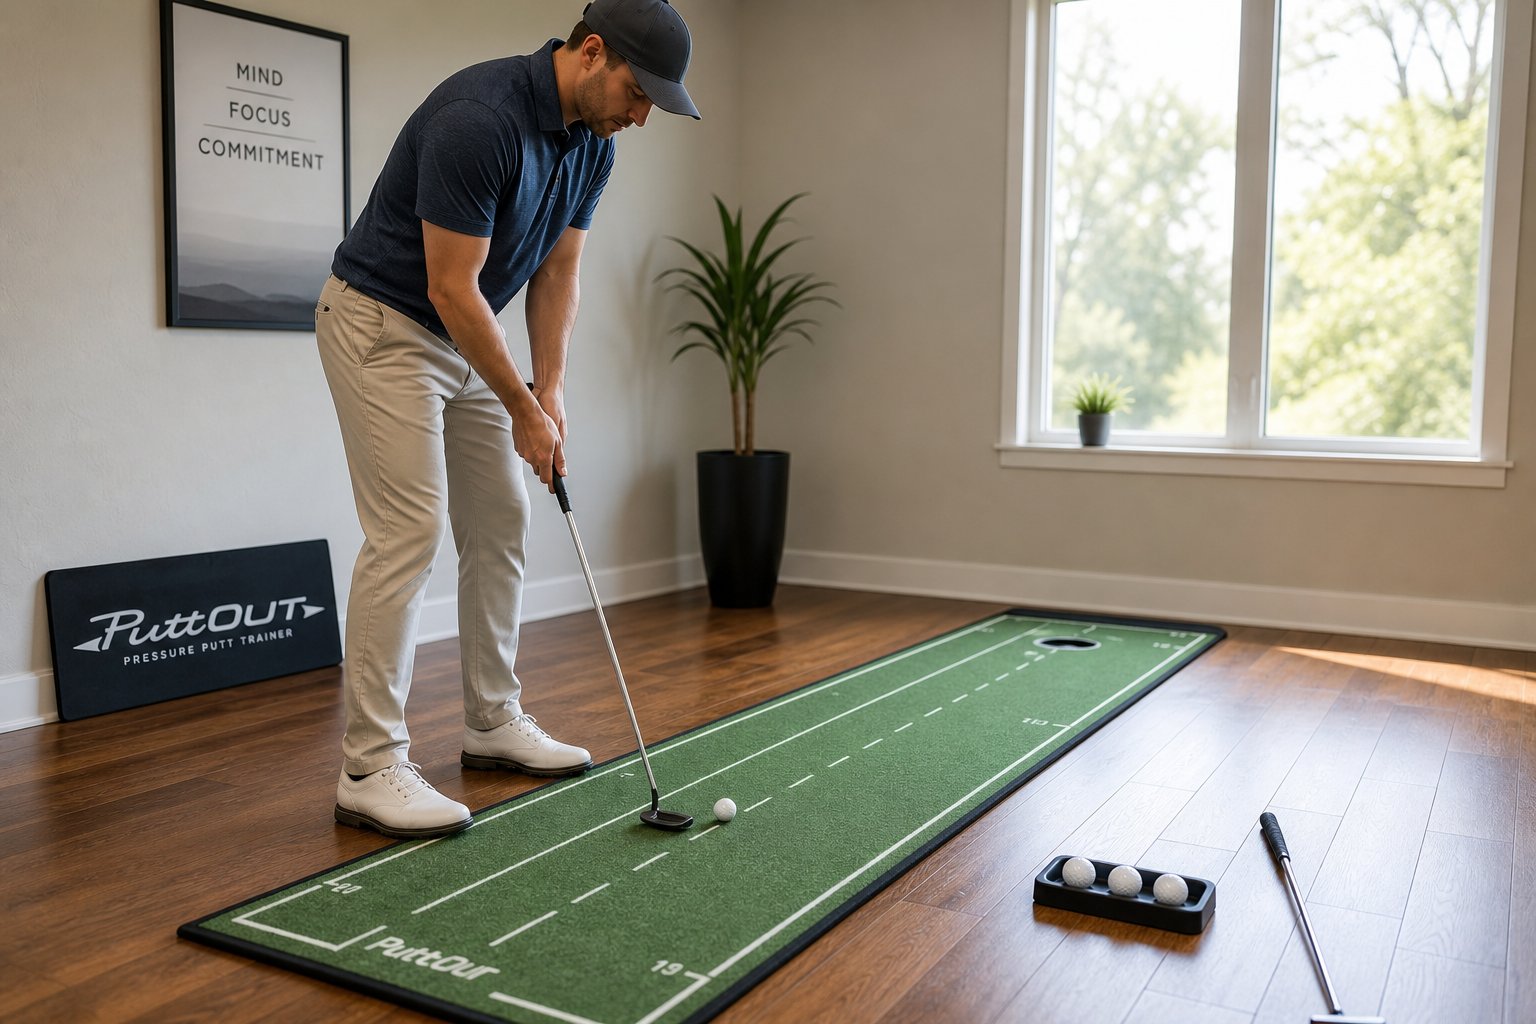
Mat length matters more than you might think. An 8- to 10-foot mat covers the basics for most home setups, but if you’ve got a hallway or spare room, a 12- to 15-footer lets you work on those longer lag putts.
Surface quality separates the mats that actually help your stroke from the ones that just collect dust. The best putting mats use materials that mimic green speeds between 9 and 11 on the stimpmeter, which is pretty close to what you’ll see at most courses. Look for a mat that rolls true all the way across, with no dead spots or weird patches.
What to look for:
- Realistic speed that’s not crazy fast or slow
- Even texture with no bumps or worn-out spots
- Wide enough at least 12 inches so you can work on alignment
- Easy to move if you need to put it away after practice
Well-made putting mats are known for giving you a true roll that translates better to the course. Give your mat a test: roll putts from different spots and check if the speed stays consistent.
Optimal Room Layout and Flooring Tips
Hallways actually work great for putting practice, since they’re long and out of the way. Spare bedrooms, basements, or even your living room during “golf time” can all do the trick.
The floor under your mat matters more than most folks realize. Carpet can make things unpredictable and let the mat slide around. Hard floors, think wood, tile, or concrete, give your mat the stable base it needs.
Measure your space before you buy anything. You’ll want at least two feet extra beyond your mat’s length so you’re not cramped. A 10-foot mat realistically needs about 12 or 13 feet of clear space.
Quick space checklist:
- At least 10 feet of open length for real distance work
- Three feet wide so you’re not bumping into furniture
- Flat, stable floor with no dips or bumps
- Somewhere low-traffic where you can leave the mat out
Lighting, Storage, and Safety Considerations
Good lighting makes a huge difference. Overhead lights that cut down shadows help you see your line and focus on alignment. Somewhere around 500 to 750 lumens of neutral white light, about 4000K to 5000K, seems to be the sweet spot for putting.
Storage matters, especially if you share your practice area with family or roommates. Mats that roll up tight or lay flat can slide under a bed or behind a door. Some folks hang alignment sticks or training aids on wall hooks to keep things tidy.
For safety, secure the edges of your mat so nobody trips. Make sure you’ve got enough ceiling height. Eight feet is usually fine for putting, but more is always better if you’re swinging a club. Keep your mat out of main walkways, and if you’ve got pets or kids, pick practice times when you won’t get interrupted.
Essential Drills for Distance Control and Accuracy
Focused drills on your putting mat turn random practice into real skill. Three main drills keep showing up as the best for building distance control and cutting down three-putts.
Manila Folder Drill for Speed Feedback
This one’s simple but effective. Place a manila folder, or even a thin book, at different spots on your mat, starting at six feet. Roll your putt so it stops right at the folder’s edge without hitting it.
You’ll see right away if your speed is off. If you’re always short or long, you’ll know. Try this from three distances each session: 6, 9, and 12 feet.
Hit five putts to each spot. Track how many stop within the folder’s width. Once you’re nailing 7 out of 10 at one distance, move the folder and try again.
Coin and Ladder Drills for Incremental Control
The ladder drill gets you controlling several distances back-to-back. Put coins or tees at 3, 6, 9, and 12 feet from where you start. Hit one ball to each target, aiming to stop it as close as possible.
This trains your brain to tweak your stroke just enough for each distance. After you hit all four, start over. The repetition helps you lock in those subtle changes.
For a twist, start at the longest target and work your way back. It forces your nervous system to adjust in a different way. Try three rounds per session to really see improvement.
Clock Drill to Add Scoring Pressure
The clock drill turns practice into a bit of a game and adds some pressure. Place 12 balls around a target hole at the same distance, try 6 feet to start, like numbers on a clock. See how many you can make in a row.
Miss one? Start over. That little bit of pressure feels a lot like the course when a putt actually matters. Most folks can get to 8 to 10 in a row with some practice.
Once you can make all 12, scoot back to 9 feet. Track your best streak each time and try to beat it. This drill is a favorite for mixing distance control with a bit of mental toughness.
Tools and Aids That Elevate Your Practice Routine
Adding a few simple training aids to your mat setup gives you instant feedback on your stroke path, face angle, and contact. These tools turn regular practice into focused improvement.
Alignment Sticks and Markers for Path Training
Alignment sticks, when you lay them down parallel to your target line, give you a quick visual on your setup and stroke path. I like to put one along the line to the target and another outside my stance, making a channel to show if my putter’s wandering.
Most golfers realize they’re aimed a little off after a few reps with alignment rods.
You can use anything straight, but proper sticks are light and won’t mess up your mat. You can also mark out distances, such as 3, 6, and 9 feet, to practice consistent backstrokes for different putts.
A few alignment stick drills:
- Gate drill: set up two sticks just wider than your putter head to groove a straight stroke
- Parallel rails: lay sticks along both sides of your line to keep your path on track
- Distance markers: use stick pieces to mark landing spots for lag putts
Putting Mirrors and Arc Devices for Stroke Mechanics
A putting mirror sits flat on your mat and lets you check where your eyes are over the ball. Most casual golfers set up with their eyes too far inside or outside, which throws off their aim.
The mirror usually has lines and a ball spot. Set the ball on the mark, get your eyes right over it, or just inside, and you’ll fix one of the most common setup mistakes.
Arc devices clip onto your mat and give you a curved rail to match your natural stroke, especially if you swing on an arc instead of straight back and through.
Some mirrors have extra lines for face angle and path, but honestly, just checking your eye position pays off the fastest for distance control. Getting setup right leads to better, more consistent contact.
Impact Bags and Other Feedback Tools
Impact bags for putting are smaller than the full-swing versions, and they really help you feel what solid contact is like at impact. You putt right into the bag and immediately notice if you’re accelerating through or slowing down, which makes a big difference for distance control.
Most feedback tools for putting focus on two things: strike quality and tempo. Just slap a piece of impact tape on your putter face. Suddenly, you can see exactly where you’re striking the ball. Hitting it in the center is huge if you want consistent distance.
Useful Feedback Options:
- Impact tape or dry-erase marker: shows your strike pattern over several putts
- Metronome apps: help you keep a consistent tempo for putts of any length
- String lines: stretch these above your mat to check if your putter face stays square at impact
- Pressure sensors: reveal how your weight shifts during the stroke
You don’t have to spend much. Even a chalk line or a yardstick can give you solid alignment feedback if you set them up right on your mat.
Developing a Smart At-Home Practice Plan
A good practice plan keeps you from just rolling putts aimlessly. Set clear goals for each session and mix up the drills so you’re working on all parts of your short game, not just one.
Structuring Your Sessions for Steady Improvement
Short, focused practice sessions, about 20 to 25 minutes, seem to get the best results indoors. Anything longer turns into a slog, and your technique falls apart.
Start with 3 to 5 minutes of straight-line putting to warm up and groove your stroke. Once you’re in rhythm, spend the next 12 to 15 minutes on one or two main drills. Don’t try to do everything at once.
End with 5 minutes of random distance practice. Just pick different spots and putt with no pattern. This keeps things fresh and mimics the unpredictable distances you’ll face on the course.
Sample 25-Minute Session:
- 0-3 min: Gate drill for face control
- 3-8 min: Distance markers at 3, 5, and 7 feet
- 8-18 min: Main drill, such as coin drill or clock drill
- 18-23 min: Random distance practice
- 23-25 min: Pressure putts with scoring
Tracking Progress and Mixing Up Drills
Keep a simple practice log. Jot down your make percentage from different distances or how you did on certain drills.
Test yourself every week with the same drill. For example, hit ten putts from six feet and record your results. If you make four one week and seven a few weeks later, you know you’re on the right track.
Rotate between three or four drills each week. Maybe Monday is speed control, Wednesday is breaking putts with alignment aids, and Friday is distance ladders. It’s easy to get bored or stuck if you just repeat the same thing every day.
Switch up your practice. Your brain learns better when you give it different challenges, and each drill helps a different part of your stroke.
Assigning Practice Goals by Skill Level
If you’re just starting, spend most of your time, about 70%, on putts inside five feet. Focus on building a repeatable stroke and face control. Don’t worry about hitting long putts yet.
Intermediate players should stretch out to 8 to 10 feet and do more distance control work. Split your time between mechanics and distance drills.
Advanced players can practice putts up to 12 to 15 feet and add pressure to every session. Set goals like making 8 out of 10 from six feet before moving back.
Practice Time Allocation by Level:
| Skill Level | Stroke Mechanics | Distance Control | Pressure Drills |
|---|---|---|---|
| Beginner | 50% | 30% | 20% |
| Intermediate | 35% | 40% | 25% |
| Advanced | 25% | 40% | 35% |
Common Mistakes and How to Overcome Them Indoors
Indoor putting can actually help your game a lot, but only if you avoid some classic mistakes. The biggest problems? Practicing without a plan, letting your alignment drift, and forgetting that mats aren’t like real greens.
Avoiding Mindless Repetition
We see it all the time: golfers rolling endless putts while half-watching TV. Honestly, that just locks in bad habits. Your brain remembers what you repeat, even if it’s sloppy.
Make every stroke count. Always pick a target and get feedback right away. Use a coin or tee at different distances and keep score. Try to get three putts in a row to stop within a grip length before moving on.
Try these structure tips:
- Pick a distance for each mini-session
- Use different stroke lengths for each distance
- Reset your stance between putts
- Stop after 10-15 reps and change targets
The difference between getting better and just wasting time is focus. When you match your stroke length to the energy needed, you build real feel for the course.
Fixing Alignment and Stroke Path Issues
It’s easy to miss alignment mistakes indoors. You might have your putter face aimed left and your feet aimed right, and you’d never know until you’re missing putts outside.
Set up alignment sticks or yardsticks parallel to your target line. Put one along your toes and another just outside the ball, both pointing at your target. Make sure your putter face sits square to the target stick at address.
For stroke path, use two sticks to create a gate just wider than your putter head. Practice swinging through without hitting them. This catches those outside-in or inside-out strokes that mess up your strike.
Managing Differences Between Mat and Course
Mats roll faster and straighter than most greens, so you’ll need to adjust your practice. A 10-foot putt on your mat might only need the energy of a 7-footer outdoors.
Focus on matching your tempo and stroke length, not the distance. The “bocce” drill is perfect: roll one ball to a random spot, then try to get two more within a grip length using the same rhythm. This teaches you to repeat the right energy, no matter the speed.
You won’t get perfect distance translation. Instead, train yourself to link backstroke length and energy at impact. That’s the skill that really carries over to any green.
Frequently Asked Questions
Here are quick answers to common questions about using a putting mat for distance control at home.
How do you practice consistent distance control on a putting mat without getting bored?
Use different targets and scoring challenges. Try ladder drills, coin targets, or the bocce drill, where you roll one ball to a random spot and try to stop the next two close to it.
What mat length is actually useful for working on lag putts in a small-space setup?
A 9- to 12-foot mat is useful for distance control in most homes. A 6-foot mat still helps with tempo, but it limits true lag putting practice.
Are ball return ramps helpful for pace control, or do they mess with your feel?
They are convenient, but they can make you hit putts too firmly. Use them for mechanics, then practice softer pace drills without relying on the ramp.
How close does an indoor putting mat roll compared to real greens, and what should you look for?
Good mats often roll around 9 to 11 on the Stimpmeter. Look for a smooth surface, consistent speed, and a true roll with no bumps or dead spots.
What are the most common mistakes people make when practicing indoors that hurt their speed control outside?
The biggest mistakes are repeating the same putt, only practicing short distances, and focusing only on makes. Practice varied distances and judge each putt by speed, not just accuracy.
Which features matter most when choosing a budget-friendly putting mat for daily practice at home or in the office?
Prioritize length, consistent roll, and easy setup. Alignment guides and targets are helpful, but a smooth surface and enough practice distance matter more.
Partager:
What Makes a Dual-Turf Golf Mat Useful for Practicing Different Shots at Home?
What Should You Practice First With a Golf Hitting Mat at Home?